 →
→ Easy Sourdough Sandwich Bread
This post may contain affiliate links. Please read my disclosure policy.
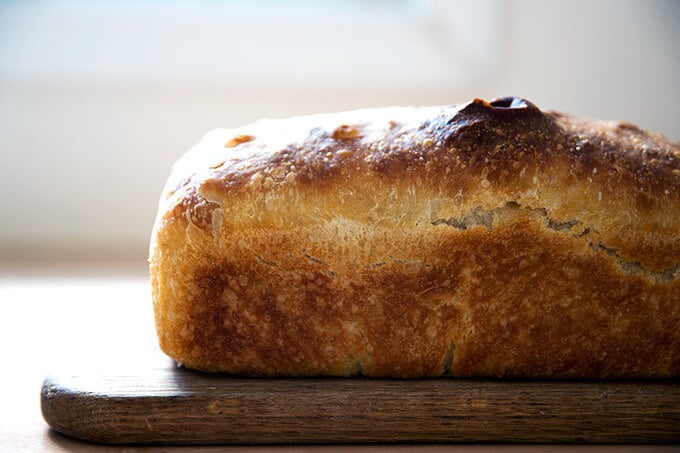
This 4-ingredient sourdough sandwich bread requires no complicated shaping, no scoring, and no preheated heavy Dutch oven. Grab your mixing bowl, pull out a spatula, and butter your loaf pan. This one is simple and delicious!
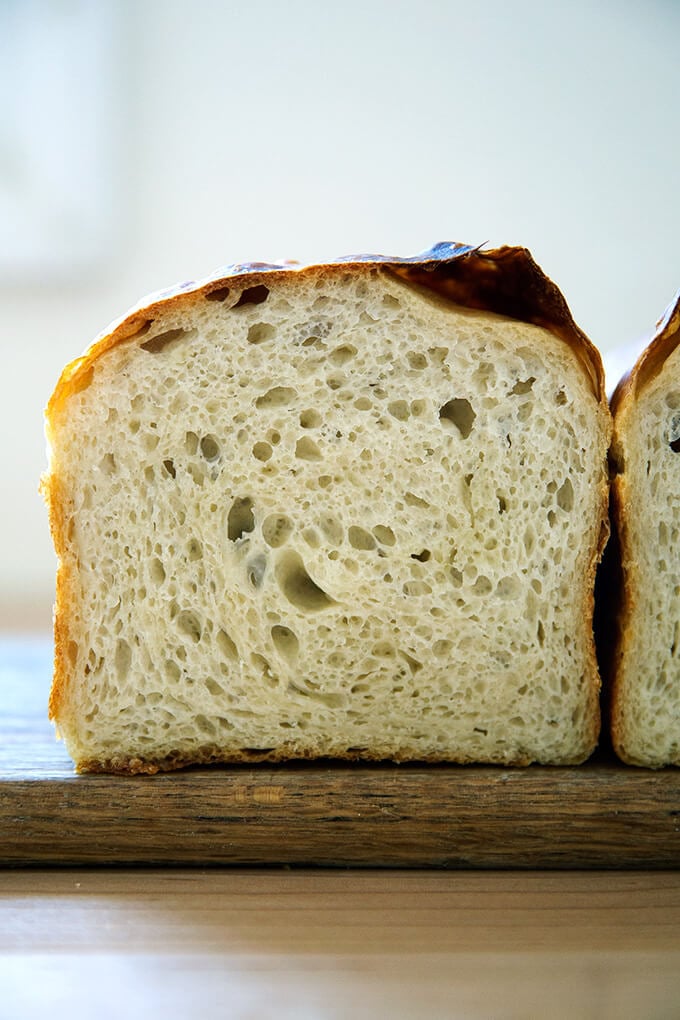
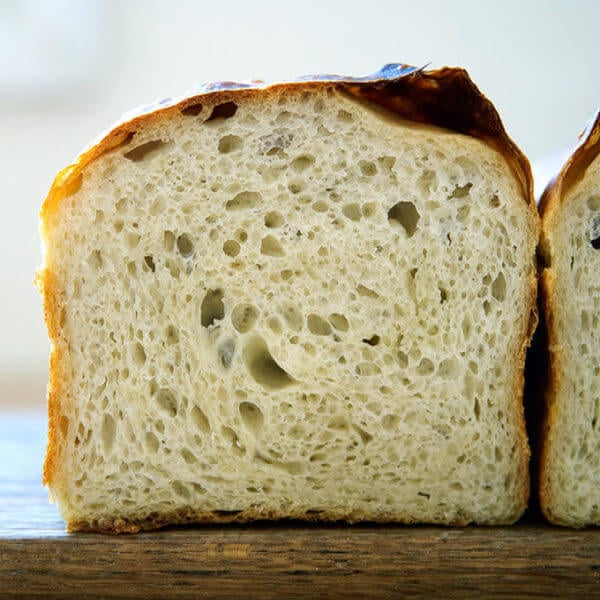
As its name suggests, this sourdough sandwich bread recipe is easy, a simple mix of flour, water, salt, and sourdough starter. In sum, it’s an adaptation of my mother’s peasant bread recipe with the sugar and yeast omitted and sourdough starter added. Like this sourdough focaccia, the dough is high-hydration, which yields a soft crumb, perfect for sandwiches when freshly baked and excellent for toast, too.
In the world of sourdough bread baking, crusty boules, open-crumbed rolls, and pillowy focaccia get all the glory. But I would argue a simple sandwich loaf deserves just as much praise, if not more, not only for its ease in assembly, but also its utility.
Find step-by-step instructions as well as video guidance below.
PS: How to Build a Sourdough Strater from Scratch
PPS: How to Activate, Feed, and Maintain A Sourdough Starter
How to Make Sourdough Sandwich Bread, Step by Step
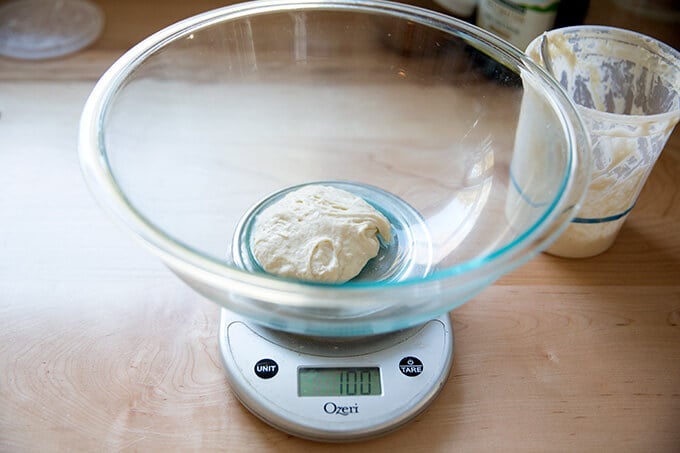
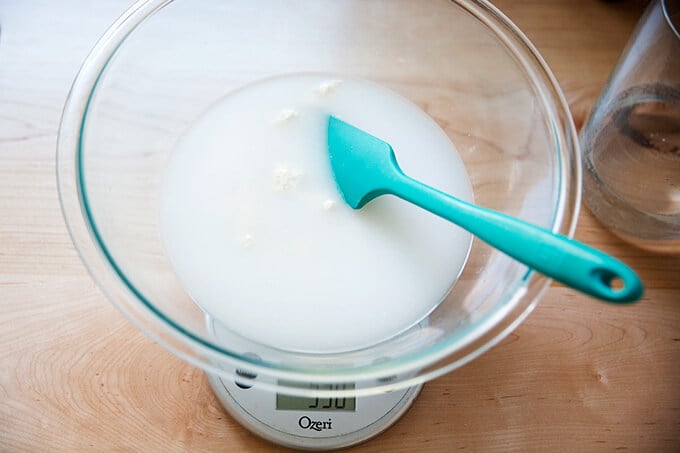
First, place 100 grams of starter in a large bowl. As always, for best results, please use a digital scale to measure.
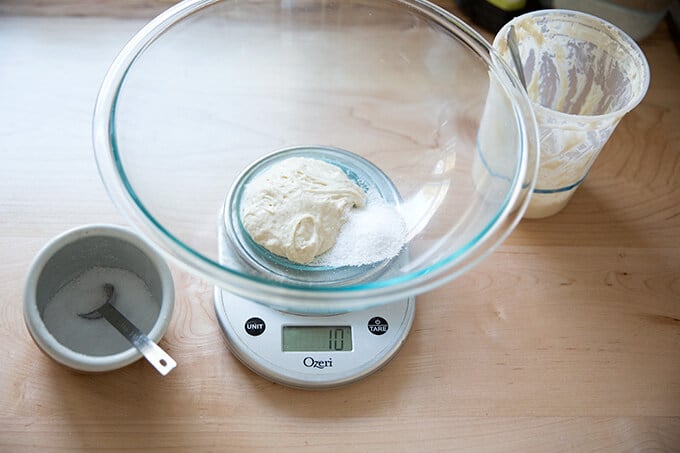
Add 10 grams of salt.
Add 430 grams of water. (You may need to use less water: see recipe box for notes.)
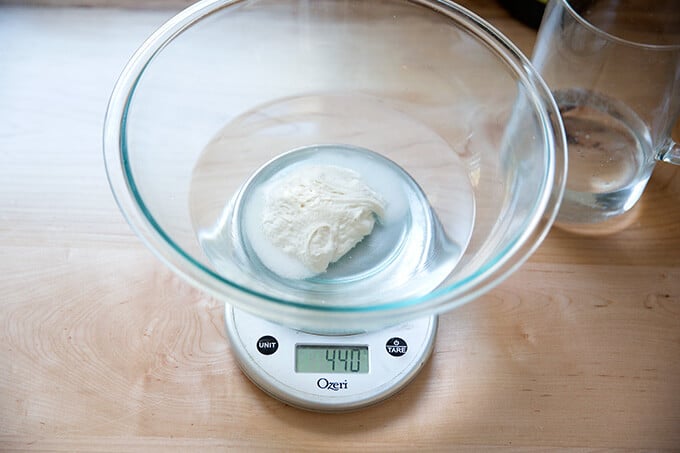
Stir to combine.
Then add 512 grams of bread flour.
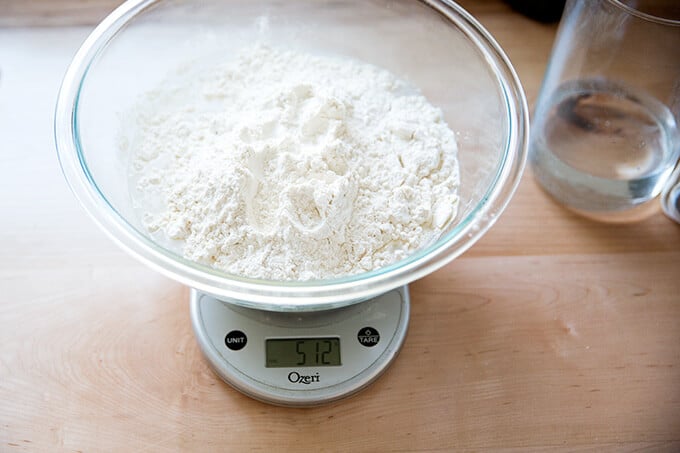
Stir to form a sticky dough ball.

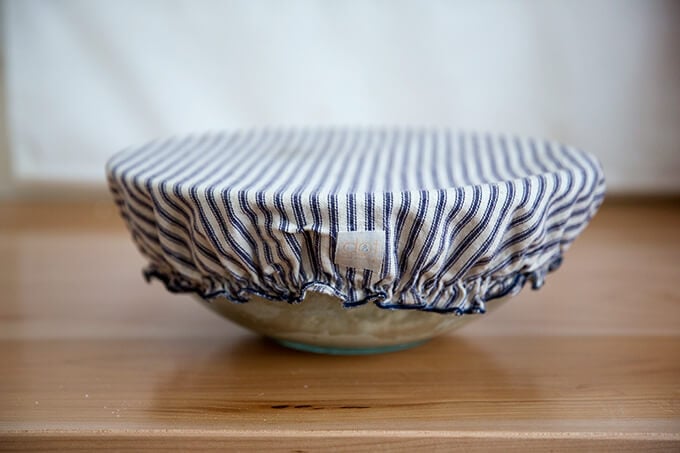
Cover with a towel or cloth bowl cover or, preferably, a lidded vessel, and let rest for 30 minutes.
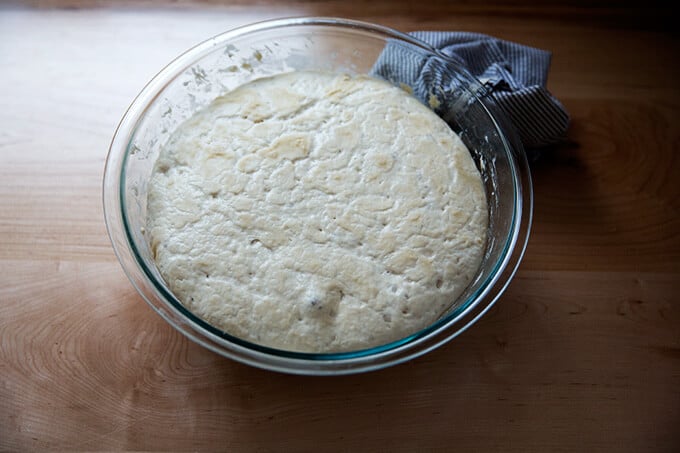
Then, perform a series of stretches and folds. See video for guidance (skip ahead to 1:13). Repeat this 3 more times for a total of 4 sets of stretches and folds during the first two hours. Then, let rise for 6 to 18 hours* (see recipe notes) at room temperature:
Drizzle the surface of the dough with a little bit of olive oil; then fold the dough inwards from the sides to deflate.
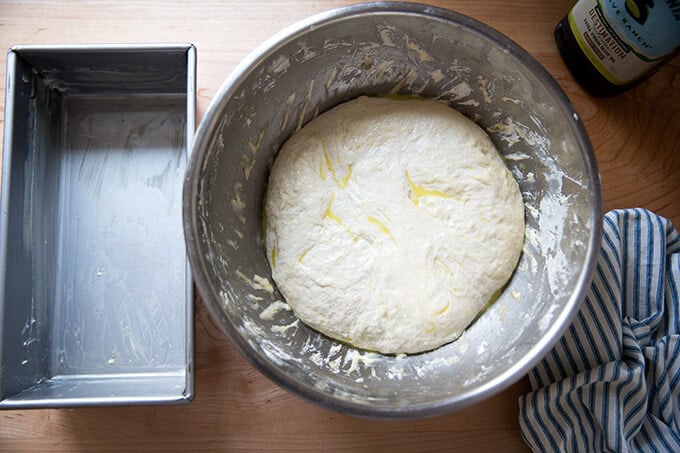
Transfer the dough to a large, buttered loaf pan. I use this 10 x 5-inch loaf pan but a 9×5-inch loaf pan will also work.
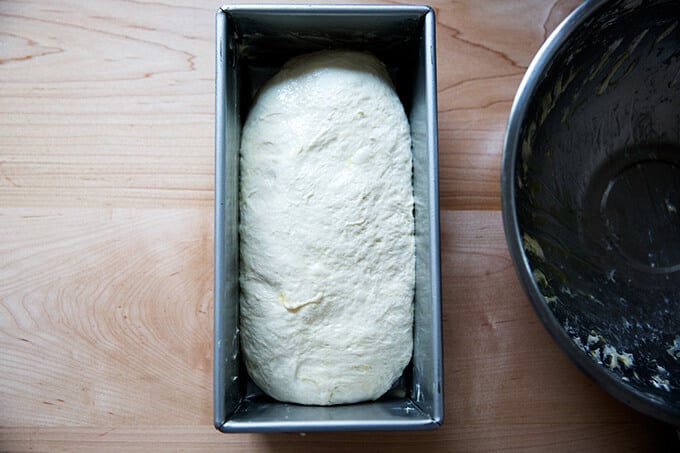
Let the dough rise just until it begins to crown the rim of the pan, about 6 hours.
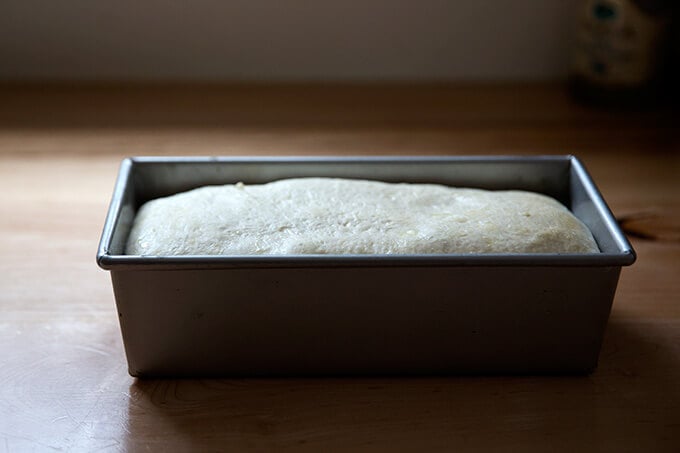
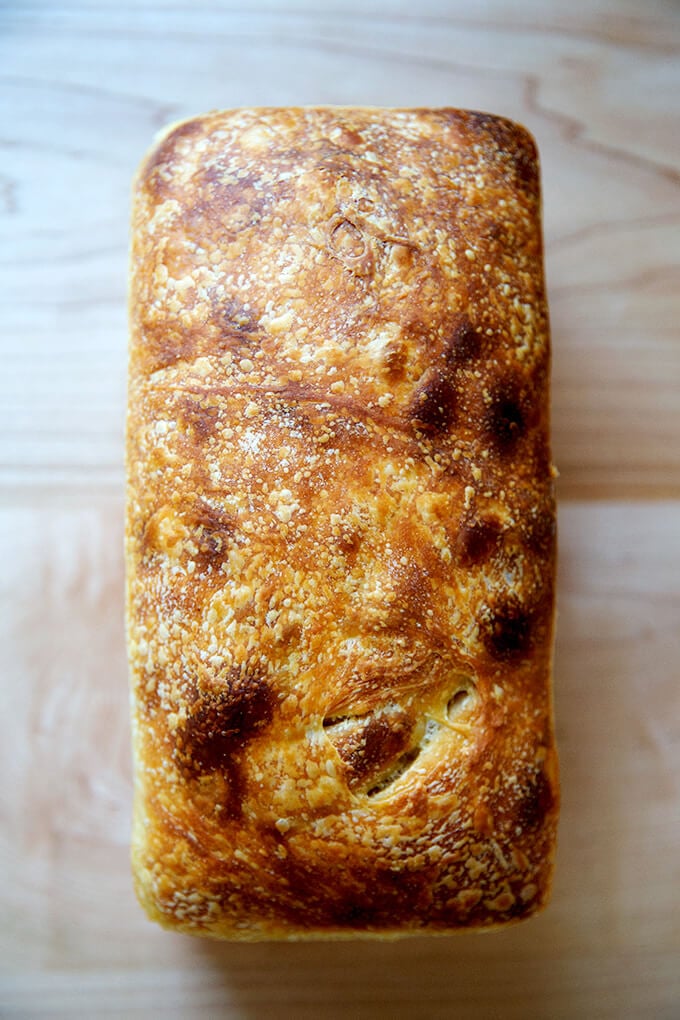
Bake for about 45 minutes or until golden brown all around.
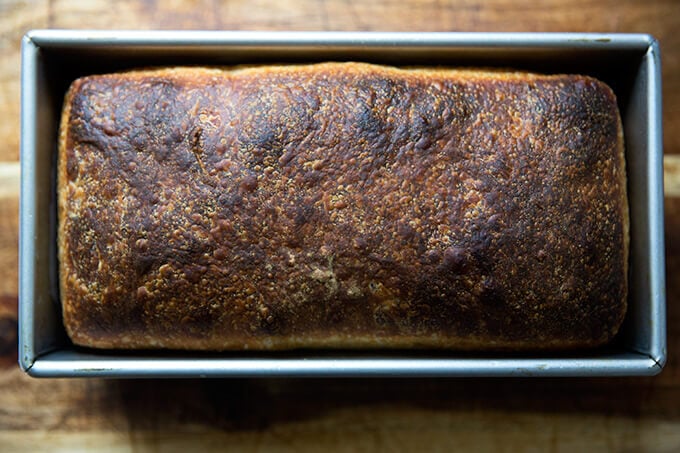
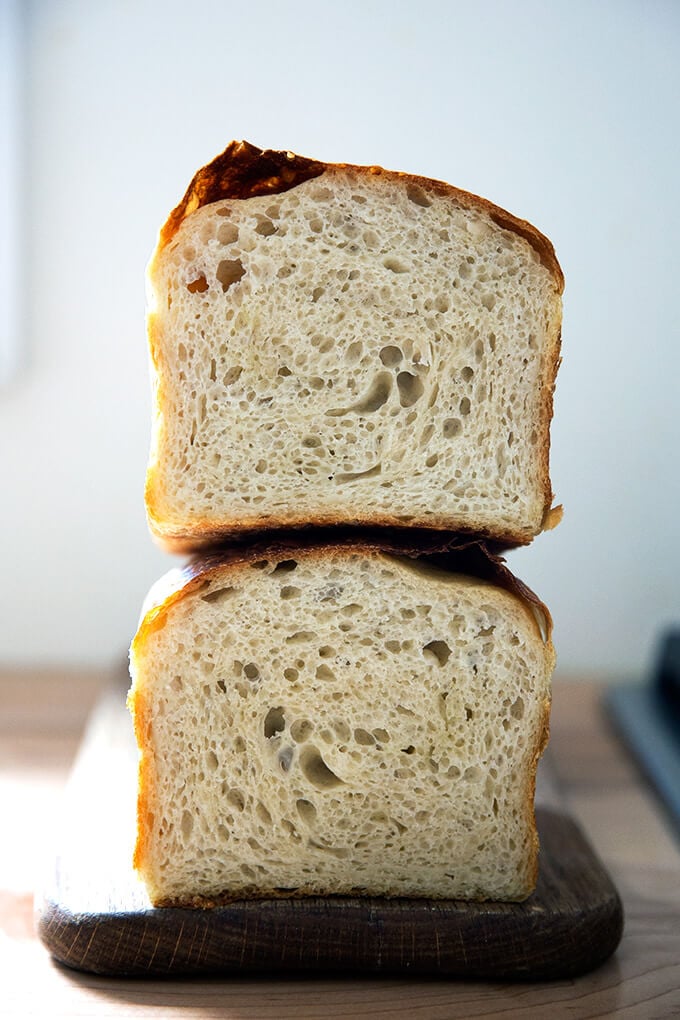
Let cool for at least 30 minutes before slicing.
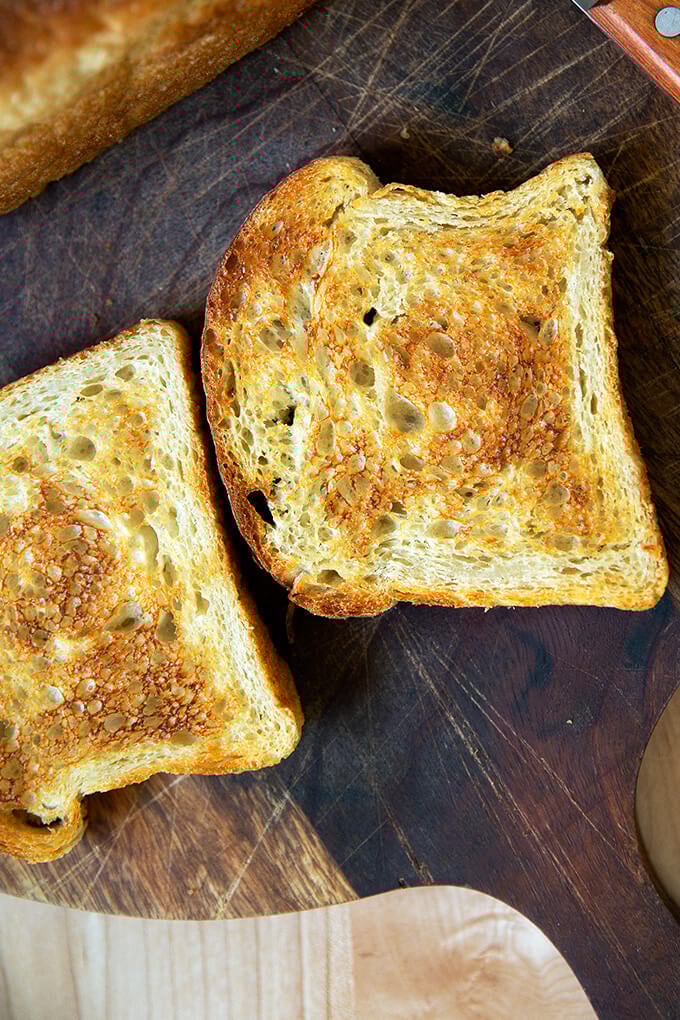
It makes excellent toast, too.

I love this tall-sided pullman loaf pan, too:

Easy Sourdough Sandwich Bread
- Total Time: 24 hours 40 minutes
- Yield: 1 loaf 1x
Description
This easy sourdough sandwich bread requires no complicated shaping, no scoring, and no preheated heavy Dutch oven. Grab your mixing bowl, pull out a spatula, and butter your loaf pan. This one is simple and delicious!
Notes:
Pan: You’ll need either a 10 x 5-inch loaf pan or a 9×5-inch loaf pan.
Plan ahead: This dough rises first for 6 to 18 hours (or less if it is super hot out or if you live in a humid area) or until the dough doubles in volume; then again for about 4 to 6 hours or until the dough crowns the rim of the baking vessel.
Troubleshooting: If you have issues with your dough being too sticky, please read this post: Why is my sourdough so sticky? The 4 common mistakes.
If you’re just getting started with sourdough, check out this post first. You’ll find tips there on procuring a starter as well as how to feed it and maintain it. If you’re up for making your starter from scratch, you can do so in just about 1 week.
Water: Chlorine in water can adversely affect sourdough. Leaving water at room temperature for 24 hours will allow most of the chlorine to escape. When I am in the habit of making sourdough bread, I fill a large pitcher with water and leave it out at room temperature. I use this for my sourdough breads and starter. Truth be told, I’ve used water straight from the tap and have not noticed a difference.
Water quantity: Also, depending on where you live and the time of year, you may need to cut the water back. If you live in a humid environment, for instance, I would suggest starting with 400 g or 420 g water. If you are not using bread flour, you also may need to cut the water back a bit. So much success with sourdough relies on getting the water quantity right.
Starter: I use a 100% hydration starter, meaning it is equal parts by weight flour and water. If you need guidance on how to maintain a starter, see this post.
Ingredients
- 100 grams (about 1/2 cup) active starter, see notes above
- 10 grams (about 2.5 teaspoons) kosher salt
- 430 grams water (or less, see notes above), room temperature
- 512 grams (4 cups) bread flour, such as King Arthur Flour
- a few tablespoons extra-virgin olive oil
- room temperature butter, for greasing
Instructions
- Mix the dough: Place the starter, salt, and water in a large bowl. Stir with a spatula to combine — it doesn’t have to be uniformly mixed. Add the flour. Mix again until the flour is completely incorporated. If you have a straight-sided vessel, transfer the dough to it — it really helps monitor the rise and allows you to see the true growth in volume of the dough.
- Perform one (or more) “stretches and folds”: 30 minutes after you mix the dough, reach into the bowl and pull the dough up and into the center. Turn the bowl quarter turns and continue this pulling 8 to 10 times. See video for guidance. If time permits, repeat this “folding” step every 30 minutes for the first two hours. (Note: even if you perform just 1 fold, your dough will be in good shape.)
- Let it rise. Drizzle with a splash of olive oil and rub to coat. Cover bowl with a tea towel, bowl cover, or a lidded vessel, and set aside to rise at room temperature (70ºF/21ºC) for 4 to 18 hours — if it is super hot out or if you live in a humid environment, it may only take 4-6 hours. When the dough has nearly doubled in volume (or UPDATE: increased in volume by 50%, which is when I now end the bulk fermentation), it is ready. (Note: Do not use an oven with the light on for the bulk fermentation — it will be too warm. It is best to rely on visual cues (increasing in volume by 50% or doubling if you’ve had success with doubling) as opposed to time to determine when the bulk fermentation is done. A straight-sided vessel makes monitoring the bulk fermentation especially easy.)
- Prepare the pan. When the dough has nearly doubled, grease a 9×5-inch loaf pan or 10 x 5-inch loaf pan with butter (or nonstick spray).
- Let it proof. Drizzle dough with a few tablespoons of olive oil. Rub your hands with a little bit of oil to coat. Use your hand to release the dough from the sides of the vessel, being careful not to completely deflate the dough. Video guidance here. Turn the dough out onto a work surface. Quickly, shape the dough into a rectangle — fold the dough envelope-style first; then use a bench scraper to shape the dough into a rough rectangle. Transfer dough, seam-side down to prepared loaf pan and gently stretch into an oblong shape. (At this point, you can transfer the pan to the fridge if it makes sense with your schedule: rub the dough with oil and cover with plastic wrap, or tuck the whole pan into a 2-gallon ziptop bag. Transfer to the fridge till the next day. Then proceed with the recipe.) Leave the pan alone for 5 to 6 hours, or until the dough reaches the rim of the pan — this may take less time when it is very warm out. Do be patient with this second rise: to get good height, the dough should be near the rim of the pan before you transfer it to the oven.
- Bake it. Heat oven to 425ºF. Transfer the pan to the oven and bake for about 20 minutes. Reduce heat to 375ºF. Bake for 20 to 25 minutes more or until golden all around. If you have an instant read thermometer, it should register 206-210ºF or so before removing. Remove the pan from the oven and turn the bread out onto a cooling rack. Cool for at least 30 minutes before slicing.
- Prep Time: 24 hours
- Cook Time: 45 minutes
- Category: Bread
- Method: Sourdough/Natural Leavening
- Cuisine: American
This post may contain affiliate links. Please read my disclosure policy.


1,405 Comments on “Easy Sourdough Sandwich Bread”
I see you start your dough at night. Would starting in the morning or early afternoon be too early to start the process? Would it ferment too long in the fridge if baking the next day?
No, you can definitely start in the morning! The bulk fermentation time will be different for everyone given the various elements — the environment, flour, strength of the starter, etc.
If when you transfer your dough to your loaf pan you don’t think there will be enough time for the second proof, simply cover the pan with plastic wrap or tuck it into an airtight bag, then transfer it to the fridge. You can pick up where you left off the next day.
This bread is perfect! Kids love it, and its so easy to make!
Curious if you had any suggestions/recommendations on how to make this a cinnamon & raisin bread? I know sourdough reacts with cinnamon, so I’d be curious how much to use and when to add it?
Thanks!
Hi! Great to hear re kids and ease 🙂
My suggestion would be to lower the hydration slightly to make your life easier when rolling/stretching it out, applying the softened butter then cinnamon-sugar layer, and coiling it up. I think holding back 50 grams of water should do.
And I think if after you coil up the loaf and let it proof at room temperature and then bake it when it has risen sufficiently (as opposed to doing a cold proof), you won’t have any issues with the cinnamon affecting your loaf.
Good luck!
Hi I tried this recipe for the first time today and just took it out of the oven and it looks wonderful. When i removed my instant read thermometer it registered the correct temp however it had sticky goo on it so i reckon the bread will be gummy inside. I did reduce the water to 400g and the dough was very sticky throughout, should i reduce the water further?
It sounds as though you need to. Try 375 grams water next time around 🙂
Is it possible that more stretch and folds could have solved the problem. More air in the bread. That’s what I do if my dough is too wet
That’s a great tip, too, Annie. Thanks 🙂
My husband who has always preferred shop bought good quality sandwich bread for toast absolutely loves the bread. All my other breads sourdough or not he has loved but It’s taken me years to make a loaf he loves toasted so he’s happy and so am I. The only change. I don’t butter the loaf at the end. Thank you for sharing
Great to hear, Annie! Thanks so much for writing and sharing this. This is one of my favorites, too 🙂
I followed your recipe exactly and it came out beautifully. Nice crumb, not overly sour. My daughter said “Mom, this slaps!”
Very proud of my first homemade loaf. Thank you.
Great to hear, Julie! Thanks so much for writing. Love your daughter’s compliment 🙂
Just started prepping this recipe and can’t wait to make my first sandwich loaf. I am going to be using a pullman pan with a lid instead of a normal loaf pan. Will that be the same baking time/temp and do you recommend taking the lid off at any point?
Hi! I’m probably too late here. I would bake it covered for 35 minutes, then uncover for the last 10. Let me know how it turns out!
Hi! You weren’t too late 🙂 It was delicious and that timing was perefect! Thank you!!
Great to hear, Hallah!
This is brilliant thank you. I replaced around 150g white with wholegrain bread flour to it turned out nicely. I only managed to do 1 stretch & fold due to time but I think it could benefit from a few more. The only other change I did was when it came out it was lovely and crispy, but as I was making it for the kids, they prefer softer bread. So I left it in the pan and put a heatproof lid on the top for 30mins. That has left the crust nice and soft. Next time I’m going to try adding seeds in the mix!
Great to hear, Alec! Thanks for writing and sharing these notes. I love your trick to make the crust softer… my kids don’t like super crusty bread either 🙂
Hi! Love how thorough your directions are. After my dough rises 50%, I put it in the fridge overnight, do I bake it as soon as I take it out of the fridge? Or do I need to let it rest 5-6 hours after I take it out of the fridge and then bake it?
You’ll need to let it rest at room temperature for 5-6 hours or until it begins crowning the rim of the loaf pan.
Success!!! I’ve struggled with sourdough for years. I just want to be able to make a loaf to use for sandwiches and toast. This one worked. My trouble is going from bulk fermentation to shaping. I don’t know what I am doing wrong but, more often than not, I end up with a flat inedible product. I loved being able to put the dough in the bread pan and eliminating that step. I also liked that i could refrigerate the pan and bake the next day. The direction on letting the dough rise to about the level of the pan edge was easy to visualize and it worked. I will be trying more of your sourdough recipes in the future, but if this is the only one that works for me, I am thrilled! Thank you!
I’m so happy to read all of this, Mary Ann! Thanks so much for writing and sharing your experience. I hope you do find some more sourdough recipes you love 🙂
This bread is delicious! I over-proofed it during the night but it still turned out well. Next time I will just refrigerate it. Thanks for all the tips!
Great to hear, Debi! Thanks so much for writing 🙂
This is the only sourdough bread recipe that I have put on repeat so far. I may be a beginner at sourdough but I have probably made 30 recipes so far and this is the only one that I have had consistent success with. It’s easy to make and tastes absolutely delicious. In fact, until I tried this recipe I was on the verge of throwing in the sourdough towel. Is it the olive oil that makes this so easy and tasty? I haven’t seen olive oil and other recipes. Thank you Alexandra!
So great to read all of this, Mary! I think the olive oil helps, but I think the high-hydration also helps as well as the pan… shaping boules/batards and free-baking them in hot Dutch ovens requires a bit more finesse. So glad this one has been easy and repeatable 🙂
Love this recipe! Thoughts on adding other inclusions like roasted jalapeño and cheddar?
Hi Brittany. I am so happy to read this. Incidentally, I am working on three new sourdough recipes:
1. One that includes jalapeno and cheddar
2. One that includes olive and rosemary
3. One that includes cranberry and walnut
And I am working on a post that will explain how to add these inclusions.
The method I prefer to use is basically to turn the dough out onto a lightly oiled countertop just before the second set of stretches and folds. And you’re going to spread it out really thinly, and then you are going to toss your inclusions over the dough, and then you kind of fold it up envelope style. I think if you can wait for one more week, my post should be out, and I can direct you to that post.
Hi Ali,
Can I leave it to proof for 48 hours (or longer) or do I need to follow what you have in the recipe? I have done that with a boule, but this is my first time wanting to try it with a loaf recipe.
Thank you!
48 hours would be the max, I think. But yes, after the bulk fermentation, you can deflate the dough and place it in the fridge (covered to ensure the dough doesn’t form a crust) for as long as 48 hours… possibly longer, but I find 48 hours to be the sweet spot 🙂
Success! I’ve been learning to bake sourdough bread for a few months and I finally got a perfect loaf with your recipe! I had to decrease the amount of water due to our humidity. Thank you for your step by step instructions!
Great to hear, Rose! Thanks so much for writing and sharing this 🙂
My Pullman box is 13×4. Will this quantity be too little for this box?
It will just be a squatter loaf… if you’re ok with that, use it 🙂
Hi do you not need to score the laof before baking lke you do for the boule
Also in a lot of recipes i have seen the need to prepare a levin is that not necessary at all even for a boule. I am so confused.
Sorry for the typos in the previous message
No need to score this sandwich loaf and no need to make a levain!
I have loved making this bread in my glazed loaf baker. It comes out great every time. Thank you for site, it helped me pay closer attention to the proofing time on the loaf as well as making sure my starter was at is strongest.
Great to hear, David! Thanks so much for writing and sharing this 🙂
I have made the artisan sourdough in the Dutch oven successfully. I would like to try the sandwich loaves. I have 2 glass Pyrex 8.5 X 4.5 inches. Would this recipe manage 2 loaves in these slightly smaller pans?
They will be very short loaves, and if you are OK with this, then go for it. I think you might be able to get away with baking it all in the 8.5-inch pan you have. Again, if you are willing to try it, the worst that will happen is that it will be slightly denser than ideal, but it will still be great.
Wonderful!! I baked at 425 and 375 as per recipe. Too hot a bit browner than I prefer for a soft bread. Would you cover the top lightly with foil or lower the temperature slightly?
This recipe is so easy! I want to bake this bread weekly! Thanks so much.
Hi Mary, I would try baking the loaf at 375 degrees for the entire time, which will take roughly 45 minutes. That should help with preventing the top from getting too brown. Great to hear you like the recipe!
Just wondering if it’s ok to do the proofing on a warming mat?
Yes!
This recipe is a keeper! I’m new to making sourdough bread and it was great to have a success. I read all the comments and took the advice from many of the questions and answers. I reduced the water to 400 grams and for the flour Idid 460 grams all purpose flour and 62 grams of whole wheat flour( King Arthur Bred flour is not available here) I followed the directions exactly and my loaf came out beautiful!
Great to hear, Terri! Thanks so much for writing and sharing these notes 🙂
Welp, it’s been 9 hours in the loaf pan and it doesn’t appear to have risen at all! I followed the instructions explicitly, but truth be told, I’m a terrible baker! I think I’m jinxed. I live at high altitude (4,600 ft). Could that be the issue?
Yes, it’s possible the altitude is the issue! Are you new to sourdough? Are you confident in the strength of your starter?
I’ve seen other recipes where they put another second loaf pan on top when putting the dough in the oven. Thoughts on this?
I’ve heard this too and have been meaning to try — I say go for it 🙂 I don’t think you could harm this by trying it.
Should I be oiling it twice? In the recipe it says to oil after the last set of stretch and folds and then to oil again before shaping and putting it into the loaf pan. But the video seems to only show you oiling it once before the shaping.
I have baked the recipe once before and it came out well considering I used a 1 lb USA pan which is smaller than you recommend.
I thought I completely over proofed
It because it was almost soupy when I went to shape it. And when I took it out of the refrigerator it was almost overflowing the pan. I thought it would bubble over like a volcano. I threw it in the oven right away without the second proof since it had already risen past the rim of the pan.
However it did its thing and created a good bread! I used two loaf pans stacked for steam which I think helped contain it.
I’m trying again to see if I can get a better consistency on the dough by reducing the hydration a bit. It’s really warm in my kitchen so that is the primary factor.
Great to hear it all worked out, Elle! Lowering the hydration sounds like a good idea given your environment. Regarding the oil: it doesn’t really matter… I now use a lidded vessel for the bulk fermentation, so oiling the dough after the last set of stretches and folds isn’t as critical — I used oil to prevent the dough from drying out during the bulk fermentation. I do like to oil the dough when it is in the loaf pan both to prevent the dough from drying and for the sheen and flavor it provides.
That’s what I ended up doing anyhow 😊. My second bake came out very consistent to the first. The lower hydration made it easier to shape, but the crumb came out identical, kind of strange but I won’t argue with it since it looks just like your pictures! I used a 9×5 pan this time, it still rose to the top within an hour of coming out of the refrigerator.
Great to hear Elle! Thanks for circling back 🙂
Hi! can you use a glass loaf pan to bake? or is metal better? I only have a glass one right now.
Glass is fine, but the bread may take longer to bake — just rely on the visual cues (even browning all around) before removing the loaf from the oven.
This came out perfect! Thanks for such a great and easy recipe!
Great to hear, Darin! Thanks so much for writing 🙂
This is a lovely looking loaf ss well a great tasting one. Enjoyed some with my homemade marmalade The only issue I have is it is very hard to cut as it is too soft. Not sure how to fix this.
Hi Nancy! I think you’ll find it to be easier to cut on day 2 and beyond — freshly baked, this one is definitely hard to slice. You could reduce the hydration next time around, however, if you find it too soft even on subsequent days.
Hi Alexandra,
I’ve had great success with this sandwich bread as well as your basic sourdough recipe. Love them both, but I want to make rolls for sandwiches, like a hoagie roll. I bought a silicone pan that makes four rolls from Amazon, but wondering what recipe would work best for these. I’m thinking this sandwich sourdough recipe would work well. If you have a specific recipe or suggestions, please let me know. Here’s a link to the pan https://www.amazon.com/dp/B095K3W7M3?ref=ppx_yo2ov_dt_b_fed_asin_title&th=1
Hi Stacey! I like the idea of using this recipe, too, because I like a high-hydration dough for rolls, though it potentially could be hard to shape into rolls. You might consider holding back some of the water to make the dough easier to portion, ball up, and shape. That pan looks great! Would love to hear how they turn out if you give them a go.
Hi Ali. I was gifted some sour dough starter from a friend that has been making bread for a while but no recipe for making the bread. I found your recipe and wonderful video and just baked my first loaf this morning. Excellent!! I was kind of intimidated at first but your instructions were spot on for me.
Thank you.
Great to hear, Myra! Thanks so much for writing and sharing this 🙂
The first time I made this I missed the all important second rise- I thought that was the cold proof. So out of the fridge and into the oven it went and was flat so this time around I did the second rise. Much fluffier result. The schedule works well with weekdays, as I can cold proof until I get home and still have 5-6 hours to rise and bake before bed. Great toast! Family loves it.
Great to hear! Thanks so much for writing and sharing your experience 🙂
Can Ap flour be used in place of Bread flour?
Yes! The dough might be slightly wetter/stickier, but it will still work. If you live in a humid environment, you could use slightly less water to make the dough more manageable to work with.