 →
→ Easy Sourdough Sandwich Bread
This post may contain affiliate links. Please read my disclosure policy.
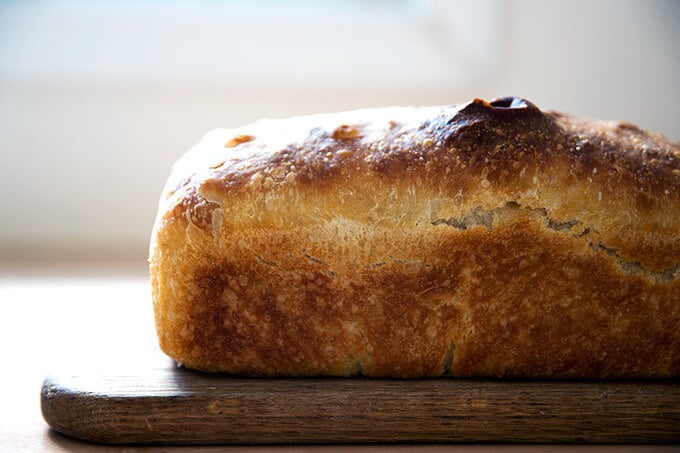
This 4-ingredient sourdough sandwich bread requires no complicated shaping, no scoring, and no preheated heavy Dutch oven. Grab your mixing bowl, pull out a spatula, and butter your loaf pan. This one is simple and delicious!
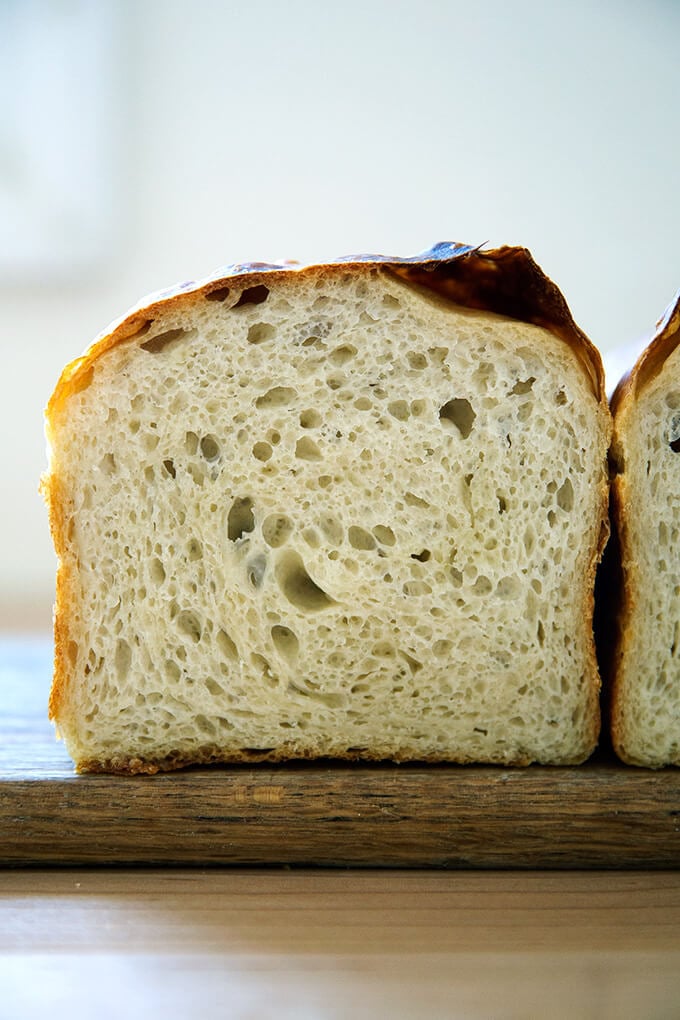
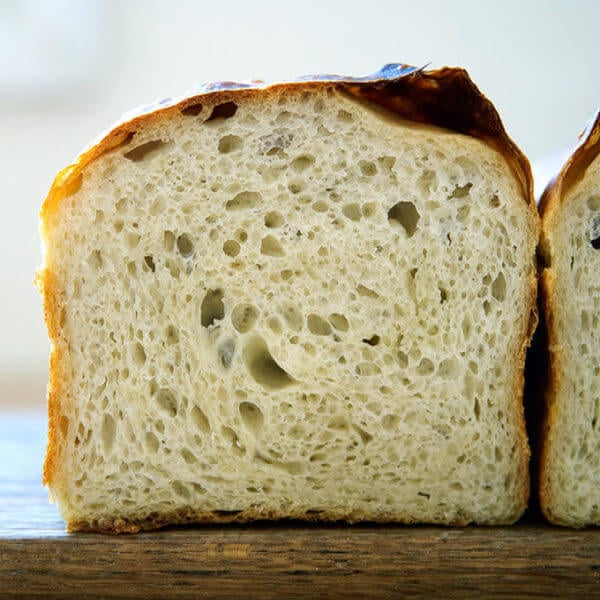
As its name suggests, this sourdough sandwich bread recipe is easy, a simple mix of flour, water, salt, and sourdough starter. In sum, it’s an adaptation of my mother’s peasant bread recipe with the sugar and yeast omitted and sourdough starter added. Like this sourdough focaccia, the dough is high-hydration, which yields a soft crumb, perfect for sandwiches when freshly baked and excellent for toast, too.
In the world of sourdough bread baking, crusty boules, open-crumbed rolls, and pillowy focaccia get all the glory. But I would argue a simple sandwich loaf deserves just as much praise, if not more, not only for its ease in assembly, but also its utility.
Find step-by-step instructions as well as video guidance below.
PS: How to Build a Sourdough Strater from Scratch
PPS: How to Activate, Feed, and Maintain A Sourdough Starter
How to Make Sourdough Sandwich Bread, Step by Step
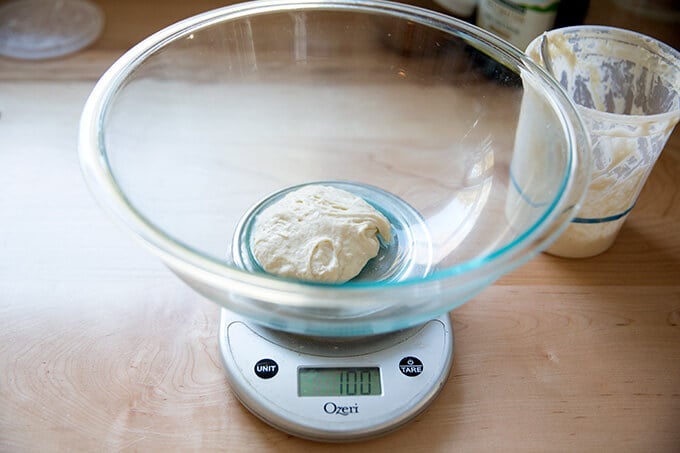
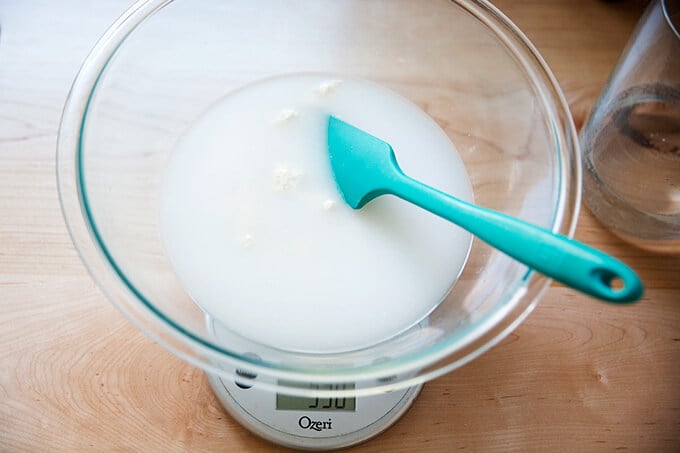
First, place 100 grams of starter in a large bowl. As always, for best results, please use a digital scale to measure.
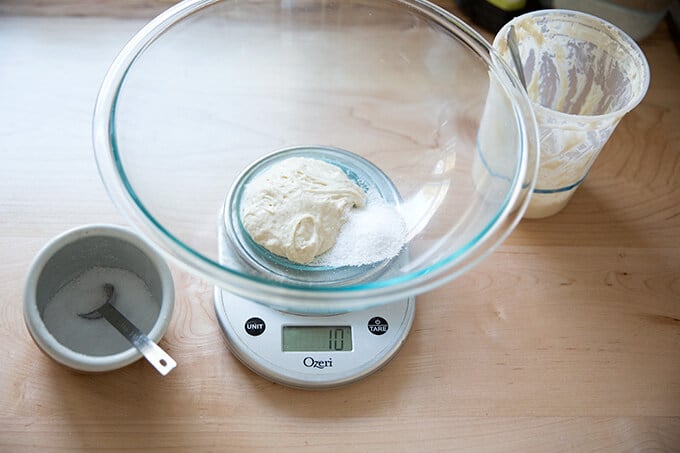
Add 10 grams of salt.
Add 430 grams of water. (You may need to use less water: see recipe box for notes.)
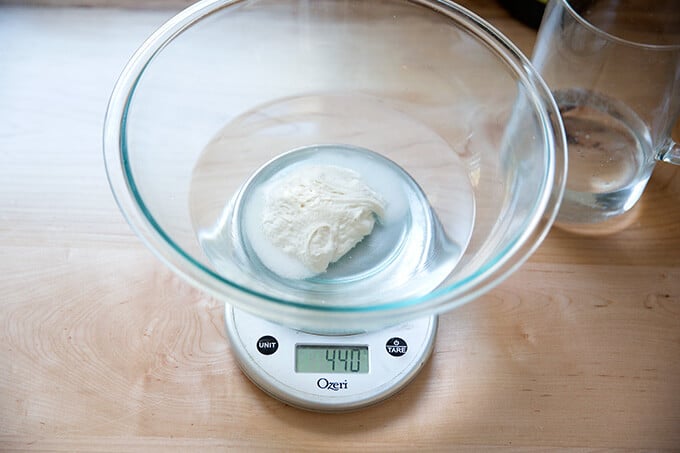
Stir to combine.
Then add 512 grams of bread flour.
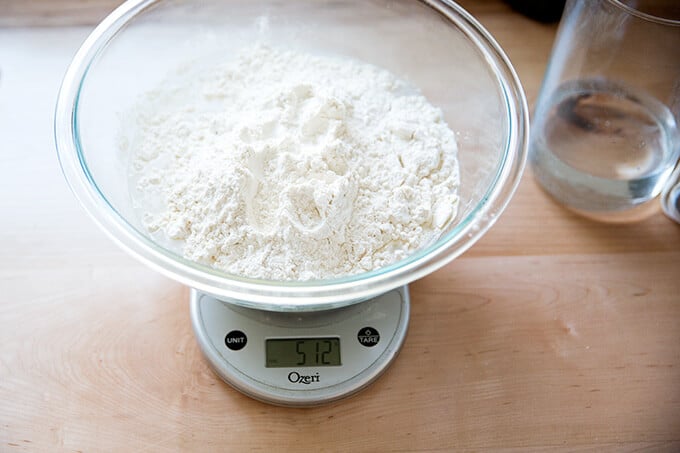
Stir to form a sticky dough ball.

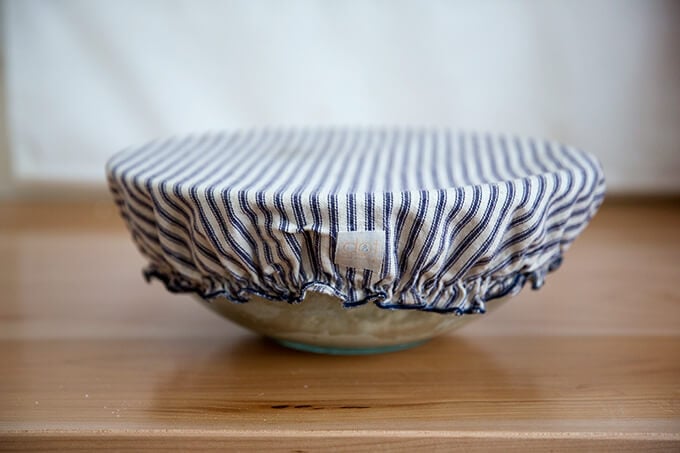
Cover with a towel or cloth bowl cover or, preferably, a lidded vessel, and let rest for 30 minutes.
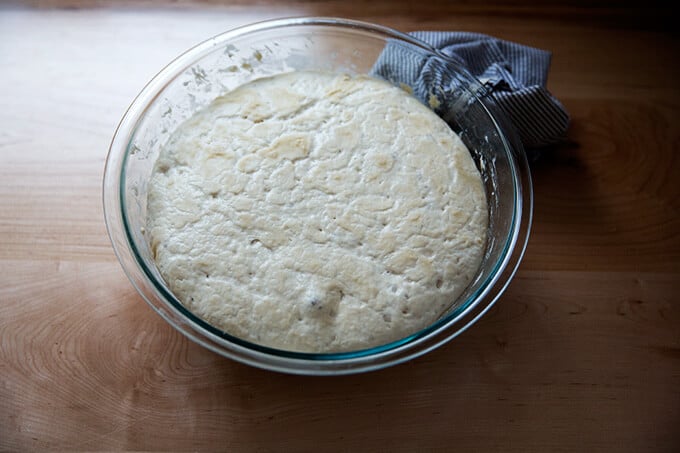
Then, perform a series of stretches and folds. See video for guidance (skip ahead to 1:13). Repeat this 3 more times for a total of 4 sets of stretches and folds during the first two hours. Then, let rise for 6 to 18 hours* (see recipe notes) at room temperature:
Drizzle the surface of the dough with a little bit of olive oil; then fold the dough inwards from the sides to deflate.
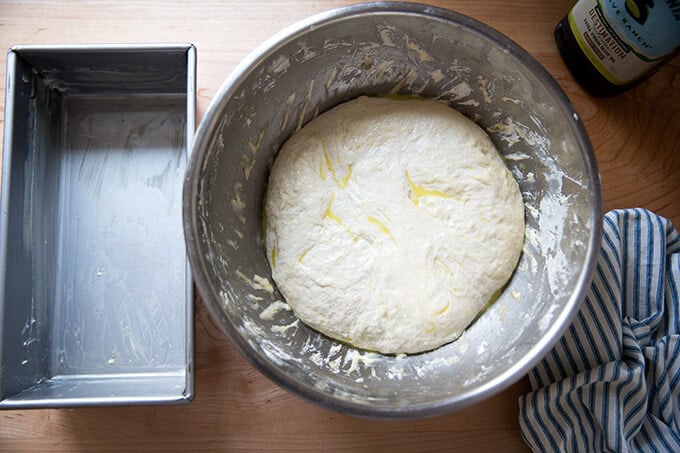
Transfer the dough to a large, buttered loaf pan. I use this 10 x 5-inch loaf pan but a 9×5-inch loaf pan will also work.
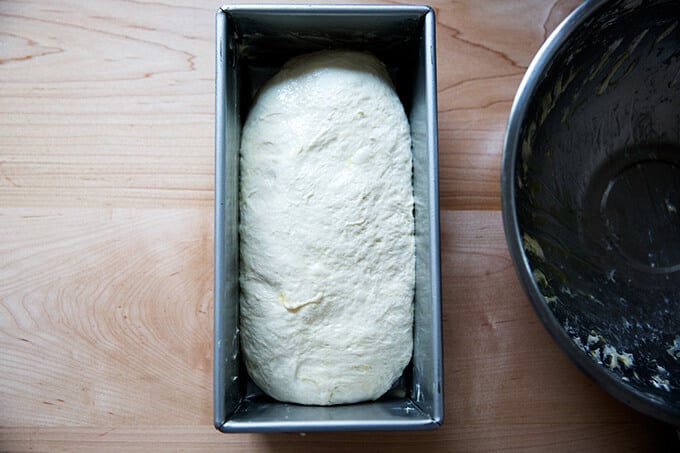
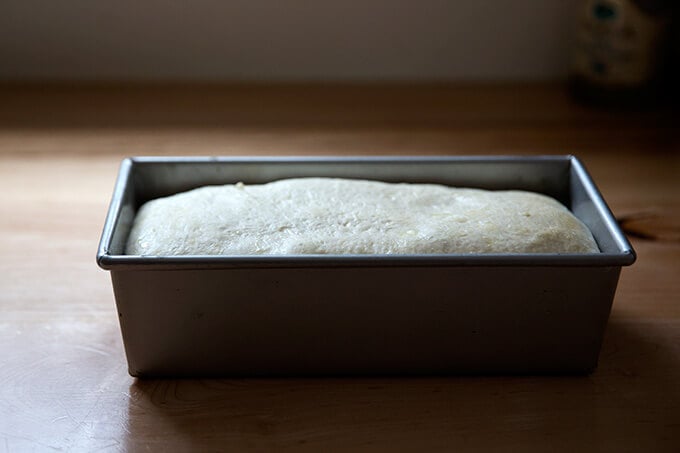
Let the dough rise just until it begins to crown the rim of the pan, about 6 hours.
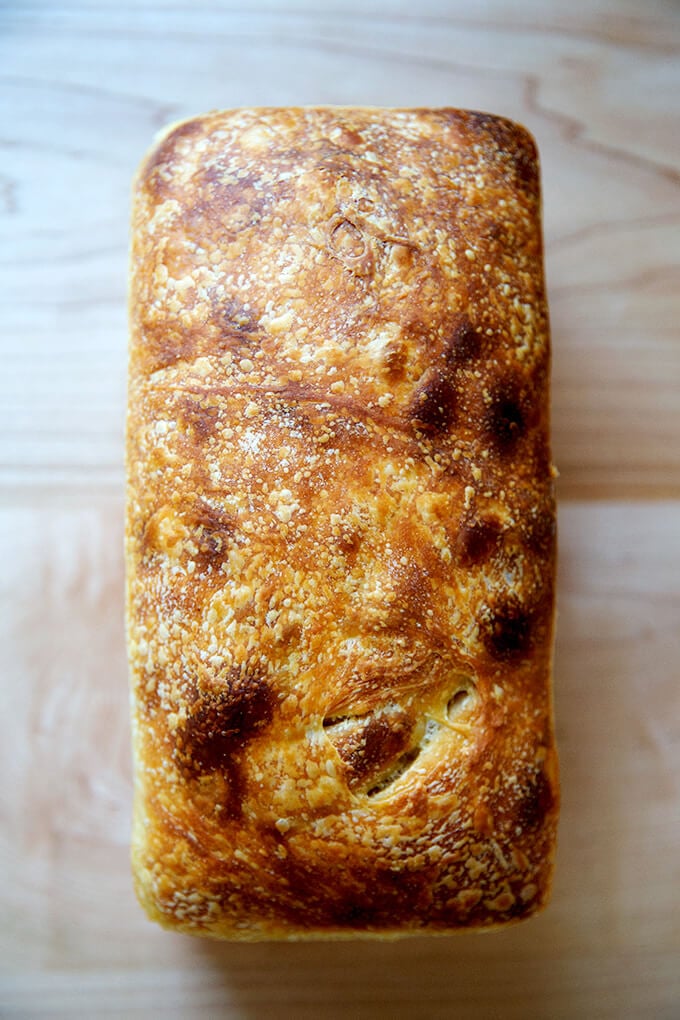
Bake for about 45 minutes or until golden brown all around.
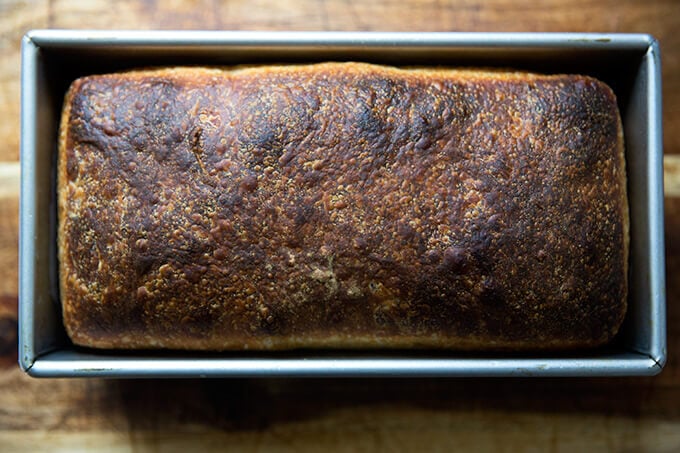
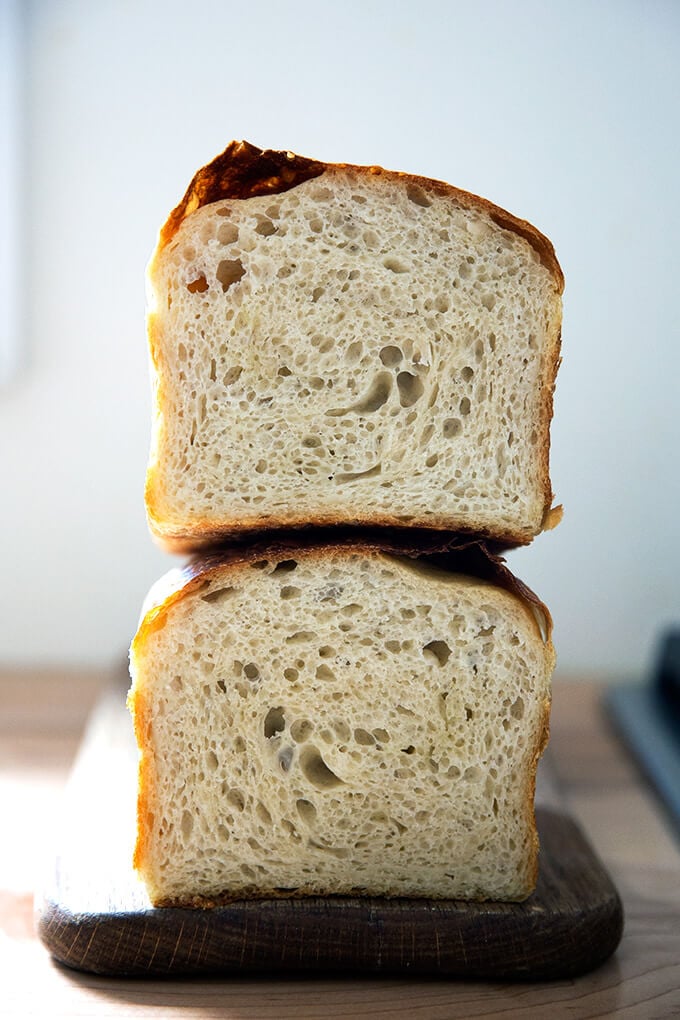
Let cool for at least 30 minutes before slicing.
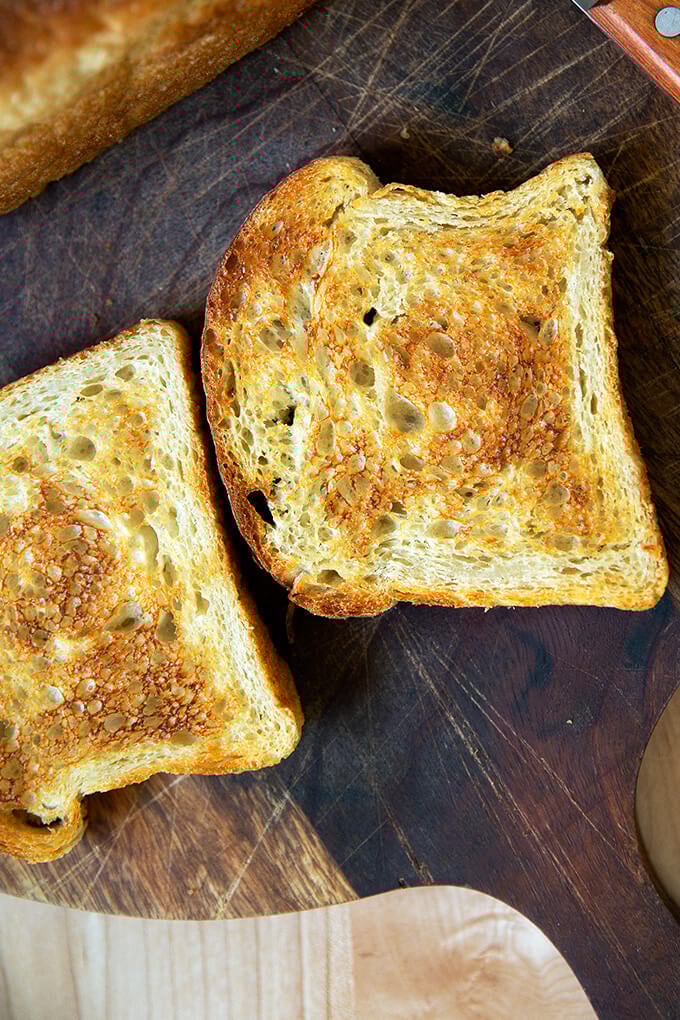
It makes excellent toast, too.

I love this tall-sided pullman loaf pan, too:

Easy Sourdough Sandwich Bread
- Total Time: 24 hours 40 minutes
- Yield: 1 loaf 1x
Description
This easy sourdough sandwich bread requires no complicated shaping, no scoring, and no preheated heavy Dutch oven. Grab your mixing bowl, pull out a spatula, and butter your loaf pan. This one is simple and delicious!
Notes:
Pan: You’ll need either a 10 x 5-inch loaf pan or a 9×5-inch loaf pan.
Plan ahead: This dough rises first for 6 to 18 hours (or less if it is super hot out or if you live in a humid area) or until the dough doubles in volume; then again for about 4 to 6 hours or until the dough crowns the rim of the baking vessel.
Troubleshooting: If you have issues with your dough being too sticky, please read this post: Why is my sourdough so sticky? The 4 common mistakes.
If you’re just getting started with sourdough, check out this post first. You’ll find tips there on procuring a starter as well as how to feed it and maintain it. If you’re up for making your starter from scratch, you can do so in just about 1 week.
Water: Chlorine in water can adversely affect sourdough. Leaving water at room temperature for 24 hours will allow most of the chlorine to escape. When I am in the habit of making sourdough bread, I fill a large pitcher with water and leave it out at room temperature. I use this for my sourdough breads and starter. Truth be told, I’ve used water straight from the tap and have not noticed a difference.
Water quantity: Also, depending on where you live and the time of year, you may need to cut the water back. If you live in a humid environment, for instance, I would suggest starting with 400 g or 420 g water. If you are not using bread flour, you also may need to cut the water back a bit. So much success with sourdough relies on getting the water quantity right.
Starter: I use a 100% hydration starter, meaning it is equal parts by weight flour and water. If you need guidance on how to maintain a starter, see this post.
Ingredients
- 100 grams (about 1/2 cup) active starter, see notes above
- 10 grams (about 2.5 teaspoons) kosher salt
- 430 grams water (or less, see notes above), room temperature
- 512 grams (4 cups) bread flour, such as King Arthur Flour
- a few tablespoons extra-virgin olive oil
- room temperature butter, for greasing
Instructions
- Mix the dough: Place the starter, salt, and water in a large bowl. Stir with a spatula to combine — it doesn’t have to be uniformly mixed. Add the flour. Mix again until the flour is completely incorporated. If you have a straight-sided vessel, transfer the dough to it — it really helps monitor the rise and allows you to see the true growth in volume of the dough.
- Perform one (or more) “stretches and folds”: 30 minutes after you mix the dough, reach into the bowl and pull the dough up and into the center. Turn the bowl quarter turns and continue this pulling 8 to 10 times. See video for guidance. If time permits, repeat this “folding” step every 30 minutes for the first two hours. (Note: even if you perform just 1 fold, your dough will be in good shape.)
- Let it rise. Drizzle with a splash of olive oil and rub to coat. Cover bowl with a tea towel, bowl cover, or a lidded vessel, and set aside to rise at room temperature (70ºF/21ºC) for 4 to 18 hours — if it is super hot out or if you live in a humid environment, it may only take 4-6 hours. When the dough has nearly doubled in volume (or UPDATE: increased in volume by 50%, which is when I now end the bulk fermentation), it is ready. (Note: Do not use an oven with the light on for the bulk fermentation — it will be too warm. It is best to rely on visual cues (increasing in volume by 50% or doubling if you’ve had success with doubling) as opposed to time to determine when the bulk fermentation is done. A straight-sided vessel makes monitoring the bulk fermentation especially easy.)
- Prepare the pan. When the dough has nearly doubled, grease a 9×5-inch loaf pan or 10 x 5-inch loaf pan with butter (or nonstick spray).
- Let it proof. Drizzle dough with a few tablespoons of olive oil. Rub your hands with a little bit of oil to coat. Use your hand to release the dough from the sides of the vessel, being careful not to completely deflate the dough. Video guidance here. Turn the dough out onto a work surface. Quickly, shape the dough into a rectangle — fold the dough envelope-style first; then use a bench scraper to shape the dough into a rough rectangle. Transfer dough, seam-side down to prepared loaf pan and gently stretch into an oblong shape. (At this point, you can transfer the pan to the fridge if it makes sense with your schedule: rub the dough with oil and cover with plastic wrap, or tuck the whole pan into a 2-gallon ziptop bag. Transfer to the fridge till the next day. Then proceed with the recipe.) Leave the pan alone for 5 to 6 hours, or until the dough reaches the rim of the pan — this may take less time when it is very warm out. Do be patient with this second rise: to get good height, the dough should be near the rim of the pan before you transfer it to the oven.
- Bake it. Heat oven to 425ºF. Transfer the pan to the oven and bake for about 20 minutes. Reduce heat to 375ºF. Bake for 20 to 25 minutes more or until golden all around. If you have an instant read thermometer, it should register 206-210ºF or so before removing. Remove the pan from the oven and turn the bread out onto a cooling rack. Cool for at least 30 minutes before slicing.
- Prep Time: 24 hours
- Cook Time: 45 minutes
- Category: Bread
- Method: Sourdough/Natural Leavening
- Cuisine: American
This post may contain affiliate links. Please read my disclosure policy.


1,405 Comments on “Easy Sourdough Sandwich Bread”
Hello i want to try the sandwich bread but only have all purpose flour i know that i need to make some adjustments to the recipe can you help with this
All purpose flour is fine! It might make for a slightly wetter dough, but I wouldn’t make any changes unless you live in a particularly humid environment. Do you?
Thanks No I don’t
I’ll try the recipe as it is keeping an eye on the water as I add it to make sure it’s not too wet
Sounds good. Good luck with it!
Can’t wait to try this! Can I use a blend of unbleached all purpose flour and whole wheat flour?
Yes! What ratio are you thinking? This is a very high hydration dough, so it should be fine… if you were to use as much as 75% whole wheat flour, however, you may need to up the water. WW flour can be very thirsty 🙂
This made an incredible loaf! Very tender inside and nice crisp crust. The recipe was very easy to follow and the timing works well for my schedule
Great to hear, Ashley! Thanks so much for writing 🙂
I LOVE this recipe 😋
I have a question though can I use it in a Dutch oven?? I usually do it in the pan but I was hoping to have some nice dutch oven sourdough.
I LOVE this recipe 😋
I have a question though can I use it in a Dutch oven?? I usually do it in the pan but I was hoping to have some nice dutch oven sourdough.
So far this is my favourite recipe! Is the oven temp in a fan forced oven?
Great to hear! Not fan forced 🙂
How do you store?
At room temperature in an airtight vessel or bag for up to 3 days. Or freeze for up to 3 months.
I have been making this bread 2-3 times/week for my family for the past several months. It is foolproof and delicious every time! The guide and linked YouTube video were so helpful as I was starting out. Thank you so much for this incredible recipe!! It is a staple in our family now for sure.
Great to hear, Anna! Thanks so much for writing and sharing this 🙂
We are making this recipe and loving it .
My question is can I add a bit of whole wheat or spelt to the recipe?
What would I need to change?
Great to hear! And yes, absolutely 🙂 Depending on how much ww or spelt flour you use, you may or may not have to change the amount of water. WW flour tends to be thirstier, so you may need to use more water. That said, this is a very high hydration dough, so if you use 25% ww flour or spelt flour, you might not need to make any adjustments. I suggest making the recipe as written without any changes to the water first; then, depending on your results, use more water next time around. Take notes!
Hi there,
Love your recipes!
Can I do the second rise overnight in the fridge like i do with your step-by-step recipe? Or does it need to be shorter at room temp?
thank you x
Yes! I like to tuck the entire loaf pan into a ziptop bag, refrigerate it, then let it proof at room temperature before baking. Unlike the other recipe, this one you’ll want to let proof at room temperature until it crowns the rim of the pan before baking.
What is the difference between “Simple Sourdough Bread, Step by Step recipe? By the way I really like Could I just do a loaf style bread recipe with that.
If I decide to do this recipe can I: place in a 9×5 pan? I would like to cold proof my dough. What percentage do I bulk? Can I bake from the fridge to the oven. How does the increase in water affect the texture of the loaf? Is it possible to take the simple sourdough recipe add olive and sugar/honey and make a sandwich loaf? Rita
This one is slightly higher hydration and so yields a softer loaf, better for sandwiches. I think you are better off using this recipe as opposed to the other one if you want a loaf style bread.
Yes, a 9×5-inch pan will work. Bulk fully, deflate, shape into a loaf, place in buttered loaf pan, cover with plastic wrap or tuck into an airtight bag; then stick it in the fridge.
Let the dough proof at room temperature until the dough crowns the rim of the pan before baking it.
Thank you! I will make the higher hydration loaf. It is similar to your focaccia recipe. I use that recipe all the time. Rita
So happy to find this recipe!
We live on your sourdough focaccia as often as possible! Would be eaten daily. Is so simple. I am trying for the first time, with ~8% rye flour, I know the focaccia doesn’t work out with heavier flours, so hoping it can perhaps be done….:) have never made a bread loaf, sd without sugar!
8% rye should be fine here! Apologies for the delay here. I hope it turned out well!
I’ve tried so many recipes! This by far is not only easiest but it tastes great and turns out great pretty much every time! The dough was way too wet a few times til I seen where you said to reduce the water if it’s humid ect.. Thank you ❤️
Great to hear, Jessi! Thanks so much for writing 🙂
Love this recipe and so does the family. Wondering if it can be safely doubled to make more than one loaf at a time though.
Yes! Go for it 🙂
If I put the bread and loaf pan in the fridge, when I take it out the next day, do I let it rise to the rim in room temp?
Yes!
I’d love to try this recipe but I have a 13″ large loaf pan. Can I do use this recipe? Tweak the flour and water measurements maybe?
Hi! I think you could make 1.5x the recipe for that size loaf pan.
Had a dough day yesterday using my 1 year old starter (happy Birthday, Sally) and let it bulk on the counter last night. Oh boy did it double… wondering why it is so wet and shapeless 🙁 For flour I used strong bread flour(90%) rye flour (5%) and whole wheat (5%), and decreased the hydration to about 80% using 410g of water. Gonna bake it anyway and see how it gets on. Fingers crossed!
How did it turn out Luke? It’s possible your dough over-fermented during the bulk fermentation over night… if it baked up very dense, it likely over fermented. Are you using a straight-sided vessel for the bulk fermentation?
My son is starting school next year, and I think this sourdough sandwich bread would be a great option for packing sandwiches for his lunch (since he LOVES our standard sourdough). I’m curious if you have any recommendations on the type of loaf pan to use? I’m worried that a standard non-stick loaf pan can’t handle the high heat. And a silicon pan might not hold its shape? Though I’d prefer it if silicon would work, because I feel like its versatile for banana bread and those other types of breads!
This is my favorite loaf pan: USA 9×5-inch pan (1.25 lb). This one is great for banana bread, too 🙂
I love this recipe. I add half stick of frozen shredded butter in the 2nd fold and the other half in the 3rd fold. I also use a loaf Dutch oven with a sling and it is perfect every time.
Thank you for this recipe 🍞🤎
Love this idea so much, Karen! Still dying to try it. Thanks for writing and sharing 🙂
My oven must be on the hot side because after 10 mins the crust was dark brown. 😳
Hello, I’m currently stretch and folding and I’m wondering if I leave it for the first rise overnight should I leave it out or in the fridge? I’m thinking the fridge as my kitchen runs pretty warm and I tend to be a late sleeper..
Yes, I would use the fridge! Apologies for the delay here! I hope it worked out well for you 🙂
I make this all the time. I make it late in the day after waiting for my starter to double. My stretches and folds are done in the evening. My kitchen is around 78 degrees so I put the lidded straight sided container directly in the fridge afterward and I leave it in the fridge for a day or two for flavor development. On the day I’m baking, I take it out of the fridge in the morning, let it rise as directed to 50% (if needed – sometimes it’s already risen to that level in the fridge), and then move to the loaf pan and continue with the recipe. This has worked for me every time. I actually do this with all the sourdough recipes of Ali’s.
The best and very easy to follow firections
The best and very easy to follow directions!!
Great to hear, Marylou! Thanks for writing 🙂
Delicious!! I’ve been wanting to learn to bake in a loaf pan and this recipe gave me perfect results on my first try. I was skeptical when I saw how wet the dough was, but I trusted the process and I’m so glad. The crust has just enough crunch but it’s soft and tender all around with a zip of sour. I doubled up and made two loaves.
Great to hear, Alexis! Thanks so much for writing and sharing your thoughts. Nice work on doubling up, too 🙂
I have made this recipe so many times and it always turns out amazing! Thank you
Great to hear, Rebecca! Thanks for writing 🙂
This turned out beautifully. It was simple to make with my sourdough discard after viewing your video. I like the option of a sandwich bread to change it up from a boule. Thank you for all the wonderful tips, videos and delicious recipes.
Great to hear, Jennifer! Thanks so much for writing and sharing this. The sandwich bread shape is nice for toast/sandwiches and the less-crisp crust is nice for that purpose as well 🙂
Hi Ali,
I have gluten sensitivity. I chose to ferment this over 24 hours in the fridge in my loaf pan. Do I need to let it sit and come to room temperature before placing in the oven?
Thank you so much! I’m so excited to try this version!
Yes! You’ll want it to rest at room temperature until it begins to crown the rim of the pan. Hope I’m getting to you in time 🙂
I follow your other no knead recipe for sourdough in a covered Dutch oven. I LOVE it. I find 48 hours in the fridge on the last rise keeps my bread softer and more moist. I’ve got 1 loaf rising in an oblong loaf sized banneton in the fridge now (28 hrs) and was hoping to bake it in a loaf pan for sandwich bread for sandwiches this weekend. Should I transfer to the loaf pan and still let it rise for 6 hours like this recipe calls for, or do you think the fridge rise in the banneton will be enough? Thanks for all your great recipes, the chocolate chip discard cookies are a staple in my house.
Hi! I hope I’m not too late here. Yes, I would transfer the loaf to the loaf pan and let it rise at room temperature until it crowns the rim of the pan… depending on the temperature of your kitchen, this may take more or less than 6 hours: rely on the visual cues, not the timing.
Thank you for your kind words 🙂
First time making the sandwich sourdough recipe and only my second time making sourdough bread. My finished loaf is a little bit tacky, not so much that I can’t thoroughly enjoy it, but what do I need to do to achieve a drier result on the inside of my loaf please? Do I need to do a longer fridge time? I left it overnight, then stood my tins in warm kitchen for 4 hours before baking. The dough was near top of the tin. Thanks in advance for your insights 🙂
Hi Gill! It sounds as though you might need to lower the hydration from the start. Did your dough appear wetter upon being mixed than what the dough looks like in the video?
sorry for late reply to this comment. I think my dough was quite wet. What do you suggest is a good reduction in water quantity for the sandwich recipe? I also wondered why do we leave the dough to rise to the tin top after being in the fridge whereas we cook the baton style straight from the fridge.? Thanks in advance for your thoughts on this.
Hi Ali,
Appreciate your help. My last two loaves of sourdough sandwich bread were flat on top – they failed to dome. My recipe is a lot like this one, noting that I use white whole wheat (golden wheat) flour for slightly more than half of the flour, and I add 1 tablespoon each of honey and olive oil to the dough. This recipe has worked for several years, but the two most recent bakes resulted in a flat top loaf of bread. Both time it rose very well in the straight-sided vessel (first rise), and again when transferred to the loaf pan where it lightly domed. But when it came out of the oven the top had flattened. Not sure that has changed. I do note that while you advise not letting it rise more than 50% in the first rise, and the last two times I lost track and it not quite doubled. In addition, I let it rise in my microwave which sits over my stove, and with the stovetop light on maintains a warm temperature. Perhaps my dough is over-rising earlier and then loses its pfft for the over? Any advice appreciated.
Thank you,
Ellen
Hi! Yeah, this time of year, I would avoid using the stovetop light or microwave or anything that might cause the dough to overferment. I’m not sure that is the issue as I don’t know the exact recipe you are using, but it’s possible you need to lower the hydration of the dough or shorten either the bulk fermentation or final proof.
Thanks, Ali. I did lower the hydration for the last loaf and it was still flat. I will try a different rising location and shorten the bulk fermentation / final proof and see if that makes a difference.
Really appreciate your adivice.
Ellen
Wow. One of the best and easiest recipes ever. Love that it has minimal ingredients, is vegan, and no steam required. We love it toasted!
Great to hear, Mary! Thanks for writing 🙂
Hydration question. This recipe has more water to flour ratio than your “step by step sourdough”… I am wondering if this is related to the loaf shape or just another variation?
Yes, it has to do with the shape and process. With the step by step recipe, the dough needs to be handled/shaped into a boule, then transferred to a hot Dutch oven. And with that recipe, we’re looking for an especially crusty crust with a light, airy crumb. With the sandwich bread, it barely needs to be handled and it doesn’t bake “free form” so it can be a higher hydration. Moreover, we don’t want that same crust as the step by step recipe — we want a softer crust and a soft/moist crumb as well, so the higher hydration helps with that. Hope that all makes sense!