 →
→ Easy Sourdough Sandwich Bread
This post may contain affiliate links. Please read my disclosure policy.
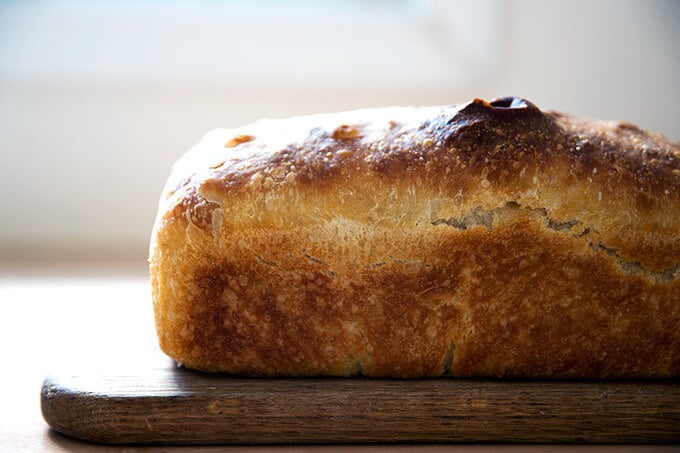
This 4-ingredient sourdough sandwich bread requires no complicated shaping, no scoring, and no preheated heavy Dutch oven. Grab your mixing bowl, pull out a spatula, and butter your loaf pan. This one is simple and delicious!
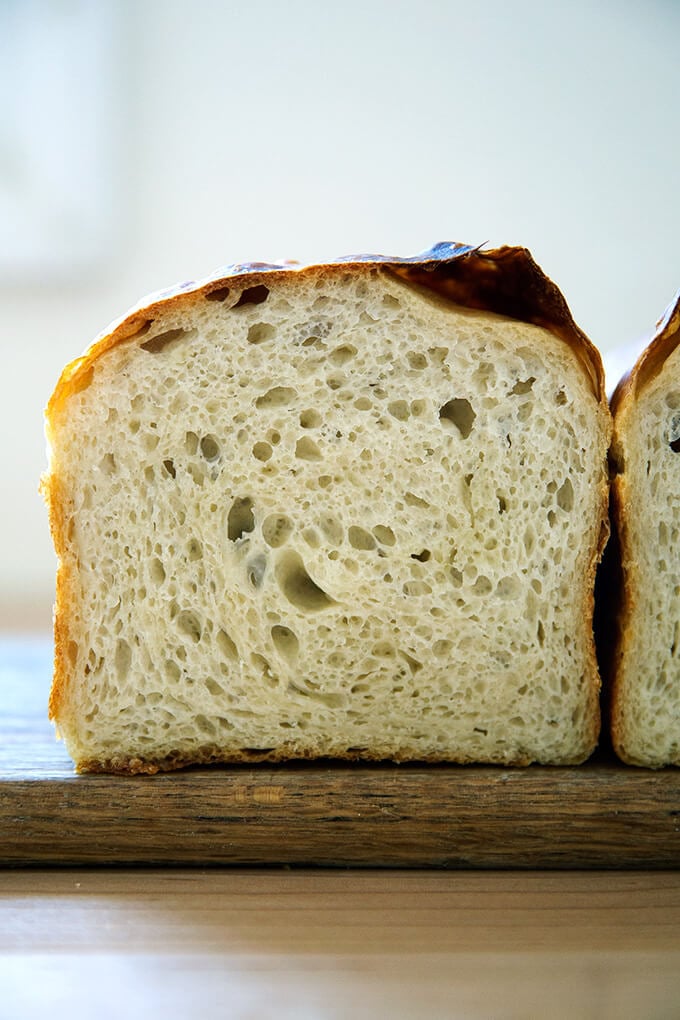
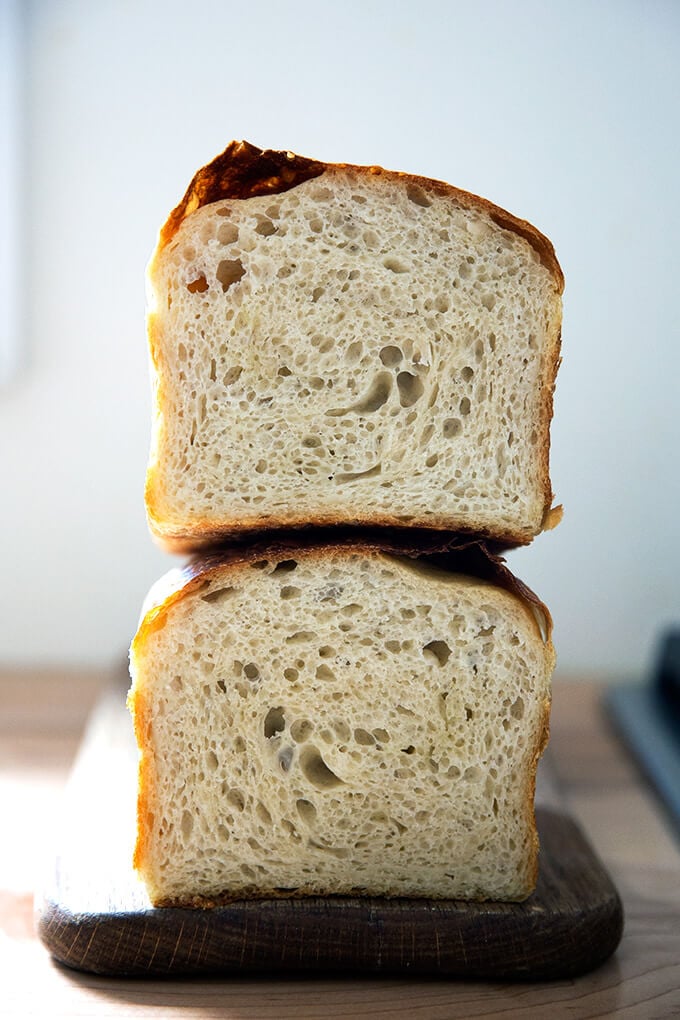
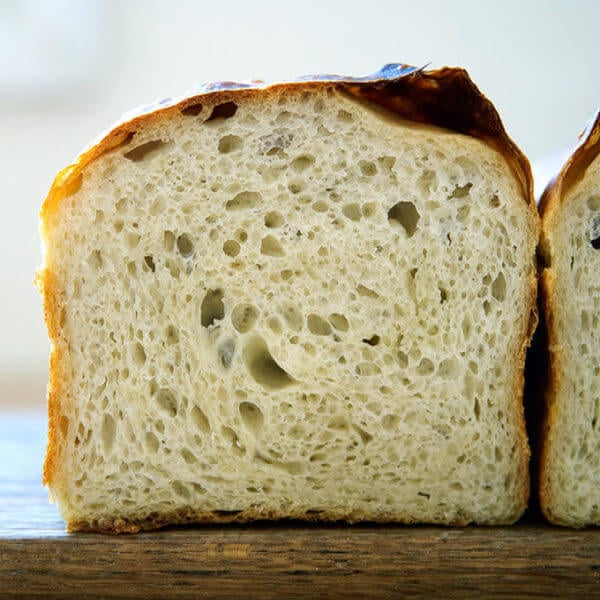
As its name suggests, this sourdough sandwich bread recipe is easy, a simple mix of flour, water, salt, and sourdough starter. In sum, it’s an adaptation of my mother’s peasant bread recipe with the sugar and yeast omitted and sourdough starter added. Like this sourdough focaccia, the dough is high-hydration, which yields a soft crumb, perfect for sandwiches when freshly baked and excellent for toast, too.
In the world of sourdough bread baking, crusty boules, open-crumbed rolls, and pillowy focaccia get all the glory. But I would argue a simple sandwich loaf deserves just as much praise, if not more, not only for its ease in assembly, but also its utility.
Find step-by-step instructions as well as video guidance below.
PS: How to Build a Sourdough Strater from Scratch
PPS: How to Activate, Feed, and Maintain A Sourdough Starter
How to Make Sourdough Sandwich Bread, Step by Step
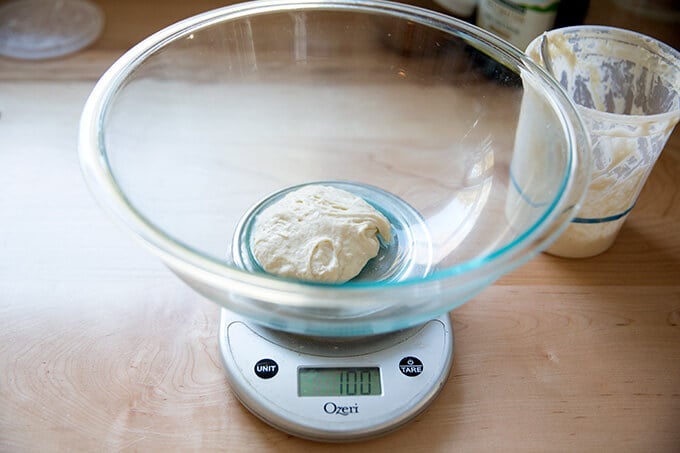
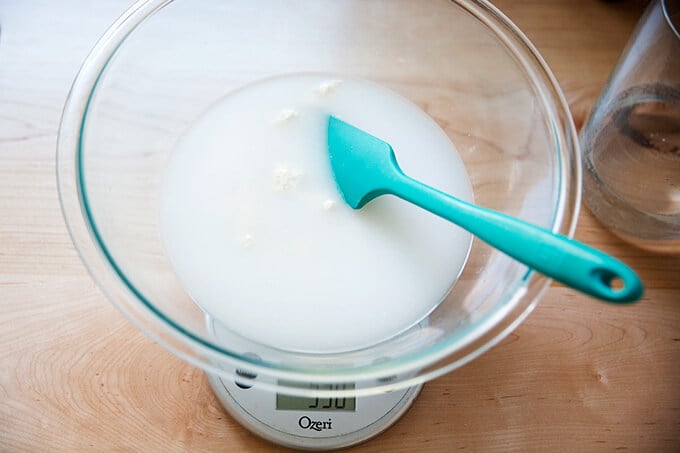
First, place 100 grams of starter in a large bowl. As always, for best results, please use a digital scale to measure.
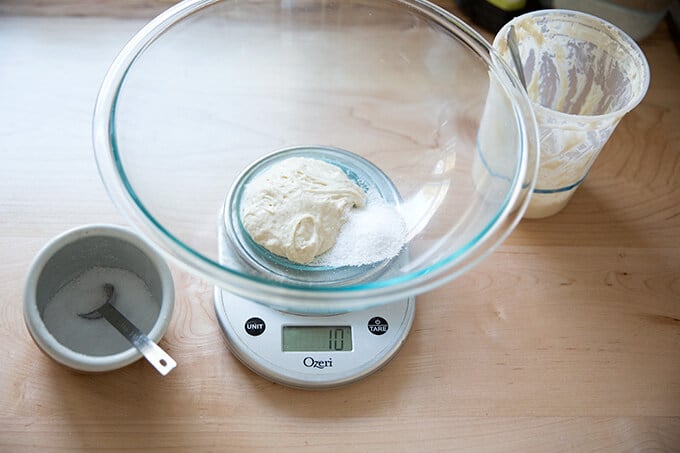
Add 10 grams of salt.
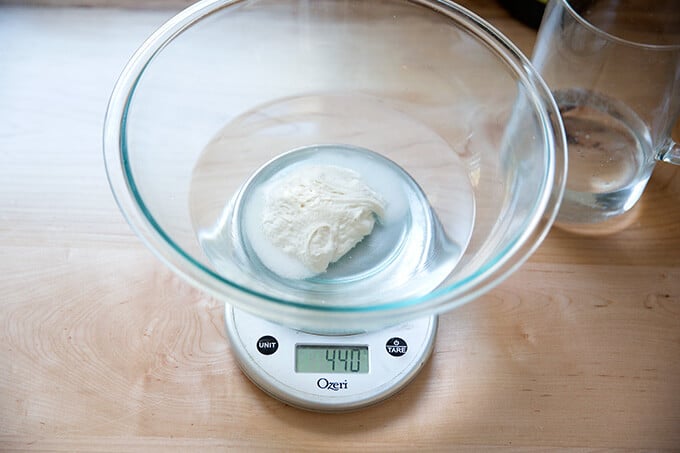
Add 430 grams of water. (You may need to use less water: see recipe box for notes.)
Stir to combine.
Then add 512 grams of bread flour.
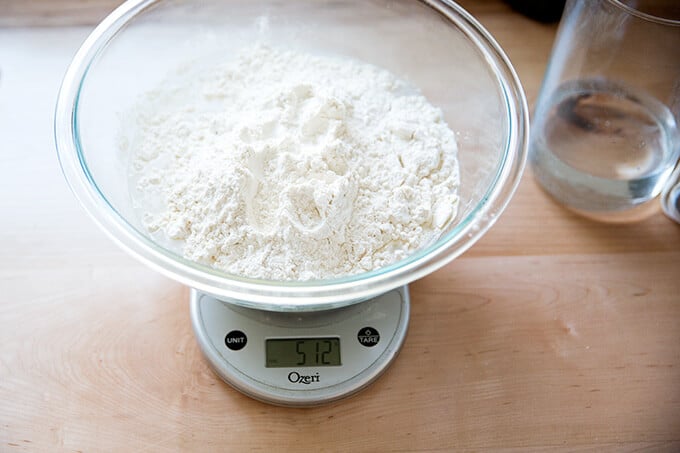
Stir to form a sticky dough ball.

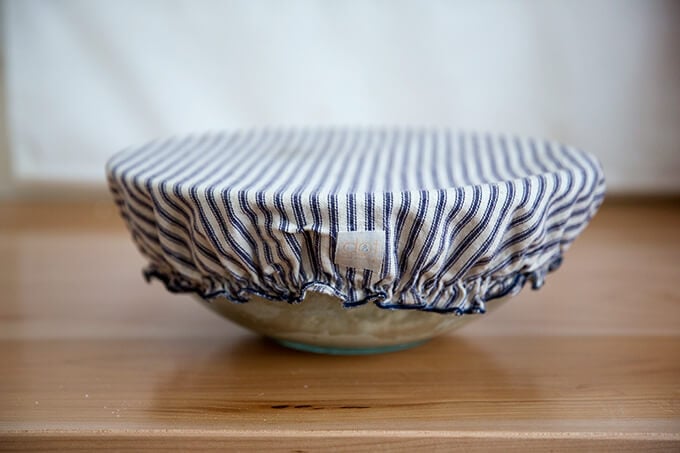
Cover with a towel or cloth bowl cover or, preferably, a lidded vessel, and let rest for 30 minutes.
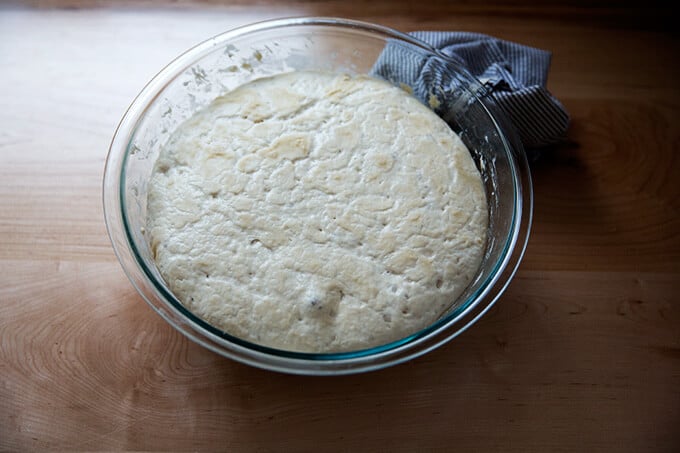
Then, perform a series of stretches and folds. See video for guidance (skip ahead to 1:13). Repeat this 3 more times for a total of 4 sets of stretches and folds during the first two hours. Then, let rise for 6 to 18 hours* (see recipe notes) at room temperature:
Drizzle the surface of the dough with a little bit of olive oil; then fold the dough inwards from the sides to deflate.
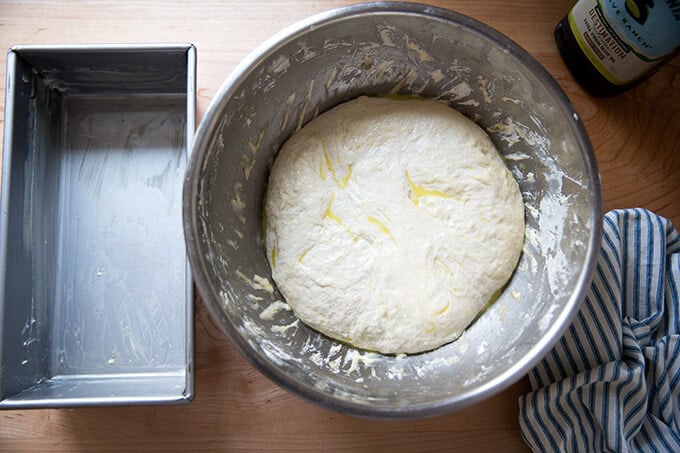
Transfer the dough to a large, buttered loaf pan. I use this 10 x 5-inch loaf pan but a 9×5-inch loaf pan will also work.
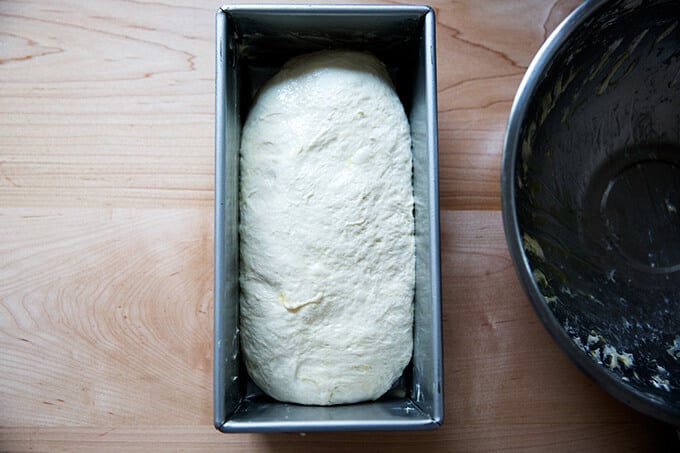
Let the dough rise just until it begins to crown the rim of the pan, about 6 hours.
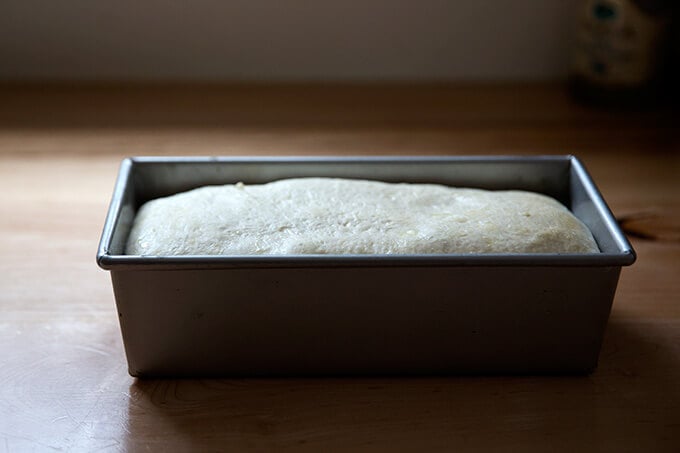
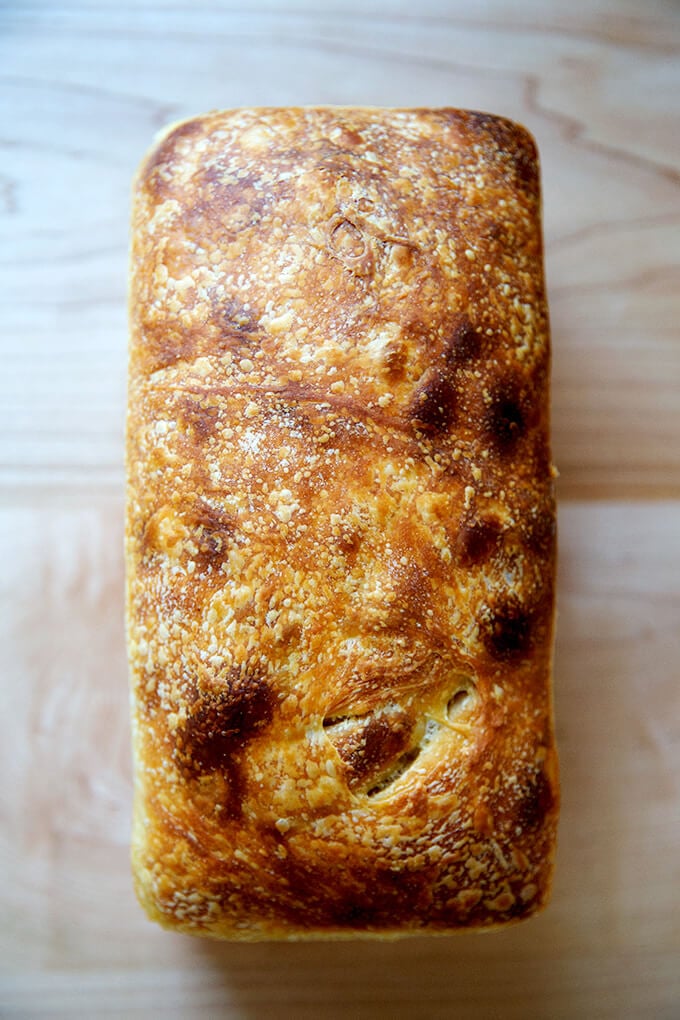
Bake for about 45 minutes or until golden brown all around.
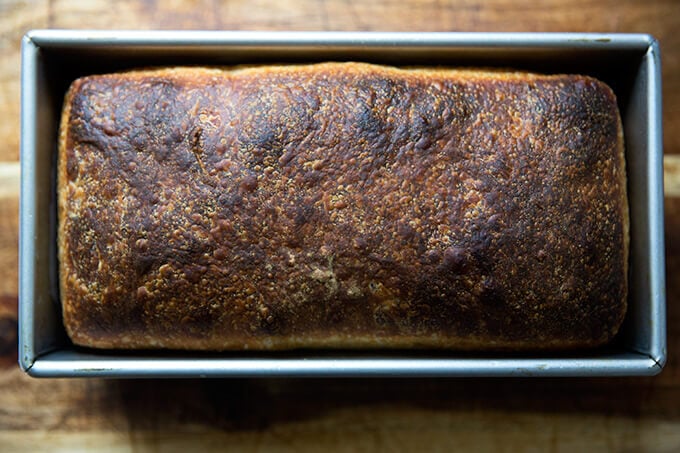
Let cool for at least 30 minutes before slicing.
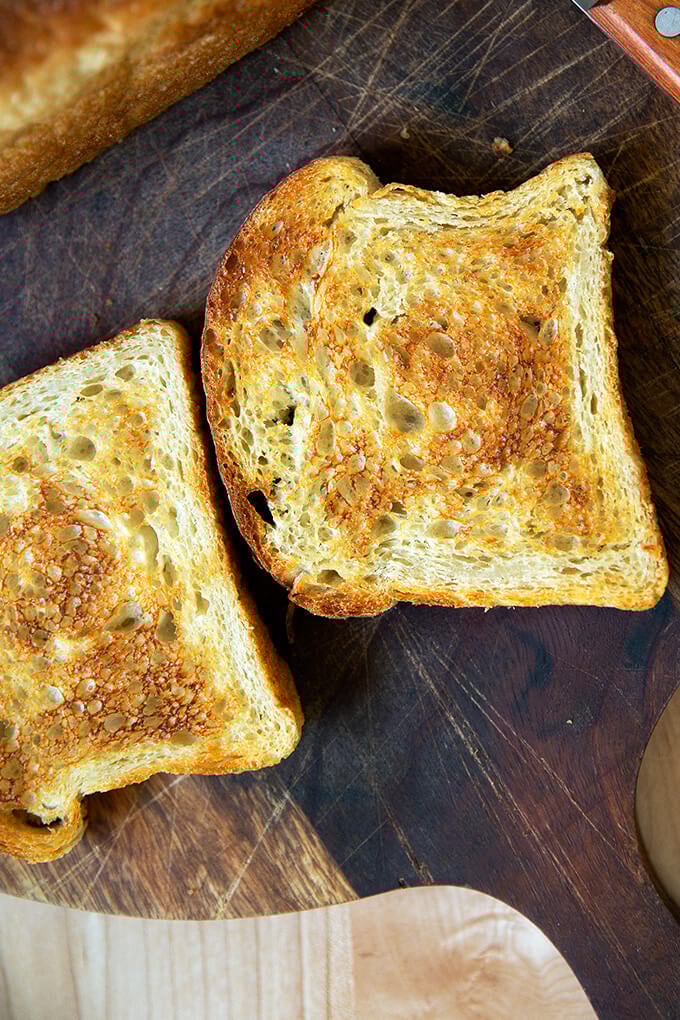
It makes excellent toast, too.

I love this tall-sided pullman loaf pan, too:

Easy Sourdough Sandwich Bread
- Total Time: 24 hours 40 minutes
- Yield: 1 loaf 1x
Description
This easy sourdough sandwich bread requires no complicated shaping, no scoring, and no preheated heavy Dutch oven. Grab your mixing bowl, pull out a spatula, and butter your loaf pan. This one is simple and delicious!
Notes:
Pan: You’ll need either a 10 x 5-inch loaf pan or a 9×5-inch loaf pan.
Plan ahead: This dough rises first for 6 to 18 hours (or less if it is super hot out or if you live in a humid area) or until the dough doubles in volume; then again for about 4 to 6 hours or until the dough crowns the rim of the baking vessel.
Troubleshooting: If you have issues with your dough being too sticky, please read this post: Why is my sourdough so sticky? The 4 common mistakes.
If you’re just getting started with sourdough, check out this post first. You’ll find tips there on procuring a starter as well as how to feed it and maintain it. If you’re up for making your starter from scratch, you can do so in just about 1 week.
Water: Chlorine in water can adversely affect sourdough. Leaving water at room temperature for 24 hours will allow most of the chlorine to escape. When I am in the habit of making sourdough bread, I fill a large pitcher with water and leave it out at room temperature. I use this for my sourdough breads and starter. Truth be told, I’ve used water straight from the tap and have not noticed a difference.
Water quantity: Also, depending on where you live and the time of year, you may need to cut the water back. If you live in a humid environment, for instance, I would suggest starting with 400 g or 420 g water. If you are not using bread flour, you also may need to cut the water back a bit. So much success with sourdough relies on getting the water quantity right.
Starter: I use a 100% hydration starter, meaning it is equal parts by weight flour and water. If you need guidance on how to maintain a starter, see this post.
Ingredients
- 100 grams (about 1/2 cup) active starter, see notes above
- 10 grams (about 2.5 teaspoons) kosher salt
- 430 grams water (or less, see notes above), room temperature
- 512 grams (4 cups) bread flour, such as King Arthur Flour
- a few tablespoons extra-virgin olive oil
- room temperature butter, for greasing
Instructions
- Mix the dough: Place the starter, salt, and water in a large bowl. Stir with a spatula to combine — it doesn’t have to be uniformly mixed. Add the flour. Mix again until the flour is completely incorporated. If you have a straight-sided vessel, transfer the dough to it — it really helps monitor the rise and allows you to see the true growth in volume of the dough.
- Perform one (or more) “stretches and folds”: 30 minutes after you mix the dough, reach into the bowl and pull the dough up and into the center. Turn the bowl quarter turns and continue this pulling 8 to 10 times. See video for guidance. If time permits, repeat this “folding” step every 30 minutes for the first two hours. (Note: even if you perform just 1 fold, your dough will be in good shape.)
- Let it rise. Drizzle with a splash of olive oil and rub to coat. Cover bowl with a tea towel, bowl cover, or a lidded vessel, and set aside to rise at room temperature (70ºF/21ºC) for 4 to 18 hours — if it is super hot out or if you live in a humid environment, it may only take 4-6 hours. When the dough has nearly doubled in volume (or UPDATE: increased in volume by 50%, which is when I now end the bulk fermentation), it is ready. (Note: Do not use an oven with the light on for the bulk fermentation — it will be too warm. It is best to rely on visual cues (increasing in volume by 50% or doubling if you’ve had success with doubling) as opposed to time to determine when the bulk fermentation is done. A straight-sided vessel makes monitoring the bulk fermentation especially easy.)
- Prepare the pan. When the dough has nearly doubled, grease a 9×5-inch loaf pan or 10 x 5-inch loaf pan with butter (or nonstick spray).
- Let it proof. Drizzle dough with a few tablespoons of olive oil. Rub your hands with a little bit of oil to coat. Use your hand to release the dough from the sides of the vessel, being careful not to completely deflate the dough. Video guidance here. Turn the dough out onto a work surface. Quickly, shape the dough into a rectangle — fold the dough envelope-style first; then use a bench scraper to shape the dough into a rough rectangle. Transfer dough, seam-side down to prepared loaf pan and gently stretch into an oblong shape. (At this point, you can transfer the pan to the fridge if it makes sense with your schedule: rub the dough with oil and cover with plastic wrap, or tuck the whole pan into a 2-gallon ziptop bag. Transfer to the fridge till the next day. Then proceed with the recipe.) Leave the pan alone for 5 to 6 hours, or until the dough reaches the rim of the pan — this may take less time when it is very warm out. Do be patient with this second rise: to get good height, the dough should be near the rim of the pan before you transfer it to the oven.
- Bake it. Heat oven to 425ºF. Transfer the pan to the oven and bake for about 20 minutes. Reduce heat to 375ºF. Bake for 20 to 25 minutes more or until golden all around. If you have an instant read thermometer, it should register 206-210ºF or so before removing. Remove the pan from the oven and turn the bread out onto a cooling rack. Cool for at least 30 minutes before slicing.
- Prep Time: 24 hours
- Cook Time: 45 minutes
- Category: Bread
- Method: Sourdough/Natural Leavening
- Cuisine: American
This post may contain affiliate links. Please read my disclosure policy.


1,405 Comments on “Easy Sourdough Sandwich Bread”
I am fairly new to sourdough baking. Created my own starter in November. I love this recipe. I have made it twice and it’s been perfect both times. Soft and delicious, specially toasted.
Thank you for this.
Great to hear, Sonia! Thanks so much for writing 🙂 🙂 🙂
Hi Ali! I’ve used your recipe several times and the flavor is great! The one problem I have occasionally is the sides of my bread collapses (so my bread looks like a keyhole) after I remove it from the oven/loaf pan. I use a Pullman loaf and I do use the cover. I make sure the bread is fully baked at 208-210 degrees… any suggestions?
Hi! I’m thinking maybe you need to reduce the amount of water? What kind of flour are you using?
I’m using bread flour and I reduced to 400 grams already, maybe I will try to reduce a little more still, thank you! Will keep you posted
PS – love your easy to follow instructions !!
Sounds good! And thank you 🙂
I accidentally posted under a different recipe…doh. I’ve tried this recipe several times with a very active starter but always get a very dense gummy loaf. my house is somewhat on the cooler side. my dough never seems to be as slack as what yours looks like. is it possible the bulk ferment isn’t done? I let it go to 50% more, not double. once I get it into the loaf pan, it never seems to reach the rim either. I’m using a scale and a combo for the bulk.
Hi! It sounds as though you are doing everything right. What kind of flour are you using? I think you could try pushing the bulk fermentation farther.
I’m using king Arthur bread flour. I think you may be right. I’m going to try again and let it ferment a tad longer. it did taste great but man it was a boat anchor!
Oh bummer! Great to hear about the bread flour. Roughly how long are you letting the dough proof in the loaf pan? And does it get to the rim before you bake it?
This recipe is so easy and the bread is irresistible, especially toasted and topped with good quality salted butter. I’ve baked it at 4000 ft of elevation without any adjustments and it was perfect. Today, from our new home in Colorado, I’ll be baking it at 8000 ft of elevation. Didn’t make any adjustments to the dough, but will use a thermometer for the first time to test doneness. Fingers crossed.
Great to hear Jackelin! Thanks so much for writing. Hope it turned out well!
For those baking at high elevation, I would like to report that my bread turned out as perfect as usual. I maybe withheld a couple of tablespoons of flour, making the dough a little wetter than usual, but that was the only adjustment. This recipe is truly foolproof, assuming you have a healthy, mature sourdough starter. Thank you, Allie. Your recipes are truly some of the best and always simple and delicious.
So nice to read this! Thanks for reporting back and sharing these notes — so helpful for others cooking at high elevation!
Tried a few sourdough recipes and this one is the best!! I’ll only be using this one from now on.
Great to hear, Claire! Thanks for writing 🙂
I made this recipe with less than 400 g of water, and the dough was still very sticky, more like cake batter and impossible to shape. Still came out delicious.
Can this recipe be used in a bread machine? Would I use the 1. Lb. setting?
Hi! At what step do you put the dough in the bread machine? I’ve never used one so I can’t really advise. So much of sourdough is relying on visual cues, and if you aren’t able to monitor the dough at every step of the way, it makes me nervous to use a bread machine. Sourdough baking requires a little more monitoring than yeast-bread baking.
I -finally- got the water right with this latest loaf, I’ve been using this recipe for Weeks (it tastes Phenomenal!) and I just thought it was me, but then after reading a few posts on the facebook page I’m a part of, it never occurred to me that the fact that I could not Shape the (very bubbly) blob of goo that was my dough was a problem. It came out Beautifully today (I went with 400g of water). I love this recipe and I’m so excited for breakfast in the morning!
Wonderful to hear this Ari! Thanks so much for writing and sharing this — so helpful for others 🙂
Hi there! I’ve made this recipe probably about 20 times over the past couple of years ☺️ First, thank you for the recipe that started my sourdough journey! I always come back to it.
I am curious if you’ve had success with making this loaf with whole wheat flour? I’m going to try it this weekend. Any suggestions to modify the recipe with whole wheat in mind?
Thanks!
Great to hear Brandon! Apologies for the delay here. Whole wheat flours tend to be thirstier, so often it’s helpful to increase the hydration of a loaf when using whole wheat flour, but this one is already very high hydration that I don’t think you’ll need to make any changes. Let me know how it works out and good luck!
I am new to sourdough and actually nervous about using my starter and making bread. Right now my starter is in the fridge. Do I feed it before I make this bread? Do I leave it out on the counter for a certain amount of time before making this bread? Any tips are appreciated. Thanks and can’t wait to make my first loaf of sourdough bread
Hi! And yes, you need to feed it before using and you’ll let it rise at room temperature. Check out this post: How to Feed, Maintain, and Store a Sourdough Starter
Love this recipe, I’ve used it many times and always delicious!
I messed up my timing today, wondering if it can go in the fridge overnight once it’s doubled and then shaped and put in pans the next morning?
Yep! Go for it 🙂
Love the sourdough sandwich loaf. Always perfect.
The sourdough sandwich loaf always works well for me. This time I just grabbed my starter straight out of the refrigerator because I forgot to feed it. When I put it in the loaf pan it was night and by the time I woke the next morning after about 10 hours it had overflowed the bread pan. Still baked fine but could I have put in the refrigerator overnight? Would it still rise slowly in the refrigerator?
Yes, definitely you could have put the loaf pan in the fridge — I would suggest sticking it in a jumbo ziplock bag or wrapping with plastic wrap to ensure the top layer of dough doesn’t dry out. Because the rise will slow way down in the fridge, you may need to let it rise at room temperature a bit before baking.
I noticed most sourdough sandwich bread recipes call for fats and sugar. I haven’t tried your recipe but can you explain why it still comes out soft without the fats and sugar? Your recipe sounds like my usual sourdough crusty bread recipe hence my question on what makes it different
Hi! It’s partly due to the high hydration. While the composition may be very similar to your crusty boule recipe, the baking method — in a loaf pan as opposed to a covered Dutch oven — will ensure it doesn’t emerge with a thick crust.
Hi there! Can not wait to try this amazing recipe… I have perfect my starter and now am ready to try a loaf. I have a couple questions if you could help me with: I live near the beach at 0 level so humidity is more than most. How much water should I be using in the recipe? Also since there is a lot of times for this recipe could you help giving a guide on what time you start, so baking time is realistic? So I am not baking in the middle of the night lol. Thank you sooooo much 😊
Try starring with 400 grams of water.
It’s really hard to give a timeline because so much depends on the strength of your starter. I’d set aside two days: first day, do your bulk fermentation (ideally in a straight-sided vessel), then deflate the dough and transfer it to your prepared loaf pan. Stick the loaf pan in a large ziplock bag, then stick the bag in the fridge. The next day proceed with the recipe when you have time: pull out the pan and let it rise at room temperature until directed in the recipe.
I love your sourdough recipes! This one has been my go to recently and I’ve modified it to make cheese bread and cinnamon raisin with great results. I’m looking to try to do a whole wheat with seeds loaf and wondering how you might tweak the amounts?
Thank you!
Hi! Great to read all of this. I don’t think you’ll need to adjust the water with whole wheat flour bc this one is so high hydration as it is. I’d reference this recipe in regard to adding seeds: No-Knead Three-Seed Bread
Thank you so so much!
This has become our daily bread — it is so easy to make and is simply delicious. Thank you for sharing this great recipe
Great to hear, Nita! Thanks so much for writing 🙂
Love this recipe so much! I make it 2-3 times a week! My only issue is is that my oven tends to crisp the top up a little more than I’d like.. I’ve been trying to adjust bake times to find a solution but haven’t 100% put my finger on it just yet. Any tips?
Hi! Have you tried baking it at 375ºF the entire time?
This recipe is so very easy and creates a great slicing bread for toast and sandwiches!
One question: Is there a reason that the salt is added to the sourdough starter rather than to the flour?
No reason! Just the way I like to do it… you’ll get the same result if you add it to the flour.
having never tried this recipe “as is” and being quite new to sourdough in general, I maybe shouldn’t have attempted any adjustments 😅 but despite that, I made two beautiful loaves of moist bread! I did one with all bread flour, using 400g water and about 15g agave, the rest as written. the next was all whole wheat flour (my starter is 50% bread flour, 50% whole wheat) and required closer to 450g water. I also added agave to this one. the wheat loaf rose faster and maybe got too big by the time I got around to shaping them 😬 the second proof also went on maybe a little too long (it is HOT here and things rise fast), but they baked perfectly and came out soooo delicious. definitely making this weekly until the end of time 😋
I’m so happy to read all of this, and I admire your adventurous spirit given you are new to sourdough — I’m so glad everything turned out so well! Thanks for writing and sharing these notes.
updating after about 3 months! after testing a few other recipes that just didn’t compare, I did some (slightly obsessive 😬) trial and error with this one until we got the ratios and timing dialed in. I do indeed make this recipe at least weekly and I’m pretty sure I can do it in my sleep by now 😂 we haven’t bought bread in months! we bake a loaf for ourselves every week (my 5 year old has an affinity for sourdough avocado toast every morning. he says likes the wheat version I make because he says it tastes more sour, maybe because it ferments faster and I have ADHD 😅🤷🏼♀️). at the same time, I bake a second loaf to give away. my son picks someone to gift it to and everyone thinks we’re magical for making homemade sourdough 😄
in short: thank you so much for your recipes and detailed instructions (your sourdough pizza crust is also a staple around here 😋)!
and for those struggling or hesitant, keep trying! the method is foolproof and once you’ve got it down, you never have to eat storebought bread again 😊
Awww it’s so nice to read all of this, Katie! How sweet that you give loaves away… people truly act as though you are giving away gold when you give them homemade bread 🙂 🙂 🙂 Thanks so much for writing and sharing all of this!
I’m relatively new to bread baking and struggle with the amount of water to use. I need to remember to withhold some when trying a new recipe. My stretch and folds were going well and I was happy to see that my dough had risen nicely, but that’s where the recipe and I went in different directions I think. The consistency of the dough was a goopy mess and unable to be shaped, but I threw it in the loaf pan for the 2nd rise and baked it anyway. The taste and aroma were delicious, and it had a nice crumb, but I never did get a 2nd rise and had to bake it longer than called for. I’ll definitely be baking this again as it’s a great recipe with easy-to-follow steps!
I have used your regular sourdough recipe many times and it always comes out perfect. I see the water and flour amounts are different for this recipe. I am guessing this is to change the texture to a softer one or something along those lines. If I want to use your other recipe, can I just move the dough to a greased loaf pan after shaping (and adding the oil)? Maybe there is another reason I am missing for changing the recipe to this one?
Correct: It’s higher hydration which creates a slightly softer crumb. And yes to using the other recipe but baking it in a loaf pan… go for it!
This recipe is amazing!! It’s so much easier than the old way of making sourdough and it’s the same ingredients. Will not make sourdough any other way now. Thank you! We make this bread every week instead of buying.
Great to hear, Melissa! Thanks so much for writing 🙂
This is my fave recipe (I use so many of your recipes) I can’t get enough of this loaf, although still trying to get the timings right for my oven as I always slightly undercook it.
Thank you for making such an easy delicious recipe!
I wonder if seeds can be incorporated into it?
Great to hear! Yes, add the seeds right with the flour.
Regarding the undercooking, it’s possible reducing the water slightly might help you. Or you could lower the temperature and bake it longer if it’s browning to much for your liking.
Hello,
My family and I love this bread recipe! I’ve made it countless times at this point. However, I am struggling with something. (My starter is healthy, I regularly feed it and maintain it well. I’ve also made many other bread recipes that turn out great. I also make sure to use it in the recipe when it is bubbly and active and ready to be used)
With all of that being said, I mixed up the dough as instructed the night before and let it rise overnight. However, it doesn’t seem to rise a whole lot overnight. Then when I transfer it into the bread pan, it doesn’t seem to reach anywhere near the brim. I am worried the longer and longer I let it sit the risk of “over proofing” could happen, even though hardly any rising is happening at all. Would you happen to know why this might be the case? Especially when I feed my starter and it rises well and I use it when it’s bubbly and active?
Thanks for advance!😊
Hi!
Did this happen just once? Or has this been happening repeatedly?
What kind of flour are you using? Are you using a straight-sided vessel for the bulk fermentation?
It seems to happen every time I use this recipe. When I bake it, it does rise a bit in the oven. It taste delicious (and is not a dense brick by any means) it just doesn’t puff up much when proofing.
I have used the straight sided vessel as well as my mixing bowl for the proofing. I see all of these other recipes where the dough is touching the top of the lid of the mixing bowl or even in your video it has clearly doubled in size in your straight sided vessel. However, that just doesn’t seem to happen for me.
I use unbleached all purpose flour.
I’m by no means a professional but I’ve been baking sourdough for about two to two and a half years now so I know a bit about what I’m doing so I’m so perplexed lol.
Are you using a scale to measure?
I’d try using bread flour. And I’d make sure your starter is really vigorous and active before you use it — feed it twice before using and make sure it doubles in volume within 5 to 6 hours of feeding it.
Do you cover for the second rise? Or leave uncovered?
Wonderful recipe by the way, so easy, have made several times 🙂
I leave it uncovered, but more and more, when I do this, I make sure the dough is slicked with olive oil to ensure a crust does not form on the dough. If your dough is lightly slicked with oil, there is no need to cover it.
I’ve been using your focaccia recipe for years but noticed I’ve been buying sourdough sandwich loaf bread a lot lately and realized I could make my own … thanks for the recipe and detailed steps. Worked great on first try!
Hi Ali. There is one thing that prevents me from baking sourdough breads regularly: My room temperature is around 32C ~ 90F. What do you suggest:
1. Proof for fewer hours.
2. Chuck the dough in the fridge and bake the next day.
Overall, it’s hard to find a consistent, reliable schedule for baking sourdough. Hope to get any help I can.
Yep! You’re on it. You could also try using less starter to allow for a slightly longer room-temperature proof.
Hi Alexandra! I originally found your site looking for sourdough recipes but all your recipes have been so inspiring! The sourdough sandwich loaves I’ve made before had both honey and butter. I was thinking that’s what made them soft? Is this loaf soft or more like a typical boule? Do you ever do loaves with butter or honey or do you prefer without? Also, I only have a 9 x 5 loaf. Is it worth investing in a bigger loaf pan? Do you find more use for that? Or could I scale back the recipe a bit? Thanks again for all your amazing recipes! I got your pizza book and love it. So tempted to splurge on a pizza oven!
So nice to read all of this, Lisa!
This loaf does still come out very soft despite not having any butter. You could definitely adapt them to include butter (and honey if you like a touch of sweetness) but it’s not necessary.
A 9×5 loaf pan is fine! No need to buy another one, and I don’t think you’ll need to scale this one back either. Actually, I think you’ll get a loftier loaf, which will be nice.
Thank you for your kind words 🙂
So do you leave it out in the counter for the second rise or fridge?
Counter! But if you need to use the fridge for timing reasons, do so.
If the bulk rise ends at bed time, can I shape and put in the fridge overnight? Should I take it out in the morning and let it rise the 2nd time?
Yes! Be sure the dough is protected — either with plastic wrap or a large ziplock, etc.
This recipe is so great! I make it 2-3x a week. I live in a hot climate and can’t leave it overnight so I either start bulk fermenting as soon as I wake up, or use the fridge method after shaping the loaf. I’ve found I get the best result if I let the loaf rest an hour or two on the counter before covering and refrigerating. I wanted to try a whole wheat loaf so I used about 30% King Arthur whole wheat flour and 70% KA bread flour. I added a little extra water by eye and it came out FANTASTIC.
Great to har, Lissa! Thanks so much for writing and sharing all of these notes — so helpful for others 🙂