 →
→ Foolproof Chewy Homemade Bagels
This post may contain affiliate links. Please read my disclosure policy.
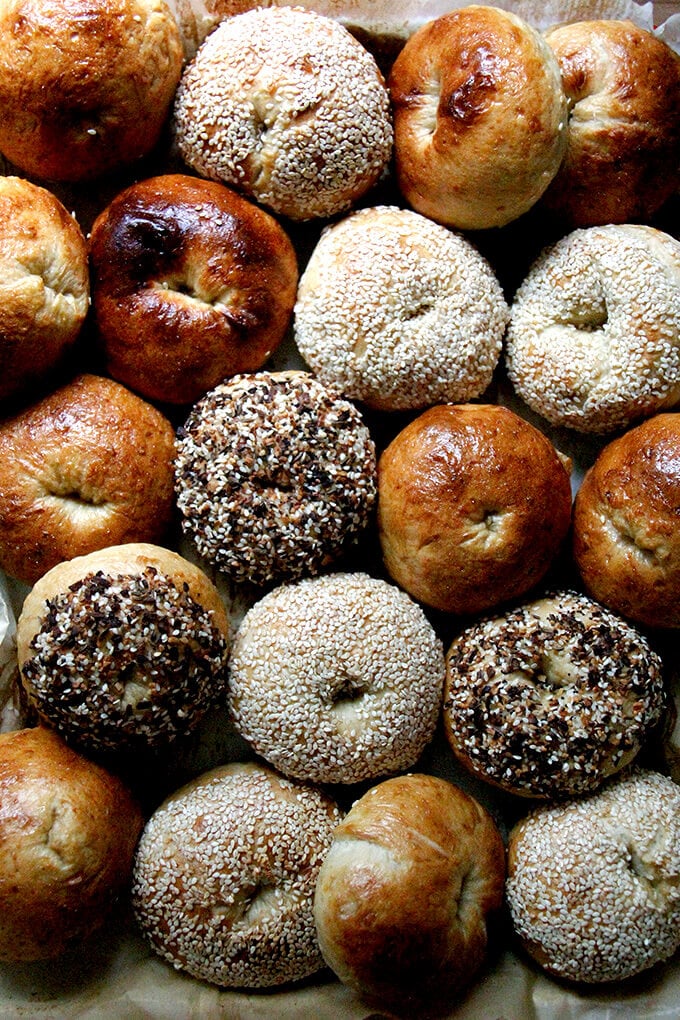
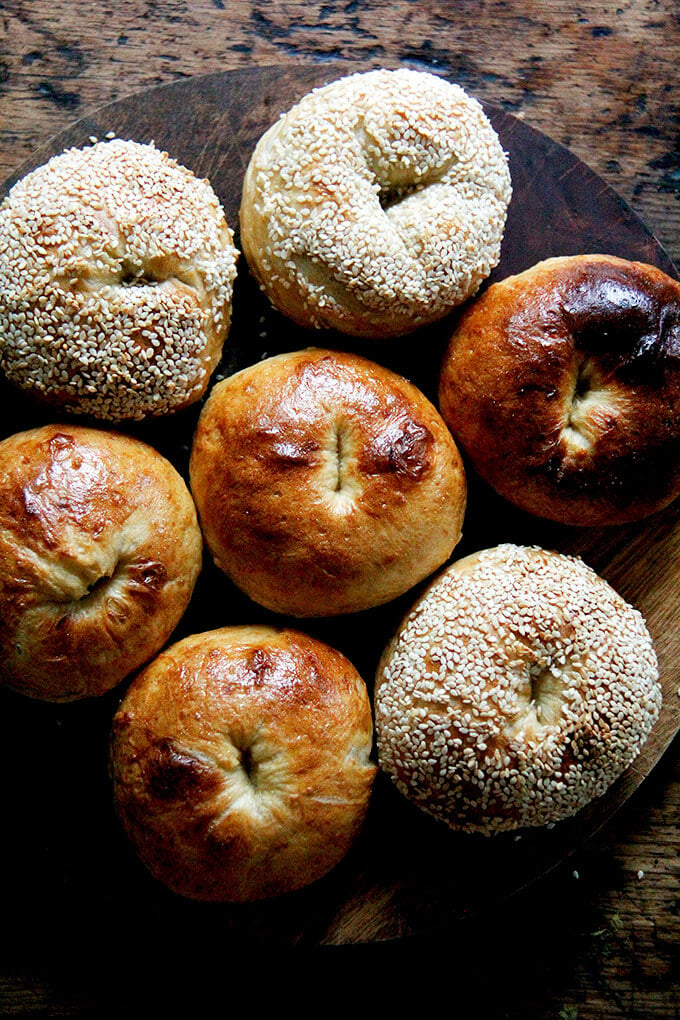
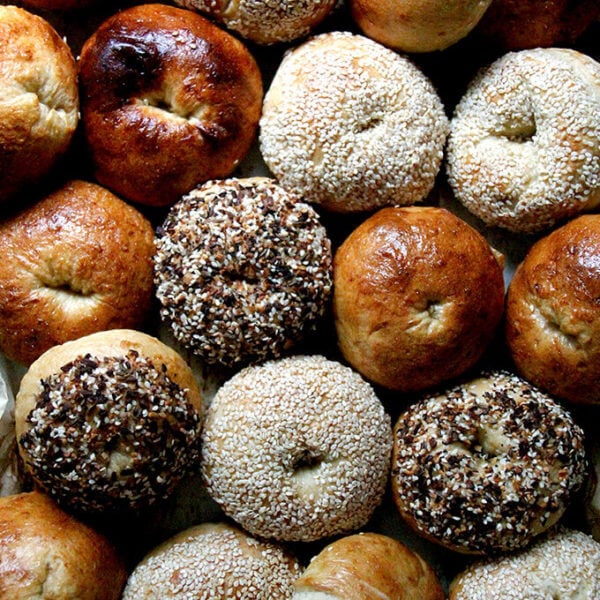
Chewy, golden, seed-crusted bagels at home? Yes. You. Can. This dough comes together in 90 seconds. Find step-by-step instructions below 🥯🥯🥯
Unlike many of the bread recipes in this site’s archives, bagels are made with a low-hydration dough and, as a result, require kneading to allow the dough to come together. Moreover, due to their nature, bagels require shaping, boiling, and egg washing.
But overall, the process is simple — the dough comes together in 90 seconds — and the result — a chewy vessel perfect for cradling juicy summer tomatoes or cream cheese and lox — is well worth the effort. Find three tips for making deliciously chewy bagels at home and step-by-step instructions below.
3 Tips for Excellent Homemade Bagels
- Knead the dough. To get that characteristic chewiness—in other words, to ensure bagels don’t simply taste like bread shaped like bagels—the dough needs to be kneaded. You can do this in the food processor, which takes 90 seconds.
- Pick up a bottle of barley malt syrup. I learned from this Stella Parks article that barley malt syrup, not only provides flavor, but also promotes “a more delicate texture in the crust, one that’s chewy and crisp rather than crunchy and hard.” If you don’t feel like picking up another product, you can use honey, molasses, or maple syrup in its place.
- Use an egg wash. To get that nice, golden sheen during the baking, an egg wash is essential. Commercial bakers often boil their bagels in a lye solution, which promotes browning and gives the bagel crust a crispness. As lye is something I am unwilling to experiment with, an egg wash is a fine substitute.
PS: Foolproof Homemade Bialys: A Step by Step Guide
How to Make Homemade Bagels: A Step-by-Step Guide
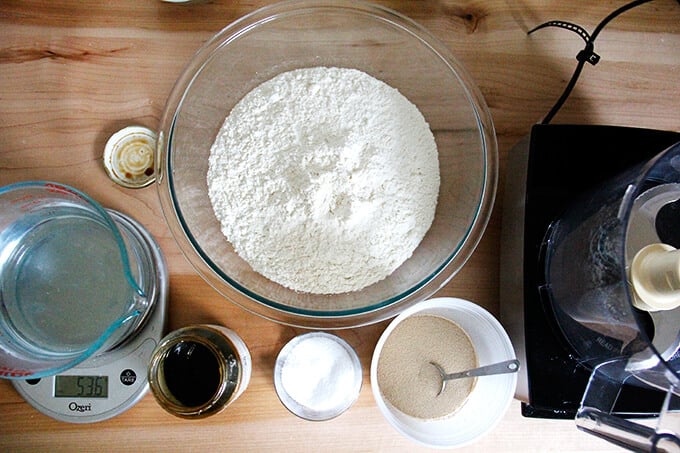
First, whisk together the flour, salt, and instant yeast. You can do this in the food processor or stand mixer, depending on which you are using.
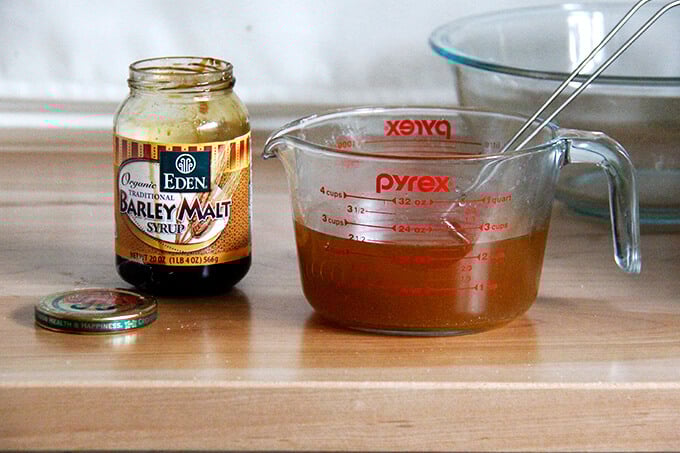
Whisk together the water and barley malt syrup:
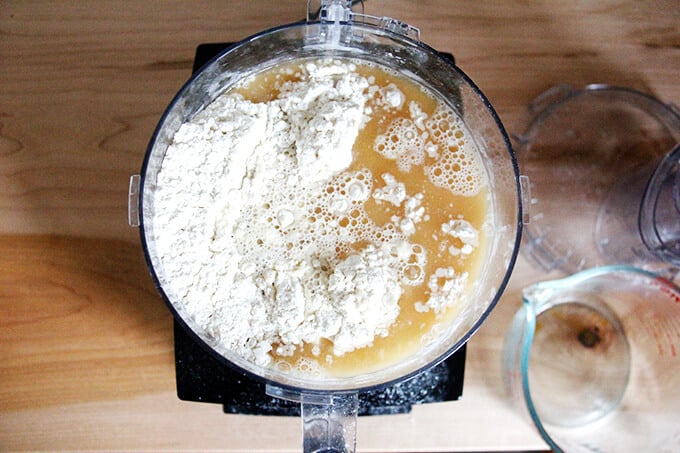
Add the liquid ingredients to the dry ingredients, and knead for 90 seconds:
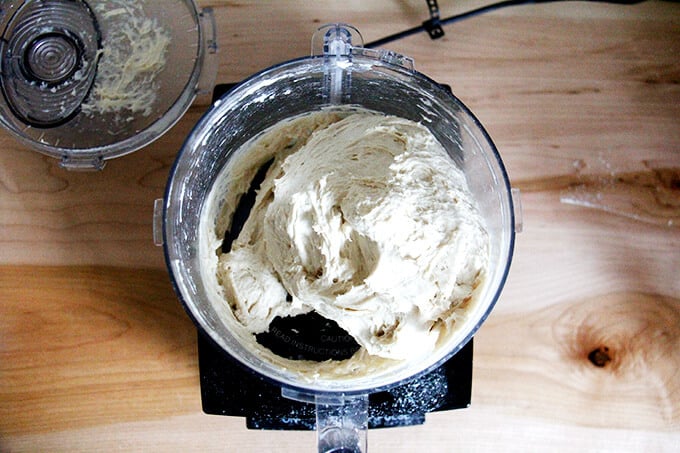
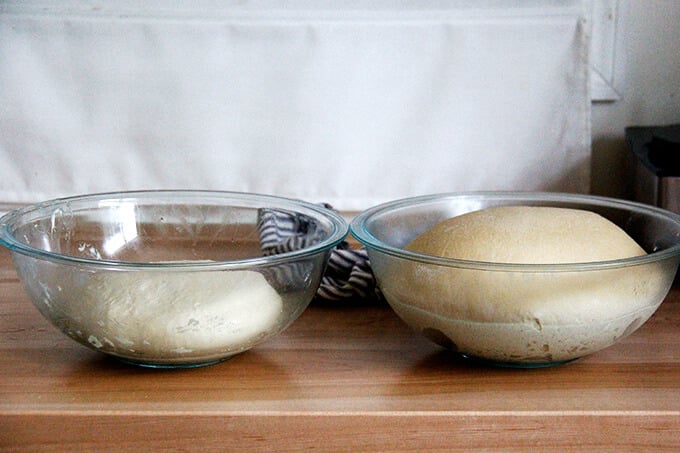
Use greased hands to transfer it to a bowl. Coat it with a little bit of olive or grapeseed oil. Cover the bowl with a lid and transfer to the fridge (see recipe box if you want to skip the overnight rise). On the left: just-mixed dough. On the right: dough after a night in the fridge.
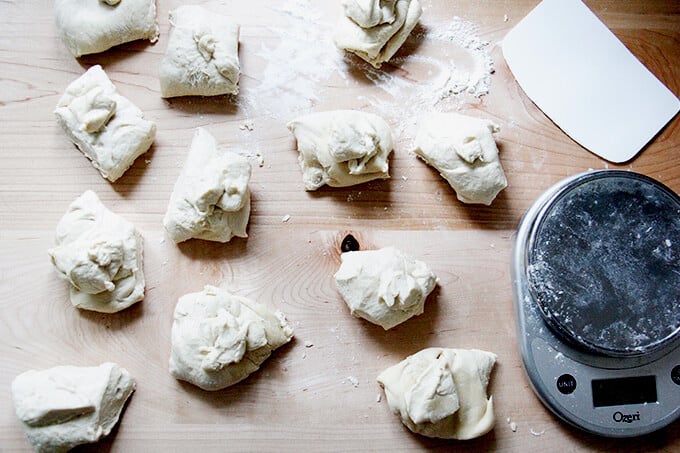
Turn the dough out onto a lightly floured work surface.

Portion the dough into 12 pieces:
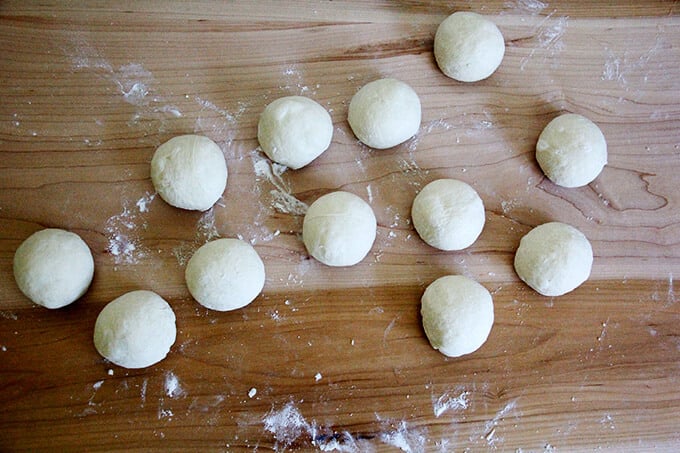
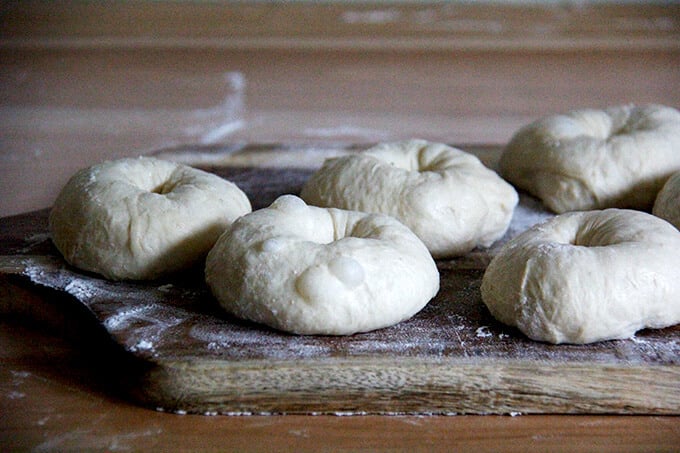
Ball them up and let them rest for 1 hour, covered with a towel or plastic wrap:
Shape them into rings, by using your thumb to poke a hole in the center of the round, then both hands to stretch the dough out and under—don’t be afraid to be aggressive.
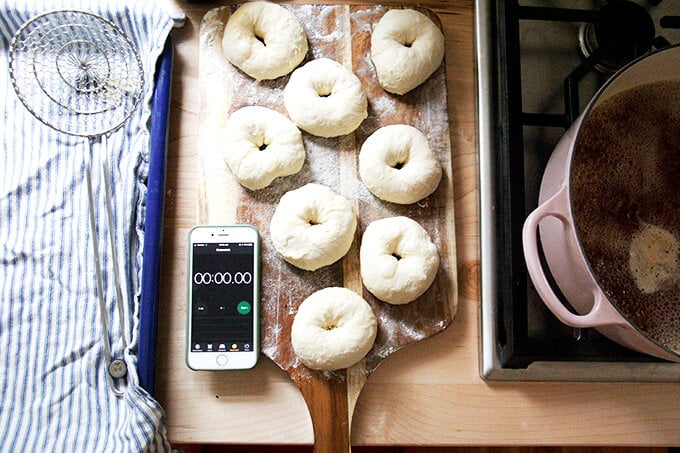
Prepare the water bath by boiling water with barley malt syrup or maple syrup.

Get ready to boil:
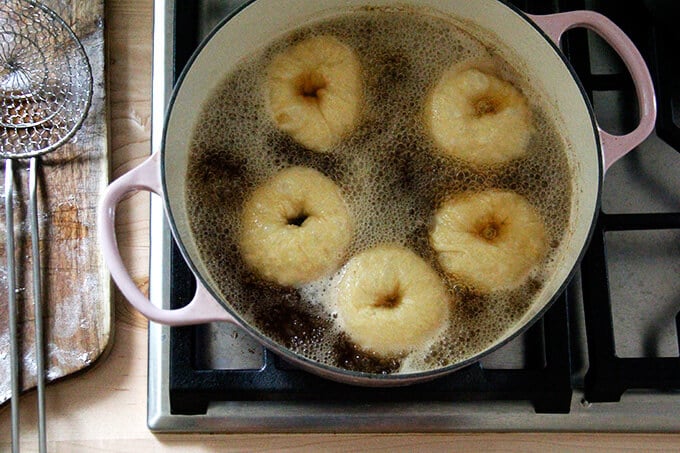
Boil 30 seconds a side:
Transfer boiled bagels to a tea towel-lined sheet pan.
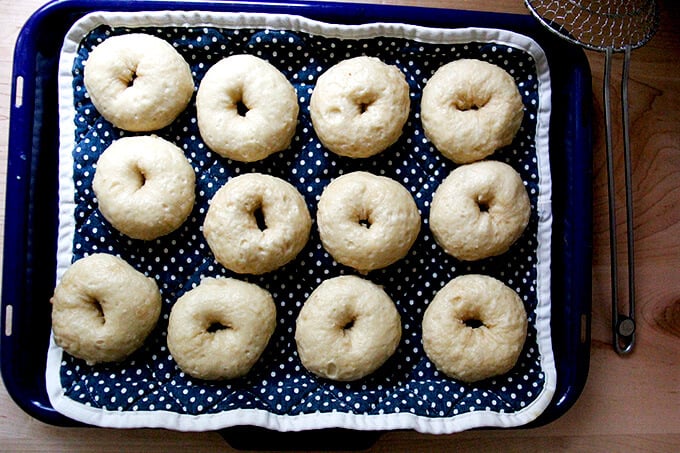
Brush bagels with an egg wash:
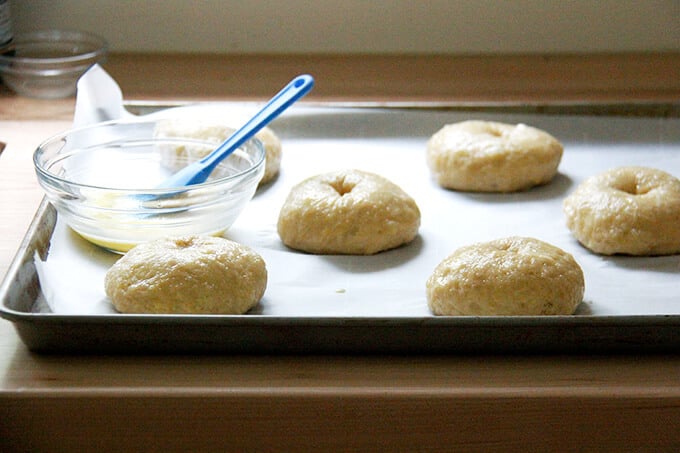
Dip in desired seasonings:
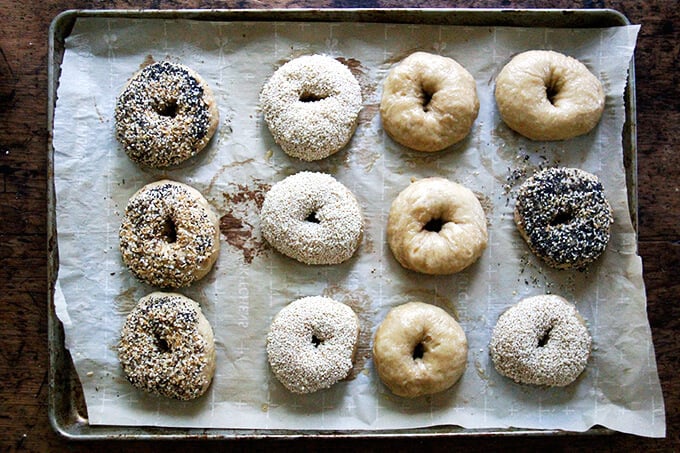
Bake until golden.

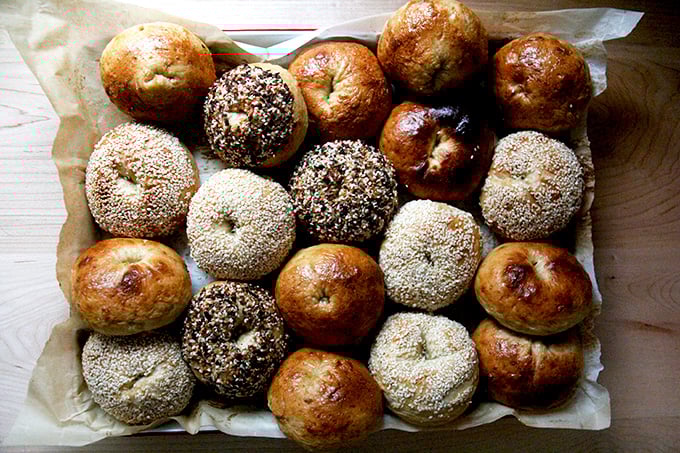
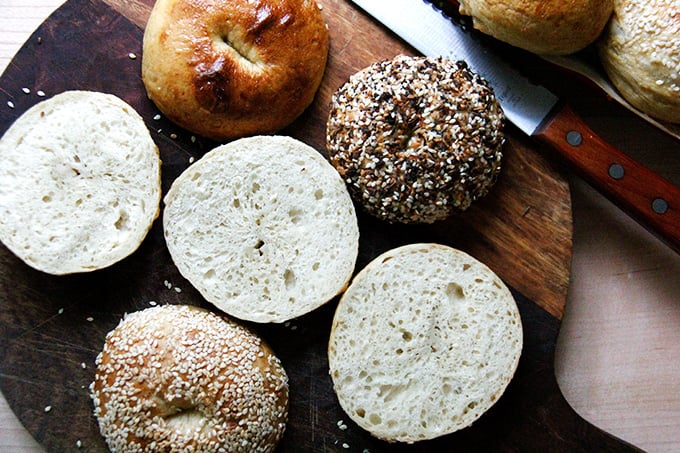
Invite some friends over for brunch. Find yourself some good tomatoes; enter summer-morning breakfast nirvana.

Foolproof Chewy Homemade Bagels
- Total Time: 12-14 hours
- Yield: 10–12 bagels 1x
Description
Chewy, golden, seed-crusted bagels at home? Yes. You. Can. This dough comes together in 90 seconds. Find step-by-step instructions below 🥯🥯🥯
Notes:
- Ideally the dough will spend at least 12 hours in the fridge, but if you wish to skip this rise, simply increase the yeast to 2 teaspoons, use lukewarm water, and let the dough rise at room temperature until it has doubled in volume, roughly 2 to 3 hours. Then proceed with the recipe.
Equipment Notes:
A scale is imperative to ensure you are measuring accurately.
A large sheet pan is so handy — it allows you to bake all of the bagels at once. If you don’t have a large one, you can squish them onto a standard sheet pan or use two standard sheet pans, and bake 5 to 6 on each.
You’ll need a spider or a slotted spoon to remove the bagels from the boiling water to a sheet pan.
A food processor or stand mixer will allow you to knead the dough quickly and powerfully. If you are using a food processor, be sure it is at least 14-cup capacity: I love my Cuisinart.
Note: Watch your food processor closely! This is a lot of dough for even a large food processor. You’ll only run the machine for 60 to 90 seconds, but it will work hard during that time and may jump around a bit — at any sign of the blade jamming, stop the machine and remove the dough. Also, after you add the liquids to the food processor, begin the kneading immediately to prevent the liquid from escaping through the center hole.
If you don’t have a food processor or a stand mixer, knead the dough by hand briefly, using as little additional flour as possible.
Ingredient Notes:
Bread flour or high-gluten flour makes for an especially chewy bagel, but if you don’t feel like picking up another product, don’t hesitate to use all-purpose flour. I have used it many times and my bagels always turn out chewy.
Barley malt syrup is hard to find. Shops like Whole Foods Market typically sell it. I order it online.
For homemade everything bagel seasoning, combine:
- 1/4 cup sesame seeds
- 1/4 cup poppy seeds
- 3 tablespoons dried onion flakes
- 3 tablespoons dried garlic flakes
- 2 tablespoons flaky sea salt
Ingredients
For the dough:
- 6 cups (768 g) bread, high-gluten, or all-purpose flour
- 3 teaspoons (20 g) kosher salt, I use Diamond Crystal
- 1.5 tsp (6 g) instant yeast
- 2 cups (454 g) water, room temperature or cold tap water
- 1 heaping teaspoon barley malt syrup, honey, molasses, or maple syrup + more for boiling
- grapeseed or olive or other neutral oil
For baking:
- 1 egg whisked with 1 tablespoon water
- various toppings: everything bagel seasoning (see above), sesame seeds, dukkah, etc.
Instructions
- Make the dough: *Please read all notes above before proceeding, especially the top note about timing.* In the bowl of a food processor fitted with the blade attachment (or in a stand mixer fitted with the dough hook), pulse together the flour, salt and yeast (or, if using a stand mixer, stir on low). In a medium bowl, whisk together the water and the barley malt syrup. Add it to the food processor (or stand mixer) and immediately (see notes above for why) blend for 60-90 seconds, standing nearby the entire time — at any sign of the blade jamming, stop the machine. (If using a stand mixer, knead on medium speed for 90 seconds or until the dough comes together and is tacky to the touch.)
- With oiled hands, transfer the dough from the food processor to the bowl. The dough will feel warm and tacky. With oiled hands stretch the dough up, then down toward the center several times to form a ball. (See video for guidance.) Lightly rub some oil over the dough to coat — this will prevent a crust from forming on the dough. Cover the bowl with a lid or plastic wrap. Transfer the bowl to the fridge for 12 hours or longer.
- Portion the dough: Remove the bowl of dough from the fridge. Turn the dough out onto a lightly floured work surface. For perfectly even bagels, use your scale to portion the dough into 10 to 12 pieces (I prefer 10). For 12 smaller bagels, each dough ball should weigh about 105 grams; for 10 slightly larger bagels, each dough ball should weigh 125 grams. Form each portion into a ball, using the pinky edges of your fingers to create tension. Place the balls on a lightly floured work surface and cover them with a tea towel or plastic wrap. Let them rest for 1 hour.
- Prepare your work station: When the hour is nearly up, place a large pot of water on the stovetop to boil. When it simmers, add a big glug (about ¼ cup) barley malt syrup. Preheat your oven to 425ºF. Line two sheet pans or one large pan one with parchment paper (see notes above). Prepare the egg wash. Place toppings of choice in small, rimmed plates.
- Shape the bagels: Lightly flour your hands. Use your thumb to poke a hole into the center of each dough ball. Use your hands to stretch the dough into a donut shape—don’t be afraid to really tug outward and under, almost as if you were going to turn the dough inside out, but stop before you do. Note: If you don’t pull out and under, the bagels will puff into cone-like shapes upon baking. Truly: Be aggressive with the shaping. Video guidance here.
- Prepare for boiling: Line a sheet pan with a tea towel. Have a stopwatch (or your phone or a clock) nearby. Drop 4 of the dough rings into the boiling water at one time. Boil 30 seconds on each side. Use a spider or slotted spoon to transfer the boiled rings to the towel-lined pan. Repeat until all of the rings have been boiled.
- Egg wash: Brush each ring with the egg wash. If you are using any toppings, dip the egg-washed bagels into the topping-filled bowls, then transfer to the parchment-lined sheet pan. If you are using an extra-large sheet pan (see notes), you can bake all 12 at once. If you are using a standard/smaller pan, bake 6 to 8 at a time.
- Transfer the pan or pans to the oven and bake for 20 to 25 minutes or until bagels are evenly golden all around. If you are using two pans, rotate the pans halfway through. Let bagels cool on sheet pans.
- Prep Time: 20 minutes
- Cook Time: 30 minutes
- Category: Bread
- Method: Boil & Bake
- Cuisine: American
This post may contain affiliate links. Please read my disclosure policy.


262 Comments on “Foolproof Chewy Homemade Bagels”
I’ve made these twice now with excellent results. I can’t believe how easy it is to make bagels at home! I use bread flour because I like a chewy bagel, it makes for a slightly stiffer dough but still easy to work with. I let the dough proof at room temp for about an hour after removing from the fridge. Instead of dipping the bagels in toppings I sprinkle the them on. But toppings aren’t needed since the bagels are very flavorful “naked”! Thanks for another great recipe.
Great to hear, Kate! Thanks so much for writing and sharing your notes. I totally agree: bread flour is best here for the chewiness factor 🙂 🙂 🙂
This recipe is amazing! You never fail to disappoint. This was shockingly easy to make, and your video helped so much to see how you did some of the steps, like shaping the bagel. I brought bagels to my family and they thought they were one of the best things I’ve ever made. So thank you for all you do and sharing these amazing recipes on your site!
Oh yay! So nice to read this, Jodi 🙂 🙂 🙂 Thank you for writing and thank you for your kind words, too.
I love the recipe but would like to see the correction for grams of water in the smaller batch recipe.
Hi 👋🏻 I looove your recipes so much. I really want to make this and have attempted the 8 bagel recipe twice, however it is too much water. Amy suggestions?
Hi! I would just cut it back even more. If you use 330 grams of water, it will bring the hydration down to 65%. Could you try that or lower it even more. Are you using a scale to measure? What type of flour?
Would you change baking time if you made mini bagels over full sized??
Yes, I’d reduce it slightly. Just keep an eye on it. Remove them 2-5 minutes before suggested cooking time, (I would guess).
We moved out of NY and miss having bagels. I tried this recipe and it was relatively simple to make, but I feel my bagels didn’t puff up as much as yours. Do you think I stretched them out too much since the holes in my bagels are bigger than yours? How can I send or post a pic to show you?
Hi! So sorry for the delay here. Questions: are you using a scale to measure? What type of flour are you using? It’s possible you stretched them out too much.
Hi Alexandra, I have the dough for the bagel sitting in my fridge now. Can I confirm that after you take it out of the fridge, you do not need to let it proof at room temp again (like your foccacia recipe) before dividing and shaping?
Correct!
Hi Alexandra, I made this recipe and the bagels turned out really well, thank you!
However, the bagels to my finicky tastebuds tasted slightly “bready” – could I add 2g of yeast to correct? I’m using the 500g recipe.
I’ve noticed your recipe is quite different to the other recipes in terms of proofing – some will let the sponge+dough sit at room temperature until doubled, then stick it in the fridge for 1-2 days, others will shape bagels and proof the shaped bagels in the fridge.
Does the proofing contribute to the “bready” taste at all or can additional yeast and additional cold fermentation in the fridge correct for that?
Hi Wilson! I’m not sure how to advise. You could definitely try a room temperature rise followed by a fridge rise followed by the room temperature shaping/proofing. The extended fermentation time will likely improve the flavor and texture. I don’t think additional yeast will help… are you wanting a lighter texture?
Hi Alexandra
Yes, a lighter texture rather than dense. I wasn’t sure how proofing at room temp, then sticking it in the fridge, then proofing again before shaping and boiling will affect taste/texture. I’m also afraid of overproofing (which happened when i used another receipe) which resulted in flat bagels.
Thank you very much for replying. It is much appreciated.
I think you’ll get great results with a room temperature proof followed by a fridge proof — be sure the dough is in an airtight container in the fridge to ensure the dough doesn’t dry out. I find that you really don’t need to do much of a room temperature proof once the bagels have been shaped — as you note, you run the risk of overproofing and deflated bagels as a result.
This recipe couldn’t have been easier. Literally foolproof. Just about to come out of the oven and my house smells just like a bagel shop!
I really didn’t need to know it was this easy…. Thank you for my new hyperfixation 😂😂😂
Oh yay 🙂 🙂 🙂 It’s so nice to read all of this. Thanks for writing!
Hi Alexandra, I have made these bagels twice. The first time I had to add extra flour because the dough was too wet. The next time I compared the quantity to weight of water and found a discrepancy. Using my scale 2 cups of water is 432g not 530g. I noticed someone else had this issue. Once I made the adjustment for the 12 bagel recipe everything worked out.
The bagels came out delicious, thanks very much.
Thank you for bringing this to my attention! I just edited the recipe to prevent others from having similar issues. The gram amount for the water is definitely off — I’ve edited the water weight to 454 grams, which is the standard I use for 2 cups of water, but the next time I make them, I may reduce it even more (given your results and others). Thank you for writing! So glad they turned out well.
Amazing recipes and easy-to-make
This is a great recipe! I agree that weighing everything is key. I wound up using bread flour because that’s just the texture that I prefer. I used to use another bagel recipe— one that tends to come first or second in search results— but this will be my new favorite. I will say, though, that because I used a salted everything bagel seasoning for the top, I would have reduced the amount of salt in the dough itself to compensate! Thanks for the recipe.
Great to hear, Trinity! Thanks so much for writing and sharing this. And thanks for adding the note about the salt — so helpful for others!
Hi! Question about using whole wheat flour in substitution of all purpose. What would the conversion be? Would I need to change the water amount as well? Thank you!
Hi! It’s possible you may need to add a little more water bc whole wheat flour tends to be thirstier… that said, all whole wheat flour behaves a little differently so it’s hard to know without experimenting.
I’m getting ready to make these and am wondering. Can these be frozen? And what’s the best way?
Yes! Airtight ziplock bag once they are completely cooled.
Thank you. Making these for Father’s Day brunch tomorrow. 😍
When freezing After they are cooled I put the whole tray of them in the freezer. When sold I vacuum seal them in packs of 4-8
Really does a great job I do this for pizzas too
Great tip, Pat! Thanks for writing and sharing 🙂
Absolutely amazing recipe! Just made a dozen and the kids plus husband raved how great they taste! I made everything bagel, cheese and plain bagels. Thanks so much for this recipe! Love your site!!
Great to hear this, Linda! Thanks so much for writing 🙂 🙂 🙂
Made these this morning and they turned out great! Thank you for the detailed instructions and video. If I want to make cinnamon raisin bagels using this, would I just fold the raisins in when I’m folding the dough in the bowl?
Yes! You can add them directly to the flour. Did you use a stand mixer or mix by hand or a food processor?
I used my food processor and it worked magically. I love bagels, and am so excited to be able to make them now. I only made 8, and my husband has already told me I need to make more.😄
Awww so nice to hear this, Joy! If you’re OK with the raisins getting a little chopped, I think you could add them straight to the flour. If you want to keep them more intact, I’d do some stretches and folds to incorporate them after you remove the dough from the food processor.
Thank you 😊
These are really great. I tried three different bagel recipes, trying to get a tasty bagel that was not super labor intensive. Being able to shape these and cook immediately is great because nobody wants to get up super early or eat super late in the morning. I do use bread flour in mine and hold back a little water depending on the season. I hosted neighbors for bagels and kid cartoons a while ago and it was lovely.
Great to hear, Rebecca! Thanks so much for writing and sharing all of this. Bagels + kid cartoons sounds so lovely… I’m sure your neighbors were so appreciative.
Thank you for the amazing recipe, I live by your focaccia so I naturally came back to you for my first bagel attempt. They ended up baking amazingly, and tasted great but I experienced one small challenge. My dough felt too stiff and tough, not at all sticky, I did my best to shape it out of the fridge but it was a struggle (I did oil and keep the dough covered). The recipe really is foolproof though because the taste was amazing and everyone loved them despite my worry.
Hi! So nice to read this. Questions for you: do you live in a dry environment? Are you using a scale to measure? What type of flour are you using?
It’s possible you may just need to add a touch more water next time around to make the shaping process less of a struggle.
Hi! I LOVE your bagel recipe!! I proofed my dough overnight in the fridge (first time doing it this way) but this morning the top of the dough formed a hard shell. Do I mix that back in? Or try to remove it? Thanks!
Bummer! I’d try to remove it if it’s very hard. Next time, use a lidded container (I realize I should probably add notes to the recipe) which will protect the dough or wrap the bowl very well with plastic wrap. I love these 4-quart pyrex bowls with lids (which appear now to be sold separately) for proofing in the fridge.
I’ve made this recipe countless times now, turns out without fail!! Love it ♡ will continue to make for years to come.
Also just wondering if I wanted to make this in a quicker period then 12hr fridge retard. What would the rise time be like? Or do you recommend always doing the fridge retard with this recipe? or if I wanted to bake after 8 hours in the fridge plus resting at room temp time would they still turn out?
Thanks in Advance
Made these with bread flour (it was that or whole wheat) and they turned out beautifully! Crisp outside and soft inside.
Great to hear, JC! Thanks for writing. Good call on the bread flour 🙂
I’m sitting here with a pile of homemade bagels that I never thought I’d make because I thought it would be a disaster and they would suck. Except these were not a disaster and they are so good! They were super easy. And really a lot of fun to make! Thanks for this awesome recipe and guide!
So nice to hear this, Lauren! Thanks so much for writing. Nothing like having a pile of homemade bagels on hand 🙂
I live on a sailboat in the South Pacific and have been trying to make bagels for a while now. Supplies are difficult to come by here so I am never sure of the quality of flour I am able to get. The last bagels I made tasted fine but were more of a flatbread than a bagel I decided to try these and due to timing issues – I only let them sit in the fridge for 6 hours. They are amazingly perfect and just what I was looking for. I can’t wait to see if letting them sit for the full 12 hours makes any difference.
Thank you for this recipe and making it possible to have a great bagel egg sandwich again!
I’m so happy to read this, Pat! Thanks so much for writing and sharing your notes. So encouraging for others. If you can make great bagels on a sailboat, anyone can!
I’m a big fan of your recipes. I’ve never been “cooker” and never thought I would willingly look at recipes let alone go searching for them on a specific site. Enough fanboying!
Is it possible to adjust this recipe for sourdough? Do you keep the hydration percentage the same as the main recipe and subtract out the amount of water and flour that you add from the starter (like 50g of water and 50g of flour)?
Thank you, Wyatt! Yes, you can adjust this to sourdough. Though I have not personally tried, my method would be exactly as you describe: use 100 grams of starter; subtract 50 grams each flour and water from the recipe.
These look awesome! Have you swapped yeast with starter? If so, how much? Thanks!!
I have not! But my suggestion would be to use 100 grams of starter; then subtract 50 grams each flour and water from the recipe.
Thank you ! Will try and report back!
Would Gluten Free flour work ok with your recipe?
I don’t think so unfortunately. I would search specifically for a gluten-free bagel recipe. Other adjustments will need to be made.
Wanting to try these this weekend: wondering why you don’t add the yeast to water & sugar to bllom first?
Hi! No knead to do that with instant yeast. If you are using active dry yeast, you should bloom it first.
Authentic-tasting NYC bagels! Chewy texture, flavor, crispy bottom. Beyond amazing & SO easy. Organic Barley Malt is key. Rolled up tiny scrolls of parchment paper placed in center while backing which kept the hole intact. Yet another 5-star recipe with gratitude!🌟🌟🌟🌟🌟
I’m so happy to hear this, Kathleen! I am so intrigued by your parchment paper scrolls and will definitely try the technique the next time I make these 🙂 Thanks for writing!
Thinking of making a large batch and just pulling out dough and baking 6 at a time. Kinda like artisan bread in 5 a day. What do you think? How long would the dough be okay in refer? I keep pizza dough for 3 days no problem. Thanks for your reply.
Happy Pi day.
Love this idea PattiAnn! I think the dough could last for a week in the fridge if not longer. Happy Pi Day Patti 🎉