 →
→ Foolproof Chewy Homemade Bagels
This post may contain affiliate links. Please read my disclosure policy.
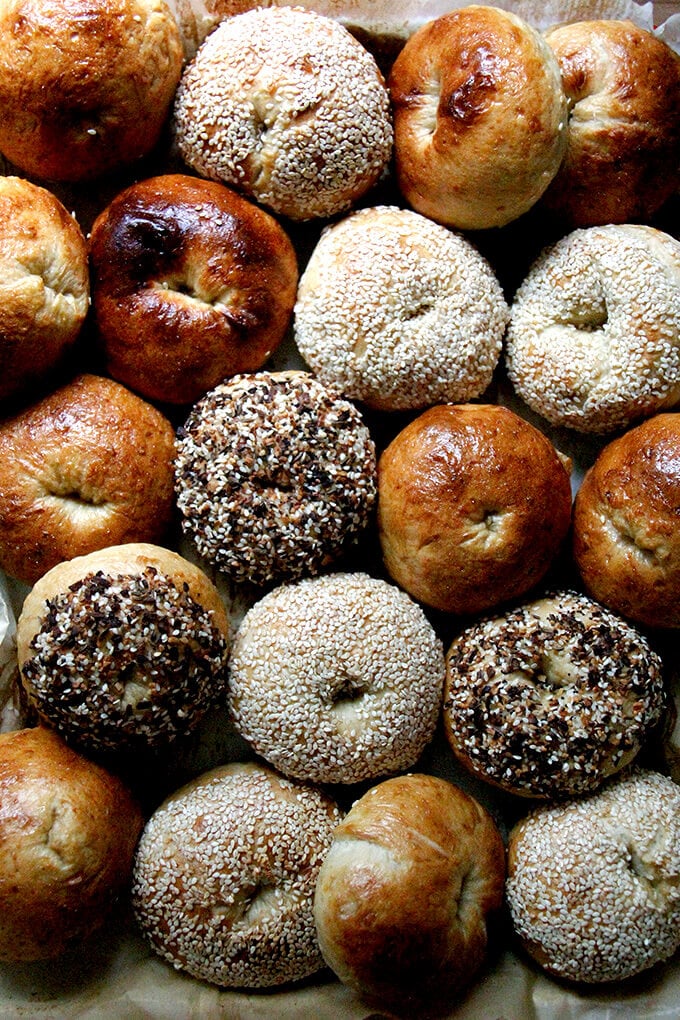
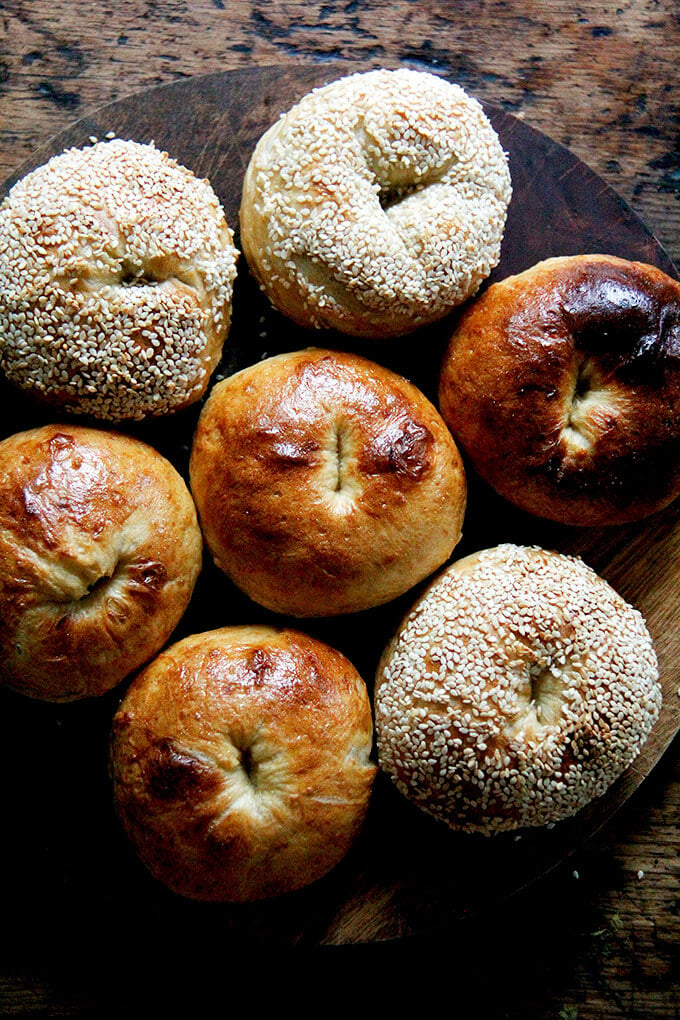
Chewy, golden, seed-crusted bagels at home? Yes. You. Can. This dough comes together in 90 seconds. Find step-by-step instructions below 🥯🥯🥯
Unlike many of the bread recipes in this site’s archives, bagels are made with a low-hydration dough and, as a result, require kneading to allow the dough to come together. Moreover, due to their nature, bagels require shaping, boiling, and egg washing.
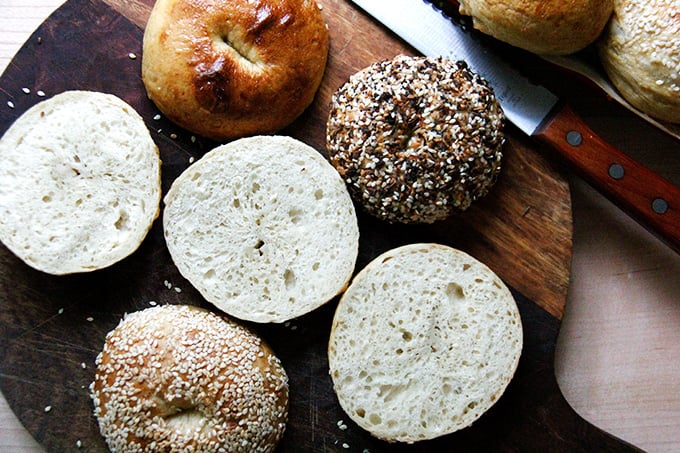
But overall, the process is simple — the dough comes together in 90 seconds — and the result — a chewy vessel perfect for cradling juicy summer tomatoes or cream cheese and lox — is well worth the effort. Find three tips for making deliciously chewy bagels at home and step-by-step instructions below.
3 Tips for Excellent Homemade Bagels
- Knead the dough. To get that characteristic chewiness—in other words, to ensure bagels don’t simply taste like bread shaped like bagels—the dough needs to be kneaded. You can do this in the food processor, which takes 90 seconds.
- Pick up a bottle of barley malt syrup. I learned from this Stella Parks article that barley malt syrup, not only provides flavor, but also promotes “a more delicate texture in the crust, one that’s chewy and crisp rather than crunchy and hard.” If you don’t feel like picking up another product, you can use honey, molasses, or maple syrup in its place.
- Use an egg wash. To get that nice, golden sheen during the baking, an egg wash is essential. Commercial bakers often boil their bagels in a lye solution, which promotes browning and gives the bagel crust a crispness. As lye is something I am unwilling to experiment with, an egg wash is a fine substitute.
PS: Foolproof Homemade Bialys: A Step by Step Guide
How to Make Homemade Bagels: A Step-by-Step Guide
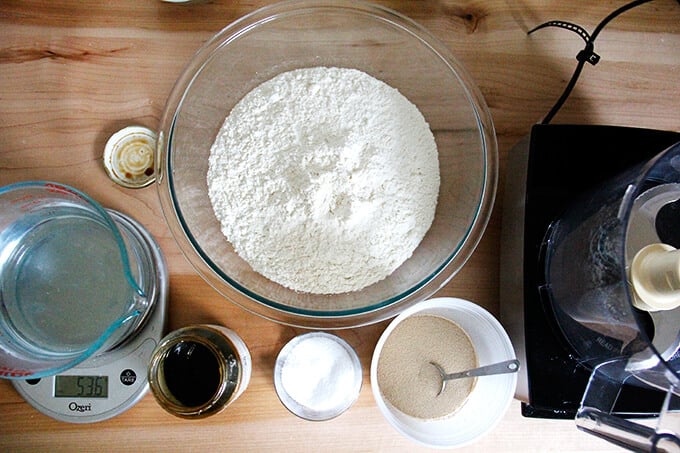
First, whisk together the flour, salt, and instant yeast. You can do this in the food processor or stand mixer, depending on which you are using.
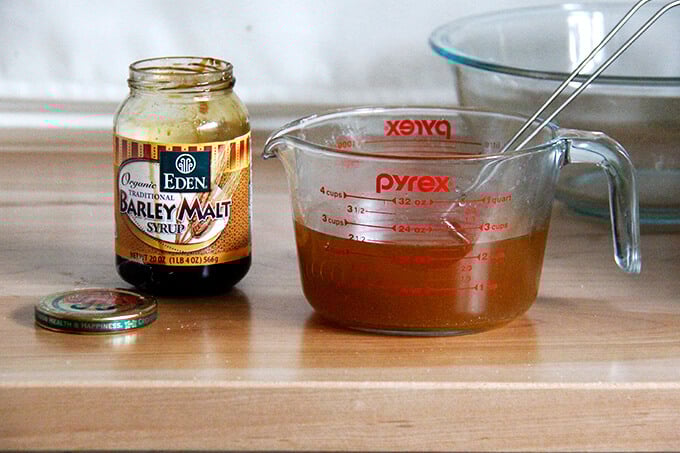
Whisk together the water and barley malt syrup:
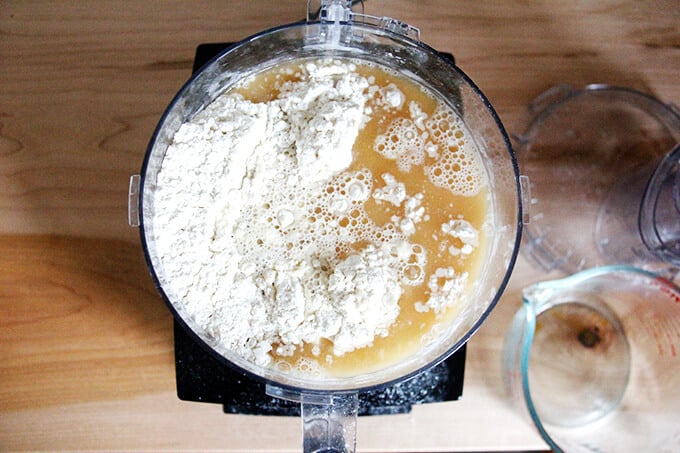
Add the liquid ingredients to the dry ingredients, and knead for 90 seconds:
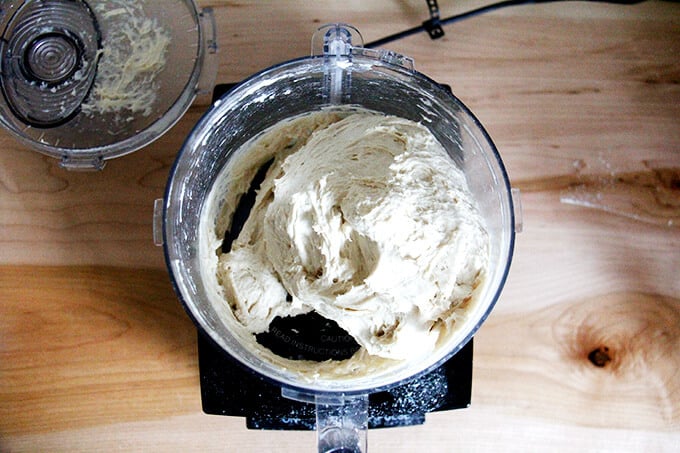
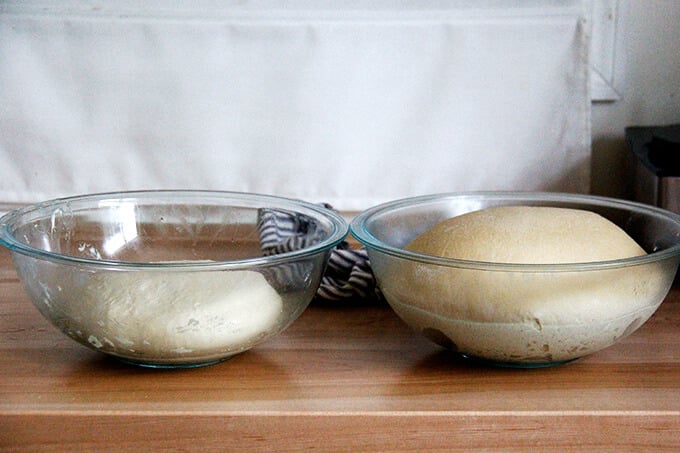
Use greased hands to transfer it to a bowl. Coat it with a little bit of olive or grapeseed oil. Cover the bowl with a lid and transfer to the fridge (see recipe box if you want to skip the overnight rise). On the left: just-mixed dough. On the right: dough after a night in the fridge.
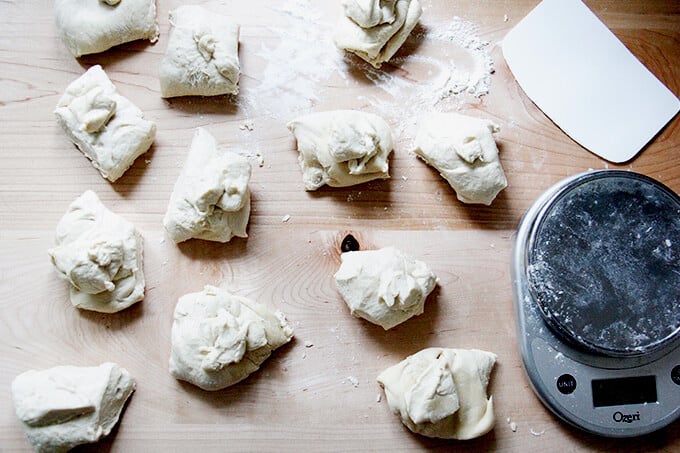
Turn the dough out onto a lightly floured work surface.

Portion the dough into 12 pieces:
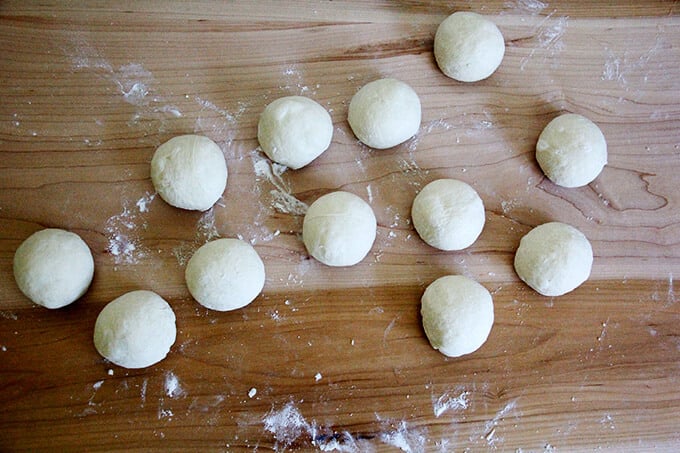
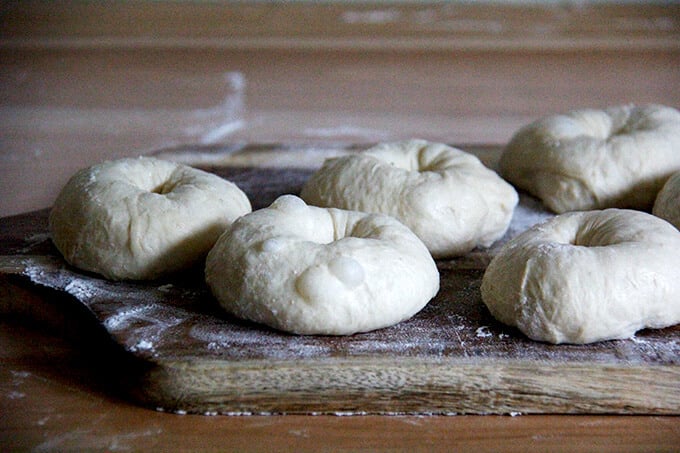
Ball them up and let them rest for 1 hour, covered with a towel or plastic wrap:
Shape them into rings, by using your thumb to poke a hole in the center of the round, then both hands to stretch the dough out and under—don’t be afraid to be aggressive.
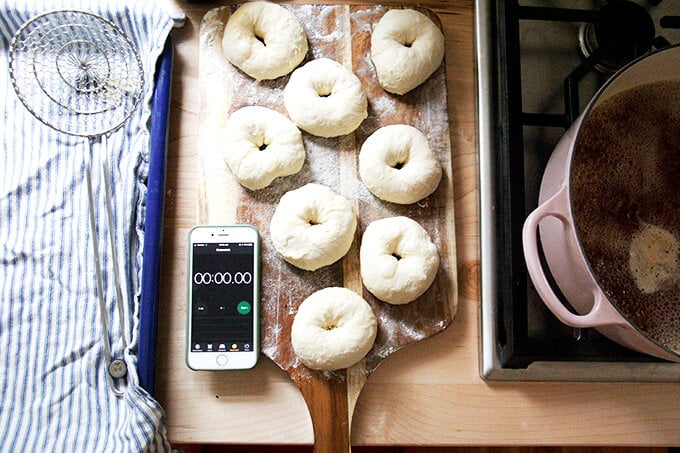
Prepare the water bath by boiling water with barley malt syrup or maple syrup.

Get ready to boil:
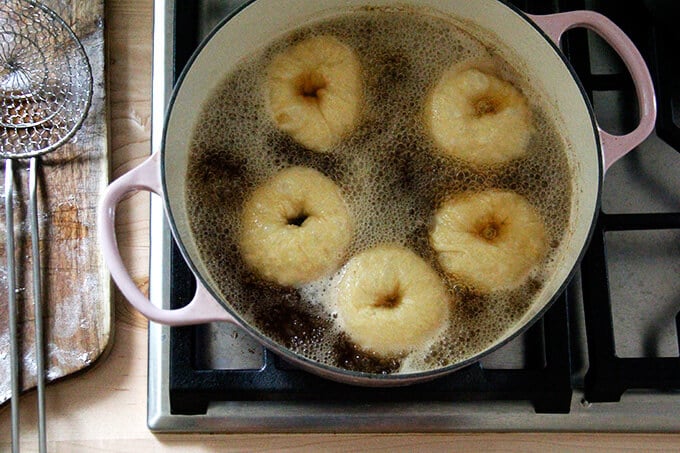
Boil 30 seconds a side:
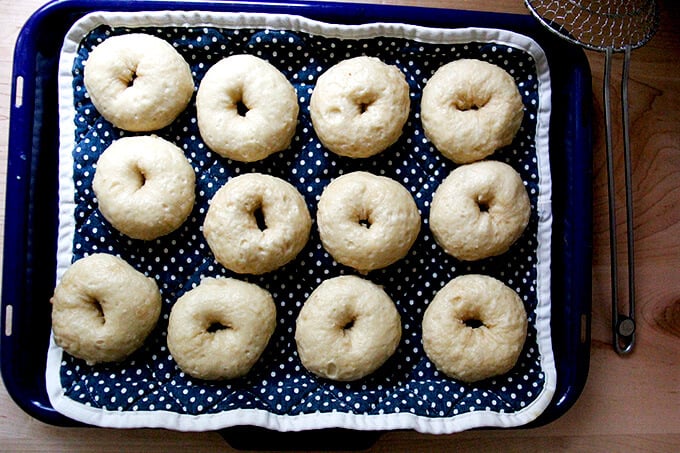
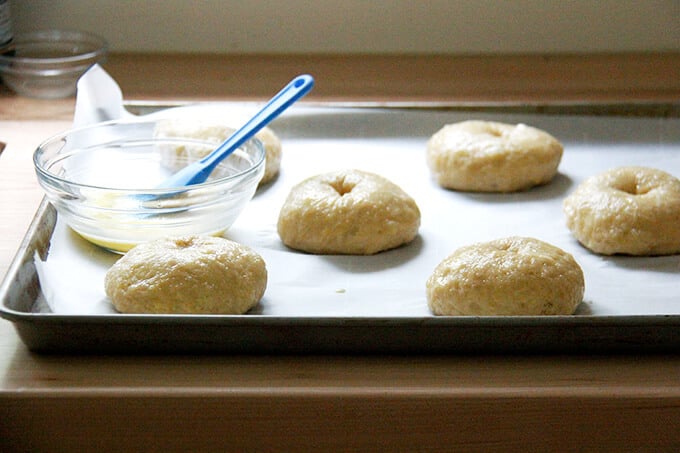
Transfer boiled bagels to a tea towel-lined sheet pan.
Brush bagels with an egg wash:
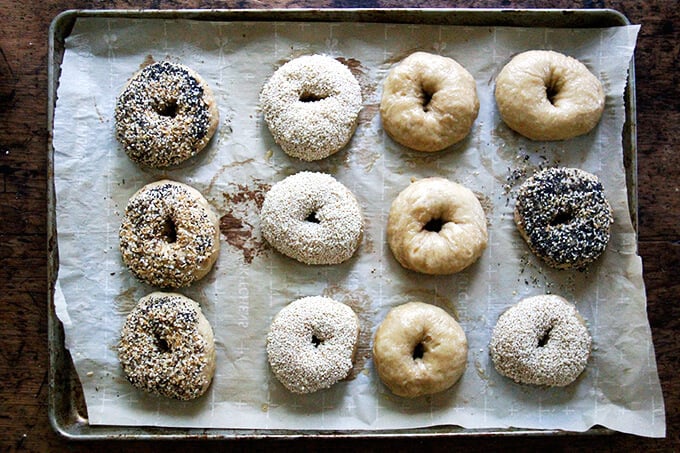
Dip in desired seasonings:
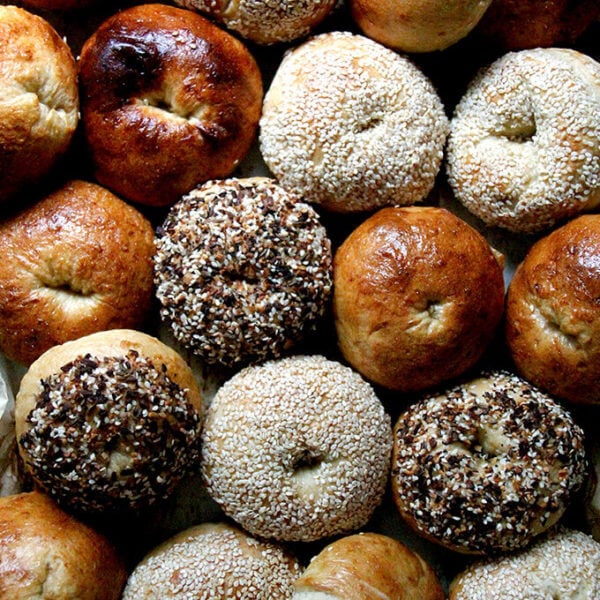
Bake until golden.

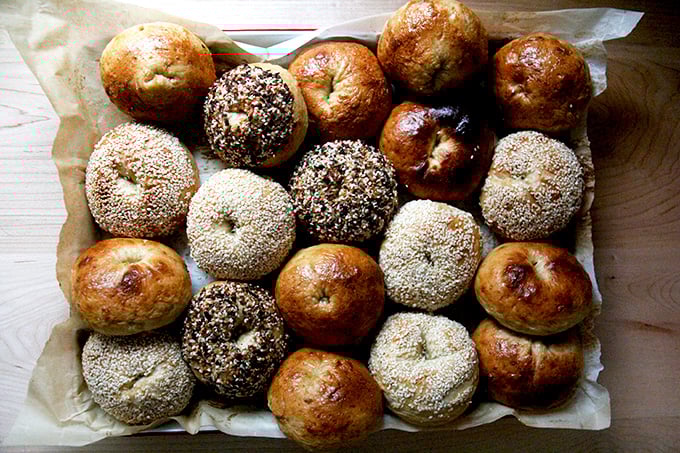
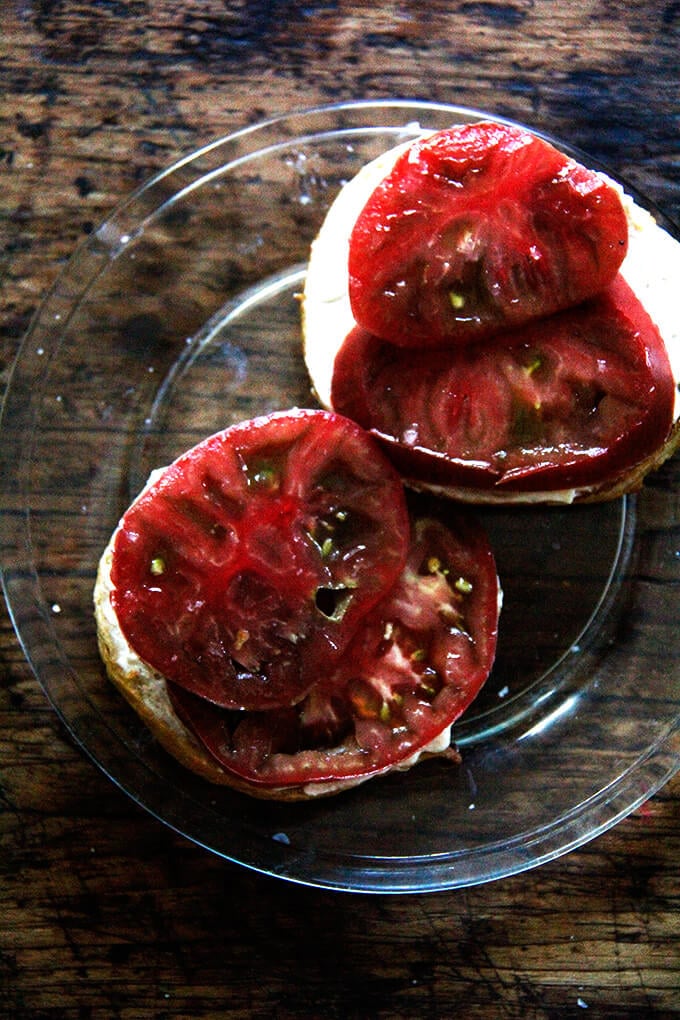
Invite some friends over for brunch. Find yourself some good tomatoes; enter summer-morning breakfast nirvana.
Foolproof Chewy Homemade Bagels
- Total Time: 12-14 hours
- Yield: 10–12 bagels 1x
Description
Chewy, golden, seed-crusted bagels at home? Yes. You. Can. This dough comes together in 90 seconds. Find step-by-step instructions below 🥯🥯🥯
Notes:
- Ideally the dough will spend at least 12 hours in the fridge, but if you wish to skip this rise, simply increase the yeast to 2 teaspoons, use lukewarm water, and let the dough rise at room temperature until it has doubled in volume, roughly 2 to 3 hours. Then proceed with the recipe.
Equipment Notes:
A scale is imperative to ensure you are measuring accurately.
A large sheet pan is so handy — it allows you to bake all of the bagels at once. If you don’t have a large one, you can squish them onto a standard sheet pan or use two standard sheet pans, and bake 5 to 6 on each.
You’ll need a spider or a slotted spoon to remove the bagels from the boiling water to a sheet pan.
A food processor or stand mixer will allow you to knead the dough quickly and powerfully. If you are using a food processor, be sure it is at least 14-cup capacity: I love my Cuisinart.
Note: Watch your food processor closely! This is a lot of dough for even a large food processor. You’ll only run the machine for 60 to 90 seconds, but it will work hard during that time and may jump around a bit — at any sign of the blade jamming, stop the machine and remove the dough. Also, after you add the liquids to the food processor, begin the kneading immediately to prevent the liquid from escaping through the center hole.
If you don’t have a food processor or a stand mixer, knead the dough by hand briefly, using as little additional flour as possible.
Ingredient Notes:
Bread flour or high-gluten flour makes for an especially chewy bagel, but if you don’t feel like picking up another product, don’t hesitate to use all-purpose flour. I have used it many times and my bagels always turn out chewy.
Barley malt syrup is hard to find. Shops like Whole Foods Market typically sell it. I order it online.
For homemade everything bagel seasoning, combine:
- 1/4 cup sesame seeds
- 1/4 cup poppy seeds
- 3 tablespoons dried onion flakes
- 3 tablespoons dried garlic flakes
- 2 tablespoons flaky sea salt
Ingredients
For the dough:
- 6 cups (768 g) bread, high-gluten, or all-purpose flour
- 3 teaspoons (20 g) kosher salt, I use Diamond Crystal
- 1.5 tsp (6 g) instant yeast
- 2 cups (454 g) water, room temperature or cold tap water
- 1 heaping teaspoon barley malt syrup, honey, molasses, or maple syrup + more for boiling
- grapeseed or olive or other neutral oil
For baking:
- 1 egg whisked with 1 tablespoon water
- various toppings: everything bagel seasoning (see above), sesame seeds, dukkah, etc.
Instructions
- Make the dough: *Please read all notes above before proceeding, especially the top note about timing.* In the bowl of a food processor fitted with the blade attachment (or in a stand mixer fitted with the dough hook), pulse together the flour, salt and yeast (or, if using a stand mixer, stir on low). In a medium bowl, whisk together the water and the barley malt syrup. Add it to the food processor (or stand mixer) and immediately (see notes above for why) blend for 60-90 seconds, standing nearby the entire time — at any sign of the blade jamming, stop the machine. (If using a stand mixer, knead on medium speed for 90 seconds or until the dough comes together and is tacky to the touch.)
- With oiled hands, transfer the dough from the food processor to the bowl. The dough will feel warm and tacky. With oiled hands stretch the dough up, then down toward the center several times to form a ball. (See video for guidance.) Lightly rub some oil over the dough to coat — this will prevent a crust from forming on the dough. Cover the bowl with a lid or plastic wrap. Transfer the bowl to the fridge for 12 hours or longer.
- Portion the dough: Remove the bowl of dough from the fridge. Turn the dough out onto a lightly floured work surface. For perfectly even bagels, use your scale to portion the dough into 10 to 12 pieces (I prefer 10). For 12 smaller bagels, each dough ball should weigh about 105 grams; for 10 slightly larger bagels, each dough ball should weigh 125 grams. Form each portion into a ball, using the pinky edges of your fingers to create tension. Place the balls on a lightly floured work surface and cover them with a tea towel or plastic wrap. Let them rest for 1 hour.
- Prepare your work station: When the hour is nearly up, place a large pot of water on the stovetop to boil. When it simmers, add a big glug (about ¼ cup) barley malt syrup. Preheat your oven to 425ºF. Line two sheet pans or one large pan one with parchment paper (see notes above). Prepare the egg wash. Place toppings of choice in small, rimmed plates.
- Shape the bagels: Lightly flour your hands. Use your thumb to poke a hole into the center of each dough ball. Use your hands to stretch the dough into a donut shape—don’t be afraid to really tug outward and under, almost as if you were going to turn the dough inside out, but stop before you do. Note: If you don’t pull out and under, the bagels will puff into cone-like shapes upon baking. Truly: Be aggressive with the shaping. Video guidance here.
- Prepare for boiling: Line a sheet pan with a tea towel. Have a stopwatch (or your phone or a clock) nearby. Drop 4 of the dough rings into the boiling water at one time. Boil 30 seconds on each side. Use a spider or slotted spoon to transfer the boiled rings to the towel-lined pan. Repeat until all of the rings have been boiled.
- Egg wash: Brush each ring with the egg wash. If you are using any toppings, dip the egg-washed bagels into the topping-filled bowls, then transfer to the parchment-lined sheet pan. If you are using an extra-large sheet pan (see notes), you can bake all 12 at once. If you are using a standard/smaller pan, bake 6 to 8 at a time.
- Transfer the pan or pans to the oven and bake for 20 to 25 minutes or until bagels are evenly golden all around. If you are using two pans, rotate the pans halfway through. Let bagels cool on sheet pans.
- Prep Time: 20 minutes
- Cook Time: 30 minutes
- Category: Bread
- Method: Boil & Bake
- Cuisine: American
This post may contain affiliate links. Please read my disclosure policy.


262 Comments on “Foolproof Chewy Homemade Bagels”
These are now my go-to bagels that I’ve made large batches of on separate occasions. They are perfect! I haven’t been able to find barley malt syrup, but have been making them with maple syrup or honey.
You can buy the barley malt syrup online thru iherb. Mine just came. Free shipping on $20. Always use the opportunity to purchase vanilla extract. Reasonable prices.
Such a great tip, Patti! Thanks 🙂
So nice to hear this Sarah! Thanks so much for writing 🙂 🙂 🙂
hi! Without a mixer, how long would you suggest I knead the dough by hand?
Hi Chloe! I think it will take about 5 minutes to get the ingredients all blended and the dough looking shiny and smooth.
Hi Ali,
I actually haven’t tried your bagel recipe yet but I plan on trying it soon. Just really like all your step by step instructions, using weights and the awesome video. Just a helpful suggestion is the
“barley malt syrup” can be found at all beer making supply stores! Usually sold in large cans or sold by the ounce. Bring a jar with you for them to fill.
Who knew! Hope this is helpful 😁
Happy bagel making!!!
Great tip, Robin! Thank you so, so much for sharing. Will add a note in the recipe now. Thanks for writing!
This is wonderful easy method! Any chance you’d do a sourdough bagel tutorial?
It’s on my list of things to try! Soon!
Ali, where can I buy the bowl cover you used in this video? Thank you jk
Hi! It’s from Dot and Army: https://www.dotandarmy.com/collections/best-sellers/products/extra-large-bowl-cover-perfect-for-breadmaking
Love it!
Ali, thank you for responding.
I will be buying this cover, jk
Wonderful!
We’ll see how this goes, but I might have messed up with the flour. I live in Japan and used what I thought was all-purpose flour, but noticed that the protein content is only around 8%. The bread flour in Japan is around 12%. There appears to be a “middle” strength flour here too around 10%. After mixing I got a very sticky / runny dough and added more flour to get closer to the consistency that I saw in the video. Haven’t baked them yet as the dough is still in the fridge. Going to be interesting to see how they come out. Going to have to try bread flour next time around.
Some of the stronger flours here are around 13 or 14%, do you think that would be too much? What % protein in the typical all-purpose flour you use?
Hi Joe!
Bummer about the flour situation! If when you are trying to shape the bagels, the rounds don’t hold their shape, you could scrap the bagel idea and just dump the dough into a large loaf pan if you have one. (9×5 inches or 10×5 inches). Let it rise till it doubles in volume or fills the pan; then bake it.
Next time, I would use one of the 12%, 13%, or 14% protein flours. Here, all-purpose flour is around 11.7% and bread flour is 12.7%.
Thank you Alexandra for the alternative baking idea. While I did end up adding a fair bit more flour to the recipe to get the right consistency, the bagels came out better than I expected. The kids still asked for the bagels every morning for breakfast, so I’d say it was a winner. The next time I’m going to be trying a bread flour and see how things turn out. Good to know on the protein ratios there. Been learning more about flour in the last week than I never knew before. Just some interesting reading for anyone that’s looking for a breakdown of flours in Japan that I’ve found useful to get my head around things. https://illmakeitmyself.net/resources/guide-to-flour/
Wonderful to hear this, Joe! And thanks so much for sharing this flour resource. So helpful for others, too!
Love this recipe along with the bialy recipe!!! Wish I could add a picture. Flavored the dough with scallions & serrano peppers. Topped some with everything seasoning, some with cheddar cheese, and some with sesame seeds. Scaled out at 105 grams and was able to make 14 bagels, a nice size for me. Thank you for the excellent directions and video.
Oh my goodness, scallions and serrano peppers sound amazing in combination with everything seasoning and cheddar and seeds … brilliant! Love this so much. Thanks for writing.
Hi, I have been working on bagels for a while with improving…results. Just discovered using the food processor, Hallelujah. I use a sort of “lye” I found online. Put a sheetpan of baking soda in the oven at 250degrees for an hour or more. Cool it, store in a canning jar. I add a few tablespoons to the water with the syrup. It does make them shiny and crisper. It is not supposed to be caustic, and I have had no problems with it. It is apparently distantly related to the real, and scary, lye. I saw some one add a spoon of sourdough starter before kneading, in addition to the yeast, said it would improve the flavor. Your recipe looks great, and it my next attempt.
Margaret, this is so interesting! I’m totally intrigued and will definitely try that method the next time I make these. Thanks so much for sharing this information.
I am so sorry. I forgot that when I bake the baking soda you should place a sheet of aluminum foil over the pan! Mine has lasted so long that I forgot that part. I don’t know what difference it makes, but it might clean your pan and deposit the stuff in the water when you boil it. You can also cook it for more than an hour to dehydrate it well.
Wonderful! Thanks again so much for sharing. I can’t wait to try this.
The bagel recipe is great and my bagels look and taste great, but they’re not as crusty as I think they should be.
I’m wondering what I might be doing incorrectly.
Hopefully you can help!
I look forward to your feedback!
Thanks
Chuck LaCortiglia
bceagles48@twc.com
So great to hear this, Chuck! In terms of getting a more crusty bagel, you could try simply baking them longer. Are you happy with how golden brown the bagels are? One other thought is to bake the bagels on the sheet pan but also on a preheated baking stone or Baking Steel. Do you have a baking stone?
Love the recipe. Just having trouble getting my bagels to brown up. Any suggestions.
Hi Sara! Questions: what type of flour are you using? Does your oven run cool? Are you doing the eggwash?
I’ve tried several bagel recipes and this is by far the best. The overnight rise is key! Alexandra makes it so easy and my hubby goes gaga for these. And he is very picky about his bagels. Thank you!
So great to hear this, Erin! Thanks for writing 🥯🥯🥯🥯🥯🥯🥯
Loved this recipe! It easy easy as promised, and a great weekend project. Listen to her about making an aggressive middle of you want the hole to be there after baking because they puff up and grow a lot.
So great to hear this, May! Thanks for writing 🙂
These bagels are so much fun to make–truly easy–as well as beautiful to behold and taste! I have wanted for years to make bagels but was put off by the idea of lye, and well, I guess a little fear of disappointment. I did buy some excellent flour from “Bakers Authority,” a supplier I discovered when stores of flour dwindled in the early months of the pandemic. It’s a great resource, and the particular flour I used is called Super Bagel High Gluten Flour. The bagels are so chewy and really taste like New York bagels. The video guidance offers excellent visual help: I watched it three times, especially to understand how to stretch the dough into a ring. I made a half recipe for New Year’s day breakfast, but we’ll see if there are any left by tomorrow! I do think that mixing the dough in the food processor in 2 batches might be prudent especially if you make more than 8. When toasted the crust is very crisp–whether that has to do with the barley malt syrup or the flour, I’m not sure.
So great to hear all of this, Mary! My mother introduced me to that flour and I have had great success with it as well here… I’ll add a note to the recipe box.Thanks so much for writing and happy New Year!
Hi Alexandra. Thanks for the great recipe and video. Have you ever tried making these by just letting them rise after making the dough and not leaving them in the fridge for 12 hours? Just curious how big of a difference there would be. Thanks!
Hi Nicki! I have not, but I think you could. I think the overnight rise helps both the crust and crumb, but I imagine you will still get something very bagel like by skipping the overnight rise. Go for it!
I tried it with a 90 minute proof and they came out great! I’ve been needing to add a little extra water, but I’m guessing that is due to the cold weather in NY right now.
Thanks so much for the great recipe! This is the fifth recipe I’ve tried and it is by far the best! I couldn’t figure out for the life of me why all of my previous attempts tasted great but flattened like pancakes after boiling. Your explanation about the levels of hydration cleared things right up! Looking forward to trying your other recipes. Stay well!
Oh wonderful! So nice to hear this, Nicki! Great to hear the 90-minute proof worked well. And nice work adjusting with more water. I do find all of my doughs to be so much stiffer in these winter months. So interesting.
Hi Alexandra
Is barley malt syrup essential for a particular ‘bagel’ flavour or will honey or maple syrup do the trick? Thanks so much.
Nancy
Hi Nancy! I think honey and/or maple syrup is just fine. I think it’s mostly the method — the boiling before baking — that gives them that classic bagel crust/texture.
Hi Ali, I’m planning to make these this weekend, so haven’t tried them yet. But I’m curious why there is no 2nd rise for the bagels in this recipe? Seems they go straight from shape my to boiling. Would you recommend leaving them to rise for an extra hour or so if we have time before boiling? They look delish and can’t wait to try them!
Hi Sami! They don’t really need much of a second rise. By the time you ball them up, and shape them, and get the water boiling and everything else ready, you will see and feel that the shaped bagels are light and slightly puffy and ready to go. You don’t want these to rise too much at room temperature bc you’re not trying to create an airy roll; you want more of a dense texture. Hope that helps!
Hi Ali! I made these last night/this morning and they were a huge hit!! This is my 3rd time making homemade bagels and I think this is now my preferred recipe. I even tried Claire Saffitz’s recipe, but those were too “airy” for bagels and these definitely had a more traditional bagel texture. Thanks for the awesome recipes as always!
Oh yay! So nice to hear this, Sami! Thanks so much for reporting back and sharing your results. And thanks for the kind words, too 🙂
Excited to try this. I have been experimenting with bagel recipes and have not found THE ONE, but yours may be it. My food processor’s not that big so I will have to halve the recipe or use my stand mixer. Just a question: there’s no need to rest between the ball shaping and hole making? I’ve always been told that it’s needed to relax the gluten. Thanks so much!
Hi Kate! I would definitely use your stand mixer — I always do now. It’s just a better size for the amount of dough.
You make a good point, but I think you’ll find that by the time you shape all of the portioned dough into balls, that when you get back to the first one, it will have rested a sufficiently long enough time to allow the gluten to relax. If when you go to make the hole, the dough feels way too stiff and is resisting too much, then you can give them another 5 minutes, but they shouldn’t need much more. Good luck!
Thanks so much for taking the time to reply! Will definitely try this and report back, especially since I finally got my hands on some barley malt syrup. So hard to find!
Also, I am a newbie with sourdough baking. All your posts have been so helpful and informative. Love your blog and YouTube videos!
So nice to hear all of this, Kate! Good luck with the bagels!
You’ve done it again! I followed your recipe and watched the video, several times. They turned out perfectly and tasted delicious. It was my first attempt at making them and it won’t be the last.
I appreciate your effort in making something as daunting as a bagel easy-ish for a home baker to tackle.
I’ll have to admit I spun the bagel on my finger when making the hole. Haha, I couldn’t help myself…it worked too.
Ha! I love this 🙂 🙂 🙂 Totally doing the finger spin the next time I make these. Thanks so much for writing! Great to hear these turned out well.
I have the beet cured salmon curing in the fridge right now! I hope it comes out well. I might act up and make these bagels to go with the salmon.
Oh yay! So fun! I hope the salmon turned out well, Vanessa! Can’t beet (ha!) cured salmon and bagels 🙂
Hi Alexandra! I’m going to try your bagel recipe but was wondering, have you ever added anything to the dough? Like blueberries or other ingredients? My hubby just loves blueberry bagels, do I add the blueberries in when the dough is mixing?
Thanks!
Hi Tammy! I have not! Are you using a stand mixer or a food processor? If you are using a stand mixer, I think you could throw them in at the very end. Keep in mind many of the blueberries will get crushed, which I think is normal for blueberry bagels … they’re often blue, due to all of the crushed blueberries.
Alexandra, I have been making homemade bagels with success, but have heard great things about this recipe. I am interested in adding barley syrup to the mix. However, I use dry yeast (works great for me) instead of instant yeast. Would mixing a small bowl of yeast, syrup, and water and then adding it to the flour and salt work? How would the yeast and syrup interact?
Great to hear, Nate! And yes, mixing a small bowl of yeast, syrup, and water and then adding it to the flour and salt will work just fine. I would let the water-yeast-syrup mixer sit for 10-15 minutes or until it gets foamy, before using … you probably were going to do this anyway, but just wanted to make that note. Good luck!
I have a quick question. Can I let the dough rise in the fridge for 2 days? We are just 3 of us at home, even halving the recipe it would be a lot for us. Alternative would be freezing proportioned dough. Is that do-able?
Thanks!
Yes you can! Just be sure the vessel is sealed or that the dough is covered with plastic wrap to prevent a crust from forming on it — it will dry out if it is not protected. But yes, go for it!
LOVE THESE! I Made the 8-bagel amount and they were incredible! I did notice, however, that these bagels are a cuter, smaller, version of the big NYC bagels. Would I be able to use the 12-bagel recipe but make 6 large bagels instead? Would that double my cooking time?
Great to hear, Hanna! Yes, definitely use the 12-bagel recipe and make larger bagels. I worry a little bit that making 6 bagels with that recipe will result in giant bagels, but maybe that is what you are going for 🙂 🙂 🙂 I wonder if making 8 bagels with the 12-bagel recipe might give you the size you are looking for? I would still boil the bagels for roughly the same amount of time. And I would add only a few more minutes to the cook time, too — maybe 4 to 5 minutes. Good luck! Thanks so much for writing.
A much delayed update and HUGE SUCCESS: I used your 12-bagel recipe to create only 6 bagels. They were actually the perfect nyc bagel size. I followed you advice on the same boil time, but the cooking time, I ended up almost doubling due to the size. That being said, they turned out incredible. Thank you so much.
Oh yay! So great to read all of this, Hanna! Thanks so much for reporting back and sharing all of your notes. So glad they were a success.
Ali, what would the measurement in grams be if bread flour were to be used?
Hi Pat! I would use the same amount: 512 grams for 8 bagels, 768 grams for 12.
How long should you mix the dough in the Kitchen Aid mixer?
Just 2 to 3 minutes or until the dough becomes tacky… it’s a sticky dough, but kneading it in the Kitchen Aid will transform the dough from sticky to tacky.
I’m just wondering if 350 grams is the correct measurement for 1 1/4 cups of water.
Patricia, I am on vacation and I don’t have my scale or measuring cups. When I get home on Saturday, I will measure … it does feel a little off. Hate to admit that, but based on my other recipes, it would be closer to 285 grams. SO sorry about this! I feel terrible.
Not a problem…I was using a measuring cup and stopped at 1 and a 1/4 cups. The bagels turned out wonderfully. My daughter-in-law said they tasted like NYC bagels. We live in New Orleans, and it’s hard to get a really good bagel.
Oh phew 😅 I’m so happy to read this. Glad you stopped at 1.25 cups. I’ll edit as soon as I get home!
Hi Alexandra- I am making this recipe right now and found the 350g of water to be off as well. Came to the comments to see if anyone had mentioned it. Just wanted to give you a heads up that it still isn’t correct 🙃
Argh… I will revisit this soon. I’m away this weekend as well.
Question: did you use 350 grams water and was the dough too wet?
I’m looking forward to trying this recipe. I’ve made many bagel recipes, some using yeast and some using sourdough starter. I always find that while they’re great right after baking, they’re quite tough the next day, even difficult to slice, and can’t be eaten without toasting. I have no idea why this is always the case. Any ideas? Also, am wondering about whether these could be made using half whole wheat flour?
Hi Ali! I would agree — I think homemade bagels are best the day of, and I absolutely wouldn’t consider eating them without toasting them on day 2 🙂 But honestly, I feel that way about the New York bagels I bring home from the NYC: amazing day 1, needing a toast day 2.
You can definitely use half whole wheat flour but manage your expectations about the texture of the bagels: they will be denser/heavier.
hi ali! thanks for the great recipe – per usual! just curious, if i wanted to add dried fruit or something in the bagel dough, at which step do you think that would be best to do so?
thanks!
m
Hi! I would use a stand mixer (as opposed to a food processor) and I think you could add the dried fruit right at the start with the flour. Do you have a stand mixer?
Hi, Ive made this receipt before with success but this time the dough was very dense out of the food processor, couldn’t stretch it so I just kneaded a little and covered in oil before the fridge. Any ideas why? Will they still turn out?
Hi! Are you using a scale to measure? Different flour?
Yes I used a scale and used bread flour.
OK, great to hear. I do find all of my doughs to be a little stiffer in the winter when it’s a little dryer out, and I find my dough doesn’t rise as quickly. Did they turn out OK? The stiffer dough should be fine.
Do you use a stand mixer, food processor or by hand?