 →
→ Cinnamon-Sugar Focaccia (No-Knead, No-Fuss)
This post may contain affiliate links. Please read my disclosure policy.
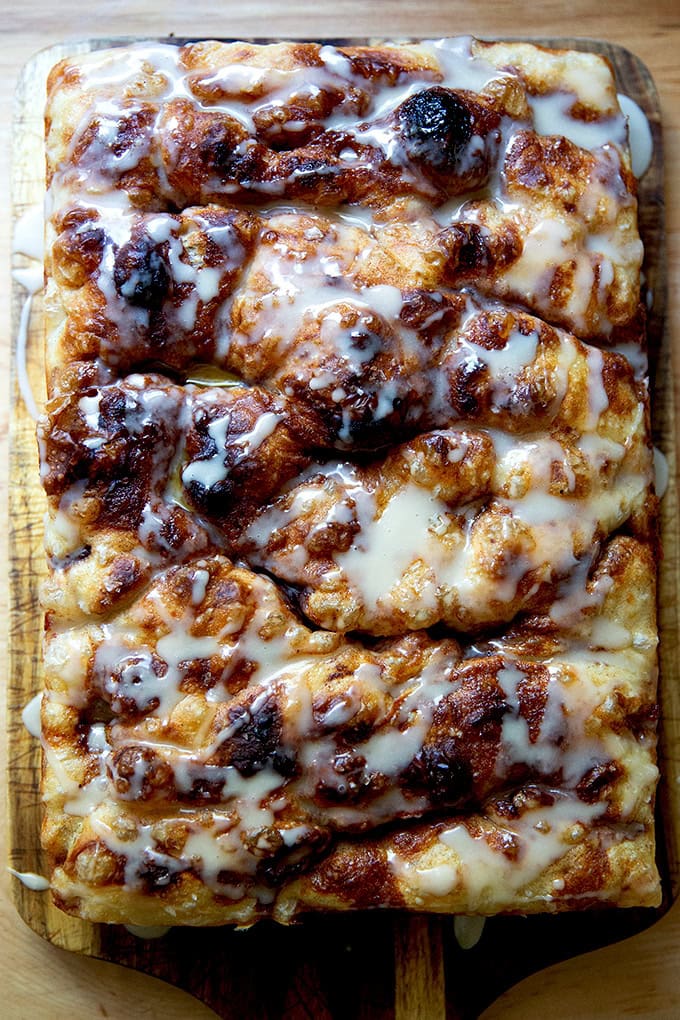
When focaccia meets cinnamon roll, good things happen. In this union, focaccia dough gets folded and dimpled with a cinnamon-brown sugar-butter mixture and baked until bubbly and golden all around. Cinnamon rolls without all the fuss? Yes. You. Can 🎉
Assembling cinnamon rolls always feels like a process, from making the dough and rolling it out, to spreading on the filling and coiling it up, to slicing, baking, and making the glaze.
Cinnamon roll focaccia feels effortless in comparison. As you know, focaccia dough, made with 4 ingredients, takes no time to stir together, and it can hang out in your fridge for days.
Moreover, with cinnamon roll focaccia, there’s no rolling and coiling — you’ll fold and dimple the dough, but all of this takes place in the confines of the 9×13-inch pan you’ll bake the focaccia in. You won’t flour a work surface or your hands, you won’t coil or cut. Overall, it’s very simple.
This would be the perfect thing to make for a fall or winter brunch, when you need something sweet to feed a crowd but maybe don’t have the energy for a more elaborate ensemble. Find step-by-step instructions below.
Cinnamon-Sugar Focaccia, Step by Step
First, gather your ingredients:
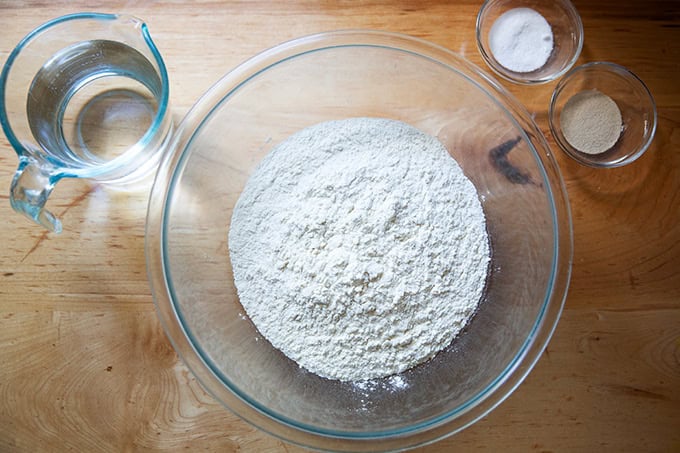
Whisk together the flour, salt, and instant yeast, then…
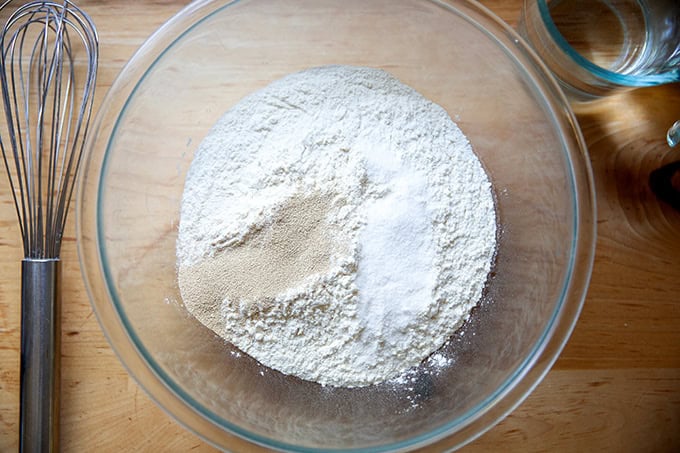
…add the water:
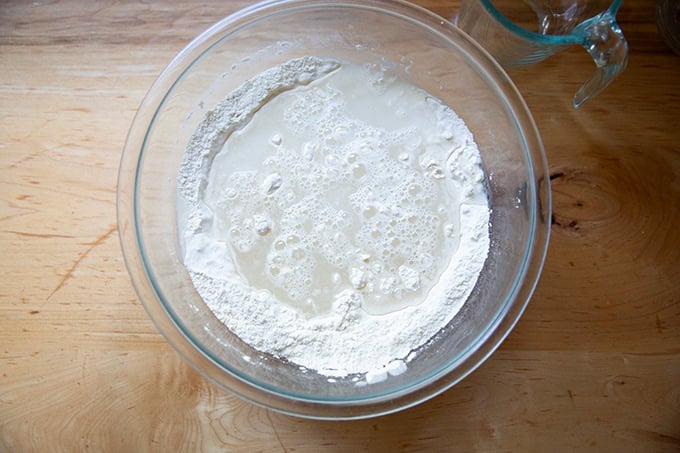
And stir with a spatula until you have a sticky dough ball:
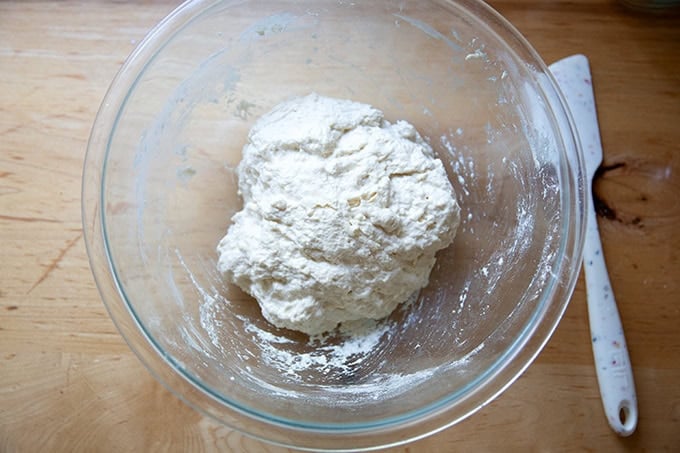
Cover the bowl and let rest for 30 minutes, then stretch and fold it. Video guidance:
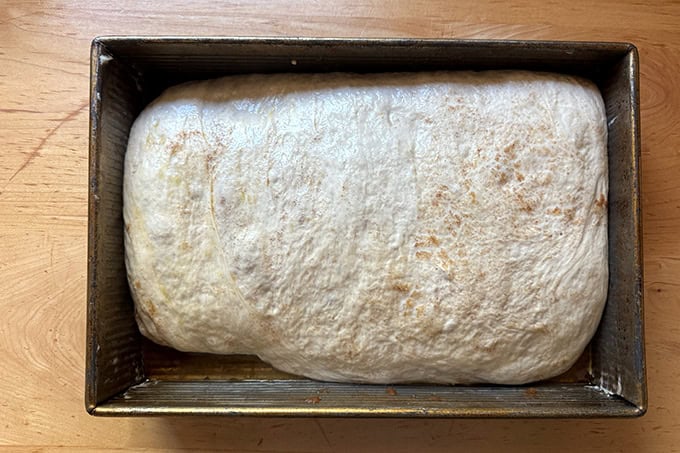
Slick the dough with oil, cover the bowl, then stick in the fridge for at least 12 hours or as long as 3 days.
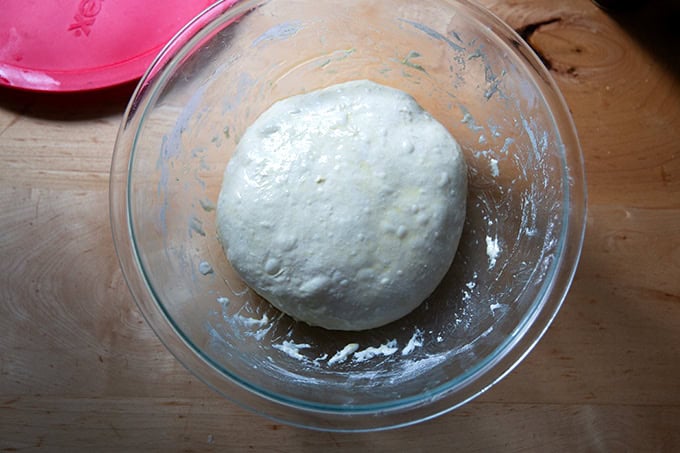
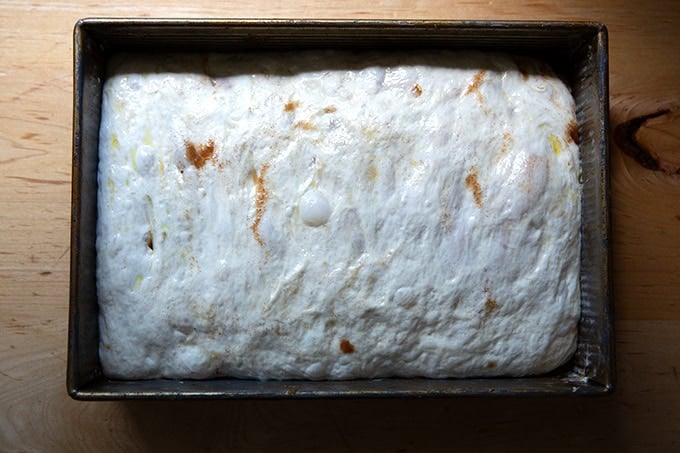
Remove from the fridge and take a moment to marvel at its beauty:
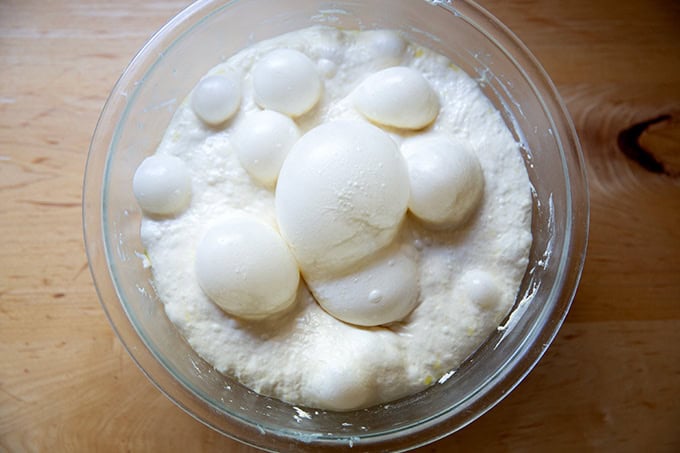
Then deflate it with a flexible bench scraper.
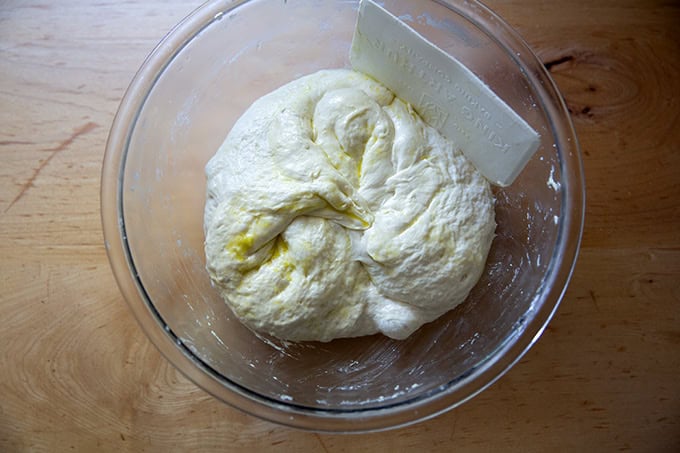
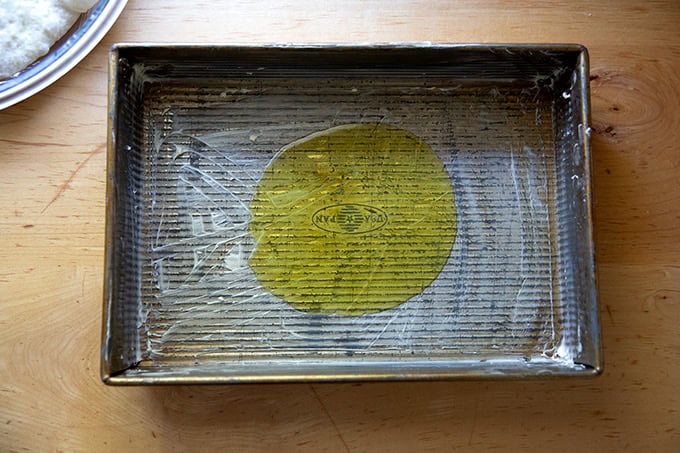
Prepare your pan:
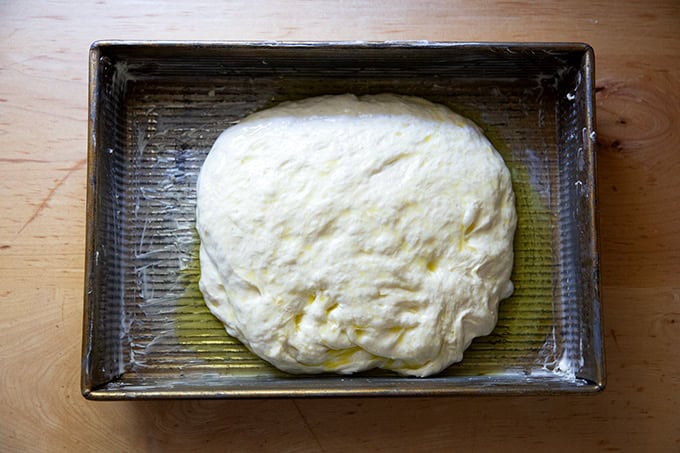
Turn the dough into the pan, and turn it in the oil to coat.
Don’t touch it for 1.5 hours:
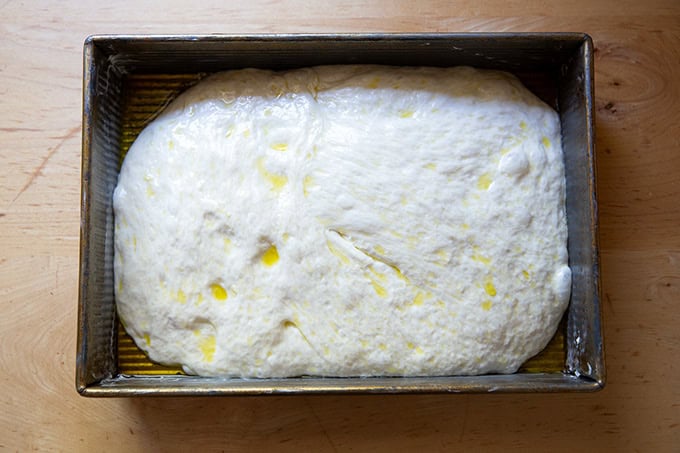
Then stretch it to fit the pan:
In a small saucepan over low heat, combine some butter, brown sugar, and cinnamon:
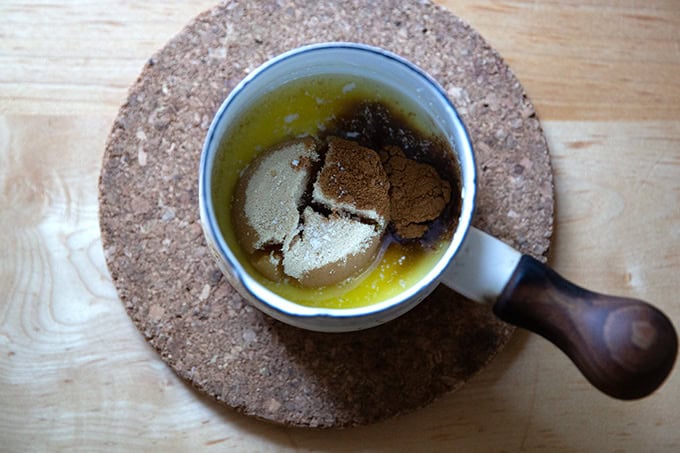
Whisk until smooth…
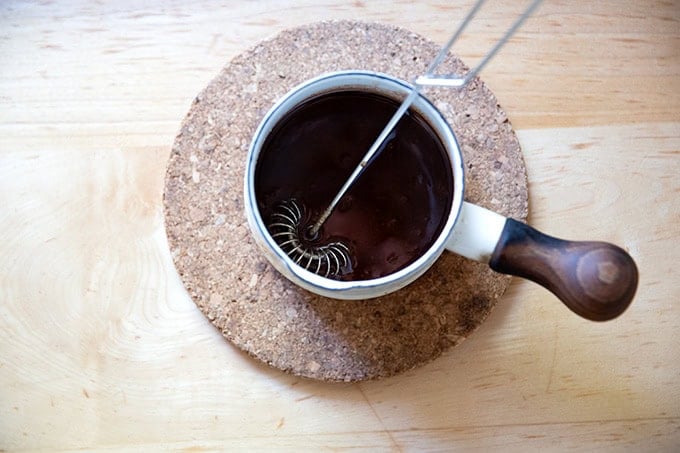
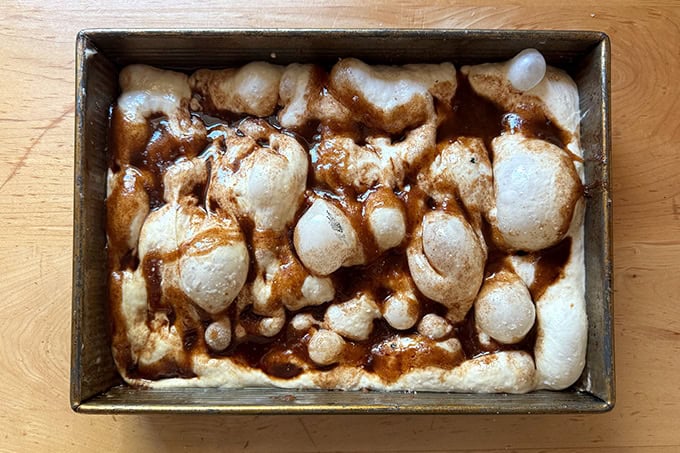
… then pour over the dough, distributing it as evenly as possible:
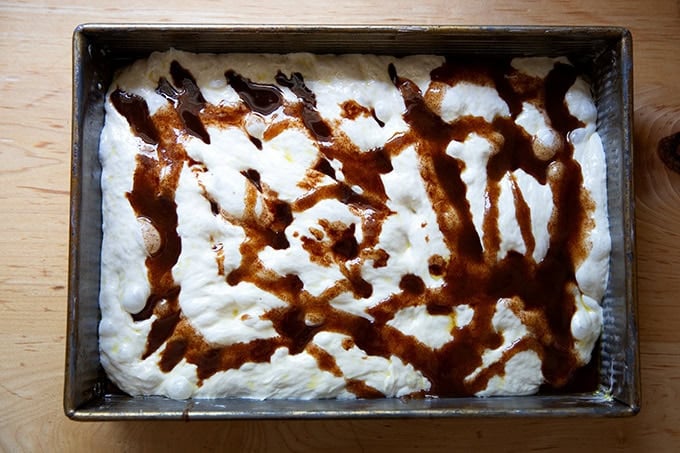
Spread the cinnamon-sugar mixture over the dough, then fold the dough envelope-style, and turn it so that the open ends of the envelope face the short ends of the pan:
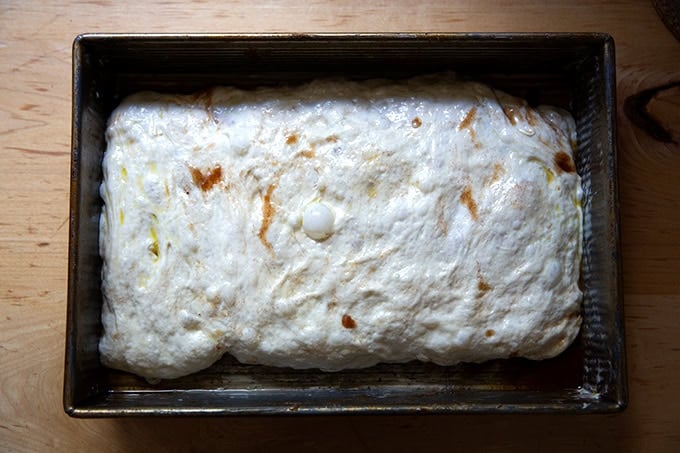
Cover the pan, and let it rest for another 1.5 hours or return to the fridge for another 24 hours (see notes below):
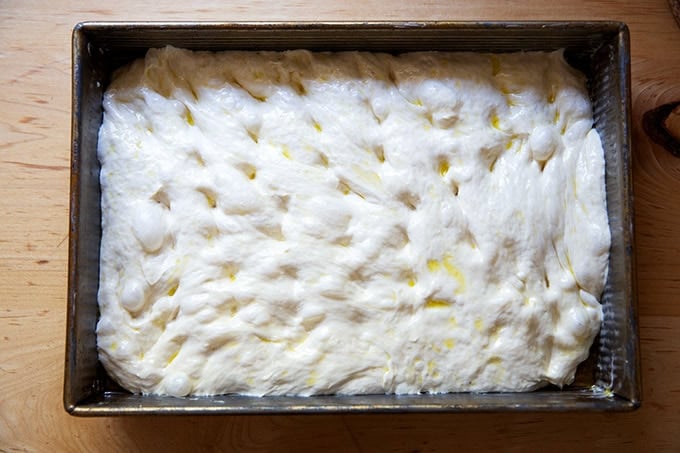
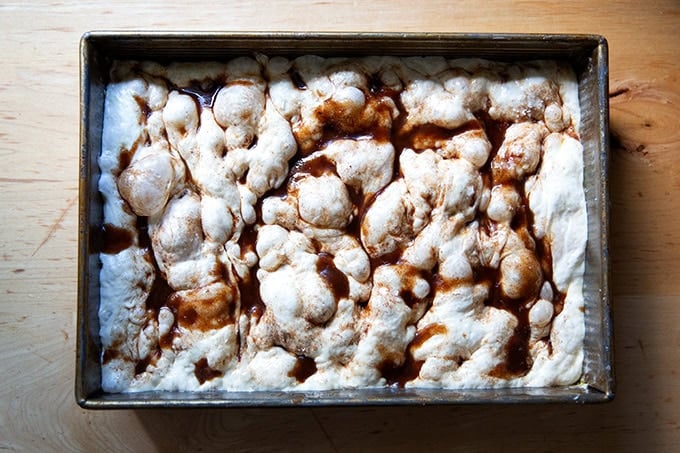
Then mix another batch of the cinnamon sugar butter mixture over the dough and dimple, distributing the mixture as your dimple:

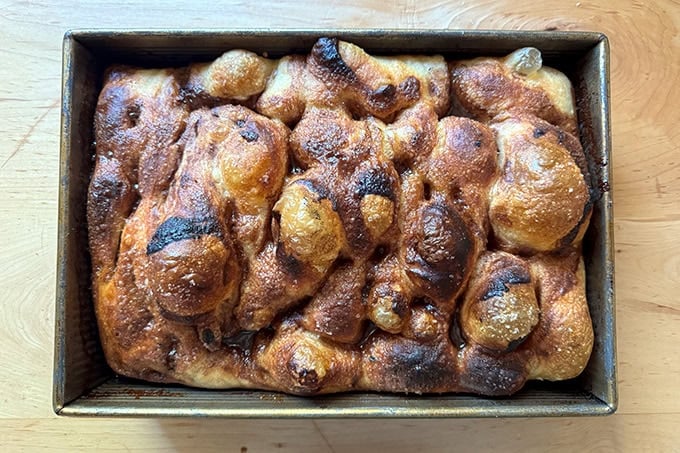
Sprinkle with sea salt, then transfer to the oven…
… and bake until evenly golden:
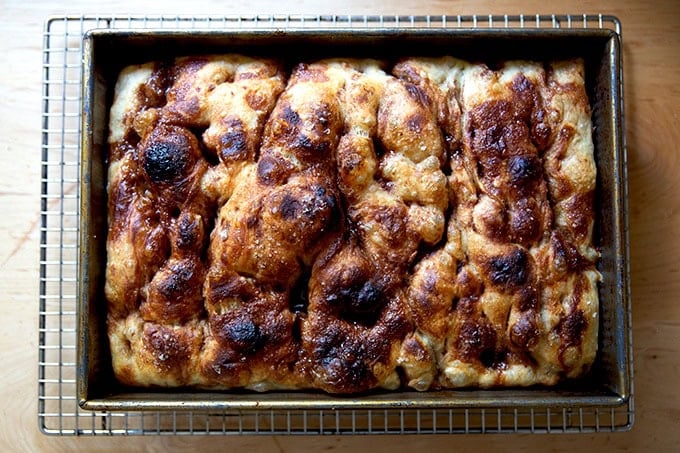
Transfer the focaccia to a cooling rack:
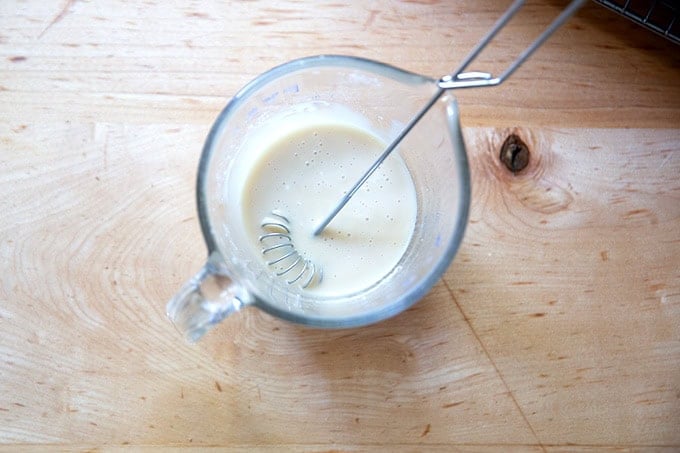
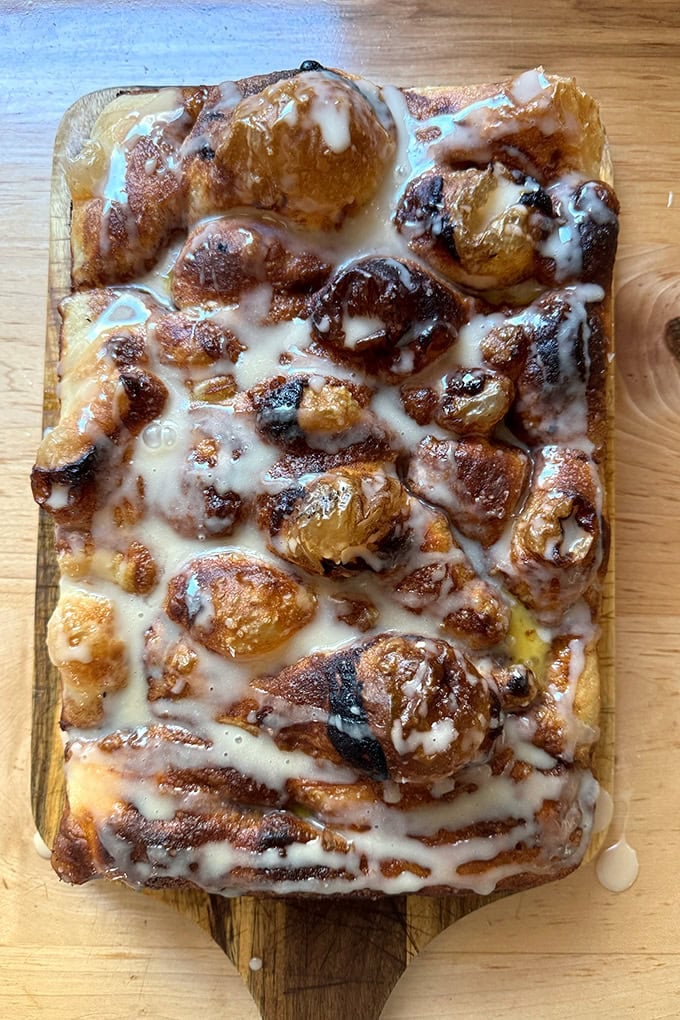
Let cool briefly, while you mix up a simple glaze:
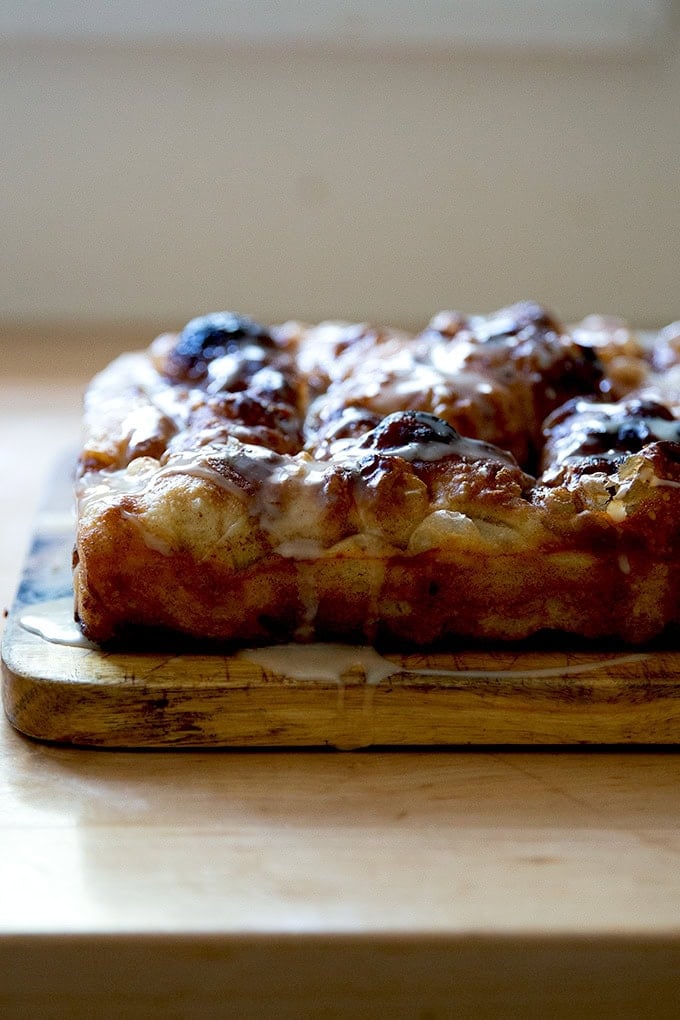
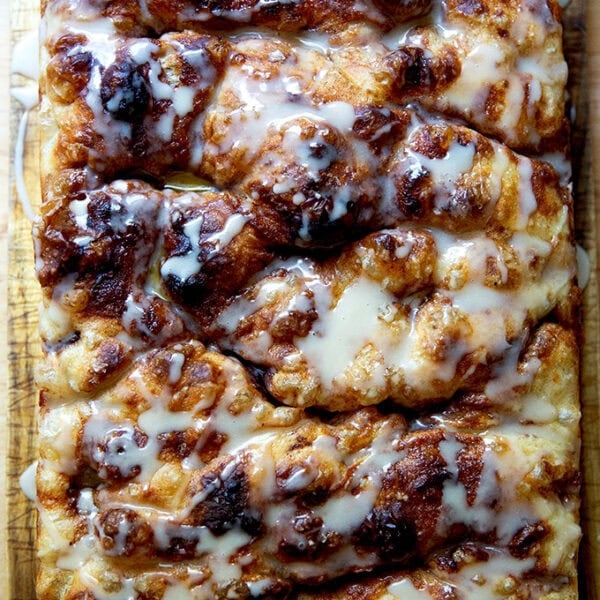
Then transfer the focaccia to a serving board, and drizzle the glaze over the top:
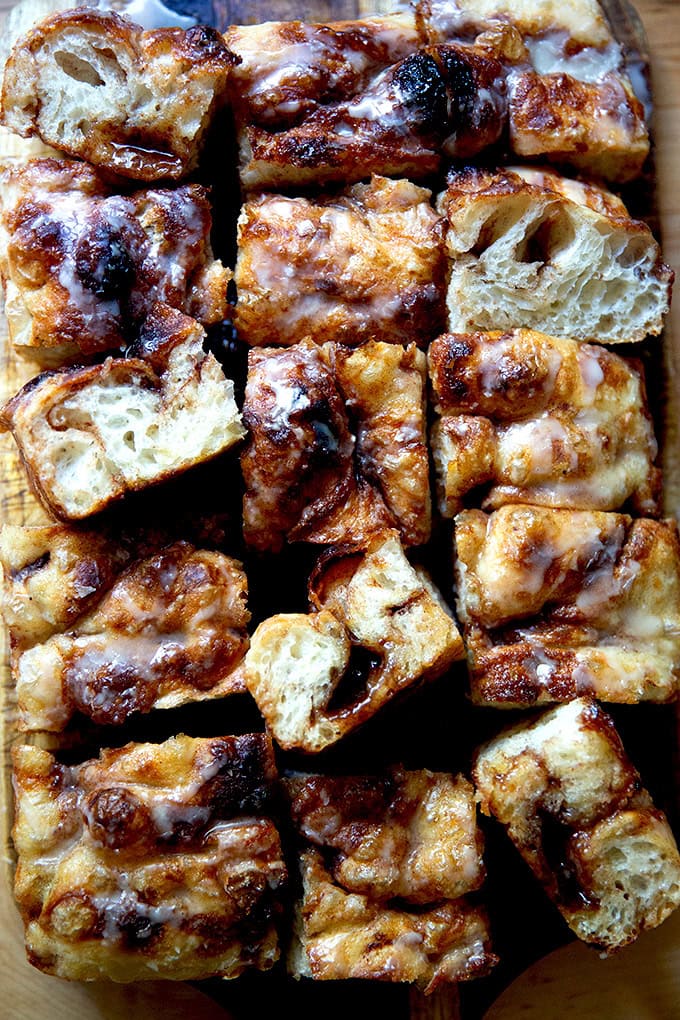
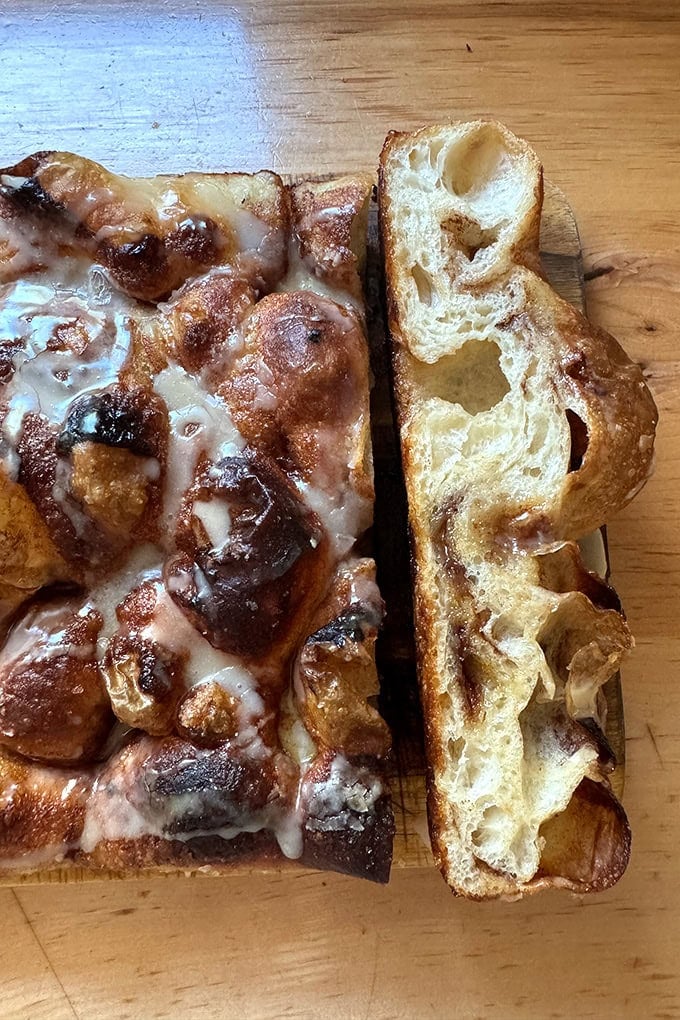
Cut into squares and serve:
Make It Ahead
If you want to reduce the amount of work on the morning you want to serve this, you can make the recipe through step 8, but after you cover the pan, you’ll return it to the fridge. You can use plastic wrap or a zip-top bag. I love these 2-gallon bags for this purpose:
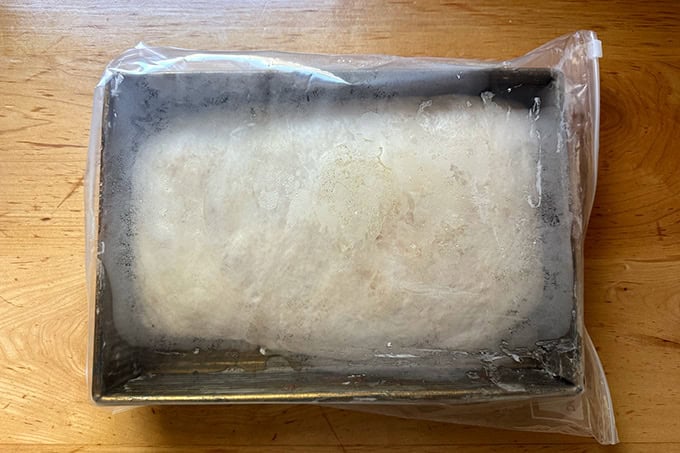
Remove it one hour before you plan on baking it and let it rise at room temperature (covered):
Then proceed with the recipe, dimpling and spreading over the final layer of the brown sugar-cinnamon-butter mixture. Note: as you dimple, you will feel the cold inside layer of the initial brown sugar-cinnamon-butter mixture — it will feel slightly solidified… don’t worry, it will be fine.
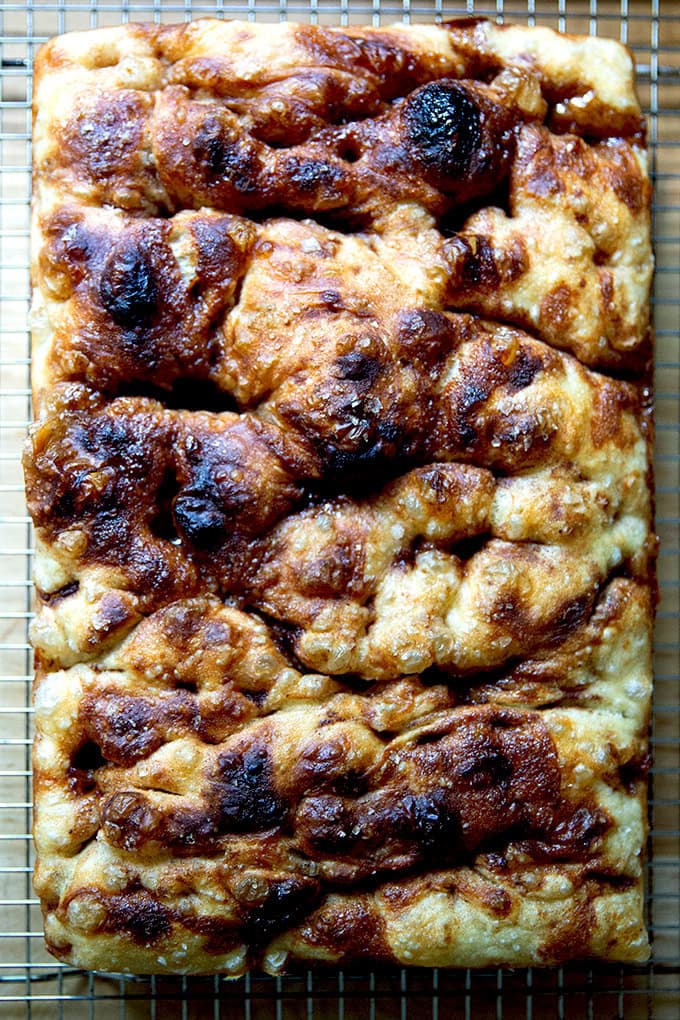
Bake as directed:
Glaze as directed:
Cut and enjoy the deliciousness:
Cinnamon-Sugar Focaccia (No-Knead, No-Fuss)
- Total Time: 5 hours
- Yield: 12 to 18 pieces 1x
Description
When focaccia meets cinnamon roll, good things happen. In this union, focaccia dough gets folded and dimpled with a cinnamon-brown sugar-butter mixture and baked until bubbly and golden all around. Cinnamon rolls without all the fuss? Yes. You. Can 🎉
In sum, this is this overnight focaccia recipe folded with a cinnamon-sugar-butter layer inspired by @_lacebakes
Notes:
- As always, for best results, use a digital scale to measure the flour and water.
- Flour: If you live in a humid environment, I would suggest using bread flour. If you are in Canada or the UK, also consider using bread flour or consider holding back some of the water — reference the video for how the texture of the bread should look; then add water as needed.
- Salt: The rule of thumb with bread dough is that the weight of the salt should be 2 to 3% the weight of the flour. For this recipe, that is 10 to 15 grams. If you are sensitive to salt, use 1o grams. If you are not, use 12 to 15 grams salt. I use Diamond Crystal kosher salt.
- Yeast: I love SAF instant yeast. I buy it in bulk, transfer it to a quart storage container, and store it in my fridge for months. You can store it in the freezer also. If you are using active-dry yeast, simply sprinkle the yeast over the lukewarm water and let it stand for 15 minutes or until it gets foamy; then proceed with the recipe.
- The Pan: I love this 9×13-inch USA pan for focaccia.
- Adapting the recipe for sourdough: Make this sourdough focaccia through step 5, then proceed with the recipe here, picking up at step 5, letting the dough proof for 1.5 hours in the pan before proceeding with the recipe.
Timing:
- Plan ahead: Ideally, the mixed dough spends a day or two in the fridge — this creates an especially bubbly-textured focaccia. Once the dough is removed from the fridge, you can take one of two paths:
- Make the recipe through step 8, but return the pan to the fridge for another day. Here’s a rough schedule of what that would look like:
- Wednesday or Thursday: Mix dough, stick it in the fridge.
- Friday: When you have time, remove the dough, let it proof for 1.5 hours in the pan, layer it and shape as directed, then return it to the fridge (covered).
- Saturday: Remove the pan from the fridge 1 hour before you want to bake it.
- Let the dough rest for 1.5 hours, then proceed with the recipe. With this method, you’ll be baking the focaccia roughly 4 hours after you remove the dough from the fridge. So, if you wanted to serve this for a 10 or 11 am brunch, you would want to remove the dough from the fridge around 6 or 7 am.
- Make the recipe through step 8, but return the pan to the fridge for another day. Here’s a rough schedule of what that would look like:
- If you are short on time and want to make this start to finish in one day: Use lukewarm water and let the mixed dough rise at room temperature until doubled, about 1.5 to 2 hours. Then proceed with the recipe as written.
Ingredients
For the dough:
- 4 cups (512 g) bread or all-purpose flour, see notes above
- 2 to 3 teaspoons (10 to 15 grams) kosher salt, see notes above
- 2 teaspoons (8 g) instant yeast, see notes above if using active dry
- 2 cups (455 g) cold or room temperature water
- olive oil
- Softened butter, for the pan
For the cinnamon-sugar mixture:
- ½ cup (113 grams) butter, salted or unsalted butter, divided
- ½ cup (100 grams) brown sugar, divided
- 4 teaspoons cinnamon, divided
- flaky sea salt, such as Maldon
For the glaze:
- 1 cup (113 grams) confectioners’ sugar
- 2 tablespoons (28 grams) milk or heavy cream
- 1 teaspoon vanilla extract
Instructions
- Make the dough: In a large bowl, whisk together the flour, salt, and instant yeast. Add the water. Using a rubber spatula, mix until the liquid is absorbed and the ingredients form a sticky dough ball. Cover the bowl and let it rest for 30 minutes.
- Stretch and fold the dough: Fill a small bowl with water. Using a wet hand, stretch and fold the dough by grabbing an edge and pulling it up and towards the center. Repeat this stretching and folding process, 8 to 10 times, moving your hand around the edge of the dough with every set of stretches and folds. As you stretch and fold, you should feel the dough transform from being sticky and shaggy to smooth and cohesive. Find video guidance in the post above as well as here.
- Let it rise: Rub the surface of the dough lightly with olive oil. Cover the bowl with a lid or plastic wrap and place in the refrigerator immediately for at least 12 hours or for as long as three days. (See notes above if you need to skip the overnight rise for time purposes.)
- Prepare the pan: Grease a 9×13-inch pan with softened butter. (Note: This greasing step may seem excessive, but with some pans, it is imperative to do so to prevent sticking. With my USA pans, I can get away with olive oil alone; with my glass baking dishes, butter is a must.) Pour 2 tablespoons of oil into the pan.
- Deflate the dough: Using a flexible bench scraper or a lightly oiled hand, deflate the dough by releasing it from the sides of the bowl and pulling it toward the center. Rotate the bowl in quarter turns as you deflate, turning the mass into a rough ball. Turn the dough out into the olive oil in the prepared pan. Turn the dough several times in the oil to ensure it is completely coated. Let the dough rest for 1.5 hours. Cover the pan. (I use a cutting board or sheet pan.)
- Prepare the filling: In a small skillet, melt 4 tablespoons of the butter. Whisk in 4 tablespoons of the brown sugar, 2 teaspoons of the cinnamon, and a pinch of flaky sea salt. Remove from the heat and let cool briefly.
- Stretch the dough: Using lightly oiled hands, gently dimple the dough, stretching it to fit the pan. Pour the brown sugar filling as evenly over the top of the dough as possible, and use your hands to distribute it over the surface. Reserve the skillet.
- Fold the dough: Starting with a short end, fold the dough envelope style: if, for example, you are starting with the right edge, fold it to the left covering two-thirds of the dough, then fold the left edge over to the right to cover (and vice versa if starting with the left edge). Then turn the bundle of dough so that the open ends face the short ends of the pan. Video guidance here. Cover the pan and let the dough rest for another 1.5 hours. (Note: At this point, you can tuck the entire pan into a 2-gallon ziptop bag or cover with plastic wrap and return it to the fridge for another day. Remove it one hour before you plan on baking it, the proceed with the recipe.)
- Preheat the oven to 425ºF.
- Prepare the remaining filling: In the same small skillet, melt the remaining 4 tablespoons of butter. Whisk in the remaining 4 tablespoons of brown sugar, remaining 2 teaspoons of cinnamon, and a pinch of flaky sea salt. Remove from the heat and let cool briefly.
- Dimple the dough: Uncover the pan, pour the filling over the surface of the dough, and rub with your hands to distribute it evenly. Using lightly oiled hands, gently dimple the dough, creating bubbles and craters as you do. Sprinkle lightly with sea salt.
- Bake the dough: Transfer the pan to the oven and bake for 25 minutes or until the focaccia is evenly browned. Remove the pan from the oven, let the focaccia cool in the pan briefly (2 to 3 minutes), then run a spatula around the edges of the pan, and transfer the focaccia to a cooling rack to cool for 5 minutes.
- Make the glaze: In a small bowl or liquid measure, whisk together the confectioners’ sugar, milk, and vanilla.
- Finish the focaccia: Transfer the focaccia to a serving board. Drizzle the glaze over the top. Using a serrated knife, cut the focaccia into pieces (or more) and serve.
- Prep Time: 30 minutes
- Cook Time: 25 minutes
- Category: Bread
- Method: Oven
- Cuisine: American
This post may contain affiliate links. Please read my disclosure policy.


171 Comments on “Cinnamon-Sugar Focaccia (No-Knead, No-Fuss)”
When I saw this, my mind automatically went to Moravian sugar cake/coffee cake. What goes around comes around.
Oh wow, yes, I just googled: so similar looking!
I beg your pardon. Will be trying this IMMEDIATELY.
YES AMANDA!! 🙂 🙂 🙂
After putting the dough together yesterday, I baked it off today and it is truly delicious! It gives cinnamon bun vibes but with a little something special by way of the focaccia texture and flavour. I love it!
I’m so happy to hear this, Amanda! Thanks so much for circling back with your results 💕💕💕💕
I can’t wait to make this. I love the regular focaccia recipe and make it so often, enough that I have the recipe memorized. I have one question- do you flip the “envelope” over so that the seam side is down in the pan? I see that you turn it to place the open ends on the short side of the pan?
Are you using the homemade starter on this? The bubbles are wonderful!
Your recipes never fail. I make so many of them on permanent rotation- ratatouille, veggie stock- the very best ever, red curry chicken, and so many more,
So sorry- I had not finished reading the post before jumping to the recipe. You already answered the “bubbles” question in your email.
I was so excited to see what was in the filling that I clicked on the ingredients before reading the email.
Glad you found your answer, Winnie! I’m just using yeast here 🙂 Thank you for your kind words. And regarding your other question about flipping the dough, no, I do not. I just rotate it so that the open ends face the sides.
Hi. I’m confused by the term “remaining” in Step Eleven. Can you clarify, please? Thanks.
Hi! I just deleted it. During my experiments, the first time I made the filling, I whisked together all of the filling ingredients, then I eyeballed half of the amount to spread over the dough after the first 1.5 hours. Then I poured the remainder of the filling over the dough after the next 1.5 hours. I find it easier to just make two separate batches of filling, so that you know that you are using the same amount at each phase. I used the word remaining because in step 10, I have you stir together the remaining filling ingredients but it’s clear in step 11 that you use the filling created in step 10. Hope this makes sense.
I saw this on King Arthur and never thought to send to you to adapt it. It looks amazing! I would love to serve this warm, just out of the oven, first thing in the morning for friends spending the night over the weekend. I’m not sure, with the resting times needed that this could be done. Anyone out there have suggestions for this timing? I do plan to make this recipe regardless. It looks amazing!
Mary, I have a batch of dough in the fridge, and I’m going to experiment doing this: making the recipe through step 8 and when you cover the pan; then I’m going to return it to the fridge till the morning and see how it works removing it for just one hour, dimpling, and baking.
Looking forward to hearing how this goes!
See below! It worked really well 🙂
Mary, it worked spectacularly! After I did the first fold with the cinnamon-sugar layer, I tucked the pan into a 2-gallon ziptop bag and returned it to the fridge for roughly 20 hours. I removed it from the fridge, let it rest for 1 hour, then proceeded with the recipe. I’ve added notes to the recipe, and I added step-by-step photos to the post above.
Still confused a bit about the folding,
The dough rectangle is in the pan. If you start with the short side, fold it in….isn’t it already facing the short sides of the pan?
Just read it again. After the folding, we then turn it around so that the other sides are now facing the short sides….? Would love a pic of this method.
And I will make this…I love your focaccia recipe. Also, have been collecting cinnamon roll recipes, but never seem to make them….this I will make.
Do you think it would freeze well after baking?
Hi! I just added a vertical video to the post… not ideal, but I think it will help with the visual. I will add a horizontal video this afternoon or maybe sooner (heading to the soccer fields shortly:)).
A proper, horizontally oriented video has been added to the post. Hope it helps! 🎉
This is my 2nd effort in making focaccia bread and each time when I go to do the stretch and fold part, the dough is too gloppy. It pulls apart and seems too wet. As I do the stretch and fold process I feel the dough changing somewhat but does not come together for me to be able lift it out of the bowl and my hand is all gooey. I have weighed all the ingredients, but it seems I may need less water, what do you think?
I do think you need to use less water. Are you using bread flour or all purpose? And do you live in a humid environment?
Help. Can you demonstrate the envelope fold? I can’t fully grasp it from just reading the directions.
I think she means fold it in thirds… like a business letter.
Fold from top on the short side to 2/3 down. Then fold the bottom up to cover the top piece you just folded down. So you’ve folded it in thirds—then you rotate it 90 degrees so that the newly short sides are now facing the shorter sides of the pan.
Marty, exactly! Thank you so much 🙂
Hi Lynne! I added a video to the post… it’s vertical, so it’s displaying small, but I think it will help with the visual. I will add a horizontal video to the post soon!
A proper, horizontally oriented video has been added to the post. Hope it helps! 🎉
Will you please give instructions on how to make this using your sourdough focaccia recipe?
Thank you!
Yes! I’ll add these notes to the recipe box too. You would simply make the sourdough focaccia through step 5, then proceed with the recipe here, letting the dough proof for 1.5 hours in the pan before spreading on the first layer of filling, etc. Let me know if you have any more questions.
I am so excited for this recipe. Your regular focaccia is my go to recipe that I share with everyone. I’ve been craving cinnamon rolls but don’t want to deal with the hassle, this sounds perfect!
Hope you love it, Sarah!
Can I put sautéed cubed apples in
Sounds delicious! Yes, go for it 🙂
Hi! I have a dough prepared for your Sicilian pizza in the frig…I just came across this delicious cinnamon focaccia and was wondering if that dough will work for it. Although the ingredients are same, the way you treat the dough differs so I’m not sure if I’ll get the ultimate result. Please let me know!! I can’t wait to try it!
Yes, use it! It’s the same dough… I do use cold water in this cinnamon recipe, and I’ve added a stretch and fold, but otherwise, the dough is the same and it will work great here 🙂
Oh man I look forward to hearing the results!
It’s in the fridge! I’ll report back tomorrow. My fingers are crossed.
Ali – so amazed you are doing this experiment so that I might gift friends coming from CA to visit ME with hot cinamon treat with their coffee first thing in the morning. Excited to hear how you the experiment workd!
I am hopeful! I mean, the only way for this recipe to really make it into the rotation would be if this works — I love that with my cinnamon roll recipe, you place the shaped rolls in the fridge so that the work in the morning is very minimal.
Mary, it worked spectacularly! After I did the first fold with the cinnamon-sugar layer, I tucked the pan into a 2-gallon ziptop bag and returned it to the fridge for roughly 20 hours. When I was ready to bake, I removed it from the fridge, let it rest for 1 hour, then proceeded with the recipe. I’ve added notes to the recipe, and I added step-by-step photos to the post above.
You are the absolute cats meow!!!
Thank you!!!
This turned out outrageously good. Crispy, gooey, sweet and salty. The glaze falls into all the right creases.
So great to hear, Kristen! Thanks so much for writing 🙂
Made this, it was fabulous. No changes needed.
Great to hear! Thanks so much for writing 🙂
Cannot wait to try. Will use Blood Orange Avocado oil instead of olive.
Hope you love it Sue! Love this idea, too 🙂
I’m confused— am I able to put it into the fridge after folding the cinnamon and sugar mixture in, or do I need to let it rise for 1.5 hrs and then refrigerate?
Hi! You can put it in the fridge immediately after you fold in the first batch of cinnamon-sugar butter layer. Hope I’m getting to you in time!
Thx for this recipe. Will give it a try for grandkids sleepover. Does the finished bread freeze well? Maybe icing after thawing and reheating?
Yes, I think that is a good plan: freeze it before icing it. Thaw it at room temperature. Reheat it at 350ºF for 15 minutes; then ice it. I have not tried this, but I have frozen many loaves of baked focaccia with success and they reheat beautifully 🙂
Could you elaborate just a little bit on what exactly you do to “dimple” the dough? I don’t understand what process I would do to make bubbles.
Kathy – re: dimpling. hold your hands and fingers like they are claws and then just push them gently into the dough, lift them out, and then repeat a few times. push almost to the bottom but not fully. the bubbles will form on their own! I am sure there are other ways to explain this, but hope this helps.
Thank you, Trish! So helpful. I appreciate you hopping in… I’m just catching up on the comments 🙂
Hi Kathy! Apologies for the delay here. Check out the video on this post and skip ahead to the 1:40 mark: https://vector-hatch.live/2018/03/02/overnight-refrigerator-focaccia-best-focaccia/%3C/a%3E%3C/p%3E
You’ll see the dimpling process in action 🙂
I, too, was concerned about messing with focaccia, but after trying this recipe I am SOLD! I don’t know what I was expecting, but this was perfectly buttery, cinnamony, and sweet! I never even got around to making the glaze or taking any pictures. I’m going to make it again this weekend. It was so incredibly easy.
So nice to read this, Renee!! Thanks so much for writing. I feel like I could go without the glaze as well… but it does make for a nice photo 🙂
Question! I’m in the midst of making this and I’m doing the method where you refrigerate overnight twice so I can bake it more quickly tomorrow morning. During step 8, do I let it rest for 1.5 hours after folding and then refrigerate, or do I put it straight into the fridge after folding? Then tomorrow morning, I only have to remove it 1 hour prior to baking? Thank you!
Straight into the fridge after you fold it. Be sure the pan is covered with plastic wrap or tuck it into a bag. Yes: tomorrow, remove one hour before baking. When you dimple it, the dough will feel weird due to the solidified butter-sugar layer—this is fine!
I’m concerned about baking it because the cinnamon sugar and butter has seeped out into the pan. I fear it will burn. Any advice on keeping in the “envelope”?
Just go for it! That happened with mine too… it won’t burn… it will just make for some nice caramelized edges.
Thanks! I went for it – as you suggested and it turned out GREAT. Seems like the excess sugar and oil absorbed back into the bread. Everyone loves it. I’ll make again for sure!
Great to hear, Claudia! Thanks so much for circling back 🙂
Delicious!!! And my house smells amazing, too. All of your recipes that I’ve tried have been delicious. Thank you for sharing!!
Great to hear, Marlise! Thanks so much for writing 🙂
Easy peasy and better than cinnamon rolls. Thanks for sharing
Great to hear, Sue! Thanks so much for writing 🙂
I made a bit of an ooops and only put the dough in the fridge for its second rise for a few hours. It seems like it still turned out alright (smells amazing!) but maybe just isn’t as fluffy.
That’s fine! I’m so happy to hear this 🙂
This was absolutely delicious! Two of us demolished this in a frighteningly short amount of time! Highly recommend.
Great to hear, Karen! Thanks so much for writing and sharing this 🙂
This looks so delicious and I will bake it soon. I was curious if you thought coffee could be worked into this recipe? Maybe espresso powder in the filling or inthe glaze? This might be too many flavors. What do you think?
Pat
YES! Love this idea so much. I think adding it to the filling or the glaze would work really well. Go for it. And please report back if you do 🙂
Just made it and oh my goodness; so yummy. Before the envelop Fold, in addition to to the filling, I spread 2/3 of a jar of Trader Joe’s apple pie spread. So good!
Fun! Love this idea. Thanks so much for writing and sharing it 🙂
This was so incredibly tasty that I almost ate the whole thing.
So nice to read this, Kathy! Thanks so much for writing 🙂