 →
→ No-Knead Brioche Hot Dog Buns
This post may contain affiliate links. Please read my disclosure policy.
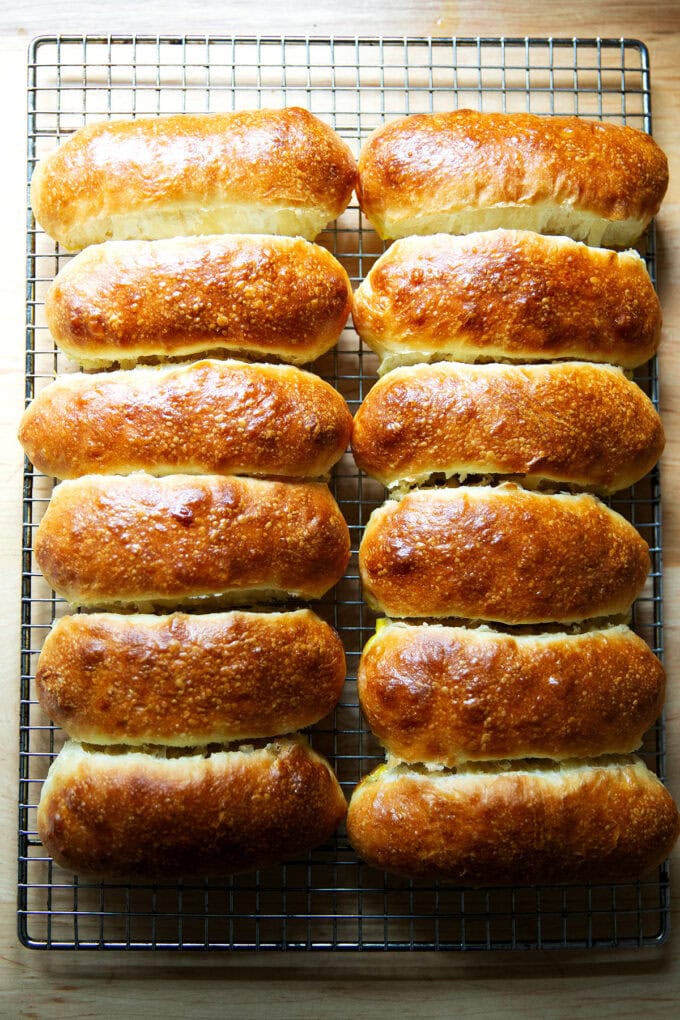
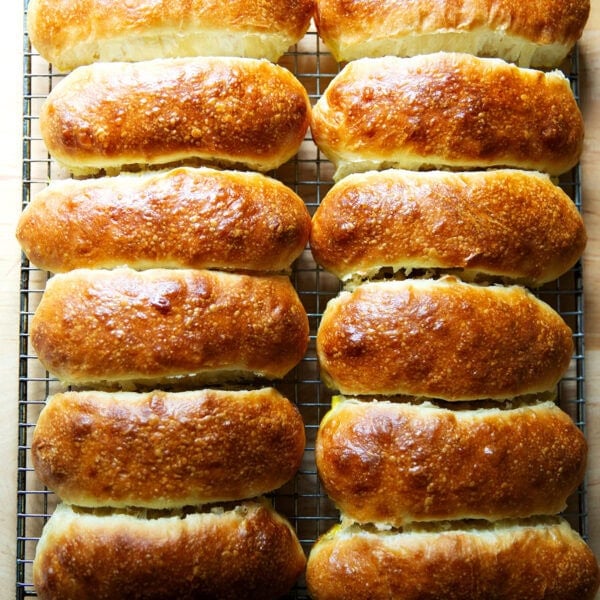
Light and airy, bronzed and burnished, homemade brioche hot dog buns are surprisingly easy to make. The no-knead dough comes together in minutes without a mixer, and the shaping process is simple. Find step-by-step instructions below 🌭🌭🌭
One of the most frequently asked questions I receive on this brioche roll recipe is if it can be used to make hot dog buns. “It sure can!” is how I always respond, supplying a rough guideline on how to do so. And while these exchanges in the comments section have been sufficient over the years, I thought it was time to give a hot dog bun recipe its own space.
Here it is, a no-knead recipe, the dough identical in makeup to these brioche rolls, with the mixing process simplified even further. If you are familiar with that brioche roll recipe, you know that as far as brioche recipes go, it’s on the light side, calling for a single egg and a modest amount of sugar, milk, and melted butter.
And while these enrichments are minimal, they create a dough that ultimately bakes into a bread with a light and tender crumb and a soft, thin crust that browns beautifully. As with the brioche roll recipe, this dough is on the high-hydration side, but it is not unmanageable. Find step-by-step instructions as well as video guidance below 🌭🌭🌭
Homemade Brioche Hot Dog Buns, Step by Step
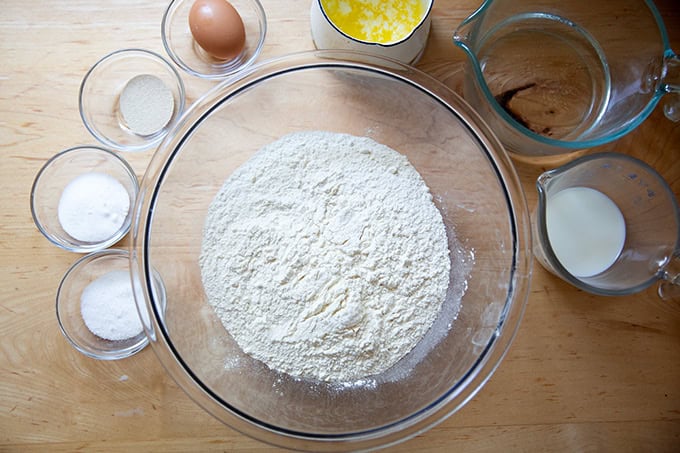
First, gather your ingredients: flour, salt, sugar, instant yeast, water, milk, egg, and melted butter:
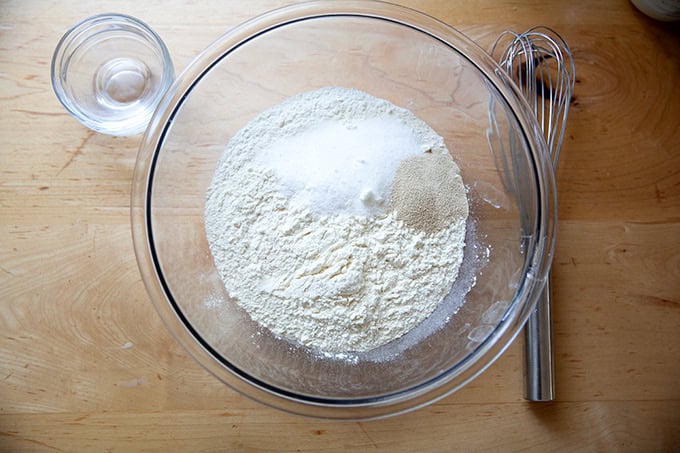
Whisk together your dry ingredients: flour, salt, sugar, and instant yeast:
Whisk together your wet ingredients: water, milk, and egg:

Add the wet ingredients to the dry ingredients, followed by the melted butter:
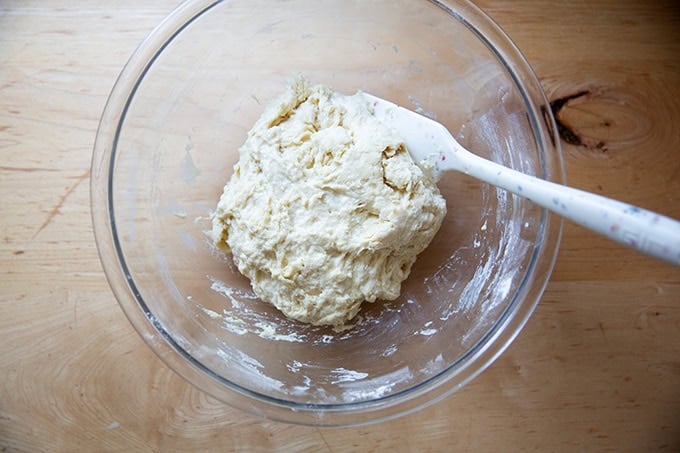
Mix until you have a sticky dough ball:
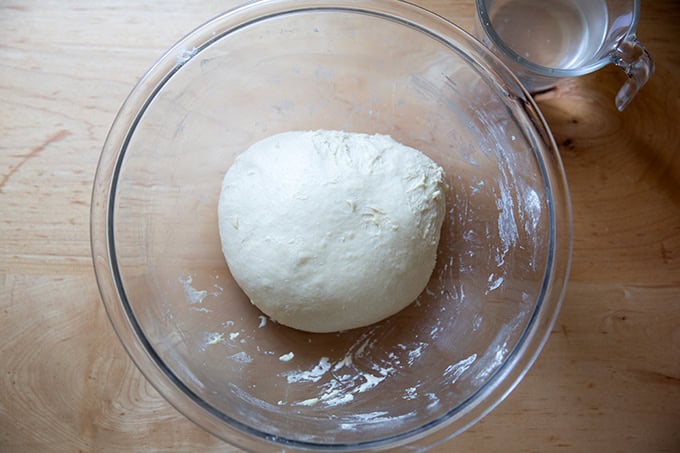
Let the dough rest for 30 to 60 minutes, then stretch and fold the dough. Here’s video guidance:
After the dough has been stretched and folded…
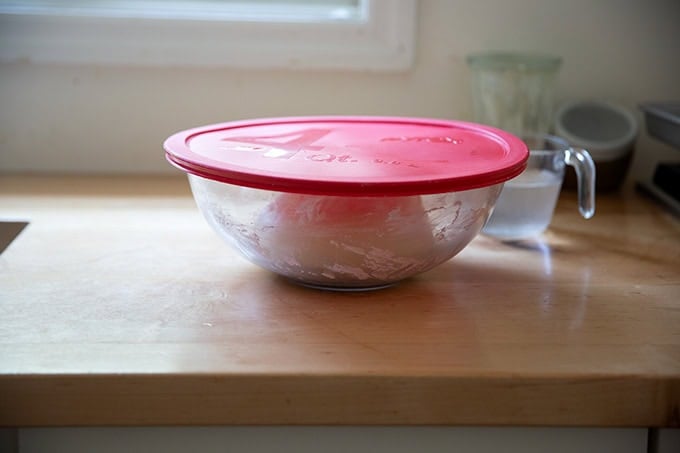
… cover the bowl:
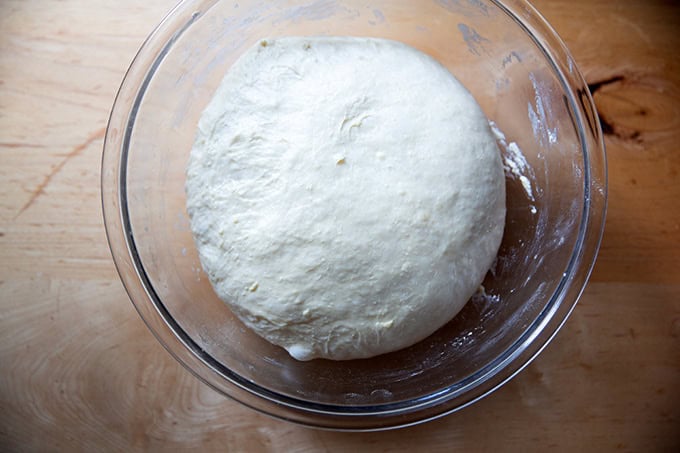
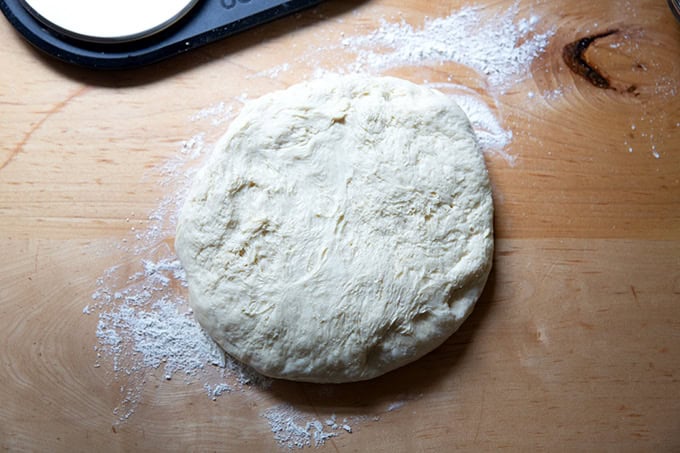
And let the dough rise until it doubles in volume:
Turn the dough out onto a lightly floured work surface:
Then divide it into 12 portions, using a scale if you care about each portion being identical:
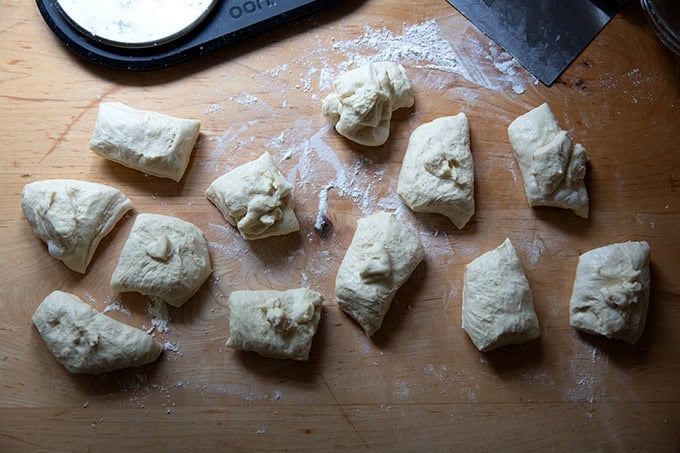
Ball up each portion. Here’s video guidance:

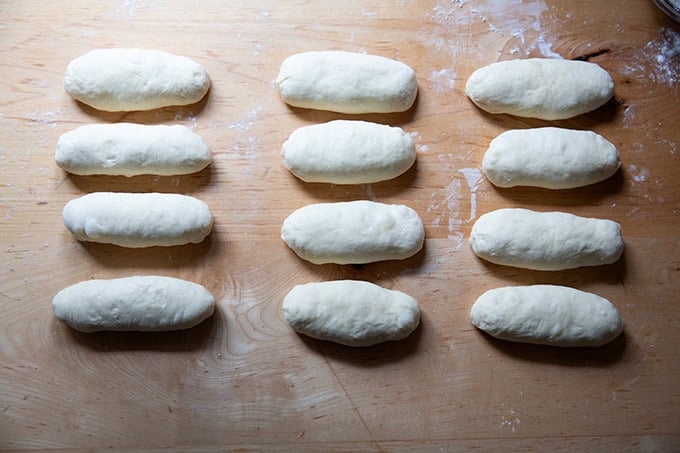
Once the portions have been balled up, roll each into a 4-inch log:
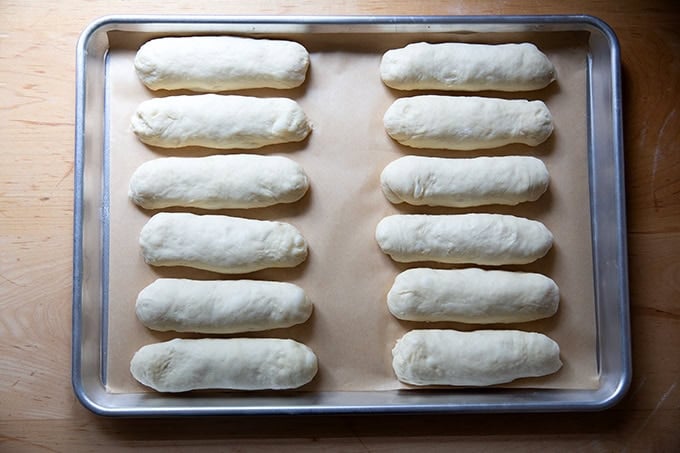
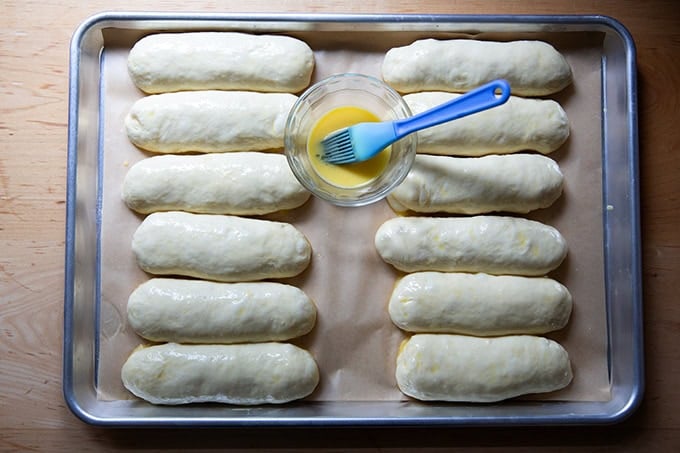
Cover and let rest for 20 to 30 minutes, then transfer to a parchment-lined sheet pan, stretching each into a 6- to 7-inch log as you do:
Let rest for another 30 to 45 minutes, or until the buns puff into each other and feel light to the touch, then brush with an egg wash:
Bake @ 425ºF for 15 to 20 minutes, or until evenly golden:
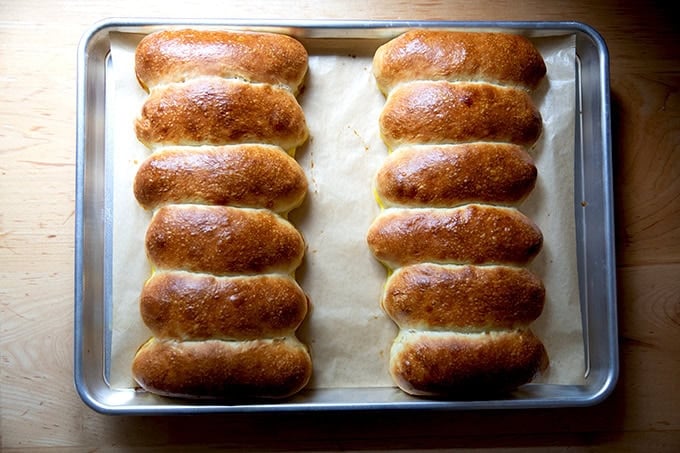
Remove the pan from the oven and let the buns rest on the sheet pan for 5 minutes, then transfer to a cooling rack and break apart:
Let cool for at least 20 minutes, before …
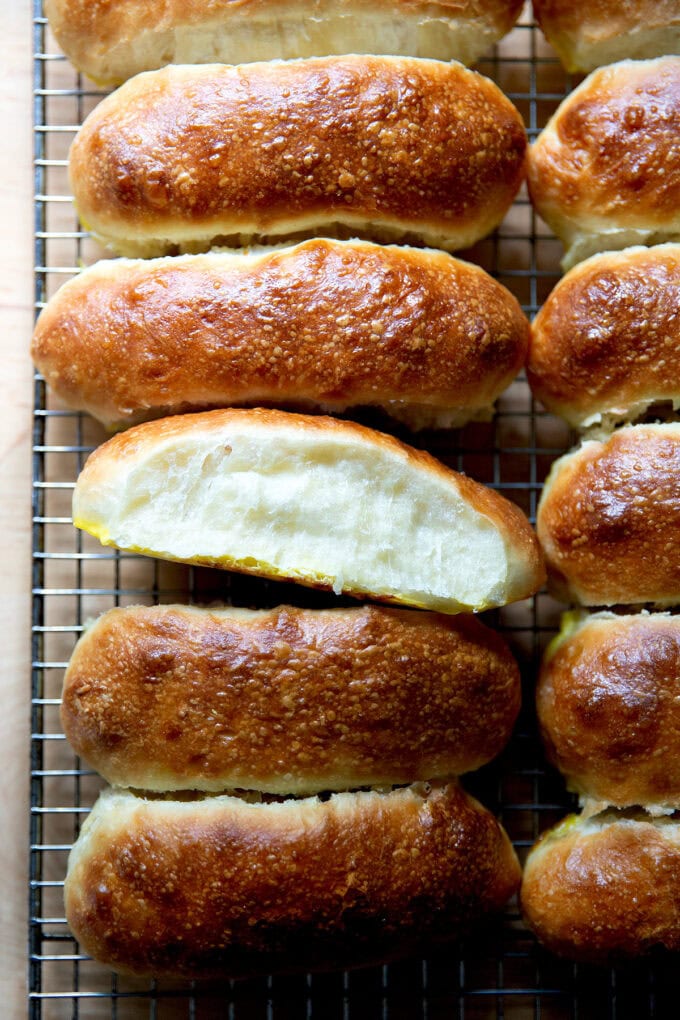
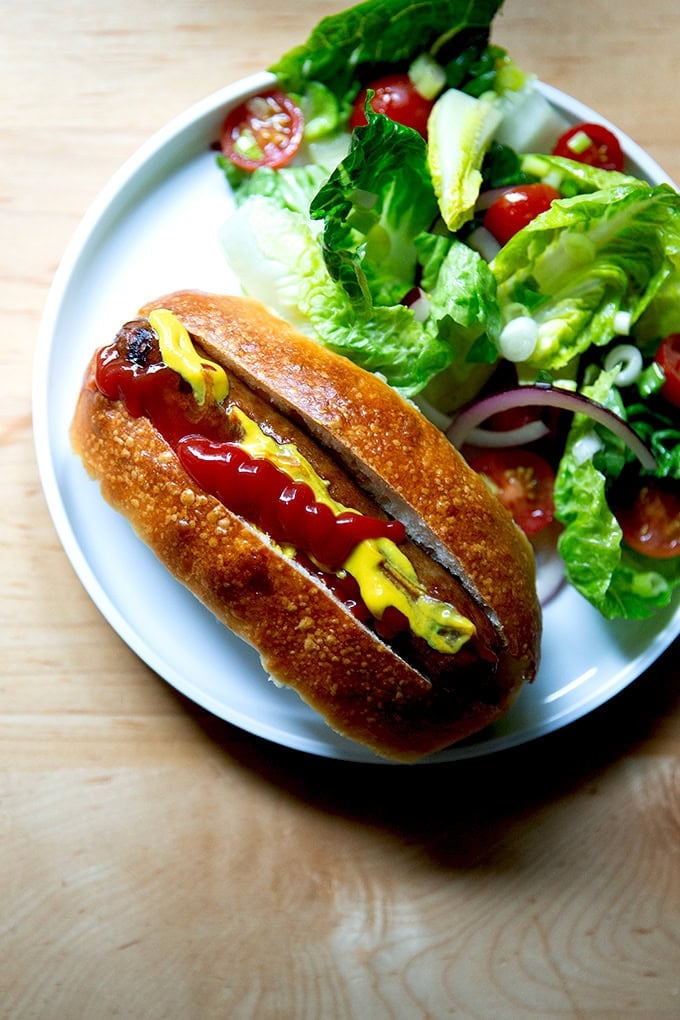
… slicing, and filling each bun with something delicious, hot dogs or otherwise!
No-Knead Brioche Hot Dog Buns
- Total Time: 4 hours
- Yield: 12 buns 1x
Description
Light and airy, bronzed and burnished, homemade brioche hot dog buns are surprisingly easy to make. The no-knead dough comes together in minutes without a mixer, and the shaping is simple: if you can roll Play-Doh, you can make hot dog buns 🌭🌭🌭
Adapted from this recipe for Homemade Brioche Rolls
Notes:
- As always, for best results use a scale to measure. I love this Ooni scale for its precision, especially when measuring smaller quantities of salt and yeast.
- Salt: The rule of thumb with bread is that the weight of the salt should be 2 to 3% the weight of the flour. For this recipe that is 10 to 15 grams. I always use 15 grams of salt, and I do not find the buns to be too salty, but, as you know, I have a high salt tolerance. Use an amount appropriate to your tastes and preferences. Finally, I always use Diamond Crystal kosher salt, but you can use fine sea salt or whatever salt you like.
- Yeast: I prefer using instant yeast, SAF being my preference but if you are using active dry yeast: Use lukewarm water, sprinkle the yeast over it, and let it stand for 15 minutes or until it gets foamy; then proceed with the recipe.
- To create a warm spot for your bread to rise, turn your oven on for one minute, then shut it off. That brief blast of heat will create a cozy place for your bread to rise.
Ingredients
- 500 grams (about 4 cups) bread flour or all-purpose flour
- 10–15 grams (2 to 3 teaspoons) kosher salt, see notes above
- 8 grams (2 teaspoons) instant yeast
- 28 grams (2 tablespoons) sugar
- 225 grams water (about 1 cup)
- 75 grams milk (about 1/3 cup)
- 1 egg
- 57 grams (4 tablespoons) melted butter
- for the egg wash: 1 egg beaten with 1 tablespoon water
Instructions
- Mix the dough: In a large bowl, whisk together the flour, salt, yeast, and sugar.
- In a medium bowl, whisk together the water, milk, and egg until blended.
- Add the wet ingredients to the dry ingredients, followed by the melted butter. Using a spatula, mix until you have a wet, sticky dough ball. Cover the bowl and let the dough rest for 30-60 minutes, then stretch and fold the dough: Fill a small bowl with water. Using a wet hand, grab an edge of the dough and pull it up and towards the center. Repeat this stretching and folding process, moving your hand around the edge of the dough with every set of stretches and folds. As you stretch and fold, you should feel the dough transform from being sticky and shaggy to smooth and cohesive. See the video above or here for guidance.
- Let it rise: Cover the bowl and let the dough rise at room temperature (or a slightly warm area, see notes above) until it has doubled in volume, roughly 2 hours.
- Portion the dough: Deflate the dough — I do this using a flexible bench scraper, which I use to release the dough from the sides of the bowl — then turn it out onto a lightly floured work surface. Divide the dough into 12 equal portions. If you want perfectly even buns — you know you do! — use a scale and divide the dough into 79-gram portions.
- Ball up each portion: Clear a space on your work surface so that it is free of flour. Working with one portion at a time, flip it over onto the non-floured space so that the flour side of the portion is up. Cup your hand around the portion and roll it into a ball: video guidance above and here. Repeat until all 12 portions have been balled up.
- Shape the buns: Using flour as needed to prevent sticking — you should need little to no flour here — press gently on each ball and roll into a 4-inch log (as though you were rolling out Play-Doh). Keep the logs on your work surface, cover with a tea towel, and let rest for 20 to 30 minutes — this allows the gluten to relax, which allows for easier final stretching. Line a sheet pan with parchment paper. Using lightly floured hands, pick up a portion, stretch it into a 6- to 7-inch log, and place it on the prepared pan. Repeat, creating two rows of six tightly spaced buns — see photo above for a visual.
- Final rise: Cover the buns with a towel, and let rise until the buns puff into each other and feel light to touch, about 30 to 45 minutes. After about 30 minutes of rising, preheat the oven to 425ºF.
- Egg wash and bake: Brush the rolls with the egg wash. Bake for 15 to 20 minutes or until the buns are golden all around. Remove the pan from the oven, transfer to a cooling rack, and let the buns rest on the sheet pan for 5 minutes. After the 5 minutes, remove the buns from the pan and transfer to the cooling rack, breaking them apart as you do. Let cool for 20 minutes before using as you wish.
- Prep Time: 10 minutes
- Cook Time: 15 minutes
- Category: Bread
- Method: no-knead
- Cuisine: American
This post may contain affiliate links. Please read my disclosure policy.


34 Comments on “No-Knead Brioche Hot Dog Buns”
Can I use oil instead of butter?
That should work! I would use 3 tablespoons of olive oil.
Hello,
We can’t eat all 12, so at what stage of the proceedings could we freeze the dough, please?
And can we then bake from frozen and if so what temperature for how long?
Or should we defrost first and then bake as per the recipe?
Thanks in advance for your assistance.
Kind regards.
I haven’t tried freezing this dough, so I can’t say for sure, but I would suggest freezing as follows: After the first rise, divide the dough in half, ball up the half you wish to freeze, transfer to an airtight vessel, then freeze immediately. Thaw the dough in the fridge 24 hours before proceeding with the recipe.
If you are up for it, I think the better move is to make the recipe as written, then freeze half of the buns — I know that the baked buns freeze beautifully.
Super – many thanks!
Well done Ali! I’ve contemplated this conversion for a while now and now I can stop and make your version, which is always the best. I can see these delicious buns helping me satiate my recent hankering for hot dogs (like KimChi and thin sliced pickles cut tip to tip or hotdog wrapped in thin sliced tomato, Dijon and mayo)
Cheers
Hooray! I hope you love the recipe, Frank. Your kimchi and pickle topped hot dogs deserve only the best. I am still eating your pear kimchi… the jar is nearly empty and I am savoring every last bit!
Can I make these into hamburger buns since this version is easier. Thanks very much
Yes! See my comment below to Kathleen!
Hi, recipe looks great! Could I do hamburger buns? And if so, what about the technique once it’s rested on the counter? This is the part where I’m not sure what I should do….
Thank you!
Hi! Yes, you can, but it might be easier to just follow this recipe: The Best, Easiest No-Knead Brioche Buns You could make this recipe (the hot dog bun one) through the first rise… the process is simpler; then jump over to that recipe to follow the portioning/balling up/baking the hamburger buns.
Instead of freezing the buns, can you 1/2 the recipe?
Rita
Yes! Use the whole egg. You may need to sprinkle some more flour in to touch… reference the photos for how the texture of the dough should be.
So excited to try this as here in France it’s impossible to find a decent hot dog bun ! I can only find Active Dry Yeast. Do you know how I could adapt the recipe to use that ?
Hi Leanne, I would use lukewarm water instead of room temperature or cold tap water. I would sprinkle the yeast over the lukewarm water and just let it stand for 15 minutes, then proceed with the recipe. Hope you love it!
Do you think this recipe would work in the New England hot dog pun pan?
I think it’s too much dough for the pan. I actually bought that pan — I bought the USA Pan one — thinking it would be really fun, but my first experiment was a failure (too much dough) and then I never revisited it because I didn’t want people to think they had to go out and buy a pan. If I were to experiment again with this recipe, I would use half the amount of dough in the pan… it will feel like not enough, but once it rises/bakes, I think it will be close to the right amount.
Hi Ali,
I have been making your brioche buns for quite a while, using it mainly for hamburgers.
I made the hot dog buns recipe this weekend . I found the dough easier to handle, bc less sticky, but I found the hdog buns aren’t as fluffy and light compare to the buns recipe. So I am curious and would like to know why you’re using 20% less water in the hdog recipe. ( 1 cup water vs 1 1/3 cup in the buns recipe, rest of the recipe is the same).
Thanks
Hi Lou! I decreased the water because I wanted the dough to be easier to handle since these require just a touch more handling than the buns. But I think if you increase the water slightly (by 50 grams or so), so that the hydration is closer to that of the brioche buns, you’ll get the light and airy hot dog bun you are looking for!
Thank you for your quick response. Great! I will try your suggestion of increasing the water, and let you know! ☺️
can the no knead brioche dough be made in a standing mixer?
Yes, it can, I would just be careful to not overmix it — mix just until the ingredients come together, let it rest for 30 – 60 minutes; then mix it again, again very briefly.
Hi there,
Going to make these buns today and wanted to confirm if it is 57 grams butter melted or 57 grams melted butter?
Thanks and hope you have a great day.
Hi! It’s 57 grams butter (before you melt it). Truthfully I don’t weigh it… I just cut a stick of butter in half, then melt it. But I like to always include the gram measurements for consistency purposes and bc tablespoons vary in sizes abroad. I weigh everything else! The butter is more forgiving 🙂
Hi again Ali,
Thanks for answering my butter question.
I did a half batch of the recipe and they worked out perfectly!
Lynne
Oh good! I’m so happy to hear this. Thanks for circling back 🙂
Who knew that a simple hot dog bun could look so beautiful and so delicious! Haven’t made then yet but can’t wait to. Thanks for all your wonderful recipes Ali!
Hope you love them, Nancy!
Good day, I was wondering if after the stretch can you proof in the fridge over night for the raise and proof before you portion out and bake???
Thanks Paul
Yes, go for it!
Easy and delicious- as always, Thanks, Alex!!
Great to hear, Halla! Thanks for writing 🙂
A question please: I am curious about the rationale for the stretch and fold. Why this recipe and not the bun recipe? (And why cinnamon bread focaccia and not regular foccacia?)
Is it simply bc more handling in each case?
Thank you
Hi PJ! The stretch and folds is a new step I’ve added to nearly all of my no-knead bread recipes… the instruction hasn’t made it to all of the recipes on the blog, but I am slowly adding it as I revisit all of my recipes — I did actually add it to the focaccia recipe very recently. I started doing this while working on my pizza book, Pizza Night, which includes 4 dough recipes, all of which employ one set of stretches and folds added 30 minutes after mixing the dough. I found that a brief rest allowed the flour to fully hydrate, so when you do the set of stretches and folds, it transforms the dough from shaggy to smooth and elastic. You will be amazed by the bubbles created in your rising dough when just one set of stretches and folds has been added to the process. I find it makes for a stronger gluten structure and ultimately for loftier, lighter loaves. It’s subtle! But I do think it makes the bread slightly better.