 →
→ Simple Soft Sandwich Bread (6-Ingredients, No-Knead)
This post may contain affiliate links. Please read my disclosure policy.
Made with only 6 ingredients, this simple, no-knead soft sandwich bread is such a treat to have on hand for sandwiches of all kinds. No mixer is required — if you can whisk and stir, you can make this bread.

Several years ago, I published a recipe here for a simple sourdough sandwich bread recipe, and I have long wanted to add a yeasted version to my collection of bread recipes … here it is!
It’s a no-knead, 6-ingredient recipe that takes about 5 minutes to stir together. Thanks especially to my oldest daughter, who brings a turkey sandwich to school for lunch nearly every day and who has no reservations sharing her opinions, the recipe has gone through many iterations these past few months.
It started with the basic bread ingredients: flour, water, salt, and yeast. In an effort to make it softer for sandwiches, I added some olive oil. When my daughter told me the bread didn’t hold up very well — that it began breaking down by lunch time — I began researching. First I added honey, then I added milk, then I took away the honey, and finally I swapped in melted butter for the olive oil.
The loaves made with a mix of water and milk, butter and no olive oil, and no sweetener at all tasted the most like the sandwich bread I was after: soft but sturdy and well seasoned but not sweet.
Depending on your timeline, you can use more or less yeast — I’ve been in the habit of using 1/2 teaspoon (2 grams) and employing a long, slow overnight rise, but if you need to speed up your timeline, there are notes in the recipe on how to do so.
As always, I am here if you have any questions. Hope you love it 🍞🍞
How to Make Soft-Sandwich Bread, Step by Step
First gather your ingredients: bread flour, salt, instant yeast, water, milk, and butter. (See notes in the recipe for using other flours.)
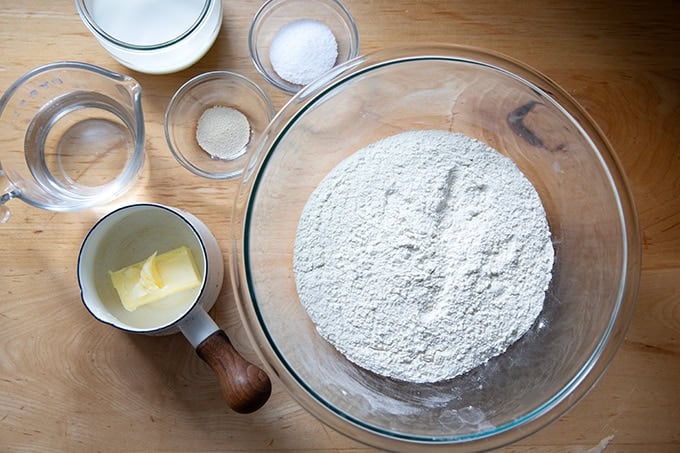
Ideally, you will measure everything with a scale. I love my dual-platform Ooni scale for its precision, especially when measuring smaller quantities of salt and yeast.

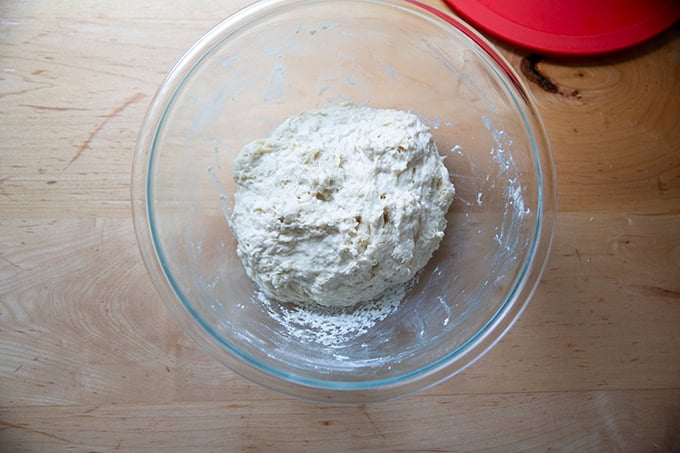
Place the flour, salt, and yeast in a bowl:
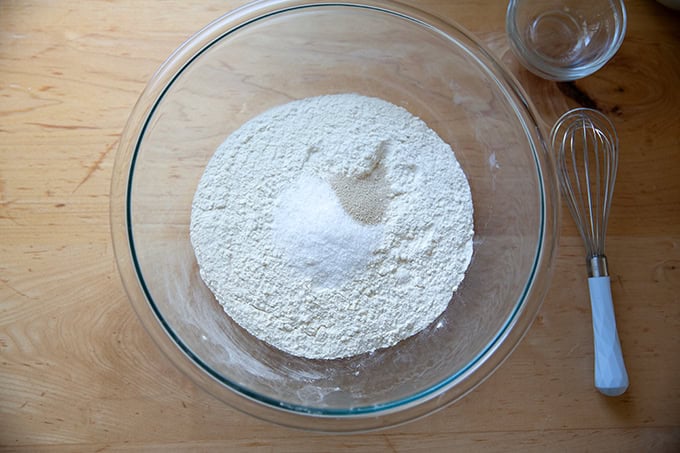
Whisk until combined:
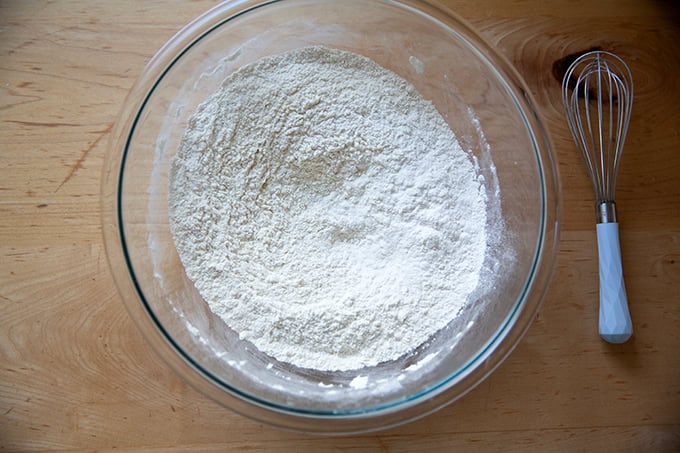
Add the water, milk, and melted butter:
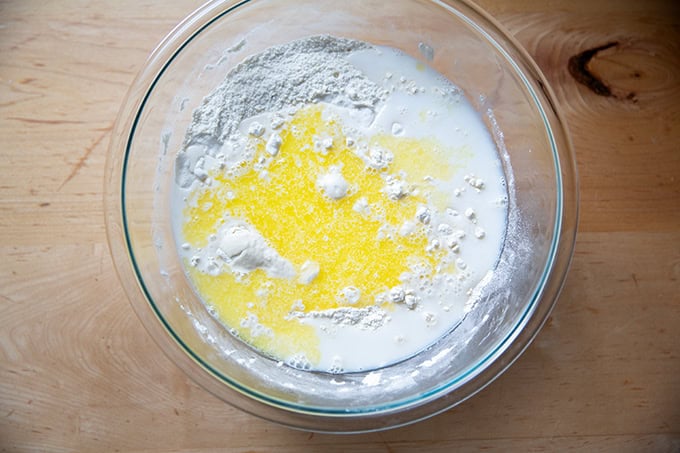
Stir with a spatula until you have a shaggy, sticky dough ball — this is an 80% hydration dough and the dough will feel sticky upon mixing… this is right!
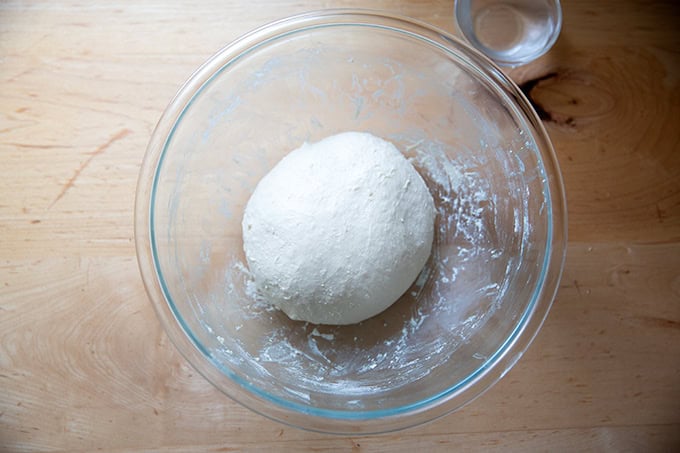
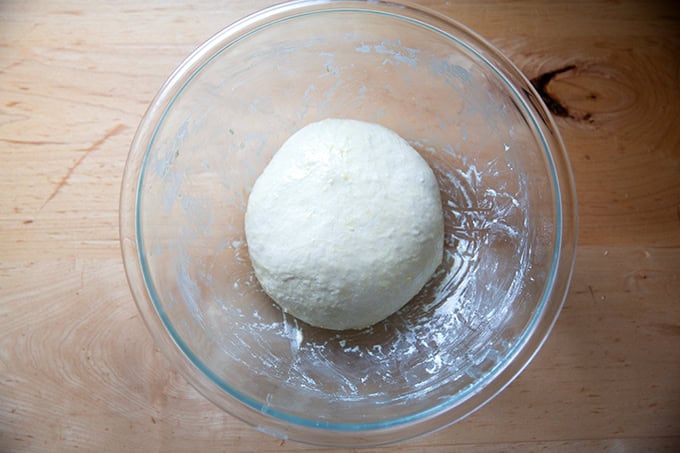
Cover the bowl and let rest for at least 30 minutes or as long as an hour; then use a wet hand to stretch and fold the dough into a cohesive mass. Here’s a quick video:
After the stretches and folds, the dough will transform from being sticky and shaggy to smooth and cohesive:
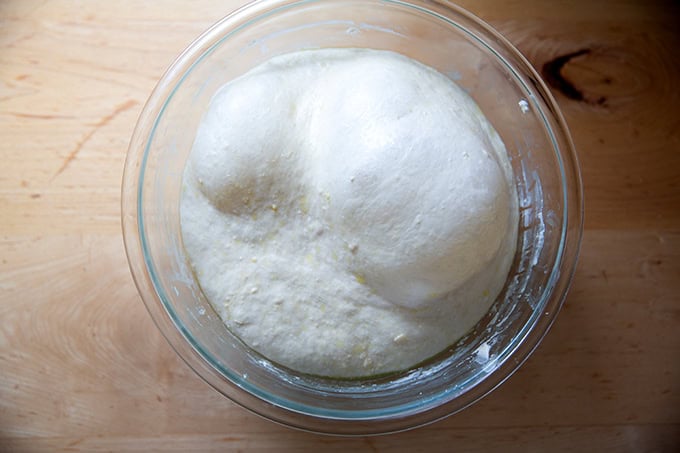
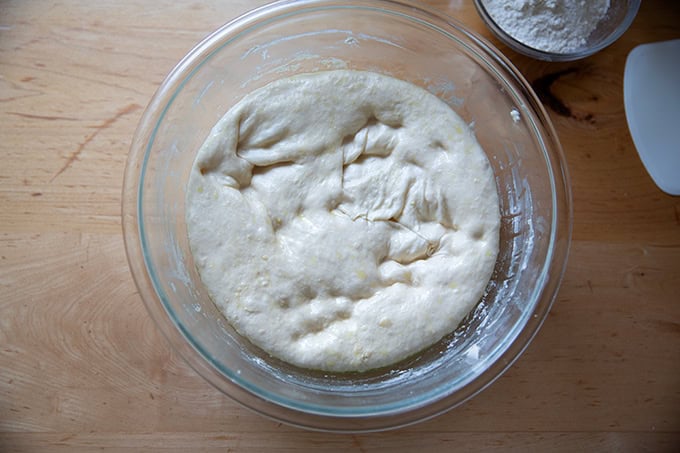
Drizzle lightly with olive oil, cover the bowl, and let rise …
… until the dough doubles in volume:
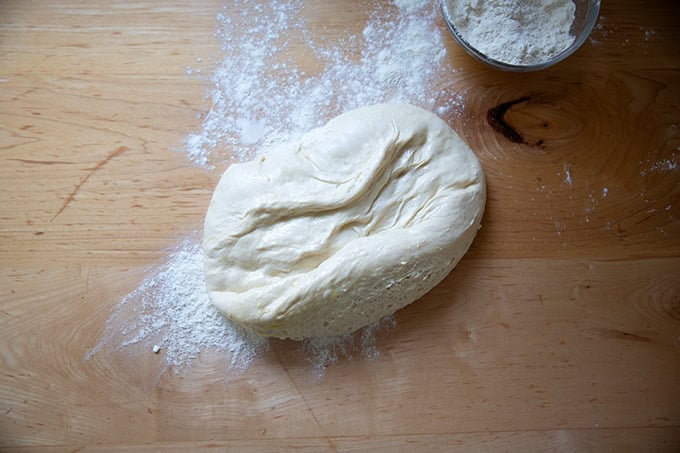
Deflate it:
Then turn the dough out onto a floured work surface:
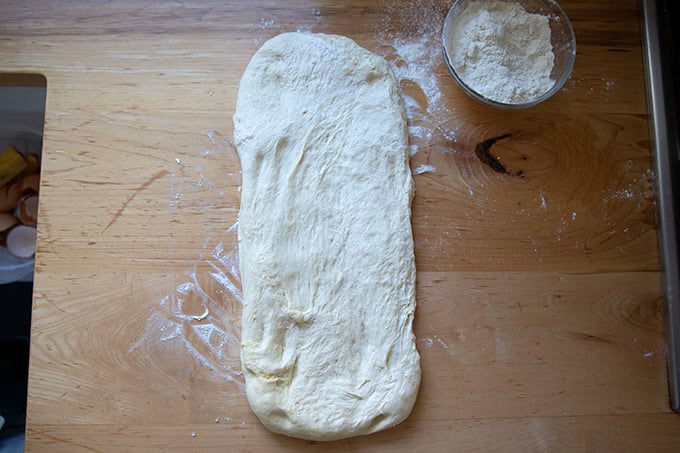
Pat the dough into a rectangle roughly 8 inches wide — the length isn’t as important, but keeping the width to 8 inches will allow the coiled dough to fit into its loaf pan.
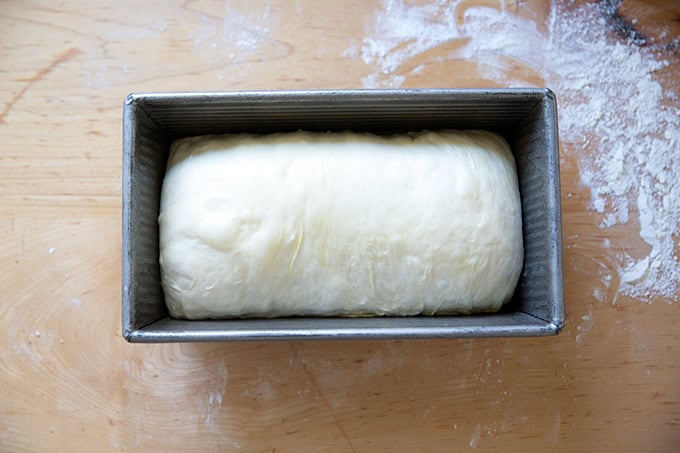
Coil up the dough:
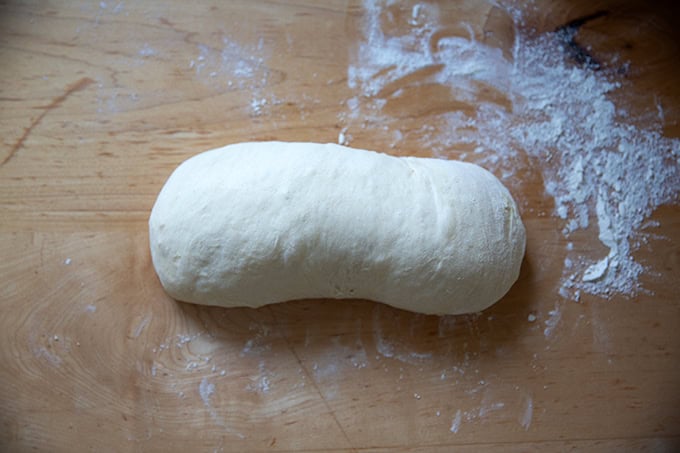
Here’s some video guidance:
Transfer the coil to a greased loaf pan:
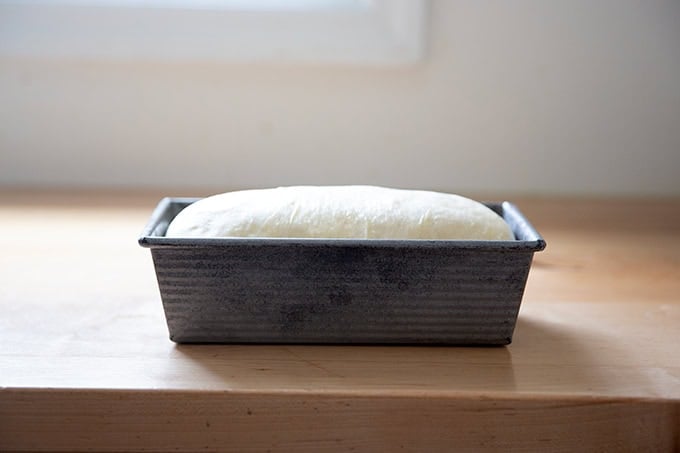
Let the dough rise until it crowns the rim of the pan:
Then bake at 375ºF for 45 minutes:
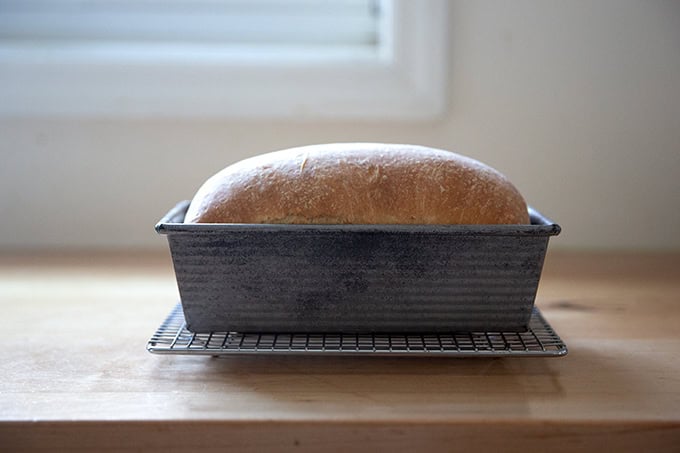
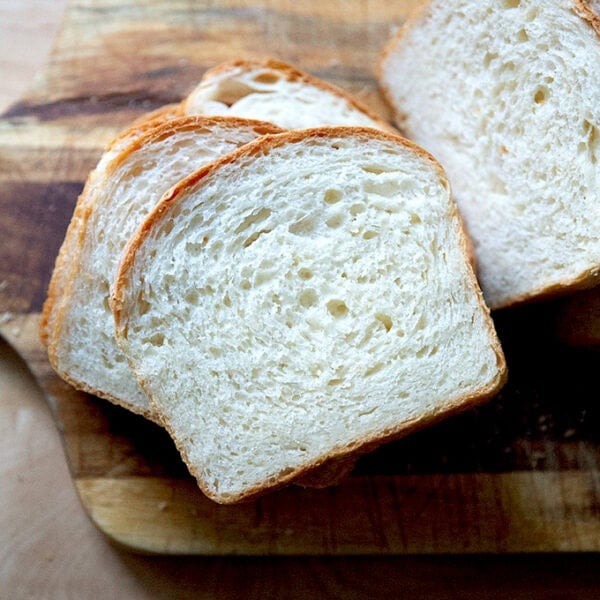
Turn out onto a cooling rack and let cool completely before slicing:
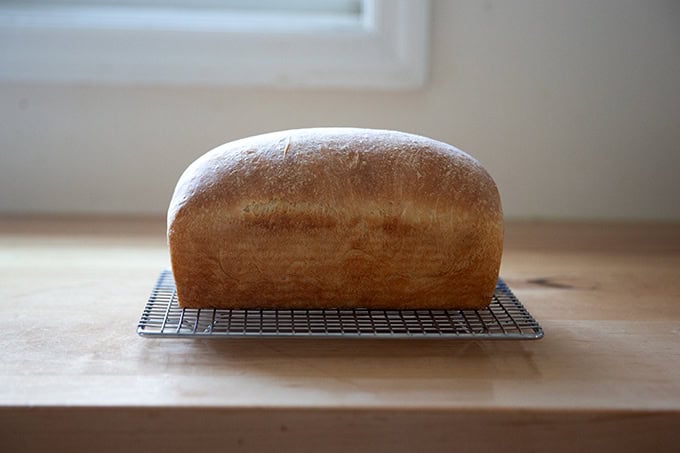
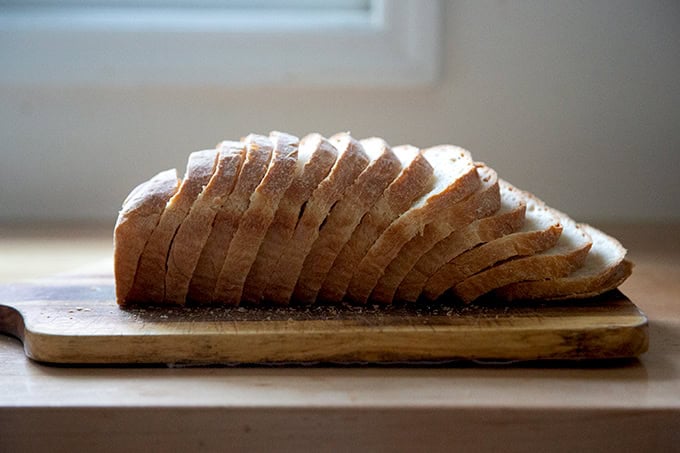
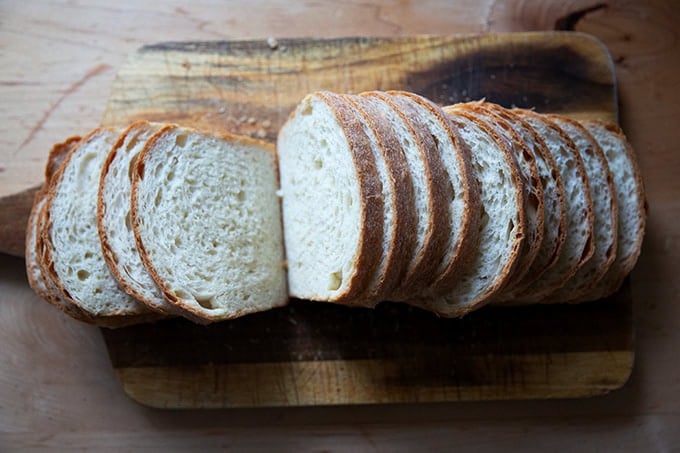

Such a treat to have on hand:
Simple Soft Sandwich Bread (6-Ingredients, No-Knead)
- Total Time: 5 to 24 hours
- Yield: 1 loaf 1x
Description
Made with only 6 ingredients, this simple, no-knead soft sandwich bread is such a treat to have on hand for sandwiches of all kinds. No mixer is required — if you can whisk and stir, you can make this bread.
Notes:
- As always, for best results use a scale to measure. I love this Ooni scale for its precision, especially when measuring smaller quantities of salt and yeast.
- Pan: A 9×5-inch loaf pan is ideal for this recipe. I love this USA pan.
- Salt: The rule of thumb with bread is that the weight of the salt should be 2 to 3% the weight of the flour. For this recipe that is 10 to 15 grams. I always use 15 grams of salt, and I do not find the bread to be too salty, but, as you know, I have a high salt tolerance. Use an amount appropriate to your tastes and preferences. Finally, I always use Diamond Crystal kosher salt, but you can use fine sea salt or whatever salt you like.
- Flour: I conducted most of my experiments with King Arthur Bread Flour. I also have made many loaves using 100% Petra 0102 as well as 100% Cairnspring Mills Glacier Peak bread flour.
- Yeast: SAF instant yeast is my preference. If you are using active dry yeast, sprinkle it over the water and let it bloom for 15 minutes before proceeding.
Timing:
- You can make this bread employing a long slow rise if you use 2 grams (1/2 teaspoon) of instant yeast or you can make it quickly if you use 8 grams (2 teaspoons).
- If you use 2 grams, the first rise will take 8 to 10 hours — this is what I usually do. I like to mix the dough at night, let it rise until I’m ready to tend to it in the morning; then proceed. The second rise will take 2 to 3 hours: wait until the dough crowns the rim of the pan before proceeding.
- If you use 8 grams, the first rise will take 2 to 3 hours and the second rise will take 1 to 2 hours.
Ingredients
Please read all notes above before proceeding:
- 500 grams (about 4 cups) bread flour, plus more for dusting
- 2 to 8 grams (1/2 teaspoon to 2 teaspoons) instant yeast
- 10 to 15 grams salt
- 200 grams (about 3/4 cup + 1 tablespoon) cold or room temperature water
- 200 grams (about 3/4 cup + 1 tablespoon) milk, 2% or whole
- 57 grams (4 tablespoons) melted butter, salted or unsalted
- softened butter or olive oil for greasing
Instructions
- Mix the dough: In a large bowl, whisk together the flour, salt, and yeast. Add the water, milk, and melted butter. Using a spatula, stir until you have a sticky, shaggy dough ball — this is an 80% hydration dough, and the dough will feel sticky upon mixing… this is right! Cover the bowl and let the dough rest for at least 30 minutes or as long as an hour.
- Stretch and fold: Fill a small bowl with water. Using a wet hand, stretch and fold the dough by grabbing an edge and pulling it up and towards the center. Repeat this stretching and folding process, moving your hand around the edge of the dough with every set of stretches and folds. As you stretch and fold, you should feel the dough transform from being sticky and shaggy to smooth and cohesive. (Note: you also will likely feel little bits of the butter solidifying — this is OK.) See the video above for guidance.
- Let it rise: Drizzle the dough lightly with olive oil and rub to coat. Cover the bowl and let the dough rise at room temperature until it has doubled in volume: depending on how much yeast you are using, this could take as long as 10 hours (if using 2 grams of yeast) or 2 to 3 hours (if using 8 grams of yeast).
- Prepare a loaf pan: grease a 9×5-inch loaf pan with softened butter or brush with olive oil — if you are at all worried about your dough sticking to your pan, grease it with butter. If you are using a USA pan or nonstick pan, you can get away with using olive oil alone. Brush the pan with 2 teaspoons of olive oil. For ease, I have been using olive oil alone, and it works beautifully.
- Coil up your dough: Deflate the dough using your hand or a flexible bench scraper, then turn the dough out onto a lightly floured work surface. Pat it into a rectangle roughly 8 by 16 inches (Note: the length isn’t as important as the width: don’t go much wider than 8 inches or you will have to squish it into your loaf pan). Starting at the small end, roll the dough into a tight coil. Transfer it to your prepared pan. Pour 1 teaspoon of olive oil over the surface and rub to coat.
- Final rise: Let the dough rise until it crowns the rim of your pan: this can take as long as 3 hours (if using 2 grams of yeast) or 1 hour (if using 8 grams). When your dough begins approaching the rim, preheat your oven to 375ºF.
- Bake it: Bake for 45 minutes.
- Turn out onto a cooling rack and let cool completely (if you have the patience) before slicing — it is much easier to slice the bread into thin, uniform slices when the bread has cooled completely.
- Store the bread in an airtight bag or vessel at room temperature for 3 to 4 days or freeze for up to 6 months.
- Prep Time: 20 minutes
- Cook Time: 45 minutes
- Category: Bread
- Method: no-knead
- Cuisine: American
This post may contain affiliate links. Please read my disclosure policy.


331 Comments on “Simple Soft Sandwich Bread (6-Ingredients, No-Knead)”
Have you ever used a cast iron loaf pan for this? I don’t want to compromise the end result if you think it won’t work. Thanks!
I have not, but I think it will work great! Just be sure to butter it well.
Hello! I tried your recipe a few days ago and added jalapeños and cheddar. Fantastic! My loaf did “fall” after it went into the pre heated oven. Delicious none the less. But could I possibly make a round loaf in my cast iron instead?
Hi Liz, You could definitely try making a round loaf in your cast iron skillet. One thing to keep in mind is that this recipe has milk and butter in it so it will brown faster/potentially burn if you are using a preheated cast iron pot at a higher temperature. You could try adding cheddar and jalapenos to this recipe instead: Jim Lahey’s No-Knead Bread
Insanely delicious sandwich bread. It’s so easy and fun to make. I started making two loaves each week and I’m so thankful to have found it! Thank you for sharing!!
Great to hear, Kristin! Thanks so much for writing and sharing this 🙂
Hello! A couple times when making this recipe my dough did not double in size when rising the 10 hours. I kept going though and it just ended up being a shorter loaf because it didn’t reach the edges of the pan during the second rise. It still tasted great and makes perfect bread to make toast with in the mornings. I weigh all of my ingredients and would really like it to consistently rise and be as tall as it’s supposed to get though. Maybe my dough was too dry by mistake? Located in the Midwest.
Hi Becca! What kind of flour are you using? And what kind of yeast?
Can you use non-dairy milk in this recipe?
Yes!
This bread is delicious! So good for sandwiches, toast, everything. I tried sourdough baking last year but gave it up after finding this recipe. It is so easy and so good! I’m trying the Brioche hot dog buns today. Thank you so much for this wonderful recipe!
So nice to read this, Lisa! Thanks so much for writing and sharing your experience. Hope you love the hot dog buns, too 🙂
A forever keeper! Forever grateful!! Best simple bread ever!
Comes out perfect every time
Great to hear, Allie! Thanks for writing.
This was an easy bread to make and very tasty. I’ve tried the no knead bread and that’s also tasty but the crust gets really hard by the time I’m close to the end. Decided to give this one a try and really liked it a lot! I don’t have a full loaf pan so I used 2 smaller (fat daddio’s) loaf pans and it worked out really well. I oiled one with what I thought was too much oil and the other with what I thought was sufficient and turns out, the one I over oiled came out beautifully out of the pan and the other was kind of a mess but still very tasty. Will over oil both pans next time.
Great to hear, Lily! Thanks so much for writing and sharing your notes.
I have a question, I usually only have half and half at home, would that work instead of milk?
Yes, that should work just fine!
The bread is delicious and great texture. I had 1% milk so I substituted about 1/4 cup buttermilk. The bread has a light brown color like whole wheat bread which I don’t understand as the flour is white. No problem, just curious as to why. Thanks for the recipe and detailed instructions.
What kind of flour (brand included) did you use? Great to hear this was a success. The butter and buttermilk will promote some browning in the bread.
Farm 2 Flour Organic Bread Flour
Nice. I just looked up that flour… it’s stone-milled, which means some of the bran and germ are still present in it, which will contribute to the brown color (as well as great flavor, aroma, and texture!)
At last: Success! I’m not a natural baker and had all but given up on baking a functional sandwich bread. This is leaps and bounds better than any other! The dough was still incredibly wet and sticky so I added a lot of flour in the stretch and fold step (I weighed digitally). It was still loose and sticky when it went into the pan, where it didn’t rise completely, so I was discouraged but then giddily surprised once it baked up so well. My question: Could I use canola or another neutral oil in place of the olive oil? I love olive bread but would prefer a more neutral flavor for sandwich bread. Either way: THANK YOU for this recipe. It has given me the confidence to try my hand at your sourdough version next.
Great to read all of this! Regarding having to add more flour, it’s likely just due to your environment (perhaps more humid) and the flour you are using (perhaps less absorbent), so nice work adding flour as needed until it resembled the dough in the photos. You can definitely use a neutral oil. Good luck with your future bread-baking endeavors. Thanks for writing 🙂
Hello! Would it be fine to bake this in a glass loaf pan? I want to ask before I try the recipe! But I love your sourdough recipe so I trust this to be great too!
Yes, go for it! And so nice to hear… thank you 🙂
Do you not warm the milk and water to make the yeast bloom?
Not necessary!
This recipe is so good, I’ve always struggled with no knead bread recipes but this turned out great! Thank you!
Great to hear, Christina! Thanks so much for writing and sharing this 🙂
Kia ora, from New Zealand! Love this recipe – so easy, so delicious, great all-around. Wondering if you or anyone has experimented with using some or all whole wheat flour? Thanks!
Great to hear 🙂
If you want to experiment with ww flour, start small: 25-50% ww flour and see how you like it. The bread won’t be as light/lofty but it will still be delicious. You can adjust the percentage with more or less ww flour next time around depending on how you like the result.