 →
→ Simple Soft Sandwich Bread (6-Ingredients, No-Knead)
This post may contain affiliate links. Please read my disclosure policy.
Made with only 6 ingredients, this simple, no-knead soft sandwich bread is such a treat to have on hand for sandwiches of all kinds. No mixer is required — if you can whisk and stir, you can make this bread.

Several years ago, I published a recipe here for a simple sourdough sandwich bread recipe, and I have long wanted to add a yeasted version to my collection of bread recipes … here it is!
It’s a no-knead, 6-ingredient recipe that takes about 5 minutes to stir together. Thanks especially to my oldest daughter, who brings a turkey sandwich to school for lunch nearly every day and who has no reservations sharing her opinions, the recipe has gone through many iterations these past few months.
It started with the basic bread ingredients: flour, water, salt, and yeast. In an effort to make it softer for sandwiches, I added some olive oil. When my daughter told me the bread didn’t hold up very well — that it began breaking down by lunch time — I began researching. First I added honey, then I added milk, then I took away the honey, and finally I swapped in melted butter for the olive oil.
The loaves made with a mix of water and milk, butter and no olive oil, and no sweetener at all tasted the most like the sandwich bread I was after: soft but sturdy and well seasoned but not sweet.
Depending on your timeline, you can use more or less yeast — I’ve been in the habit of using 1/2 teaspoon (2 grams) and employing a long, slow overnight rise, but if you need to speed up your timeline, there are notes in the recipe on how to do so.
As always, I am here if you have any questions. Hope you love it 🍞🍞
How to Make Soft-Sandwich Bread, Step by Step
First gather your ingredients: bread flour, salt, instant yeast, water, milk, and butter. (See notes in the recipe for using other flours.)
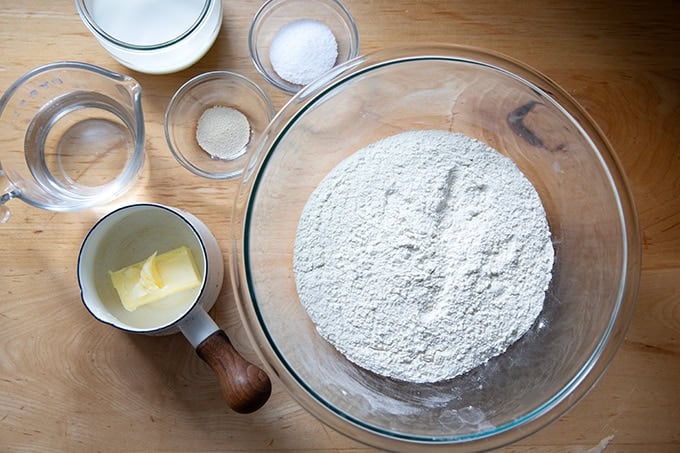
Ideally, you will measure everything with a scale. I love my dual-platform Ooni scale for its precision, especially when measuring smaller quantities of salt and yeast.

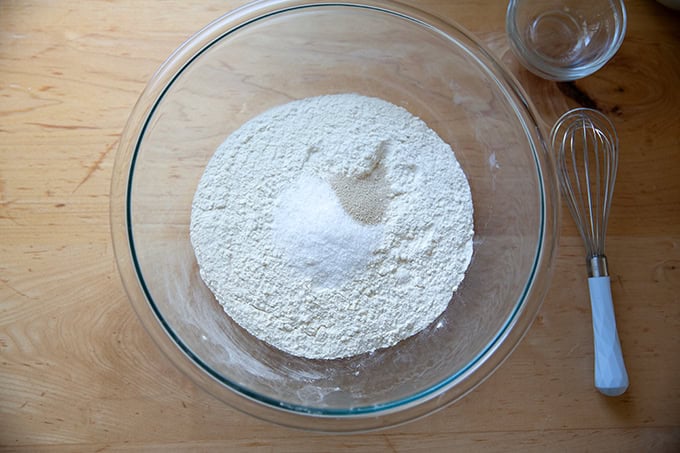
Place the flour, salt, and yeast in a bowl:
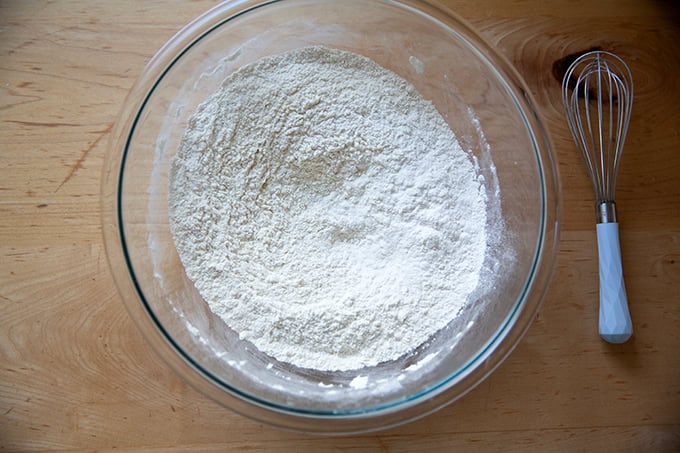
Whisk until combined:
Add the water, milk, and melted butter:
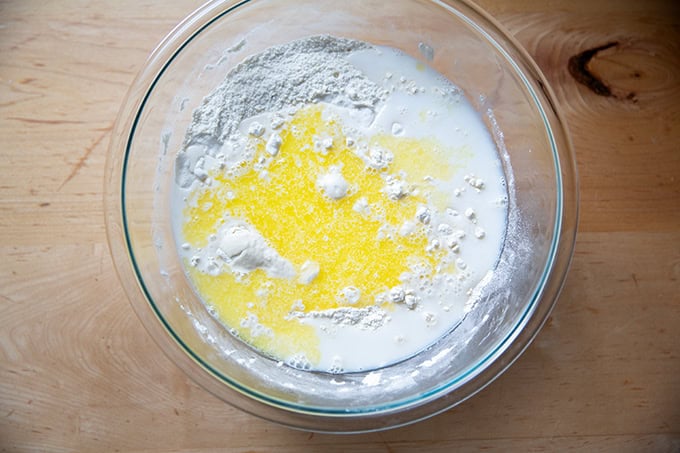
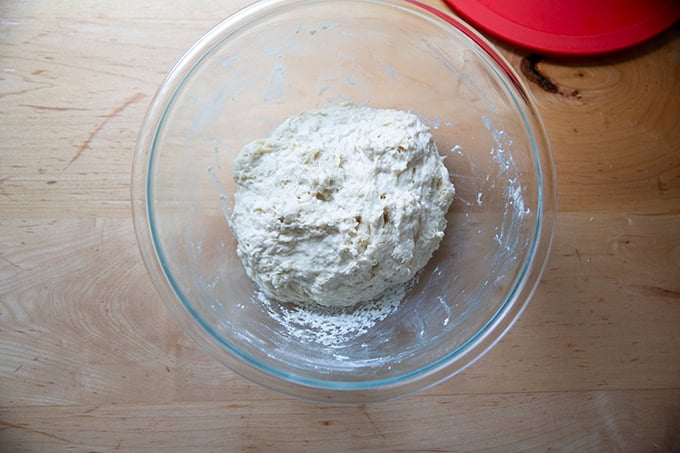
Stir with a spatula until you have a shaggy, sticky dough ball — this is an 80% hydration dough and the dough will feel sticky upon mixing… this is right!
Cover the bowl and let rest for at least 30 minutes or as long as an hour; then use a wet hand to stretch and fold the dough into a cohesive mass. Here’s a quick video:
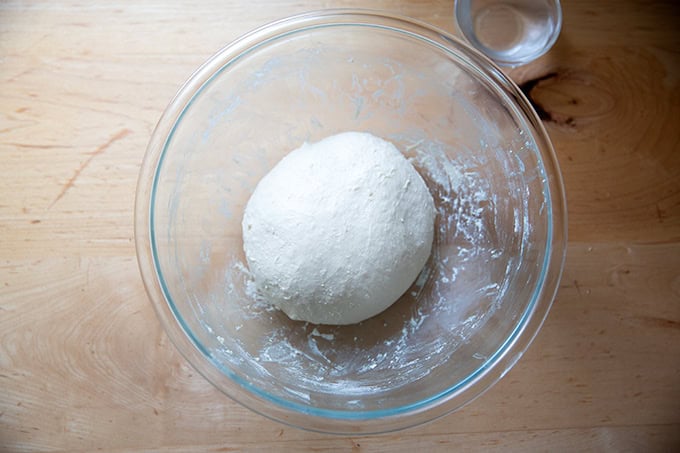
After the stretches and folds, the dough will transform from being sticky and shaggy to smooth and cohesive:
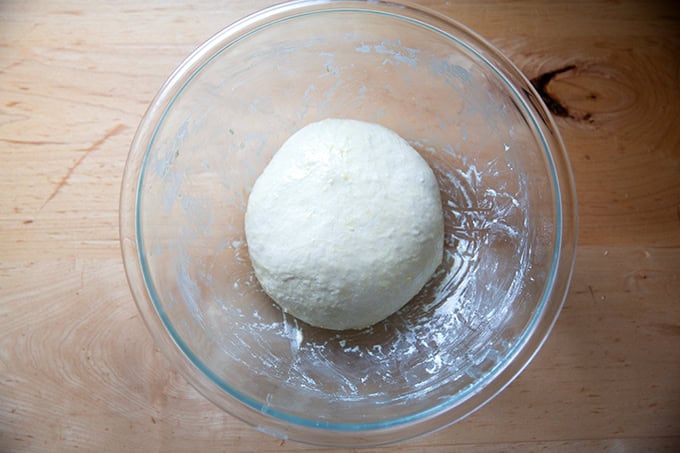
Drizzle lightly with olive oil, cover the bowl, and let rise …
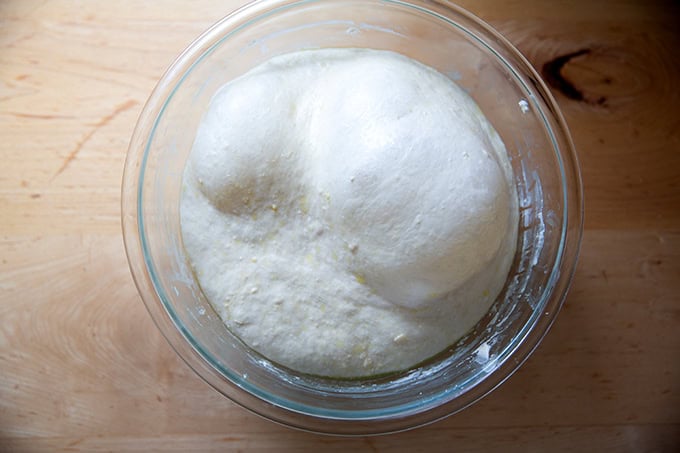
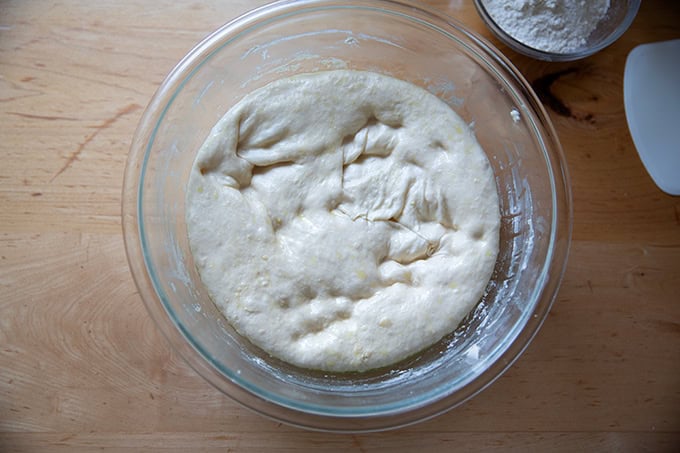
… until the dough doubles in volume:
Deflate it:
Then turn the dough out onto a floured work surface:
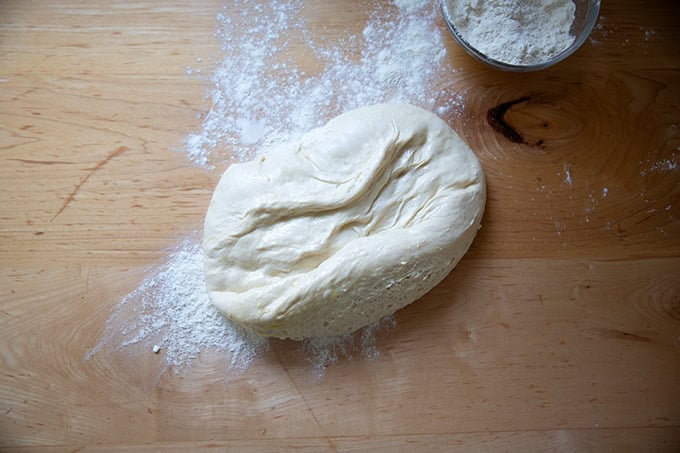
Pat the dough into a rectangle roughly 8 inches wide — the length isn’t as important, but keeping the width to 8 inches will allow the coiled dough to fit into its loaf pan.
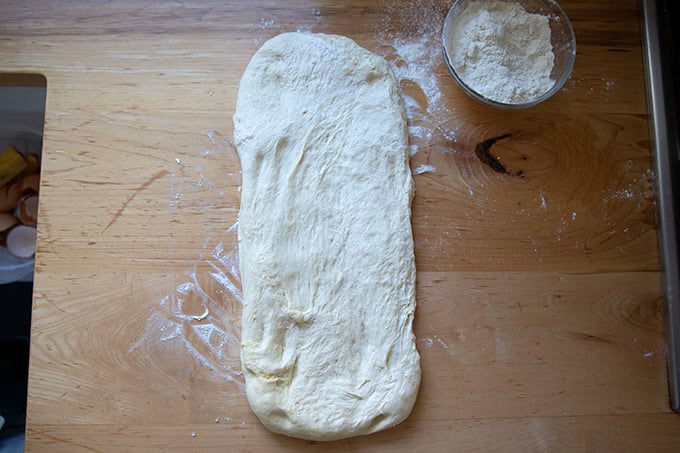
Coil up the dough:
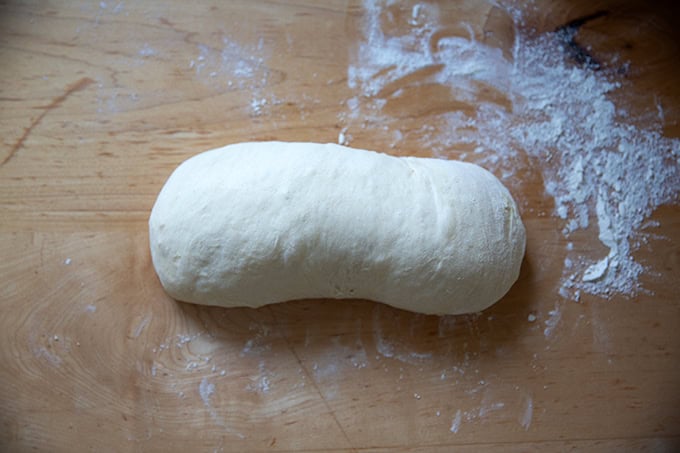
Here’s some video guidance:
Transfer the coil to a greased loaf pan:
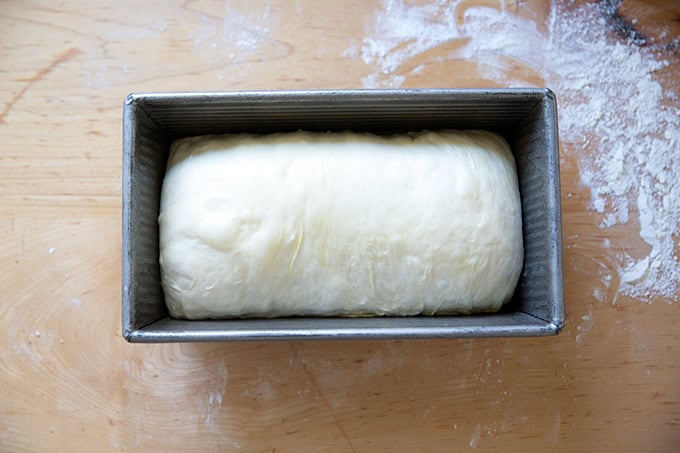
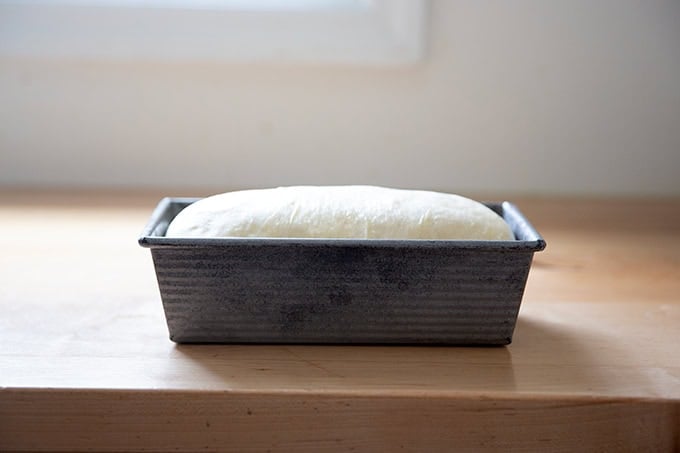
Let the dough rise until it crowns the rim of the pan:
Then bake at 375ºF for 45 minutes:
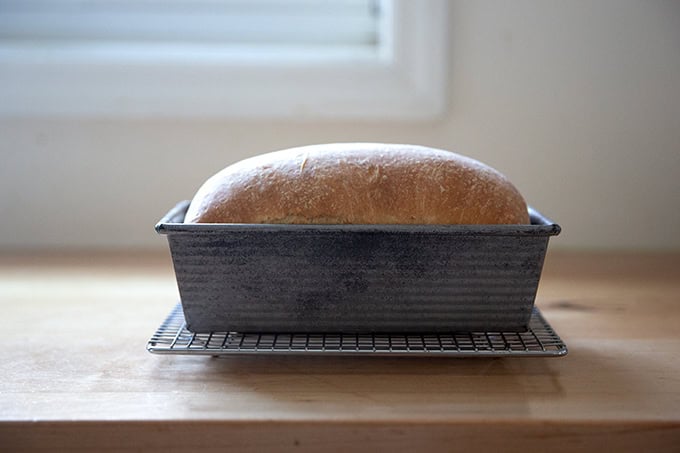
Turn out onto a cooling rack and let cool completely before slicing:
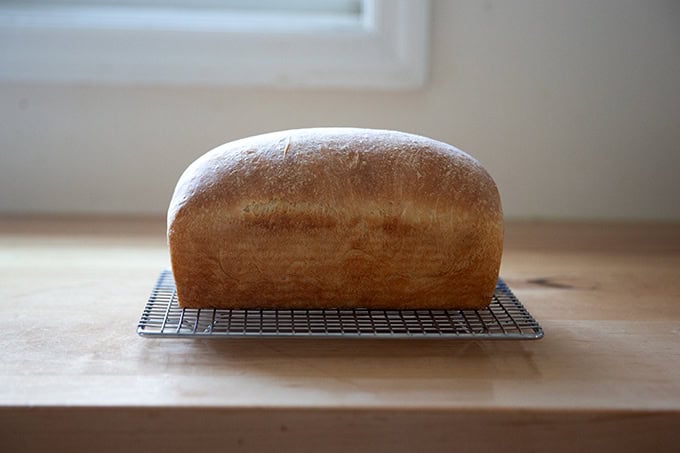
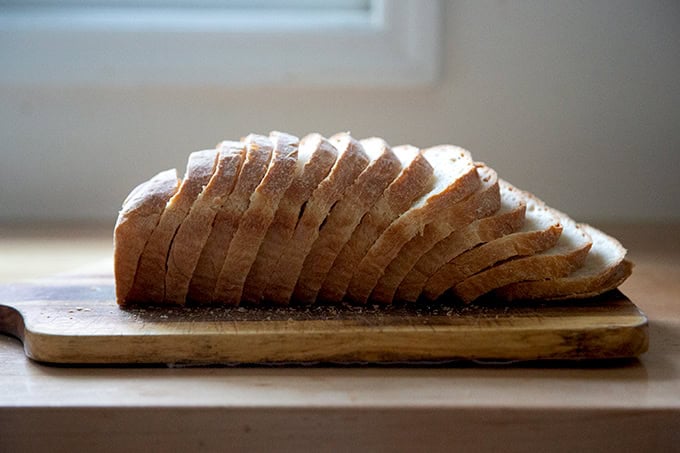

Such a treat to have on hand:
Simple Soft Sandwich Bread (6-Ingredients, No-Knead)
- Total Time: 5 to 24 hours
- Yield: 1 loaf 1x
Description
Made with only 6 ingredients, this simple, no-knead soft sandwich bread is such a treat to have on hand for sandwiches of all kinds. No mixer is required — if you can whisk and stir, you can make this bread.
Notes:
- As always, for best results use a scale to measure. I love this Ooni scale for its precision, especially when measuring smaller quantities of salt and yeast.
- Pan: A 9×5-inch loaf pan is ideal for this recipe. I love this USA pan.
- Salt: The rule of thumb with bread is that the weight of the salt should be 2 to 3% the weight of the flour. For this recipe that is 10 to 15 grams. I always use 15 grams of salt, and I do not find the bread to be too salty, but, as you know, I have a high salt tolerance. Use an amount appropriate to your tastes and preferences. Finally, I always use Diamond Crystal kosher salt, but you can use fine sea salt or whatever salt you like.
- Flour: I conducted most of my experiments with King Arthur Bread Flour. I also have made many loaves using 100% Petra 0102 as well as 100% Cairnspring Mills Glacier Peak bread flour.
- Yeast: SAF instant yeast is my preference. If you are using active dry yeast, sprinkle it over the water and let it bloom for 15 minutes before proceeding.
Timing:
- You can make this bread employing a long slow rise if you use 2 grams (1/2 teaspoon) of instant yeast or you can make it quickly if you use 8 grams (2 teaspoons).
- If you use 2 grams, the first rise will take 8 to 10 hours — this is what I usually do. I like to mix the dough at night, let it rise until I’m ready to tend to it in the morning; then proceed. The second rise will take 2 to 3 hours: wait until the dough crowns the rim of the pan before proceeding.
- If you use 8 grams, the first rise will take 2 to 3 hours and the second rise will take 1 to 2 hours.
Ingredients
Please read all notes above before proceeding:
- 500 grams (about 4 cups) bread flour, plus more for dusting
- 2 to 8 grams (1/2 teaspoon to 2 teaspoons) instant yeast
- 10 to 15 grams salt
- 200 grams (about 3/4 cup + 1 tablespoon) cold or room temperature water
- 200 grams (about 3/4 cup + 1 tablespoon) milk, 2% or whole
- 57 grams (4 tablespoons) melted butter, salted or unsalted
- softened butter or olive oil for greasing
Instructions
- Mix the dough: In a large bowl, whisk together the flour, salt, and yeast. Add the water, milk, and melted butter. Using a spatula, stir until you have a sticky, shaggy dough ball — this is an 80% hydration dough, and the dough will feel sticky upon mixing… this is right! Cover the bowl and let the dough rest for at least 30 minutes or as long as an hour.
- Stretch and fold: Fill a small bowl with water. Using a wet hand, stretch and fold the dough by grabbing an edge and pulling it up and towards the center. Repeat this stretching and folding process, moving your hand around the edge of the dough with every set of stretches and folds. As you stretch and fold, you should feel the dough transform from being sticky and shaggy to smooth and cohesive. (Note: you also will likely feel little bits of the butter solidifying — this is OK.) See the video above for guidance.
- Let it rise: Drizzle the dough lightly with olive oil and rub to coat. Cover the bowl and let the dough rise at room temperature until it has doubled in volume: depending on how much yeast you are using, this could take as long as 10 hours (if using 2 grams of yeast) or 2 to 3 hours (if using 8 grams of yeast).
- Prepare a loaf pan: grease a 9×5-inch loaf pan with softened butter or brush with olive oil — if you are at all worried about your dough sticking to your pan, grease it with butter. If you are using a USA pan or nonstick pan, you can get away with using olive oil alone. Brush the pan with 2 teaspoons of olive oil. For ease, I have been using olive oil alone, and it works beautifully.
- Coil up your dough: Deflate the dough using your hand or a flexible bench scraper, then turn the dough out onto a lightly floured work surface. Pat it into a rectangle roughly 8 by 16 inches (Note: the length isn’t as important as the width: don’t go much wider than 8 inches or you will have to squish it into your loaf pan). Starting at the small end, roll the dough into a tight coil. Transfer it to your prepared pan. Pour 1 teaspoon of olive oil over the surface and rub to coat.
- Final rise: Let the dough rise until it crowns the rim of your pan: this can take as long as 3 hours (if using 2 grams of yeast) or 1 hour (if using 8 grams). When your dough begins approaching the rim, preheat your oven to 375ºF.
- Bake it: Bake for 45 minutes.
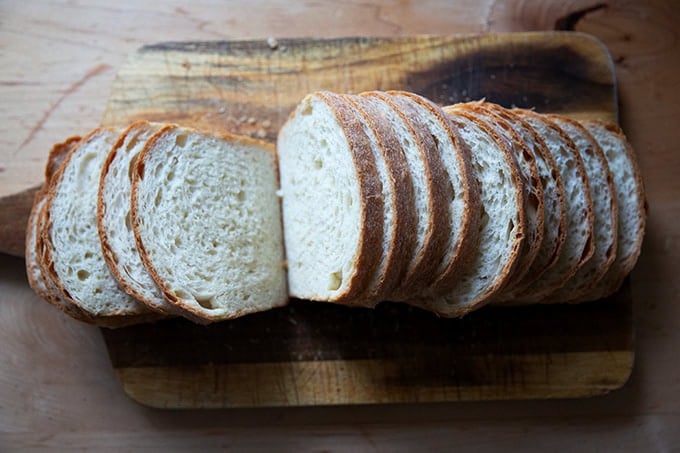
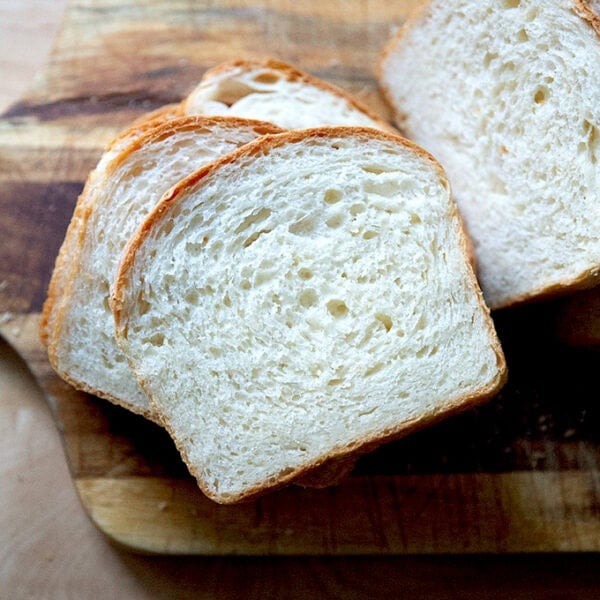
- Turn out onto a cooling rack and let cool completely (if you have the patience) before slicing — it is much easier to slice the bread into thin, uniform slices when the bread has cooled completely.
- Store the bread in an airtight bag or vessel at room temperature for 3 to 4 days or freeze for up to 6 months.
- Prep Time: 20 minutes
- Cook Time: 45 minutes
- Category: Bread
- Method: no-knead
- Cuisine: American
This post may contain affiliate links. Please read my disclosure policy.


331 Comments on “Simple Soft Sandwich Bread (6-Ingredients, No-Knead)”
Wow, this was fantastic! Probably the easiest bread I’ve ever made. The crust is golden & just the right thickness & the inside has a lovely flavour from the butter & the perfect amount of salt. I’m looking forward to trying it as toast tomorrow, if there’s any left! Thank you for a great recipe.
Great to hear, Anna! Thanks for writing and sharing your notes 🙂
My dough was VERY sticky for the coiling process. I noticed when I went to deflate it and it stuck to my whole hand. Weighed and measured all ingredients accurately. Was I just supposed to add ton more flour at that point to dry it out? Not a good coil… We’ll see how it turns out!
Nope! Not supposed to add more a ton more flour at this step. How did the stretch and folds go for you? Were you able to feel the dough transform from being shaggy to being smooth, strong, and elastic?
Finally, do you live in a humid environment?
I am hopeful that it still will turn out well for you!
The stretch and fold was also pretty sticky. I’m in New England, not typically humid though today was a warmer day. The bread is out of the oven! It has a little hard crust and the inside is super moist! Not sure it’s resembling sandwich bread, more like a loaf, but it’s TASTY! That’s what counts 🙂
Thanks for the recipe Ali. I am new to bread making. When I saw the headline with no knead, I was super excited n try this recipe today. I measured all the ingredients as mentioned but my dough was sticky even after doing the stretch n fold for more that 30 mins. I just left it to rest . I am not sure how it’s going to turn out. Could you please help me to understand the pbm or it’s normal to have a sticky dough. I am placed out in UK. Thanks again.
Hi Vanathi! I think the issue is your flour. Having troubleshooted with many people from the UK over the years, I have learned that certain UK flours just don’t absorb liquid the way commercial American flours do. So, I think next time around, you’ll have better results if you hold back some water from the start. Try holding back 75 grams of water and see if that helps.
I’ve tried at least three other sandwich bread recipes, and I like this one the best by far.
So nice to hear this, Robina! Thanks so much for writing 🙂
I am totally new to bread baking. I hav a glass loaf pan. Can I use that? Do I have to make any alterations? Thanks!
Hi Jessica,
Yes, you can definitely use a glass loaf pan. Glass may not brown quite as well as metal, but if that doesn’t bother you, then yes, using glass is just fine as long as it is the same/similar in size.
Absolutely love this recipe ! The bread was so good and incredibly easy to make. I doubled the recipe and made two loaves. I’ll definitely be making this every week! Thanks so much for this amazing recipe!
Great to hear! Thanks so much for writing and sharing this 🙂
It came out so well that I used it as a base for a cinnamon raisin loaf. First I put 125g of raisins into a 2 cup pyrex measuring jug and filled it up with Earl Grey tea. When it was cold I strained the liquid into another jug and added enough water to make 200g as in your recipe. To the dry mix I added 1/3 cup of Carnation malted milk powder and 1tbs of cinnamon. I stirred the raisins into the dry mix making sure they were well coated. Everything else remained the same. It was a was a wonderful loaf, much better than the “leading brand”!
YUM! I have been meaning to do this. Thanks so much for writing and sharing all of these notes. I love that you plumped the raisins in Earl Grey Tea!!
Hi! Is there anything I should be doing differently if I’m using coconut milk? The dough seems like it has too much hydration. Thanks!
Hi! I’m too late here, but next time you could sprinkle in more flour so that it resembles the dough in the video/photos. Did you use a scale to measure? And what type of coconut milk are you using?
I did use the scale to measure. I used the Thai Kitchen canned coconut milk.
Hi! Great to hear re scale. Do you live in a humid environment? It’s possible you may need to use less water next time around given your environment and the flour you are using.
I just made your Walter Sands bread and it was amazingly easy and delicious. Could you compare that recipe and this one in terms of taste/texture? I realize the Walter Sands recipe gets kneaded, but otherwise how are the finished breads same and different from each other? Thanks!
Hi Michele! I think they are similar… I haven’t made the Walter Sands one in ages because this one is just easier for me — I know it by heart, and I love that it requires no kneading.
Thanks for responding. I’m going to give this one a try today!
I am having trouble with this recipe. The dough seems dry after the first step. I am using the amount of water and milk you suggested. I don’t have scale to measure the flour so I did 4 cups. Also do you let it rest 30 minutes in the fridge or out the fridge?
Hi John! Sorry to hear this. How did it turn out? I let the dough rest out of the fridge.
My guess is that you are just using too much flour relative to the wet ingredients… that is easy to do when using cups. Next time around, use a lighter hand when measuring the flour.
I made it a second time and it turned out great. I believe my mistake was letting it rest in the fridge. Thank you for the help!
Great to hear, John! Thanks for circling back 🙂
Hi, would I be able to use almond milk and vegan butter for this recipe? Would like to make a vegan version for my allergy boys. Thank you!
Yes, absolutely, go for it 🙂
What modifications do I need to make if I want to use whole wheat flour, or half whole wheat? I often add 1 Tbsp gluten per cup of WW flour. Does that seem right? Do quantities remain the same? I have made this recipe before using sour dough discard, and it was delicious- so soft!
Hi Holly! If you use half whole wheat flour, I don’t think you’ll need to change the recipe, but if when you mix the dough it feels too dry and stiff, add more water little by little until it resembles the texture of the dough in the photos. My guess is that if you use 100% ww flour, you’ll need to add a little more water. You could start with 25 grams. I have never used vital wheat gluten so I can’t speak on how that will work here. Good luck!
Thanks! I have been making it with half WW flour and the dough did seem a little dry but the bread turned out fine (I also added 1Tbsp of gluten). I will try adding a bit more water next time too. I have also been experimenting with adding flax seeds, and have also made your 3 seed bread with half WW flour. I was going to bake bread today, but our power is out!
Great to hear, Holly. Thanks for writing and sharing your notes 🙂
Hi Holly,
I made this bread yesterday and to my surprise it turned out very yummy. I was also curious about the whole wheat prospects so thanks for asking that question. I noticed you talked about using sourdough discard, would you be so kind as to tell me your method / proportions.
Thanks so much
DJ
Thanks for your reply Holly. How much sourdough discard do you add to the recipe? And do you take anything out of the original recipe or is the discard simply an addition.
I mostly bake sourdough bread so this is my first time using yeast based baking.
Thanks again and I hope your power is back on.
DJ
I used the recipe that Alexandra posted below. I can also highly recommend her sourdough discard waffles
Hi DJ,
I have a sourdough discard toasting bread recipe you could reference: Simple Sourdough Discard Toasting Bread
Oh my gosh!!! Ladies thank you so much. Seriously I can’t stop eating this bread. Can’t wait to try it with my discard. Thanks again!🩷
Great to hear 🙂
Hello Ali. I see that this recipe is different from the Soft Sandwich Bread recipe in your book Bread Toast Crumbs. Can you explain the differences and which bread you prefer. Thank you.
Hi! And thank you for buying my book 🙂
This one has a texture that resembles more of a classic sandwich bread. The BTC version is really just the peasant bread recipe with the addition of some olive oil, which definitely promotes a soft crumb and definitely can be used for sandwiches.
This recipe has the addition of milk and melted butter and it omits the sugar. The milk and butter, again, give it more of that classic sandwich bread texture, and they also provide some stability — in my experiments (through my children’s lunchboxes, sandwiches made with this bread held up better throughout the day, whereas the BTC version fell apart or got a little soggy.
I made the choice to omit the sugar bc I did try a few batches with honey, 1 to 2 tablespoons, and my eldest daughter (the most honest critic) found it tasted more like a treat, almost like a brioche, which is delicious of course, but not necessary for sandwich bread.
So overall, I prefer this one for sandwiches, and I think the process is still very simple. Hope that helps!
Thank you for this gorgeous recipe, relatively new to making bread but this worked perfectly, even with my dodgy oven, that runs at whatever temperature it decides. Thank god for probe thermometers 🤣
I made this yesterday, and it worked really well. It’s yummy with just butter, toasts with a nice crunchiness without developing a hard, shrapnel-like crust, and holds up well for sandwiches. I clearly need to work on stretch and folds because it felt like I was doing it wrong even though I watched the video and the dough did the right thing. I just decided to trust the process, and it worked! We’re at high altitude (5600′) and my usual trick is simply to turn up the oven 25°. Since this was my first time making this, I decided to follow the recipe, but added 5 minutes to the cooking time. It was perfect. Finally, I weighed the ingredients, and used 15g of salt. I think10 would be better next time.
Thanks for the great recipe.
Great to hear, Sharyn! Thanks so much for writing and sharing all of these high-altitude notes… so helpful for others also baking at elevation. The stretching and folding/slapping and folding definitely takes some practice, but just know that doing it (any which way), will help strengthen the gluten and ensure any unhydrated bits of dough become hydrated.
Absolutely fantastic! I did the quick rise version with 2t of instant yeast. It is truly easy and tastes great! It slices like a dream, even with mu not so great knife! Highly recommend!
Hooray! Great to hear, Liz. Thanks for writing and sharing your notes 🙂
Hi! I couldn’t get my dough to turn from shaggy to smooth during the first stretching/folding. I used bread flour and a scale to weigh. Do I just keep stretching and folding? I felt like I did it a ton, and kept having to add more water to my hands so it didn’t stick to my hands, and then thought maybe the dough was getting too wet? Question is, if the dough doesn’t seem to be getting smooth do I keep stretching/folding, or just move onto the next step? Thanks!
Just move on to the next step! I don’t think you could have added too much water, even if it appeared that way… this dough can handle a little more hydration without any trouble.
I feel like I need to do a slow-mo video of the stretching and folding/slapping and folding. There are some tricks to making the technique feel more successful — I think you probably were successful, but the appearance of the dough led you to think you were not. Stay tuned!
Thanks for your response! I did indeed continue to the next step, even though my dough still seemed pretty sticky and not a nice smooth ball like yours was in your video… but the finished product turned out pretty good! Not GREAT, but I’m going to blame it on user error, not the recipe 🙂 Will definitely try this recipe again! A slow-mo video sounds helpful – thanks for all your great recipes!
Great to hear, Kate! I’ll get on that slow-mo video 🙂
Best no-knead bread recipe I’ve ever made. So easy too. This is going to be my first choice bread recipe. Reminds me of the great bread my mom used to make when they only used real butter and whole milk. Great detailed instructions also.
Great to hear, Jim! Thanks so much for writing and sharing 🙂
Hello, I love this recipe and am currently making my third loaf.
I opened the bag of my stored second loaf so I could eat the last two slices for lunch. There is a sweet smell to the bread, to the extent that it is unappetising, Do you have any idea why this happened? Is it because the bread is 5 days old or because it was stored in the bag of an old store bought loaf?
I have been making a loaves in my bread machine for years and I store those on a bread board on the counter, these have never smelt sweet. But I searched for your recipe as I really wanted to replace the super soft loaf I was buying for my children’s lunch box sandwiches.
Thank you for reading and for any advice you have.
Miriam
Hi Miriam! I think 5 days at room temperature in a bag especially in the warmer months (like summer/fall) is probably too long. I would recommend freezing the loaf if you are going to store it longer than 3 days at room temperature. But a sweet smell isn’t bad! If there’s a fermentation smell, then it’s a sign your loaf might be on the outs.
This is the second bread recipe from your site that I’ve made; first was the peasant bread and that came out nice. Second was the this bread and while it didn’t look like as nice as yours throughout the process (I’m a 71-year old retired USCG LCDR) I kept plugging and everything happened as it was supposed (1st & 2nd rise and baking). The loaf looked quite nice once done. I made toast with the bread this morning and it was great!
I’m planning on making more real soon!!
Great to hear, Mike! Thanks so much for writing and sharing all of this. I love this one for toast, too. And thank you for your service as well!!
Amazingggggg!
I have made this several times and it’s perfect each time! Thank you!
Great to hear, Bethany! Thanks for writing 🙂
Even my kids say the crust is their favorite part!! The dough was easy to handle and will definitely put this on the rotation.
Great to hear, Meems! Thanks so much for writing. Love that your kids loved the crust 🙂 🙂 🙂
This will be my first ever attempt at making bread. (Or a dough in general, never even made pizza dough. I’m new to cooking and not working 55+hrs a week) so I’m learning what most learnt in their 20’s at 39 yrs old. I am a bit sensitive to salt lately. Would it be ok to do 8g instead of 10 for fine sea salt if I plan on doing the 2g yeast version? Also I haven’t used olive oil in a while, we switched to avocado oil. Would that be an ok substitute or does it absolutely need to be olive oil? Thank you 🙏🏼
Hi! Yes, absolutely, use 8 grams of salt, and use avocado oil. Good luck! You got this 💪
How much butter is needed? You give 4 tablespoons for volume, but the weight given equals more than a single tablespoon according to my scale. Is my scale that far off or is there a typo?
I think your scale is off. If you look at a stick of butter, it should say it weighs 113 grams. You need half a stick or 4 tablespoons, which weighs roughly 57 grams.
Love the recipe! I noticed when I made my bread using the rough measurements instead of by weight my bread came out nice and full and thick but when I finally did by weight they came out on the smaller side. Any insight on why would be helpful!
At 35 mins the loaf was a perfect brown. Is it my oven or did I make a mistake? I didn’t cook it the full 45 mins..
Perhaps your oven just runs a little hot. If the bread was fully baked, then no, you didn’t do anything wrong, and bravo on checking on it at the 35-minute mark 🙂
I’m so looking forward to making my first loaf of your mother’s peasant bread. I have acquired both of your books and have many recipes checked to make going forward. I will use this recipe for my first baking. After reading the recipe, I am wondering if you know what the percentage would be to increase the recipe from the 8. 5″ x 4.5″ pan to accommodate the 9″ x 5″ pan. Any input you could give me would be very much appreciated. Thank you.
So nice to read this, Linda! Thanks so much for buying my books… means a lot 🙂 I don’t think you need to make any changes when using a 9×5 inch pan for this recipe. That size is great for this amount of dough.
Could you adjust this recipe to work with either 12in x 4in or 13in x 5in metal pans? Would you just increase the ingredient amounts slightly? Thank you!
Hi! I think doing 1.5 x the recipe would work for those size pans.
Great! Thank you!
I”m weirdly struggling with this dough. After resting for just over 1/2 hours, the dough was so incredibly wet that I couldn’t get it to become cohesive. I’ve added a ton of extra flour and it’s still not overly cohesive, but I was worried about adding more. I used a scale to measure, so I’m not sure where I’ve gone wrong, or if it’s just the conditions of my kitchen right now. Fingers crossed it works out in the end.
Hi Ginger! Sorry to hear this. What kind of flour are you using? And remind me where you are located, meaning: are you in a humid environment?
I used King Arthur Bread flour and I live in the Chicago area. My bread turned out great, fyi. Everyone really enjoyed it. I ended up putting in probably a full cup more of flour. I’ve never struggled with any of your bread recipes before (or any of your recipes), so I don’t know what was going on!
Very bizarre! I’m stumped. If you make it again, I will be curious to hear if the same thing happens.
Thank you, Ali, for another great receipe! Excellent bread for kids sandwiches. Definitely a keeper!
I did the versions with 8g of yeast and used all purpose flour! Even tho the dough wasn’t nearly as neat as yours after stretch and fold the loaf turn out beautifully! 🍞
Great to hear, Margot! Thanks so much for writing and sharing this 🙂
Hi i live in singapore which is humid and warm.How long will it take for the first rise? Anything I need to take note.
Hi! Just rely on the visual cues: doubling in volume. I’d guess roughly 2 hours, but it may take more or less.
I know you said it was ideal with butter and milk, however I cannot have dairy. Would I substitute the same amounts of water and oil for this recipe? Thank you!
Yes, that should work fine… you might consider just adding a tiny bit less of each: maybe 3 tablespoons of oil and a scant 3/4 cup milk (because milk is 87-90% water).
You mention that the recipe can be allowed a long rise but is that a good idea with a dough made with milk? Wouldn’t the milk sour during a long rise?
It won’t sour with that time frame — 8-10 hours is fine!
If using the smaller amount of yeast for the over night rise is this at room temperature not the fridge?
Hi! Apologies for the delay here. The overnight rise is at room temperature.