 →
→ Simple Soft Sandwich Bread (6-Ingredients, No-Knead)
This post may contain affiliate links. Please read my disclosure policy.
Made with only 6 ingredients, this simple, no-knead soft sandwich bread is such a treat to have on hand for sandwiches of all kinds. No mixer is required — if you can whisk and stir, you can make this bread.

Several years ago, I published a recipe here for a simple sourdough sandwich bread recipe, and I have long wanted to add a yeasted version to my collection of bread recipes … here it is!
It’s a no-knead, 6-ingredient recipe that takes about 5 minutes to stir together. Thanks especially to my oldest daughter, who brings a turkey sandwich to school for lunch nearly every day and who has no reservations sharing her opinions, the recipe has gone through many iterations these past few months.
It started with the basic bread ingredients: flour, water, salt, and yeast. In an effort to make it softer for sandwiches, I added some olive oil. When my daughter told me the bread didn’t hold up very well — that it began breaking down by lunch time — I began researching. First I added honey, then I added milk, then I took away the honey, and finally I swapped in melted butter for the olive oil.
The loaves made with a mix of water and milk, butter and no olive oil, and no sweetener at all tasted the most like the sandwich bread I was after: soft but sturdy and well seasoned but not sweet.
Depending on your timeline, you can use more or less yeast — I’ve been in the habit of using 1/2 teaspoon (2 grams) and employing a long, slow overnight rise, but if you need to speed up your timeline, there are notes in the recipe on how to do so.
As always, I am here if you have any questions. Hope you love it 🍞🍞
How to Make Soft-Sandwich Bread, Step by Step
First gather your ingredients: bread flour, salt, instant yeast, water, milk, and butter. (See notes in the recipe for using other flours.)
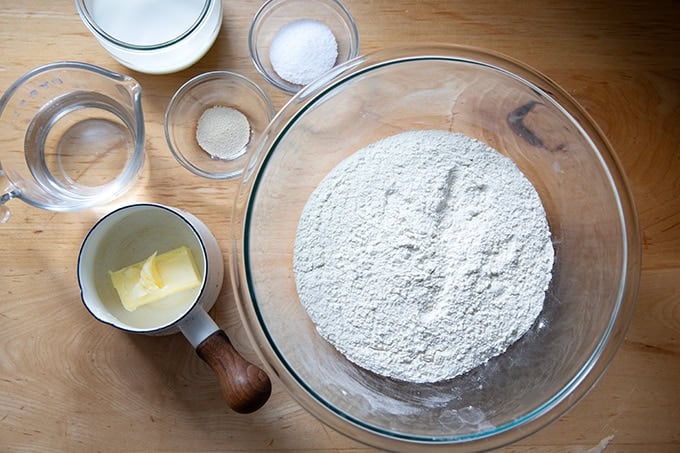
Ideally, you will measure everything with a scale. I love my dual-platform Ooni scale for its precision, especially when measuring smaller quantities of salt and yeast.

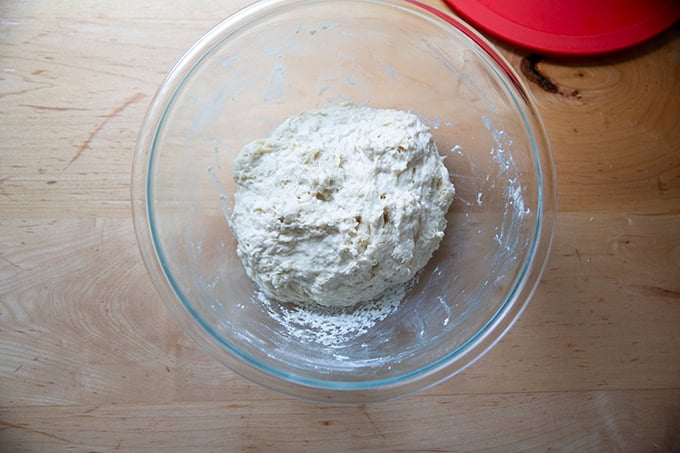
Place the flour, salt, and yeast in a bowl:
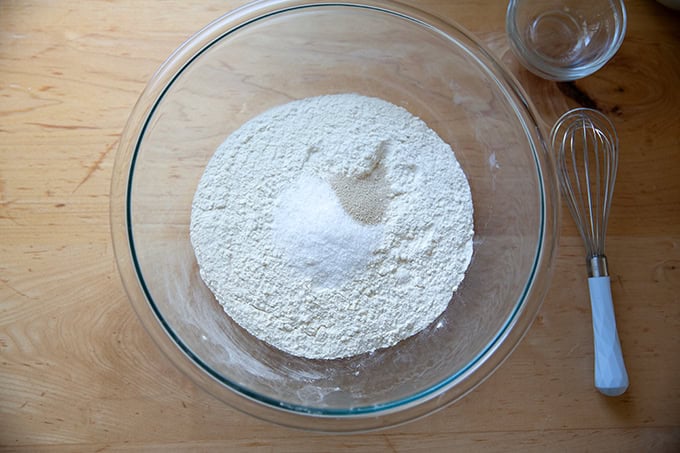
Whisk until combined:
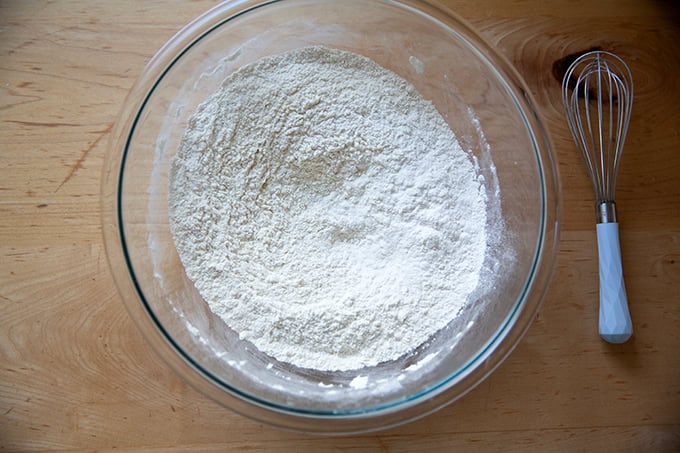
Add the water, milk, and melted butter:
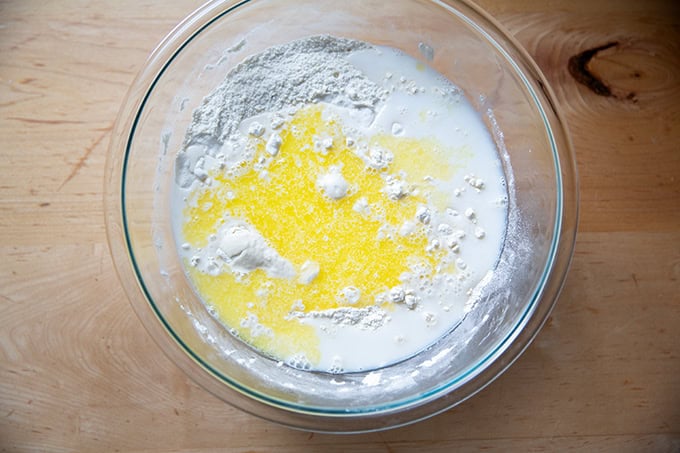
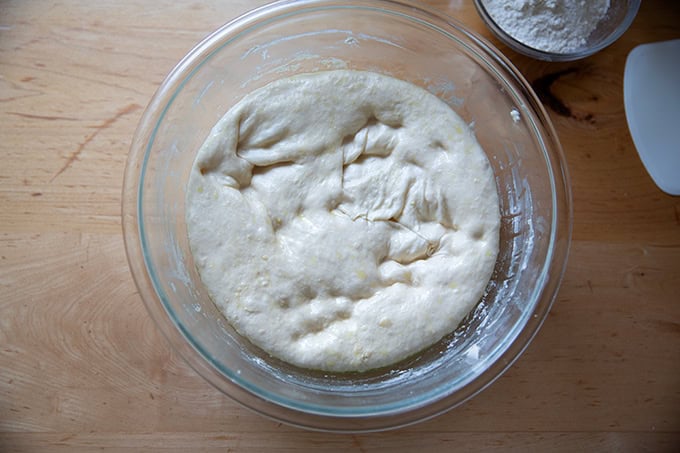
Stir with a spatula until you have a shaggy, sticky dough ball — this is an 80% hydration dough and the dough will feel sticky upon mixing… this is right!
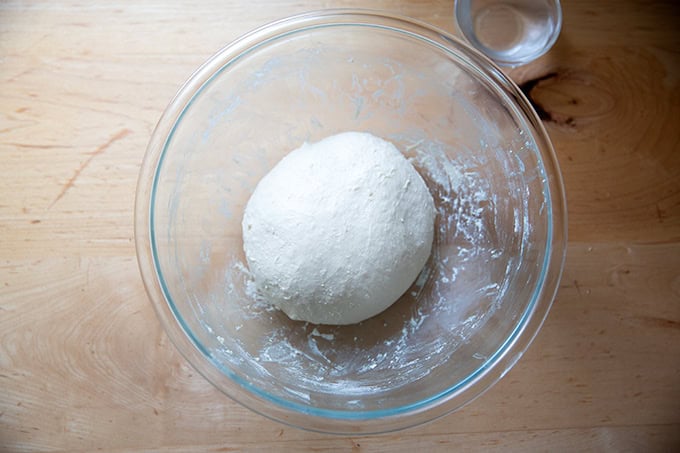
Cover the bowl and let rest for at least 30 minutes or as long as an hour; then use a wet hand to stretch and fold the dough into a cohesive mass. Here’s a quick video:
After the stretches and folds, the dough will transform from being sticky and shaggy to smooth and cohesive:
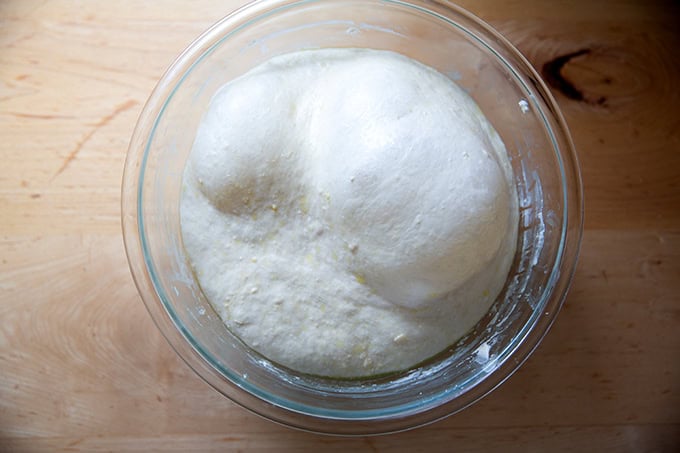
Drizzle lightly with olive oil, cover the bowl, and let rise …
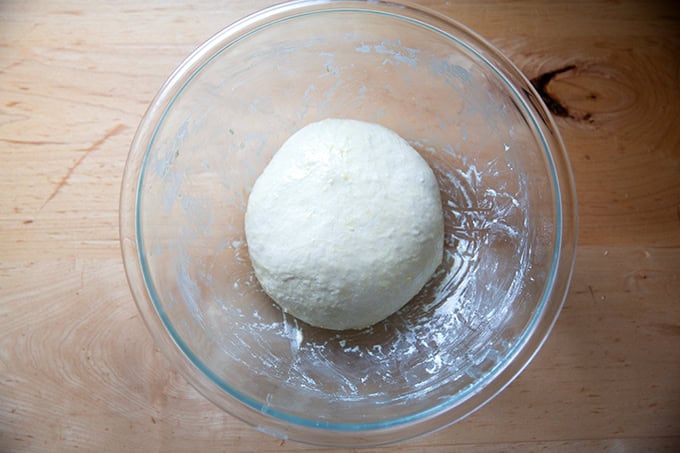
… until the dough doubles in volume:
Deflate it:
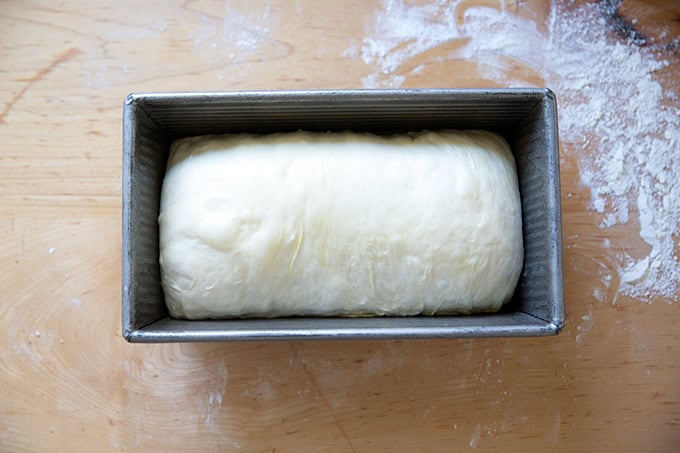
Then turn the dough out onto a floured work surface:
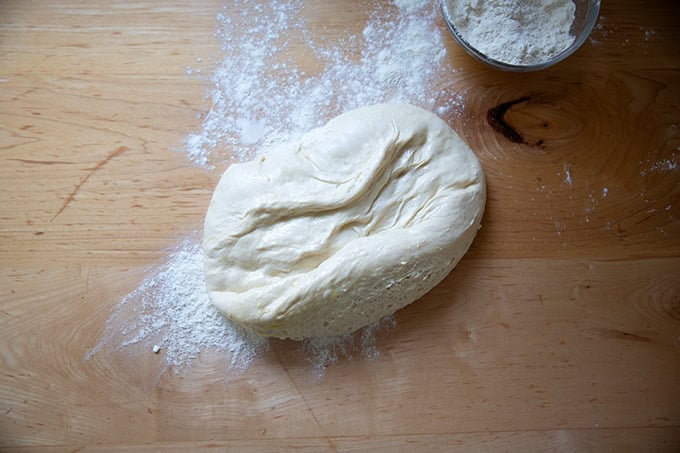
Pat the dough into a rectangle roughly 8 inches wide — the length isn’t as important, but keeping the width to 8 inches will allow the coiled dough to fit into its loaf pan.
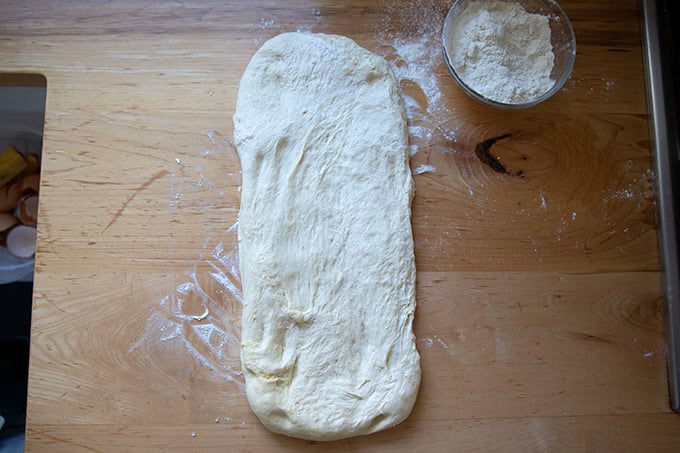
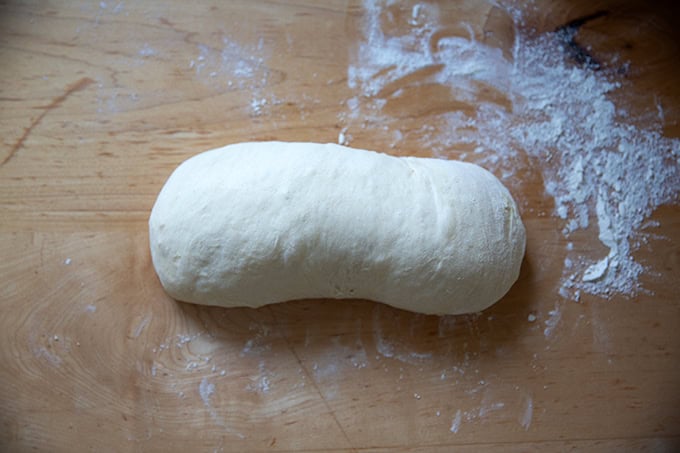
Coil up the dough:
Here’s some video guidance:
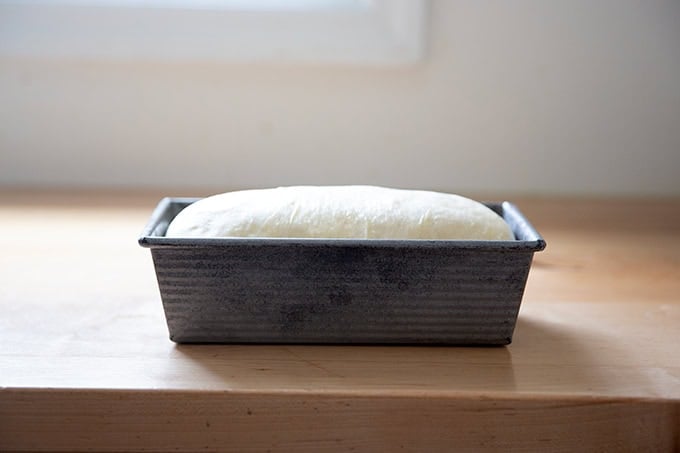
Transfer the coil to a greased loaf pan:
Let the dough rise until it crowns the rim of the pan:
Then bake at 375ºF for 45 minutes:
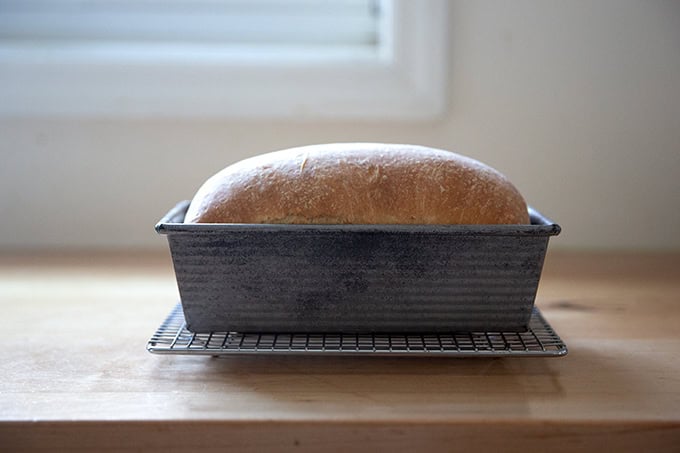
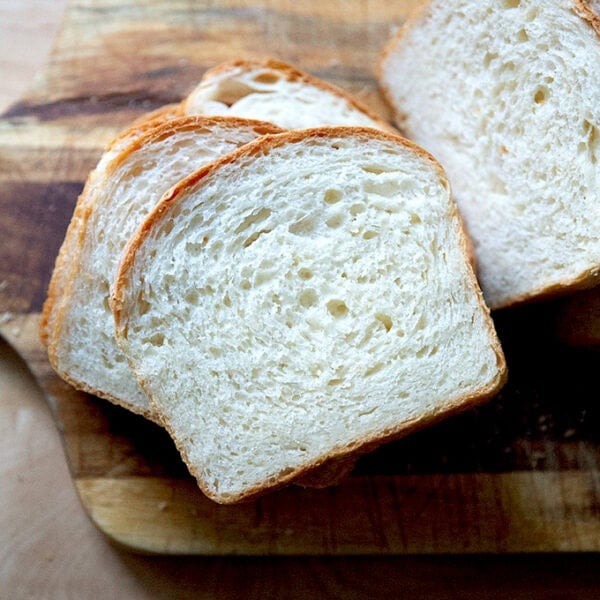
Turn out onto a cooling rack and let cool completely before slicing:
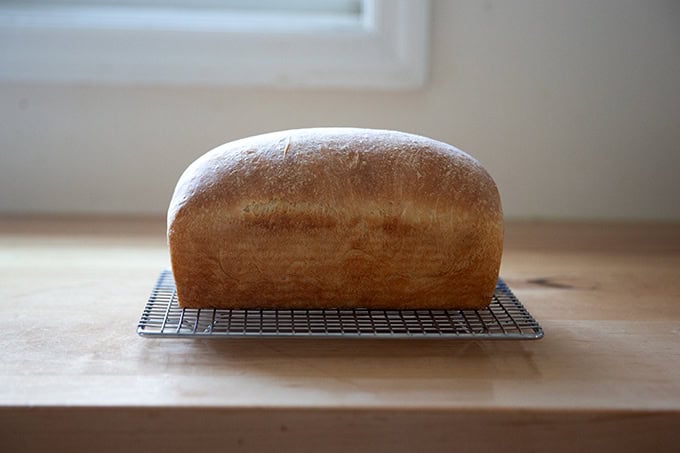
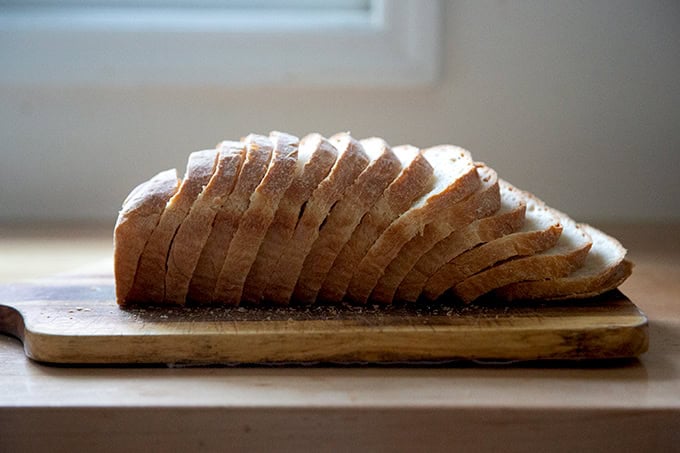
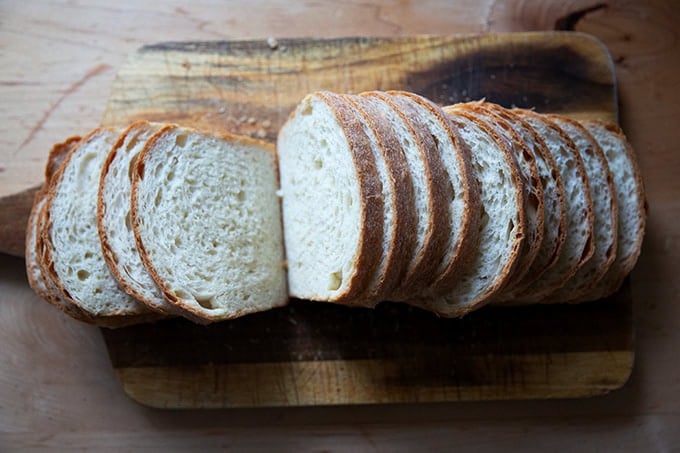

Such a treat to have on hand:
Simple Soft Sandwich Bread (6-Ingredients, No-Knead)
- Total Time: 5 to 24 hours
- Yield: 1 loaf 1x
Description
Made with only 6 ingredients, this simple, no-knead soft sandwich bread is such a treat to have on hand for sandwiches of all kinds. No mixer is required — if you can whisk and stir, you can make this bread.
Notes:
- As always, for best results use a scale to measure. I love this Ooni scale for its precision, especially when measuring smaller quantities of salt and yeast.
- Pan: A 9×5-inch loaf pan is ideal for this recipe. I love this USA pan.
- Salt: The rule of thumb with bread is that the weight of the salt should be 2 to 3% the weight of the flour. For this recipe that is 10 to 15 grams. I always use 15 grams of salt, and I do not find the bread to be too salty, but, as you know, I have a high salt tolerance. Use an amount appropriate to your tastes and preferences. Finally, I always use Diamond Crystal kosher salt, but you can use fine sea salt or whatever salt you like.
- Flour: I conducted most of my experiments with King Arthur Bread Flour. I also have made many loaves using 100% Petra 0102 as well as 100% Cairnspring Mills Glacier Peak bread flour.
- Yeast: SAF instant yeast is my preference. If you are using active dry yeast, sprinkle it over the water and let it bloom for 15 minutes before proceeding.
Timing:
- You can make this bread employing a long slow rise if you use 2 grams (1/2 teaspoon) of instant yeast or you can make it quickly if you use 8 grams (2 teaspoons).
- If you use 2 grams, the first rise will take 8 to 10 hours — this is what I usually do. I like to mix the dough at night, let it rise until I’m ready to tend to it in the morning; then proceed. The second rise will take 2 to 3 hours: wait until the dough crowns the rim of the pan before proceeding.
- If you use 8 grams, the first rise will take 2 to 3 hours and the second rise will take 1 to 2 hours.
Ingredients
Please read all notes above before proceeding:
- 500 grams (about 4 cups) bread flour, plus more for dusting
- 2 to 8 grams (1/2 teaspoon to 2 teaspoons) instant yeast
- 10 to 15 grams salt
- 200 grams (about 3/4 cup + 1 tablespoon) cold or room temperature water
- 200 grams (about 3/4 cup + 1 tablespoon) milk, 2% or whole
- 57 grams (4 tablespoons) melted butter, salted or unsalted
- softened butter or olive oil for greasing
Instructions
- Mix the dough: In a large bowl, whisk together the flour, salt, and yeast. Add the water, milk, and melted butter. Using a spatula, stir until you have a sticky, shaggy dough ball — this is an 80% hydration dough, and the dough will feel sticky upon mixing… this is right! Cover the bowl and let the dough rest for at least 30 minutes or as long as an hour.
- Stretch and fold: Fill a small bowl with water. Using a wet hand, stretch and fold the dough by grabbing an edge and pulling it up and towards the center. Repeat this stretching and folding process, moving your hand around the edge of the dough with every set of stretches and folds. As you stretch and fold, you should feel the dough transform from being sticky and shaggy to smooth and cohesive. (Note: you also will likely feel little bits of the butter solidifying — this is OK.) See the video above for guidance.
- Let it rise: Drizzle the dough lightly with olive oil and rub to coat. Cover the bowl and let the dough rise at room temperature until it has doubled in volume: depending on how much yeast you are using, this could take as long as 10 hours (if using 2 grams of yeast) or 2 to 3 hours (if using 8 grams of yeast).
- Prepare a loaf pan: grease a 9×5-inch loaf pan with softened butter or brush with olive oil — if you are at all worried about your dough sticking to your pan, grease it with butter. If you are using a USA pan or nonstick pan, you can get away with using olive oil alone. Brush the pan with 2 teaspoons of olive oil. For ease, I have been using olive oil alone, and it works beautifully.
- Coil up your dough: Deflate the dough using your hand or a flexible bench scraper, then turn the dough out onto a lightly floured work surface. Pat it into a rectangle roughly 8 by 16 inches (Note: the length isn’t as important as the width: don’t go much wider than 8 inches or you will have to squish it into your loaf pan). Starting at the small end, roll the dough into a tight coil. Transfer it to your prepared pan. Pour 1 teaspoon of olive oil over the surface and rub to coat.
- Final rise: Let the dough rise until it crowns the rim of your pan: this can take as long as 3 hours (if using 2 grams of yeast) or 1 hour (if using 8 grams). When your dough begins approaching the rim, preheat your oven to 375ºF.
- Bake it: Bake for 45 minutes.
- Turn out onto a cooling rack and let cool completely (if you have the patience) before slicing — it is much easier to slice the bread into thin, uniform slices when the bread has cooled completely.
- Store the bread in an airtight bag or vessel at room temperature for 3 to 4 days or freeze for up to 6 months.
- Prep Time: 20 minutes
- Cook Time: 45 minutes
- Category: Bread
- Method: no-knead
- Cuisine: American
This post may contain affiliate links. Please read my disclosure policy.


331 Comments on “Simple Soft Sandwich Bread (6-Ingredients, No-Knead)”
This was a great and simple recipe! I added 2 tablespoons of sugar to mine. My dough was VERY loose and shaggy by shaping time though. I ended up having to just kind of scrunch it up and dump it in the pan. I used White Lily bread flour and did the quick rise. I used my Brod and Taylor proofer. Any advice?
Hi! Are you using a scale to measure?
I am! Everything was weighed.
Great re scale. It’s possible that the white lily bread flour doesn’t absorb water the way king arthur bread flour does, so next time around, I’d consider holding back some water from the start (50 grams or so). Sugar will also lend some moisture, so that is probably contributing to the stickiness.
I don’t make bread very often, but I just tried this recipe and it turned out great! It was super easy. Will definitely make it again.
Great to hear, Rachel! Thanks so much for writing 🙂
Amazing!!! I usually go off the number of reviews when picking recipes and have previously been baking bread from another recipe however felt it wasn’t completely to my liking. This recipe is EXACTLY what I’ve been looking for. So of course, leaving 5 stars to add to that review count! Perfection! 👏👏👏
So nice to read this, Emily! Thanks so much for writing 🙂 🙂 🙂
Awesome bread. I didn’t see how no-knead could achieve a good sandwich bread but I’ve always liked your recipes so I gave it a try. Everyone in the house loved it! It’s currently very humid here so I subbed in 75g whole wheat flour without adjusting the hydration and had good results.
Great to hear, Moriah! Thanks so much for writing and sharing your notes. Love that you added ww flour without having to adjust the formula 🙂
Hi Ali,
I want to add some whole wheat flour or even maybe use all whole wheat flour. How would I adjust the recipe?
All your recipes are so good and easy to follow! Thank You!!!
Thank you, Mindy 🙂
Someone recently wrote in saying she used 75 grams of whole wheat flour without changing the hydration, so you could start there. If you wanted to up the amount, I would start with no more than 125 grams of whole wheat flour, which is 25%. Whole wheat flour tends to be thirstier, so the more whole wheat flour you use, the more water you may need to add. But it also has a weaker gluten structure, so the more whole wheat flour you use, the les lofty/the more dense the loaf will be.
Thank you for sharing this recipe. I made it with 350 gms of Bob’s Redmill Artisinal Bread flour and 150 gms of Bob’s Redmill Whole wheat flour. Turned out really well. Was soft and tasty.
Great to hear! Thanks for writing 🙂
Hello, just made this recipe and it was easy and turned out great. My husband likes his bread a little sweet. You think I could add honey or sugar? I prefer honey but also have raw sugar. Any suggestions? Thank you!
I do! I think no more than 2 tablespoons of either sugar or honey would be great 🙂
Can you substitute King Arthur All Purpose Flour for bread flour?
Yes! The dough might be a little bit stickier to worth with, but that is OK. Don’t make any changes and ideally you are using a scale to measure 🙂
Curious if you’ve ever used this dough for sandwich rolls/buns.
I have not, but I think it would be great! Maybe with an egg wash? It is definitely a sticky/wet dough so shaping might be tricky, but I think if you use flour as needed while shaping, it will work beautifully.
Can I make this using a stand mixer?
Yes!
Hi, thanks so much this recipe is great. The bread is so soft and fluffy and delicious.
Do you maybe have the Marcos’s of this recipe please.
Great to hear 🙂 I do not have the macros, unfortunately.
Hi Ali. I’m currently letting this bread rise. I have a USA Pullman pan that is 9s4x4. I’d like to bake the bread in it. Are there any adjustments that need to be made? Thank you so much! I made you Belgium waffles this morning. Soooo good!
Hi Kim! I’m likely too late here, but your pan should work just fine! I hope it turned out well 🙂
Thank you for your reply. It worked great in the pullman! I just made your raasted salsa recipe with garden fresh tomatoes and I threw in some peppers. So good! Love your recipes!
Great to hear, Kim! Thanks so much for writing 🙂
This has become my go-to recipe. Turns out perfect every time!
Great to hear, Rebecca! Thanks so much for writing and sharing this 🙂
Hi Ali, we absolutely love this recipe, thank you! I do have a question, if I do the overnight method using only 2 grams of yeast at what point do I stretch and fold, after 1 hour or after 8-10? Thank you again, Sophia
Hi! Great to hear 🙂 You’ll stretch and fold after 1 hour.
Hi, Do I put it in the fridge overnight?
No! Room temperature is fine 🙂
Hello,
This is the EASIEST and most forgiving bread I have ever made! I used to have a machine…hated it…tried others and they just weren’t what I was expecting. A lot of it for me was your descriptions! Thanks for those! Was wondering if you thought this bread would allow the addition of seeds? As in multigrain bread types.
Thanks again!!
Great to hear, Athena! Thanks so much for writing. And yes, absolutely, it would be great with the addition of seeds: sunflower, pumpkin, sesame, etc. Go for it 🙂
Has anyone had an issue with the sides of the bread bowing a little bit? When I bake these, the sides always dip a bit, the internal temp registers at 205°but as it cools the sides dip in slightly. I’m using a 9×5 loaf tin. Any ideas?
Hi! What material is your loaf pan? And are you using a scale to measure?
It sounds as though you may need to reduce the hydration slightly. Do you live in a humid environment?
Made this today (rise was overnight) and it came out great!
Thank you!
Great to hear, Mike! Thanks for writing 🙂
I love that you provide gram measurements!! Am I able to do the wole process up until the 1st rise in a stand mixer? I’m planning on making this tomorrow now I’ve found this recipe lol. And will come back to rate ❤️
Thanks xo
That should be fine! Just don’t over mix. It doesn’t need a long mix.
This recipe is OUTSTANDING, best sandwich bread I’ve made and so easy. Made it exactly as specified the first time and it was perfect and stayed fresh for days on the counter. Then I made it again but only had AP flour. Used that and substituted about 50 grams of white flour for whole wheat bread flour. I was sure it was going to be a total bust as the dough was sooooo sticky even after kneading for a while in my mixer. Once again, it came out perfectly, and I liked the little bit of extra depth the whole wheat gave it. Both times I used the overnight method, and when I added the whole wheat I’m pretty sure it was overproofed. But I just shaped it as well as I could and hoped for the best, and it came out great. T
Great to hear, Emily! Thanks so much for writing and sharing all of these notes… glad to hear it has been adaptable and forgiving for you. This has been a staple in my house for about a year, and I too have made it with all sorts of flours, varying amounts of yeasts, and varying timelines, too… it always works out 🙂
One more thing I forgot! I have two of the USA loaf pans, and used a trick I use when making sourdough bread — I used one pan to cover the other and put in the oven that way for the first 15 minutes of baking. By keeping the steam in, and some of the heat blast out, that lets the loaf get extra oven spring before it sets its crust. Each time I’ve gotten a huge loaf, with probably 3 inches of rise over the top of the pan!
Emily!! I LOVE this idea and will try it the next time I make this, which will be very soon… though I have been on a homemade bagel kick this week 🙂 Soon! Thank you so much for sharing. Can’t wait to try it.
This bread turned out great! I’m definitely going to be making it again. Thanks so much for providing gram weight, makes it so much easier for those of us who don’t have US cup sizes etc. and huge thanks for answering my previous question. Mine didn’t come into a cohesive ball as much as yours did so was a bit hard to coil up, though it still baked beautifully. & turned out gorgeous. I used a stand mixer & was abit paranoid about over mixing so next time I’ll mix it a little longer & see how that goes 🤗
Great to hear, Nioka 🙂 Thanks so much for writing and sharing your notes. It’s definitely forgiving!
Love the bread. Your bread is sliced so nice. Is it done by hand.or do you use a guide. If you use a guide which one. Thanks for all your great recipes and advice.
I slice by hand! I’ve thought about getting a guide but I’m not sure I want to store something so big. A sharp serrated knife helps!
I have make the simple sandwich bread twice and both times it was very sticky and hard to work with
Hi! Are you using a scale to measure? What type of flour? It is definitely a wet and sticky dough, and depending on where you live (if it’s very humid for example), you may need to reduce the water or milk.
I am using bread flour and a scale. I am in Rochester, NY and it is ridiculously humid but I do have the air-conditioning on. I just can not roll the dough but, it did turn out prefect. It is just so hard to work with. I so let is rise more than 10 hours for the first raise.
Rita
I’m glad it worked out in the end… it is definitely sticky. You could try reducing the water or milk slightly next time around if you find the process frustrating, but if you are happy with the result, just leave the formula as is 🙂
I never know if I should add more flour or liquid when dough is too sticky.
Rita
Hi Rita! I would add more flour. Something that is helpful to do, too, is to add a set of stretches and folds, using a wet hand, 30 – 60 minutes after you mix the dough. There is a video in the post above… I do understand that it looks easier than it is, and that some people have not had success with this part of the process… it does take practice 🙂
Hi Ali,
We’ve been loving your peasant bread recipe so much! Can’t wait to try this one.I’d like to add cinnamon and sugar to this loaf. At what stage in the process would you recommend adding it? Thank you, Erica.
Hi Erica! You can whisk the cinnamon and sugar straight into the flour, salt and yeast. Great to hear about the peasant bread 🙂
I made this along with my 12 year old granddaughter who wants to learn to cook, and it came out great. We did the short-rise version because, kids and impatience. One note for your readers from the Pacific Northwest: there is a local mill called Cascades Milling that has recently started to supply consumers as well as factory bakeries. The only white flour they sell is labeled as all purpose, however, its stated protein content is identical to KAF’s bread flour!! So it wouldn’t be as good for quick breads, but it is fine in this recipe since it is effectively bread flour anyway. A good reminder to check protein levels in flours for me when using a new brand!
Great to read all of this, Janet! Thanks so much for writing and sharing. Love hearing that your 12-year-old granddaughter partook in the baking. The flour sounds lovely, too 🙂
I never leave reviews but I am so IMPRESSED! I have tried SO many different sandwich bread recipes. THIS IS THE BEST BY FAR! Amazing! Soft just like store bought bread but with a taste that is 100x better!
Great to hear, Mary! Thanks so much for writing and sharing this 🙂
I just put the recipe together. It will stay in the fridge overnight. I gave it five stars already because I know it’s going to be perfect because every recipe I’ve tried from you has turned out perfect. And I know what I’m talking about! I’ve been making bread for 50 years, at one point I even owned a bakery.
So nice to read this, Gina 🙂 🙂 🙂 Thanks so much for writing 💕
Simply delicious. There is a richness from the butter that comes through subtly in the flavour. Really nice. I made it “as-is” and also made a loaf with oatmeal and flax. Both were perfect to work with; rose nicely for first and second round and then a nice oven spring. Really nice light loaf that slices thinly and perfectly! Thanks for another winner. BTW – the only adjustments I used for the oats and flax were only: Flour 420g, oats (I used quick) 80g, ground flaxseed 14g. I will be making this often!!
I have just toasted a slice….OMG….the butter flavour really comes thru almost like a pastry taste. This is a phenomenal recipe!!
Great to hear, Anne! Thanks for writing 🙂
Just wanted to say thank you for this recipe. It is so easy. I like that I only dirty one bowl, one spoon and one pan (thanks to the weight measurements!).
I’ve made this recipe 4 times now, with consistently excellent results, even when I goofed on my liquid measurement on loaf 3. This is the only bread recipe I will ever need, and makes the best toast and BLTs. Thank you, thank you, thank you!
Great to hear, Michelle! Thanks for writing and sharing these notes. It’s BLT season for sure!!
Can i use all purpose flour
Yes!
I have two questions- does this recipe double well? Also, when doing the slow rise, you leave it on the counter overnight, correct? I assumed so because the yeast is decreased, but the milk content in the dough made me question if it does get left on the counter. Thanks! So excited to try this, have loved your recipes for many years!
Yes, it doubles beautifully! And yes, you can leave it on the counter, and it works great even though there is milk in the dough. Thank you for your kind words 🙂