 →
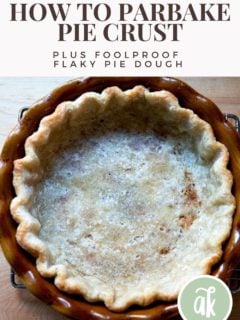
→ How to Parbake Pie Crust + Foolproof Flaky Pie Dough
This post may contain affiliate links. Please read my disclosure policy.
Below you will find guidance for both making pie dough and parbaking or blind baking it. This trusted method will ensure your crusts do not shrink in the oven and will prevent your finished pies from having soggy bottoms.
For many years, I shied away from parbaking my pie crusts. I never found the bottoms terribly soggy when I didn’t parbake, and I hated the process: from dealing with pie weights to chilling to baking, I found the process time-consuming, and, moreover, I always found the crust of my finished pies to be overbaked.
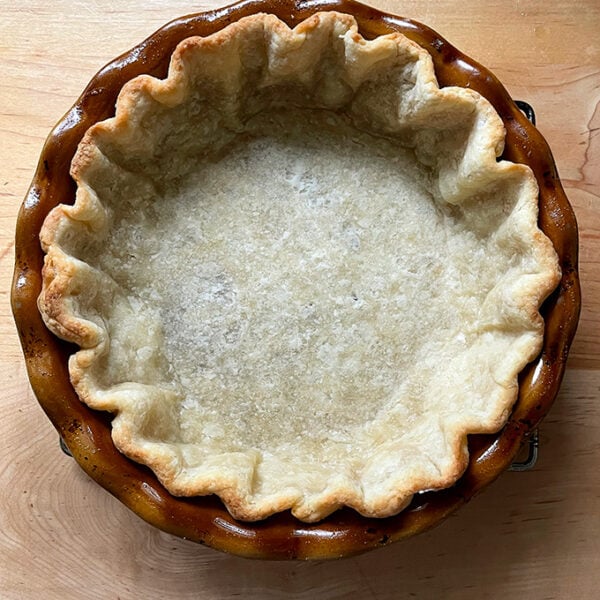
Several years ago, however, I saw a photo in The Book on Pie depicting a correctly baked parbaked pie crust. It looked barely toasted, mostly blonde with the faintest hint of brown; the edges were lightly golden. The suggested baking method called for an initial 15-20 minutes with pie weights in the crust, followed by 2-3 minutes without the weights.
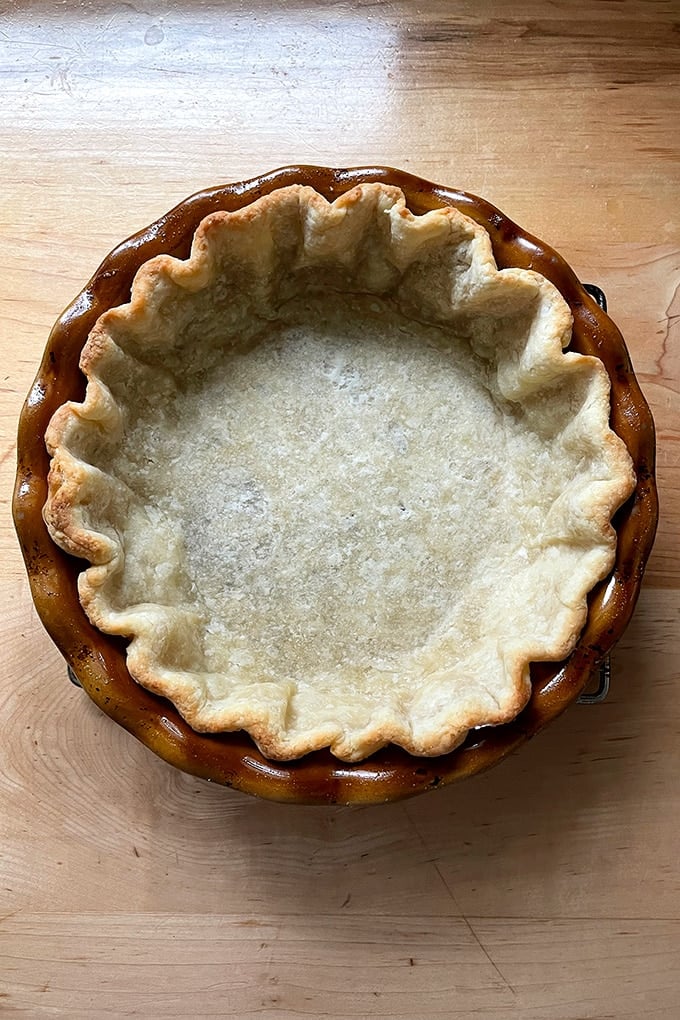
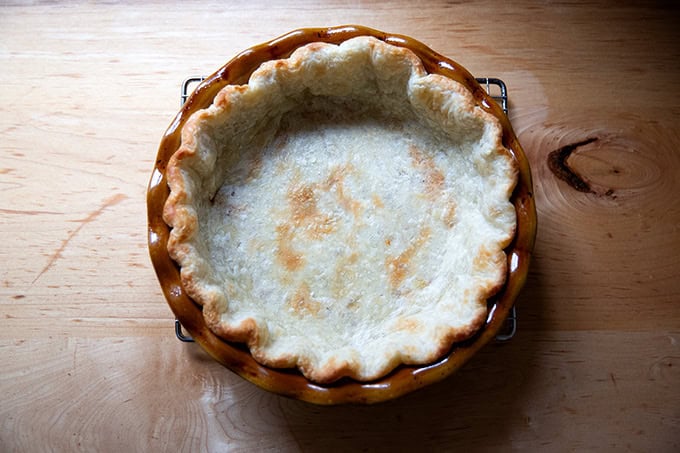
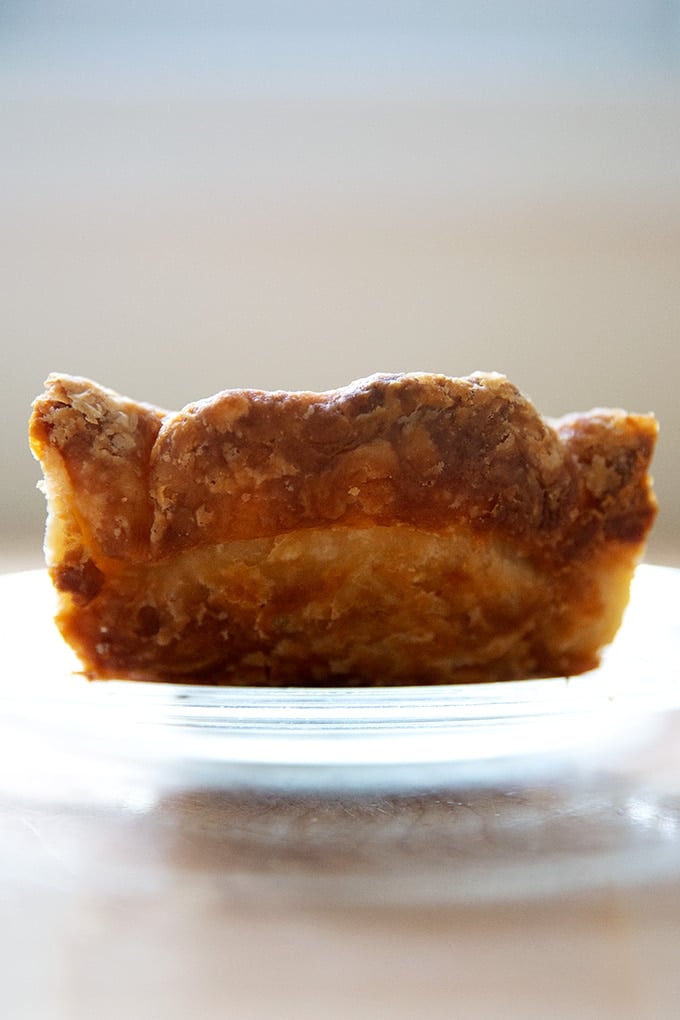
Following the method, my parbaked crust emerged from the oven with edges lightly toasted and the bottom surface mostly blonde. And the crust of the finished pie was deeply caramelized but not at all overcooked. See below:
Parbaked crust:
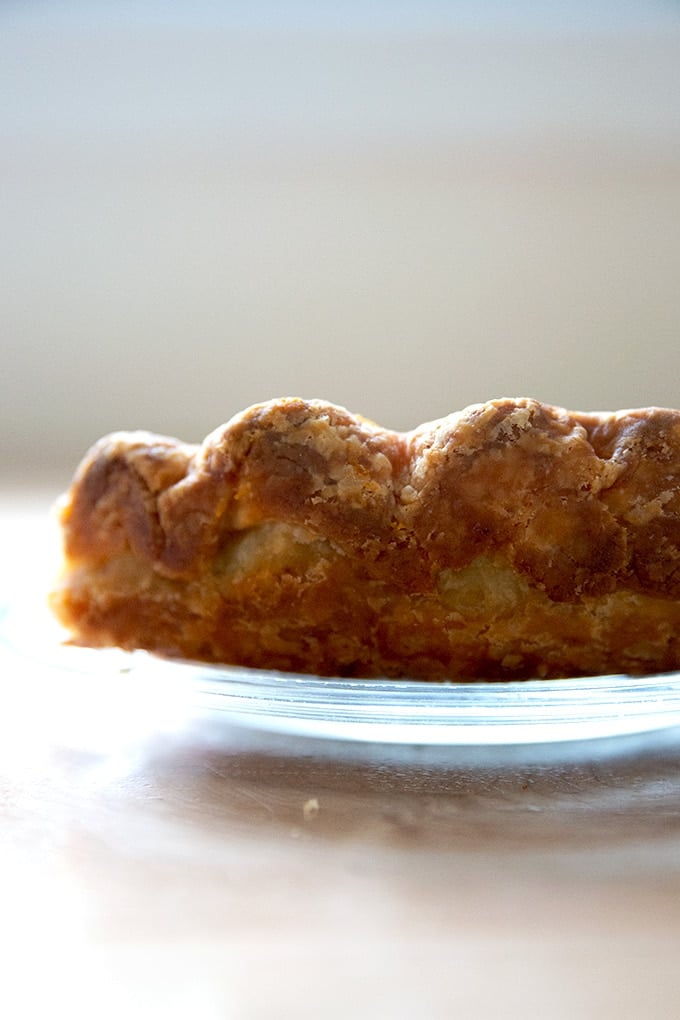
Fully baked crust:
I now find parbaking an essential step in my pie-making process. It does require some planning, but overall it is not hard, especially if you pay attention to the details, namely two things:
- Chilling your pie dough before rolling it out and before parbaking it.
- Using a sufficient amount of pie weights.
Let’s explore each:
The Importance of Chilling Your Pie Dough
After you make your pie dough, you should let it rest in the fridge for at least 30 minutes or better, 12 to 24 hours, before you roll it out. Why? For two reasons:
- Chilling the dough after mixing makes it easier to roll out. This is because chilling allows the natural protein stands (i.e. the gluten) that form when flour is hydrated to soften and relax, making the dough easier to roll out.
- A rested dough will shrink less in the oven due, again, to the gluten having had the chance to relax.
You Need More Pie Weights Than You Think
When you fill your parchment-lined pie shell with weights (or dried rice or beans, which you can save and reuse), be sure to fill it to the very top. I use 3.5 pounds of dried rice/beans per shell, and I pile them high above the rim of the dough.
How to Parbake Pie Dough, Step by Step
Remove your chilled round of pie dough from the fridge. (See recipe box for pie dough recipe.)

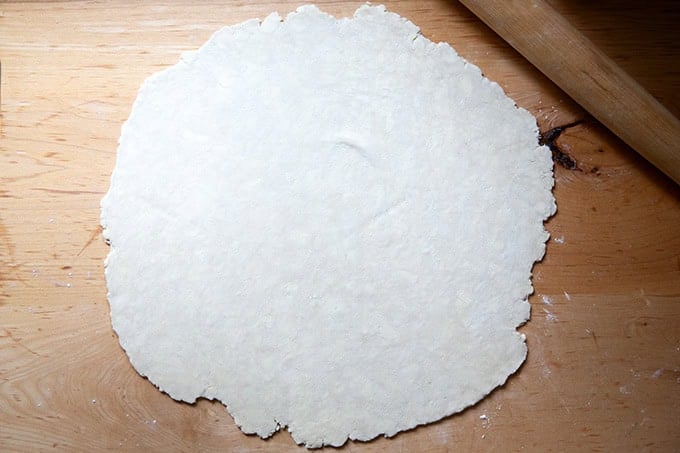
Roll it out on a lightly floured work surface into roughly a 15-inch round:
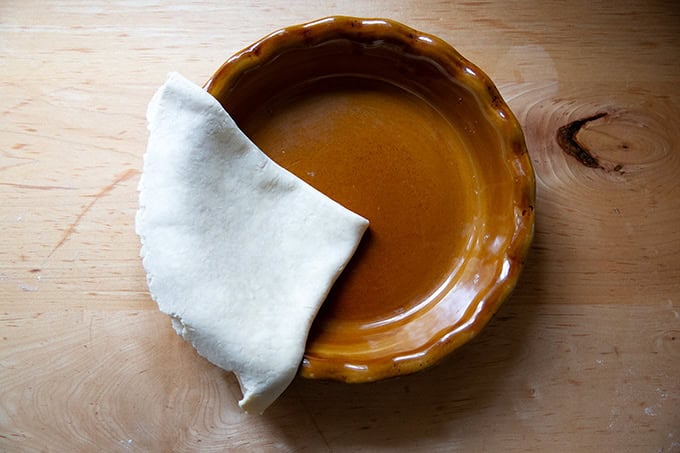
Fold in half, then half again, and transfer it to a pie plate:
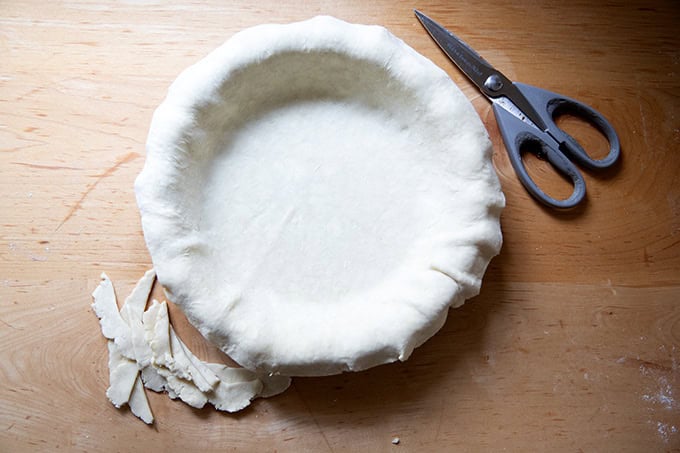
Unfold the pie dough and trim the over-hanging dough, leaving roughly a 1/2 inch of dough extending beyond the edge.
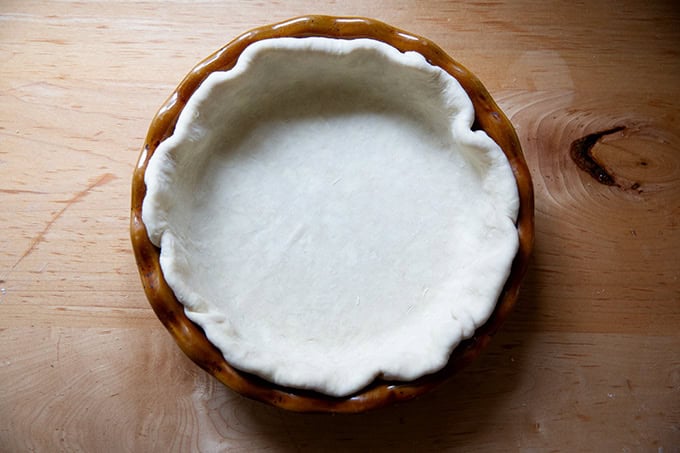
Tuck the overhanging dough behind itself into the pie plate:
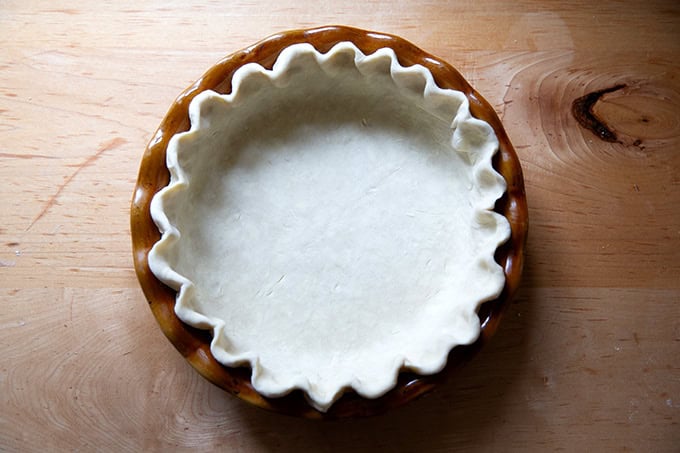
Then pinch the dough using both hands to make a pleated edge. Chill for 30 minutes.
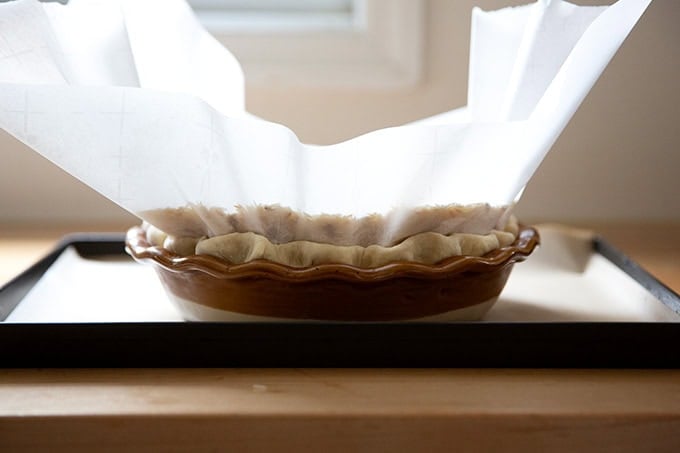
Lay a sheet of parchment paper across the dough and fill it with dried beans or rice: be generous with the beans/rice! I fill mine so that the beans and rice extend at least a half inch above the rim of the crust.
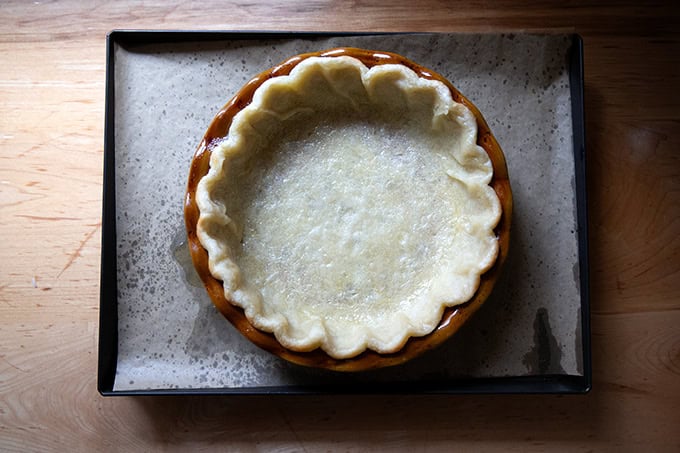
Transfer to the oven and bake for roughly 20 minutes, relying on the visual cues: remove the pan when you see light browning at the edges:
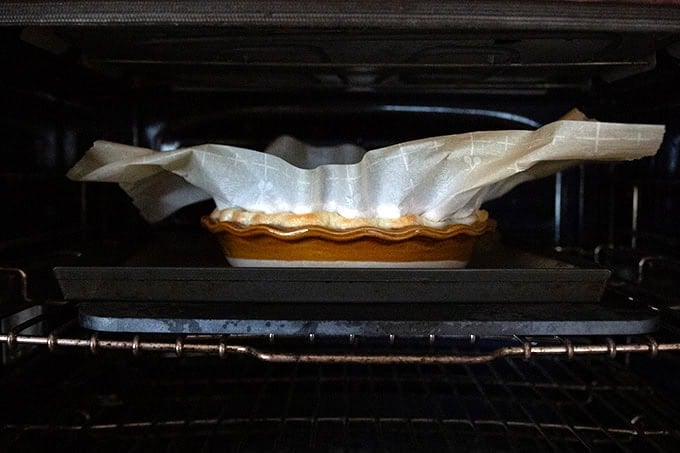
Lift the entire parchment paper sling out of the parbaked crust…

… then return the pan to the oven …
… for another 2-3 minutes:
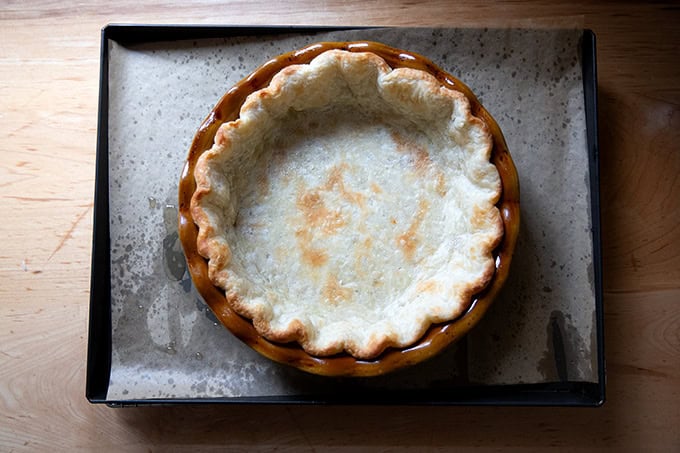
Transfer to a cooling rack:
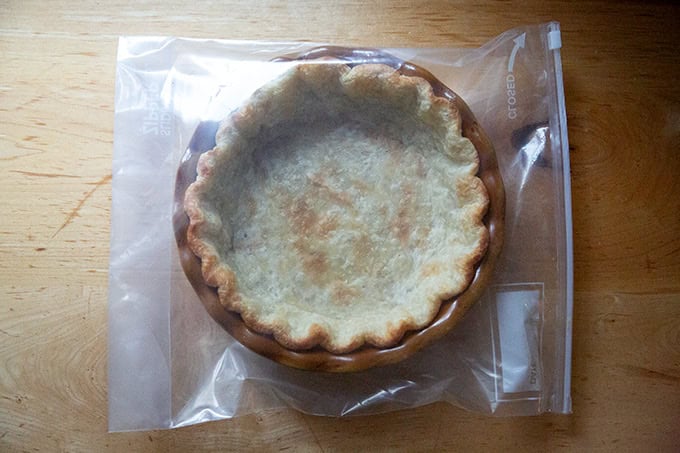
Let cool completely before storing. See storage notes in recipe box. I find these 2-gallon bags to be so handy for storing parbaked crusts and other large items.
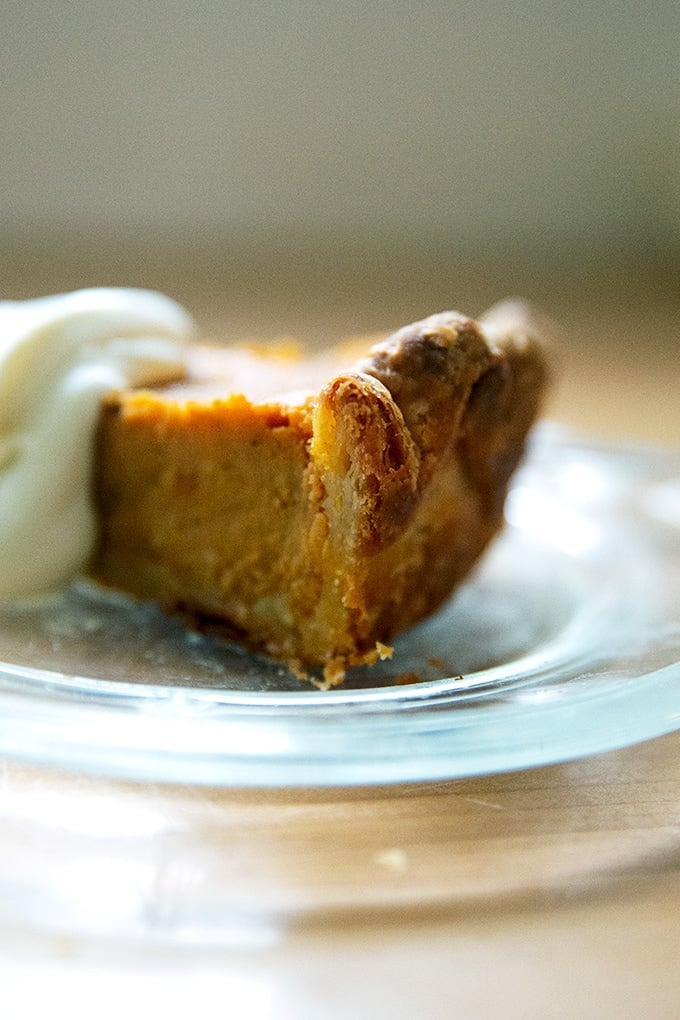
When you are ready to bake, simply fill your parbaked shell with the filling and bake as directed. This is this butternut squash pie filling:

Can you see how flaky the crust is?
How to Parbake (and Blind Bake) Pie Crust + Foolproof Flaky Pie Dough
- Total Time: 1 hour 25 minutes
- Yield: 2 pie crusts 1x
Description
Below you will find guidance for both making pie dough and parbaking or blind baking it. This trusted method will ensure your crusts do not shrink in the oven and will prevent your finished pies from having soggy bottoms.
Here are a few recipes that benefit from a parbaked crust:
- Bourbon Pecan Pie
- Roasted Butternut Squash Pie (i.e. The Best Pumpkin Pie)
- Salted Maple Pie
Notes:
- Plan ahead: Ideally, make your dough 12 to 24 hours before you plan to roll it out. Doing so allows the flour to fully hydrate and allows the gluten to relax. This makes rolling the dough out more easily and also helps minimize shrinking in the oven.
- To make a double batch: do not load your food processor with double quantities. Make the dough in separate batches — no need to wash the food processor in between batches.
- To make a half batch, see quantities in the notes section below.
- Favorite Pie Plate: I swear by my ceramic Emile Henry 9-inch Pie Plate.
- Do not bake pies directly on the rack — butter will seep out and when it hits the oven floor (or Baking Steel), it will make a smoky mess. Instead, place your pies on sheet pans and use parchment paper, if you wish, for easy clean up.
- Dough Storage: Dough can be made up to three days in advance and stored in the fridge or made weeks in advance and stored in the freezer. To thaw, place dough in the fridge overnight before baking.
- Once you roll out your dough and fit it into your pie plate, don’t freeze it — the crust will not bake properly directly from the freezer.
- Parbaked Crust Storage: Once you parbake your pie shells, let them cool completely; then store in an airtight vessel or bag — a 2-gallon zip-top bag works well. Store at room temperature for up to 3 days or freeze for up to 3 months.
- Pie-Making Schedule: This is a great schedule to follow if you are making pies for Thanksgiving or any holiday:
-
- Tuesday (or 2 days before you plan to serve your pies): Make the dough and chill it.
-
- Wednesday: Parbake the crust.
-
- Thursday: Fill and bake the pie.
-
Ingredients
- 2½ cups (320g) all-purpose flour
- 2 tablespoons (25 g) sugar
- ½ teaspoon (3 g) kosher salt
- 16 tablespoons (227g) unsalted or salted butter, cut into small pieces and chilled
- ½ cup + 2 tablespoons (142g) ice water
For baking and storing:
- pie weights or dried beans/rice — I always use dried beans/rice. You need more than you think — over 3 lbs. per pie. You can use them forever and ever. I store mine in this OXO vessel.
- parchment paper — I like the large size of Reynolds for parbaking.
- Jumbo ziptop bags — the 2-gallon size is particularly helpful
Instructions
- In the bowl of a food processor, pulse the flour, sugar, and salt together. Add the chilled, cubed butter. Pulse at 1-second intervals until butter is the size of peas — should be about ten 1-second pulses. Add the ice water and pulse again about 10 times until the mixture is crumbly but holds together when pinched. (To make without a food processor: In a large bowl, whisk flour, sugar, and salt together. Add the butter to the flour mixture, and using the back of a fork or a pastry cutter, incorporate it until it is in small pieces. Add ice water and continue to stir with a fork until mixture is crumbly but holds together when pinched.)
- Lay two clean tea towels on a work surface. Dump half of the crumbly dough mixture (roughly 350 grams) into the center of each. Grab the four corners of the towel together and twist to create a beggar’s purse, pressing the dough into a round. Use your hands to pack and flatten the round. Wrap in plastic wrap or parchment paper, place in ziplock or other airtight bag/vessel, and stash in the fridge for at least 30 minutes, but ideally 12 to 24 hours or for as long as 3 days. You also can store it in the freezer for as long as 3 months.
- To parbake or blind bake the pie crust: Heat your oven to 425ºF. If you have a Baking Steel or pizza stone, place it on a rack in the lower third of your oven. (Steels and stones retain heat well, and they encourage proper and even browning on the bottoms of pie. They also help keep the oven temperature’s even as you open and close the door to check on your pie.) On a lightly floured work surface, roll out one of the chilled rounds of pie dough, flipping the round over every few strokes, until you have a circle roughly 15 inches in diameter. Note: If you are using very chilled dough, you may find it helpful to pound it gently with your rolling pin before beginning the rolling.
- Transfer the round to a pie plate. Trim any excessive overhanging pie dough — there should be roughly one inch of dough overhanging the edge. Save the scraps in an airtight container in the fridge. Tuck the overhanging dough behind itself; then use your fingers to crimp the edge into a fluted pattern — video guidance here. If time permits, chill the shell for 30 minutes. Lay a sheet of parchment across the pie plate and pour pie weights or dried beans into the center until they reach the top of the pie crust. Use your hands to press the weights down and fit them into the edges of the fluted crust.
- Transfer the filled pie crust to a parchment-lined sheet pan and transfer to the oven for 15-20 minutes or until the edges are just beginning to color — do rely on the visual cues here. It sometimes takes my crusts a little longer to take on that light color at the edges.
- Remove the pan from the oven and carefully remove the pie weights or dried beans (which you can use again and again — let them cool completely; then transfer to a storage bag). Return the pan to the oven. For a parbaked crust, bake the shell for another 2 to 3 minutes — it should take on only the slightest bit of more color all around. For a blind-baked crust, return the shell to the oven for another 10 to 12 minutes or until the crust is evenly golden brown.
- Once you parbake or blind bake your pie shells, let them cool completely; then store them in an airtight vessel or bag — a 2-gallon zip-top bag works well. Store at room temperature for up to 3 days or in the freezer for up to 3 months. From here, proceed with whichever pie recipe you are making. I use this pie crust for every pie I make. See notes above.
Notes
Half Recipe Quantities:
- 1 1/4 cups (160 g) all-purpose flour
- 1 tablespoon sugar
- 1/4 teaspoon table or kosher salt
- 8 tablespoons (114 g) cold, cubed butter, salted or unsalted
- 1/4 C. + 1 T. (71 g) ice water
- Prep Time: 1 hour
- Cook Time: 25 minutes
- Category: Dessert
- Method: Oven, Food Processor
- Cuisine: American, French
This post may contain affiliate links. Please read my disclosure policy.


219 Comments on “How to Parbake Pie Crust + Foolproof Flaky Pie Dough”
So excited to see how these shells come out, as I’ve been using a different recipe for 2 years and something about this already feels better! Question – once chilling in the fridge all shaped before par baking…. Can I leave them there overnight and par bake the next day or is that going to allow the crust to dry out too much? I rolled the dough today and shaped but would rather do all the baking tomorrow when I make the pies.
Thank you- have loved all of your recipes over the years!
Hi! Do you have any 2-gallon ziptop bags you could tuck the pies into? It’s not too long to keep them in the fridge, but I do worry about the dough drying out a bit. Alternatively, you could wrap them well in plastic wrap or cling wrap.
Thank you for your kind words! I hope these turn out well for you. I parbaked my three crusts this morning, and I find the process so satisfying. Happy Thanksgiving!
Does this crust have to be par baked or can I pour my filling in right away after chilling and bake?
You don’t have to parbake! It’s just to help prevent a soggy bottom 🙂
Hi Ali!
I noticed that you didn’t prick the bottom with a fork. I just parbaked my crust. It shrunk and bubbled up on the bottom. Luckily, I made 2, so I’m going to try again. Wondering if I should’ve pricked it?
You can prick it! I find that pricking it doesn’t really make much of a difference, but definitely worth a shot. Questions: are you using enough dried rice/beans/weights? And did you chill the pie plate once the dough had been added before baking it?
I used a full bag of rice. (Thought I had beans , but I didn’t’t) I did not chill after shaping. The second crust was 70% better. Held its shape, the bubbles collapsed as it cooled. Next time, and there will be a next time because I’m no longer afraid of pie crust!, I will use beans and chill before baking. I made the salted maple pie for Thanksgiving. It was gorgeous and delicious. Thank you!
OK, great to hear the fear has been eliminated! Chilling after shaping will help. And really making sure the rice/beans are filling the parchment all the way to the top of the crust will also help. So glad you liked the Salted Maple pie 🙂
So I prepared the crust dough a week ahead and thought it was ruined, waaaay too wet compared to any other pie dough I’ve every made. Tossed it in the freezer and didn’t hold high hopes. After defrosting it in the fridge overnight it rolled out absolutely beautifully, baked beautifully and was a great crust for my pecan pie. Have saved this recipe now to use again in the future
Great to hear, Joy! Thanks so much for writing 🙂
How long would cook the crust if you want to completely cook it (blind bake it) for a cream pie? Thanks!
Hi! After you remove the pie weights, return the shell to the oven for another 10 to 12 minutes or until the crust is evenly golden brown.
Hello Alexandra,
Just want to confirm what type of butter we are supposed to use for pie crust. The recipe calls for unsalted butter but in your video you say you always use salted butter. Can you please let me know? Thank you.
You can use either! When I first wrote the recipe, I always used unsalted butter (as I did with all of my baking). When I discovered that salted butter never made things taste too salty, I switched to salted butter, because that’s what I like on my toast 🙂 and it’s easier to buy just one butter. Both work equally well.
Thanks for your pie crust recipe. All of the information you have shared is going to be most helpful for me. Will definitely try putting the crumbly dough in the tea towels!! The baking times and info for storing baked crust is just what I needed when I found your website. I certainly appreciate you sharing with us. 🥧
Great to hear, Mitzi! Thanks for writing 🙂
I was so fearful of making my own pie crust. This was easy!!! I did not use my food processor. I don’t have parchment paper. Can I use aluminum foil?
Great to hear! And yes, you can use aluminum foil 🙂
Thank you for the recipe and double thanks for your detailed instructions! I haven’t tried making my own pie crust in years, but I know homemade is tastier. My par baked crust turned out great.
I’ve also had terrific results with your bread recipes. Love your book. 🙂
Great to hear, Teresa! Thanks so much for writing and thank you for your kind words. Means a lot 🙂
Hi Ali.
Can I ask if you butter your pie plates before you put the pastry in to bake and also when you give the temperatures for par baking, are they fan forced or just traditional baking temperatures?
Your recipe for the Shortcrust pastry is incredible.
Thank you for all your recipes.
I do not butter my pie plates, and the temperatures are not fan forced. Thank you for your kind words 🙂
Hi, hav you made this with gluten free flour?
I have not I’m afraid. I do think using something like Cup4Cup here would work well in place of the flour.
Hi Ali!
After years of trying to make pie dough I learned this from you and now I always make my pie dough this way! I love it!
My question is about the towels you used to make beggars purses… are they something I can purchase somewhere?
Thank you… think I’ll make my dough today too! 😉
Warmly,
Courtney
So nice to read this, Courtney! Thanks so much for writing. I use these flour sack towels from Dot and Army. Love them!
I love your process for making pie dough. As I live alone, I divide batches into 3oz portions, wrap and freeze those for later quiches, or galettes. So easy.
Love this idea, Jane! So smart. Thanks so much for writing and sharing this great tip 🙂
Hi Ali
I just wanted to thank you so much for all your recipes.
They really are inspiring.
After years and years and I mean that, I have finally found the perfect pie crust and it is all thanks to you.
I’m not scared to make them now and they are so light and crispy.
You are such a wonderful cook and I can’t thank you enough.
Awww, Julie!! It’s so nice to read this. Thank you so much for taking the time to write, and thank you for your kind words, too 🙂
Ali, Where do you buy the tea towels you use for the pies? I’m flyng to my son’s in North Carolina for Thanksgiving, and I want to try your method for the pies.
Linda
Hi again! I’m replying to both just to make sure you get it: Dot and Army.
Soory I forget to include my email.
Ali, Where do you buy the tea towes for making your pie dough?
Linda
Hi Linda! They’re from Dot and Army.
Hi Ali,
Thank you for the wonderful tutorial! I have a question. Would you parbake for a double crust fruit pie? Thank you for all your recipes and wisdom.
Hi Meg! I have not tried this actually only because I have heard that it is hard to adhere non baked pie dough (top layer) to parbaked pie dough (bottom layer). But a number of people have asked me this, so I’m tempted to try. If I give it a go, I will add notes to the recipe box here.
Help! I tried to parkbake a crust and after 15 min when the edges had a hint of color, I removed the parchment and beans and there was a pool of butter in the bottom. Talk about soggy!
I chilled the dough for 24 hrs, and chilled it again for an hour after rolling it out and putting it in the pie dish. I measured with a scale.
Seeing pools of butter is normal! It will seep back into the crust. Also, it may look soggy, but it won’t be soggy once it bakes again for the 45-60 minutes for whatever pie recipe you are following. Did you return the pie to the oven without the weights for 3 minutes?
I did return the pie to the oven without the weights for 3 minutes… it just did not seem right, but I guess I should have trusted the process! I thought maybe I had worked dough too much as I don’t have a food processor and mixed by hand. Thank you for the reply…I will try again!
Ok, sounds good! Apart from the butter pooling at the bottom, how did the rest look? Did the crimped edges hold their shape? Was their any shrinkage?
Hmmmm there was a little bit of shrinkage. I made another batch of dough and while I haven’t parbaked it yet, I think maybe my first batch was too wet. Will try again and report back!
OK, interesting! Are you using a scale to measure? What type of flour are you using?
One more question! I am assuming I am freezing the parbaked crust in the ceramic pie plate (and not try to remove the crust from the plate). When I go to bake the pie next week, do I need to put the plate/crust in the fridge overnight to defrost, or can I go directly into the oven?
The easiest thing to do is to freeze the parbaked crust in the ceramic plate. I would remove the plate from the freezer the day before you plan on baking and leave it at room temperature (not the fridge). It’s unlikely that your pie plate would shatter, but ideally, you want it to be room temperature before you put it in the oven.
Super helpful, thank you for all the handholding! I did another batch using slightly less water. In both batches I used the Trader Joe’s brand unbleached enriched all purpose flour. Not what I usually use, so maybe that was part of the issue. I always use a scale! The seccond parbaked batch (with less water) turned out much better.
Great to hear re scale! Glad the second batch turned out better 🙂
Really? You would serve this odd color pie crust to guests or even family?
Do you use unbleached flour? Storing an unbaked flour product even over night will always discolor with unbleached flour.
Yes, I absolutely would. The finished parbaked pie crust looked no different than any other parbaked crust I have made — only the unbaked dough looked different (a little gray). It would have been a waste to throw it away. Yes, it was unbleached flour.
Hey Ali,
For many years I have mixed up my pie crust dough and before adding the water, I dump the dry mix into a ziplock bag and freeze it all. (my late husband always labelled it ‘Proto-Pie Crust’, LOL) Then whenever I want to bake a pie, I scoop out a couple of cups, add water and roll it out as usual. Generally, I don’t thaw anything, I work with the frozen flour/butter. What do you think about using your recipe with this process?
Awww, Annah! I love this story so much. I think it would work really well with this recipe. Part of the reason I’m sure your method was so successful was because every element was ice cold! Generally it’s just the ice water and butter that are on the cold side. Good luck with it. Thanks for writing 🙂
Can I use this dough in a tart pan, are there any reasons I shouldn’t?
Yes! I use it for this French Apple Tart.
Excellent, no fuss. Another winner !
Great to hear, Michelle! Thanks for writing 🙂
Q re: salted butter. If you use salted butter then do you cut back on the added salt in the recipe?
Thanks for the feedback!
Nope! Hi Claire 🙂
Hi, Ali! thank you! and Happy Thanksgiving to you!
I was curious about the 425 temp. I tested this in my 5-year-old Electrolux oven and, following all instructions (dough in fridge overnight, formed pie crust in fridge 30 mins) and got too-dark crusts after 15 minutes. I switched to 410 and had much better results.
I have been using your pie crust recipe for a few years and I love it! So easy, so flaky and crusty. I’ve used it with the Salted Maple as well as an apple crumble pie and even a savory quiche. I am wondering, though, what do you do with the scraps cut off and put into the refrigerator. I’ve been using them to make decorations for the pies, i.e. leaves, snowflakes, etc. Is this what you intended?
Great to hear, Lisa! Yes, that’s what I do, too: Pie Crust Cookies You can also make cinnamon snails:
Roll out pie dough scraps into a rectangle. Spread with a layer of butter. Sprinkle generously with cinnamon and sugar. Roll into a spiral. Cut crosswise into slices. Bake at 375º for 10 to 15 minutes — just keep an eye on them; they brown quickly at the end.
Hello,
I may have missed this, but what do you do with the bits that you cut off the edges and put in the fridge?
I have made this crust several times and it’s amazing.
Thank you!
Hi Vana! Great to hear. I use them to make these Pie Crust Cookies
What thickness do you recommend for the crust?
Hi! It’s pretty thin… I think the general recommendation for pie dough thickness is that of a ritz cracker, but I definitely go thinner. For this recipe, I go more on the diameter: I roll it to a diameter of 15 inches, and that is the right thinness.
I wrote my comment in frustration because I made so many mistakes with this recipe; my fault, not yours! For instance, when I finally managed to roll it out it was approximately cowboy boot shaped, so I tried cutting and pasting. I am a very inexperienced baker and adding pie to my Thanksgiving menu was, I think, one step too many for me to handle. Still, I learned a lot and I’m going to try again. It was so kind of you to post a reply, especially over the holiday. The pie and crust tasted delicious but I am still reaching for beautiful too. Thank you for your support.
I just made this pie crust for your salted maple pie and it was so good! I found the beggar’s purse trick really helpful. My crust shrunk a bit during the cooling but it wasn’t really an issue. I did fill the shell up entirely with pie weights and beans, and I also chilled it before baking. I think next time I will try to make the sides taller to allow for some shrinkage.
Hi Linda! I’m so happy to hear this. Making the sides taller is a good idea and should help with the shrinkage. Not sure how long you chilled the mixed dough in the fridge, but I do find that chilling it for at least 24 hours helps with both rolling out the dough and with shrinkage.
Absolutely the best pie crust I’ve ever made or eaten! It is so flaky and tender.
Great to hear, Denice! Thanks so much for writing 🙂