 →
→ Simple Sourdough Ciabatta Bread
This post may contain affiliate links. Please read my disclosure policy.
Made with four ingredients, this sourdough ciabatta has a crisp crust, a beautiful honeycomb crumb, and a lovely lightness and chew. The process is truly simple, and the ciabatta is so tasty, perfect for sandwiches of all kinds, for dunking into soup, or transforming into bruschetta.

Originating from the Lake Como region of northern Italy, ciabatta means “slipper” in Italian. Traditional ciabatta is characterized by its slipper shape and extremely porous, light texture, created with a biga (a preferment), a high-hydration dough, and a long, slow rise.
A biga is made with a small amount of yeast, flour, and water. In this recipe, I’ve replaced the biga with a sourdough starter, but kept the remaining elements the same: the high-hydration dough is made with four ingredients and requires a long, slow rise, which produces a crisp crust, a beautiful honeycomb crumb, and a lovely lightness and chew. This ciabatta is perfect for sandwiches.
Best of all: the process is truly simple. The dough does not require an autolyse, a preheated Dutch oven, or a baking stone. If you have a sheet pan, you’re good to go. What’s more, there’s no shaping, scoring, or balling up dough. After the bulk fermentation, you turn the dough out onto a floured work surface, pat it into a rectangle, and divide it into 8 pieces. You then transfer those pieces, irregularly shaped and all, to a sheet pan, and bake them one hour later.
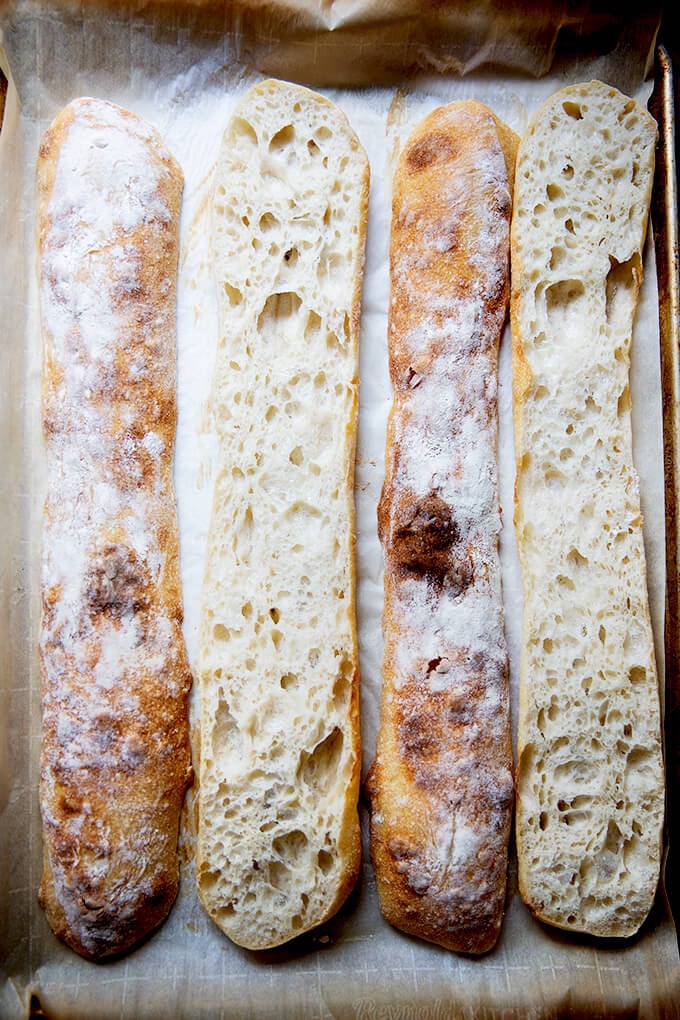
Can I tell you the most exciting part? This dough makes an excellent baguette! Unscored and flour-dusted, it has a crumb and flavor better than any other I’ve attempted previously. See photos below.
PS: If sourdough isn’t your thing, please try this yeast-leavened ciabatta bread recipe.
How to Make Sourdough Ciabatta, Step by Step
Gather your ingredients: bread flour, water, salt, and a sourdough starter. I am a proponent of buying a starter (see recipe box for sources), but if you are up for it, you can build a starter from scratch in just about 1 week.
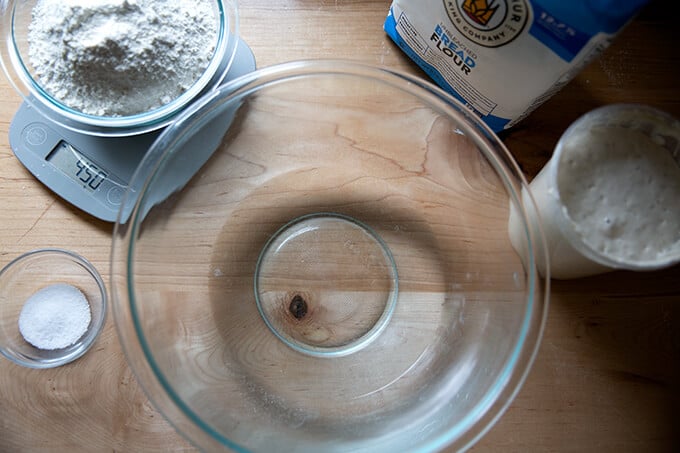
For this recipe, you’ll need: 100 grams sourdough starter, 360 grams water, 450 grams flour, and 12 grams salt. It’s 80% hydration.

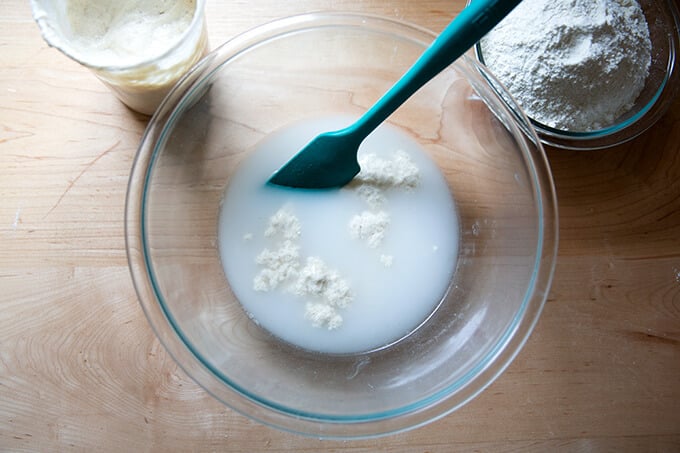
Mix together the water, sourdough starter, and salt.
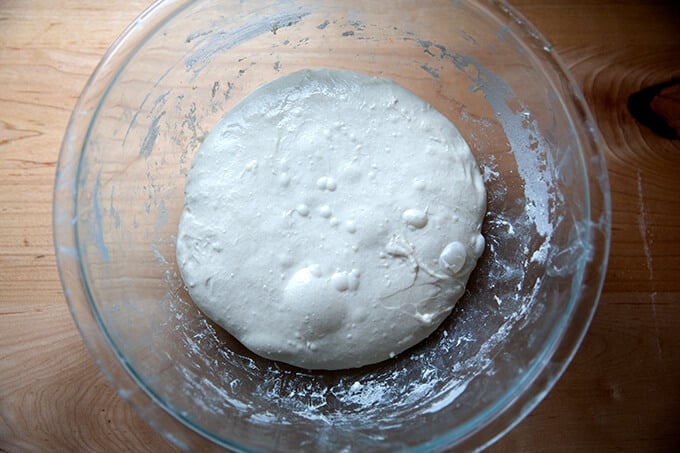
Add the flour and mix to form a sticky dough ball.
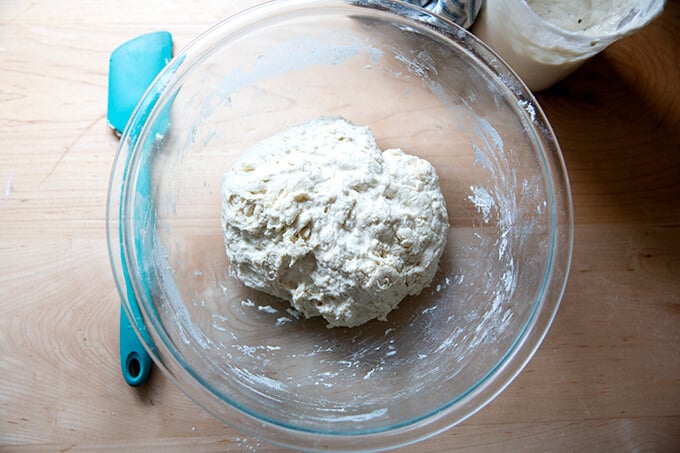
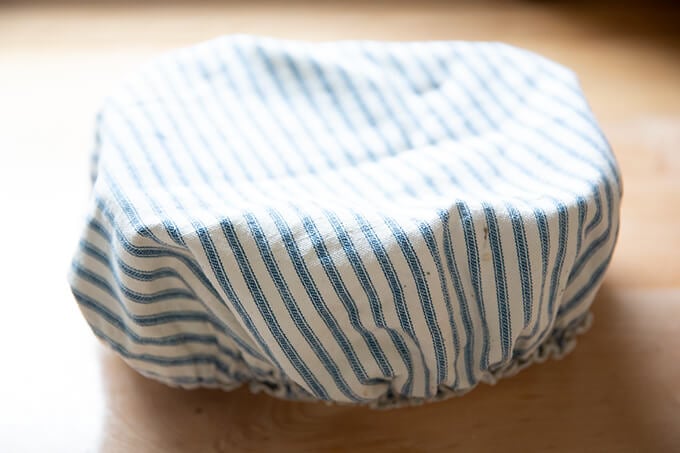
Cover the bowl and let rest for 30 minutes. Then perform a set of stretches and folds. See the video above or in the recipe box for guidance. This is what the dough will look like after one set of stretches and folds.
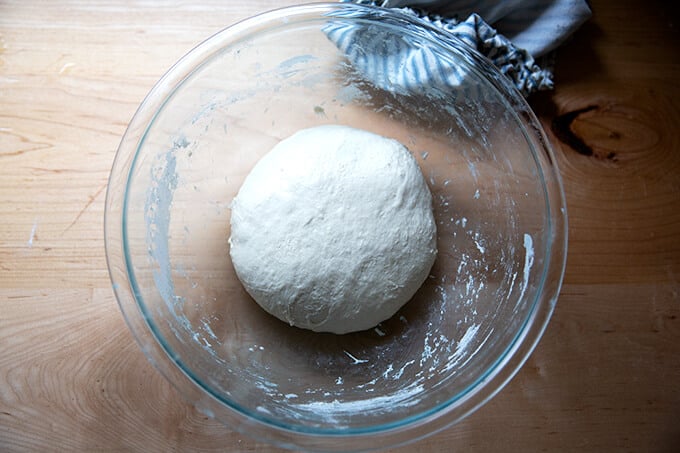
This is what the dough will look like after 4 sets of stretches and folds.
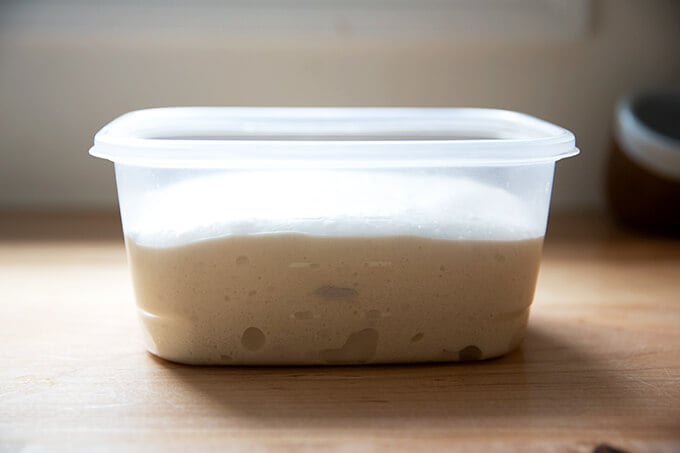
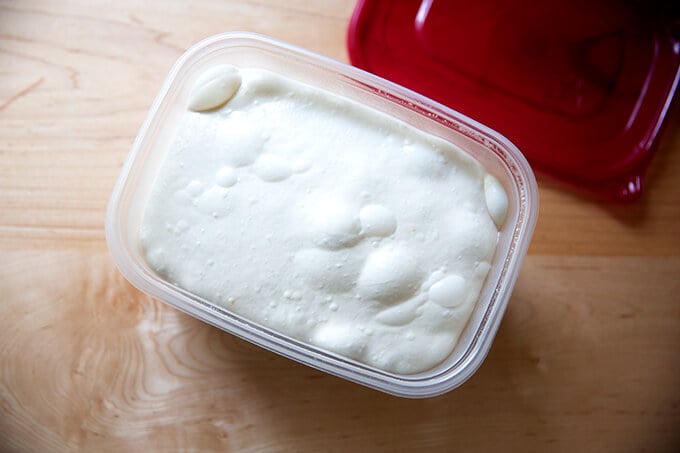
Transfer dough to a straight-sided vessel (this one is 8 cups, but anything similarly sized will do) for the bulk fermentation (the first rise):

Mark the height of the dough on the vessel, cover the vessel, and let the dough rise until it increases in volume by roughly 75%.
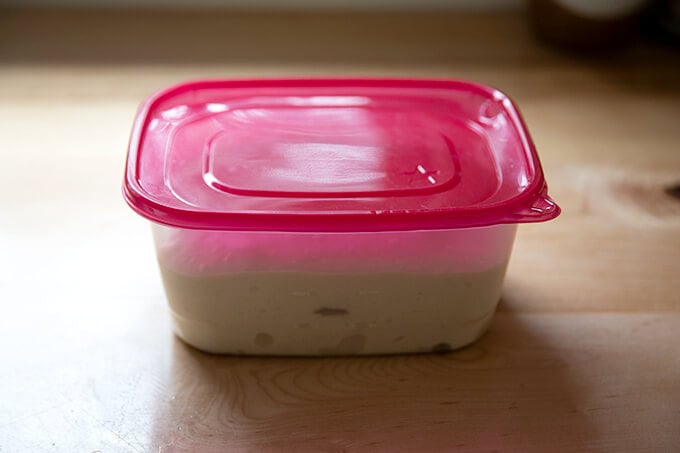
When the dough has increased by 75% (roughly), place a lid on the vessel, and transfer it to the fridge for 12-24 hours.
When ready to bake, remove the vessel from the fridge.
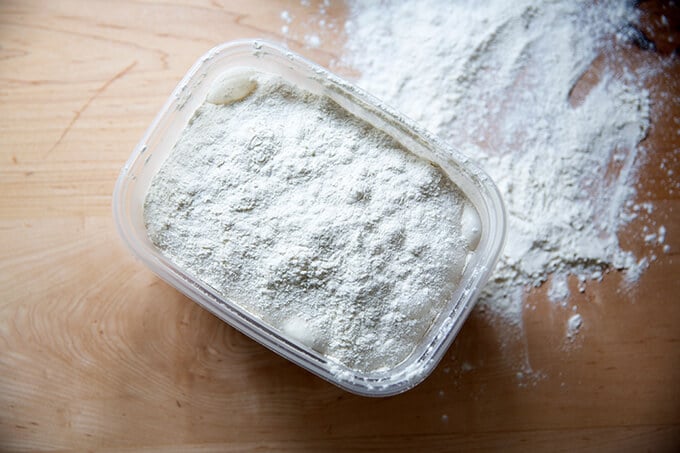
Dust the top of the dough liberally with flour. Dust a work surface liberally with flour, too.
Turn the dough out onto the prepared work surface.
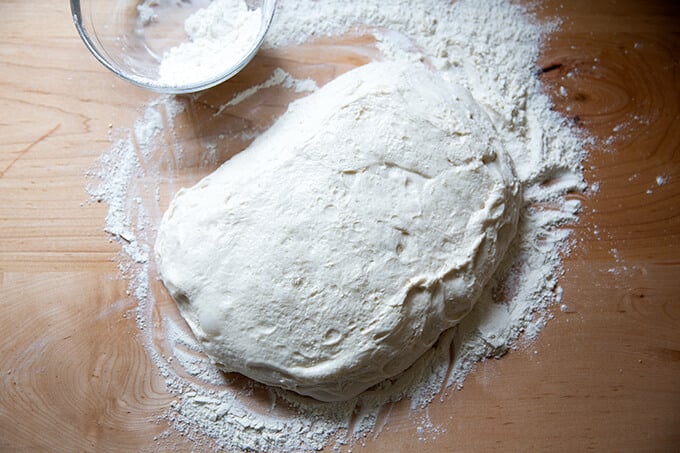
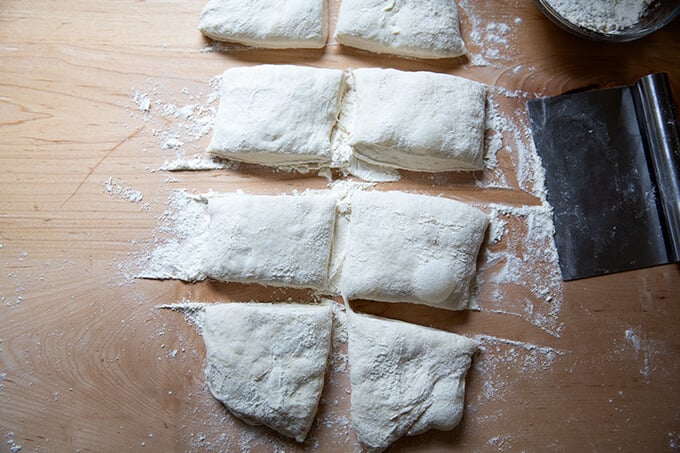
Pat the dough into a rectangle.
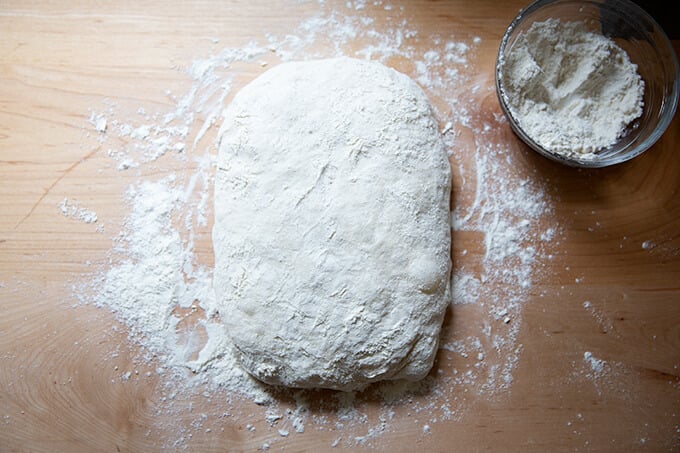
Cut the rectangle into 8 roughly equal portions.
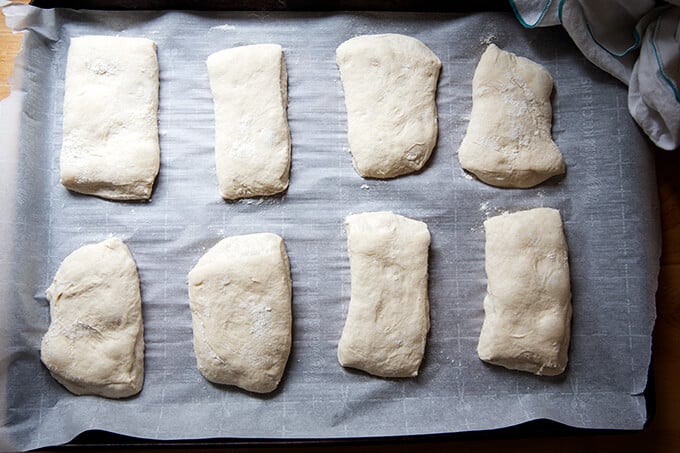
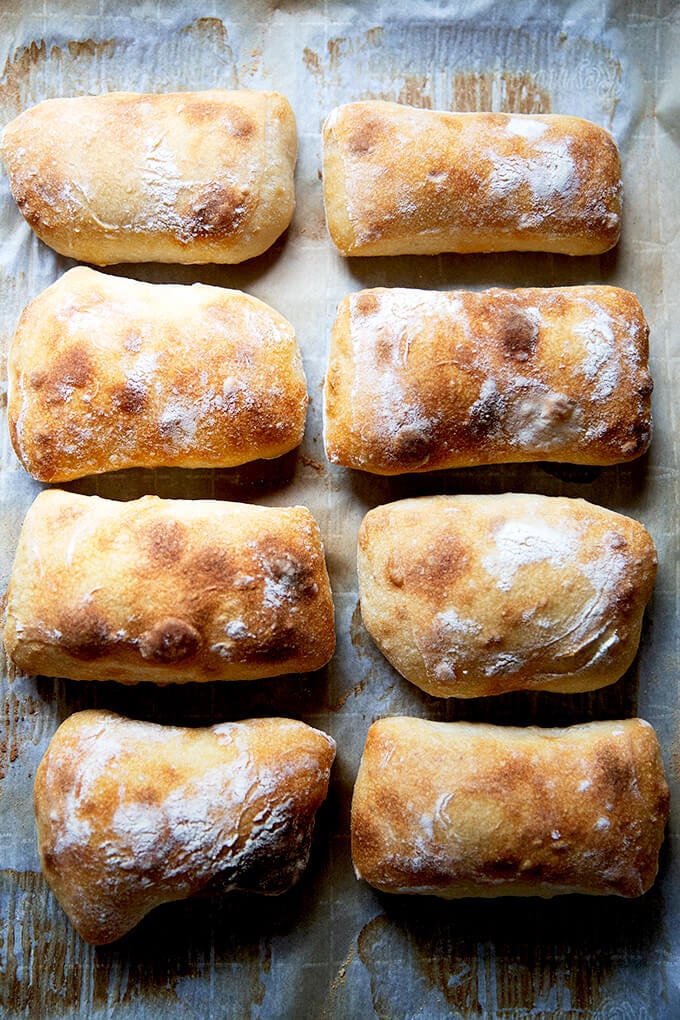
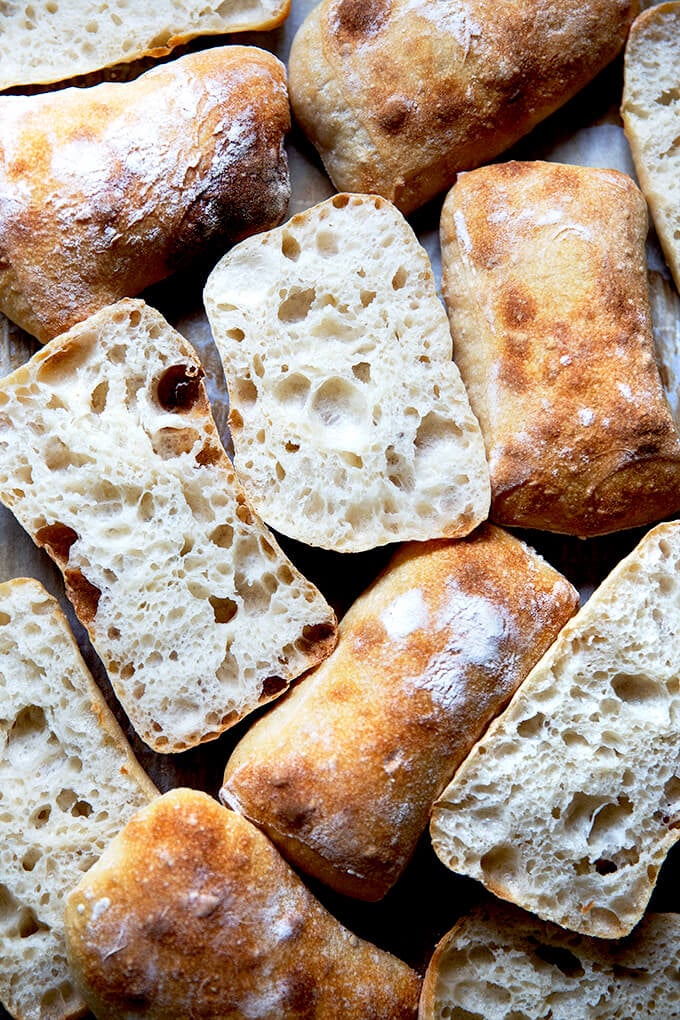
Transfer the portions to a parchment-lined sheet pan. Let rest for 1 hour. Then transfer to a 475ºF oven for 10 minutes. Lower the heat to 450ºF and bake for 10 minutes more.
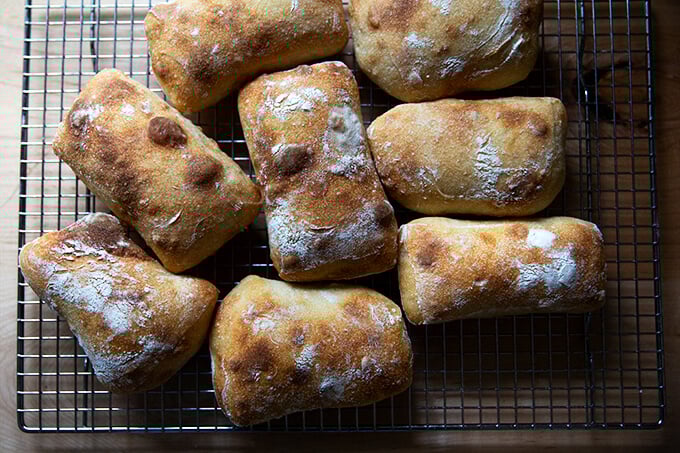
Transfer the rolls immediately to a cooling rack, and let cool for at least 20 minutes before cutting.
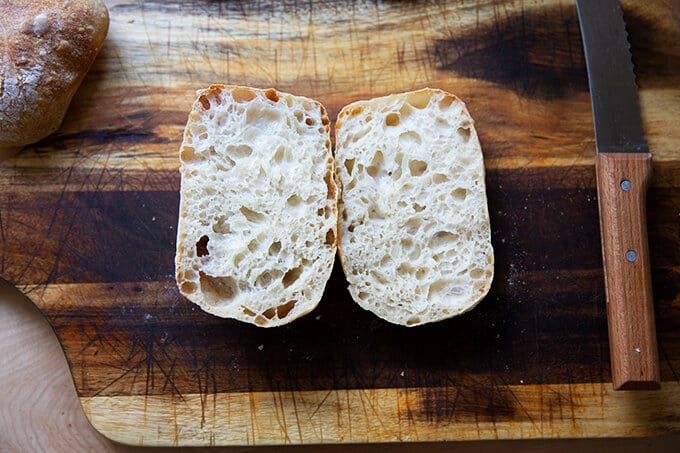
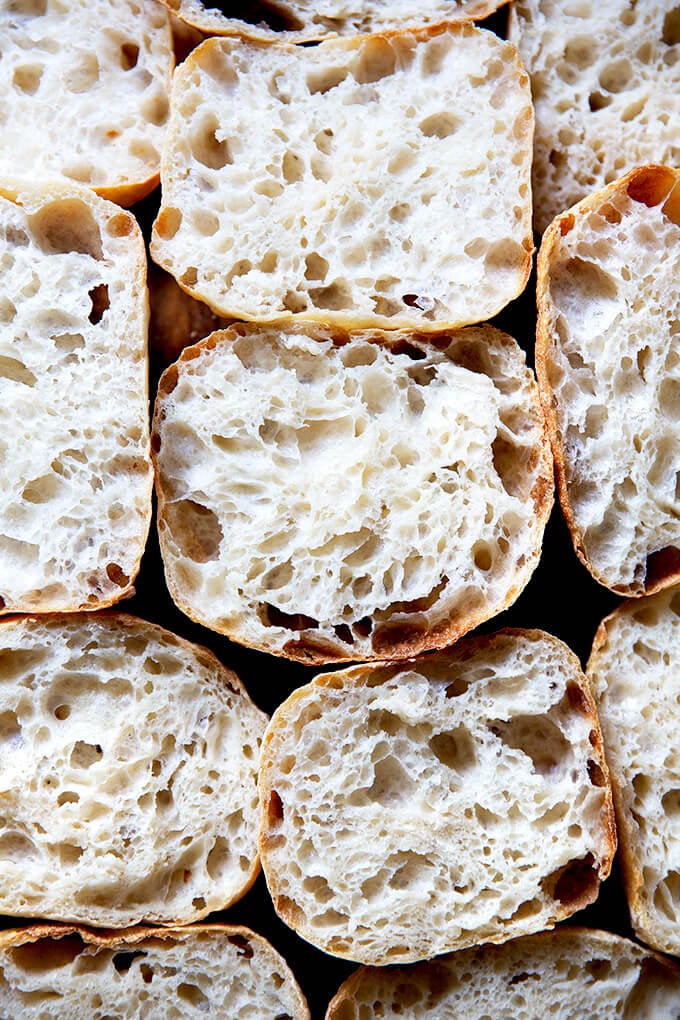
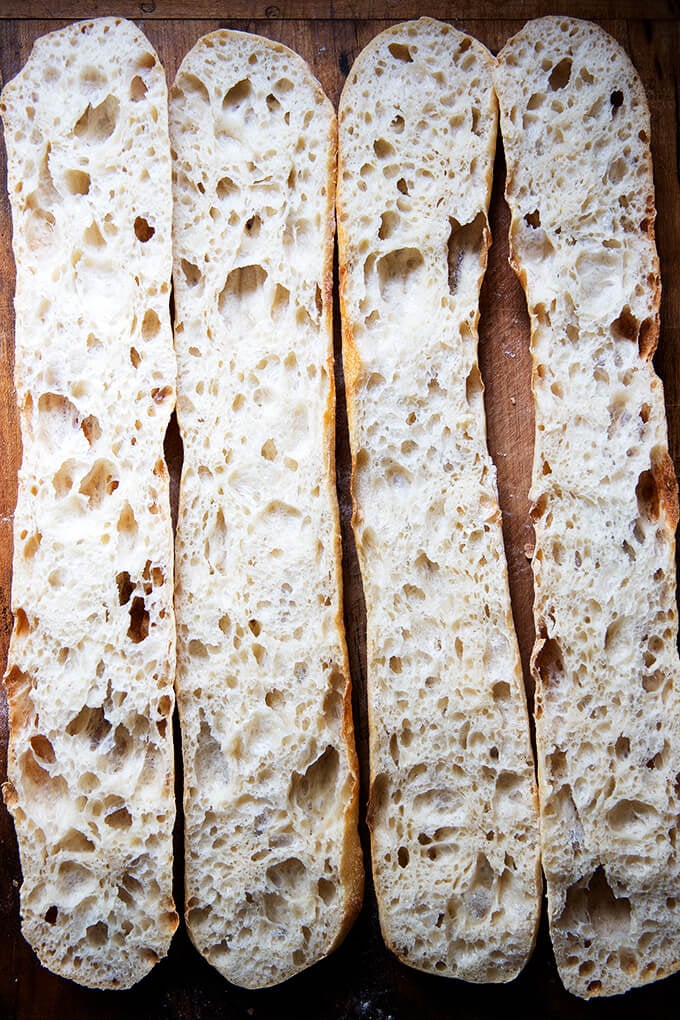
How pretty is that crumb?
Ciabatta sandwich: This recipe is inspired by Gabrielle Hamilton’s Blood, Bones, and Butter. In short, the success of the sandwich relies on a delicate balance: “the perfection of three fats together — butter, olive oil, and the white fat from prosciutto or lardo.” To make it, spread good bread with “cool waxy butter,” top with prosciutto (more than you think), and arugula. Drizzle it all with good olive oil.

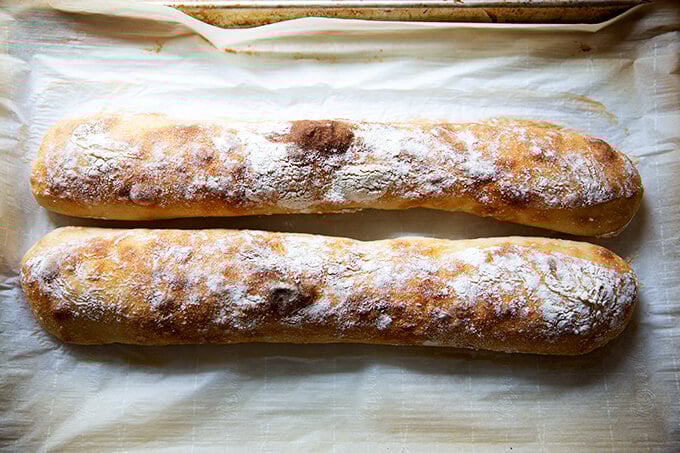
Sourdough Ciabatta “Baguettes” 🥖🥖🥖
To make baguettes, follow the same process, but instead of dividing the rectangle of dough into 8 portions, divide it into two. I find an extra-large sheet pan to be necessary to bake both baguettes at the same time. If you don’t have an extra-large sheet pan, I would bake one baguette at a time, and orient it at a diagonal angle from one corner to another.
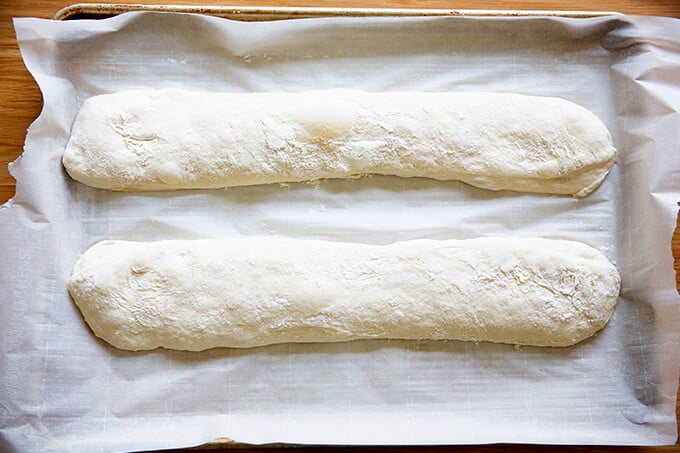
Bake the baguettes at the same temperature and for the same amount of time as the rolls.
Not bad for the effort, right?
These ciabatta “baguettes” would be great vessels for giant sandwiches.

Simple Sourdough Ciabatta Bread
- Total Time: 24 hours 20 minutes
- Yield: 8 Rolls 1x
- Diet: Vegan
Description
Made with four ingredients, this sourdough ciabatta has a crisp crust, a beautiful honeycomb crumb, and a lovely lightness and chew. The process is truly simple, and the ciabatta is so tasty, perfect for sandwiches of all kinds, for dunking into soup, or transforming into bruschetta.
Notes:
- You need an active sourdough starter. You can build a starter from scratch in just about 1 week. But I am a huge proponent of buying a starter. Here are two sources:
- As always, I highly recommend investing in a digital scale before beginning any bread baking adventure.
Flour: I have had success using all-purpose flour, but if you can get your hands on bread flour, that is ideal, especially if you live in Canada or abroad. Moreover, if you live in Canada or abroad, you may need to reduce the water amount. Consider holding back some of the water during the mixing process to ensure you don’t end up with a soupy mess.
Straight-Sided Vessel:
- The vessel I use in this recipe, similar to this one, is 8 cups. Most grocery stores carry storage vessels similarly sized.
- Using a straight-sided vessel for the bulk fermentation will help prevent over-fermentation because it allows you to see when the dough has truly increased by 75% (or slightly more or less) in volume.
Ingredients
- 360 grams (about 1.5 cups) water
- 12 grams (about 2 teaspoons) salt
- 100 grams (about 1/2 cup) active sourdough starter, see notes above
- 450 grams (about 3.5 cups) bread flour, see notes above
Instructions
- Mix the dough: Place the water in a large bowl. Add the salt and stir briefly. Add the starter and stir briefly to incorporate. Add the flour, and stir until you have a wet, sticky dough ball. Knead briefly with your hands if necessary to incorporate the flour. Cover with a tea towel or cloth bowl cover and let sit for 30 minutes.
- Stretches and folds: With wet hands, grab one side of the dough, and pull up and to the center. Rotate the bowl a quarter turn, and repeat the grabbing and pulling. Do this until you’ve made a full circle. (Watch the video for more guidance. I do a few more pulls and turns in the video.) Cover the bowl. Repeat this process three more times at 30-minute intervals for a total of 4 sets of stretches and folds over the course of two hours. (In the video, I switch to coil folds for the last two sets of stretches and folds.)
- Bulk fermentation: Transfer the dough to a straight-sided vessel. Cover the vessel with a towel. Let rise at room temperature until the dough nearly doubles in volume (shoot for a 75% increase in volume). Times will vary depending on your environment and the strength of your starter. Recently, this has taken about 4 hours for me, but don’t worry if it takes longer for you. Cover vessel with a lid (ideally) or a towel (if you are using a towel, slick the top of the dough with oil to prevent it from drying out.) Transfer to fridge for 12-24 hours.
- Shape: Remove vessel from fridge. Remove lid. Sprinkle top of dough liberally with flour. Turn dough out onto a floured work surface. Pat dough into a rectangle. Sprinkle top with flour. Use a bench scraper to cut the dough in half vertically. Then make three cuts equally spaced in each half to create 8 small rectangles.
- Line a sheet pan with parchment paper. With floured hands, transfer each rectangle to the prepared pan, gently pulling outward. Cover the pan with a towel. Let stand for one hour.
- Bake: Heat oven to 475ºF. Transfer pan to oven and bake for 10 minutes. Lower heat to 450ºF, rotate pan, and bake for 10 minutes more. Remove pan from oven. Transfer ciabatta rolls to a cooling rack. Let cool for 20 to 30 minutes before slicing.
- Prep Time: 24 hours
- Cook Time: 20 minutes
- Category: Bread
- Method: Oven
- Cuisine: American, Italian
This post may contain affiliate links. Please read my disclosure policy.


804 Comments on “Simple Sourdough Ciabatta Bread”
I am looking for a recipe to make hamburger buns with sourdough starter and I’m wondering if I can use your ciabatta recipe and make them in the shape of buns? Thanks
Hi Sandy! I think you could. I worry a little bit that these might be too crisp on the outside (as opposed to a brioche bun that is so nice and soft), and I worry that the dough will be kind of a pain to shape into buns because it is such a high hydration dough. That said, of course you can use this dough for buns — just use flour as needed during the shaping process.
I’d like to make large ciabatta loaves with this recipe instead of rolls. Do I need to do anything different apart from cooking for longer?
Nope! Same temperature. Possibly longer cook time so just look for the visual cues before removing them from the oven.
Everything was going so well–my relatively new starter was happening on a grand scale, and the overnight proof showed great promise. Then I did the divide and shape and left on counter for that last 1 hour rise. Everything went flat! I was certain there would be no ciabatta rolls for our nice summer dinner. Boy, was I wrong! They puffed up beautifully in the oven, the crumb was open, airy, holey, and the taste was beyond expectations! So, don’t give up if your last rise looks sad—just bake! Thank you, Alexandra!
Oh phew! I was feeling very sad as I read your comment until I got to the end. Sourdough can be misleading… sometimes it looks like nothing is happening, but so much is beneath the surface 🙂 Thanks for writing! So glad the rolls were a success 🙂
Thank you so much for the video! I love this recipe. My question is if I have 3 batches to make, should I do it separately or have you had success doing bulk quantities together?
As long as you have big enough storage vessels and as long as you are using a scale, you can scale the recipe up as much as you’d like 🙂
This is a delicious and relatively easy recipe for sourdough. The instructions are very clear and makes the whole process quite easy.
Will definitely make again!
Great to hear, Jami! Thanks for writing 🙂
Love this recipe! Super simple to follow. And the texture is perfection. I rushed it and only refrigerated the dough about 6 hours and it still came out great. Thank you for this wonderful recipe!
Great to hear, Hannah! Thanks so much for writing 🙂
Hoping to make these for an elderly relative. Do they freeze okay?
Yes!
How does sourdough work in an air oven…and is it 450 degrees for 20 min
Hi! I’m not familiar with an “air” oven. Is it the same as convection? For a regular oven, the timing is:
Bake for 10 minutes at 475ºF. Lower heat to 450ºF, rotate pan, and bake for 10 minutes more.
I forgot to refrigerate the dough when I went to bed so it sat out all night at about 55 to 60°. It has risen at least 75%. Should I proceed as if I had refrigerated it or should I refrigerate it for a while? I hate to lose this beautiful looking recipe! Thank you!
Hi! So sorry for the delay here… what did you end up doing?
I think you could do either. More fridge time is never a bad thing — good things happen to the dough in the fridge. But if time is a constraint, you could proceed.
Hi this is a great recipe… tastes great and easy to follow. I sometimes get tunneling when I bake it. Almost like a pita pocket, but not always. What am I doing wrong! I’m using bread flour . Thank you!
Love your recipes and videos!
It sounds as though you need to proof it at room temperature longer. How long are you proofing it before you bake it?
I let it sit at room temp for 4 hrs, then into my frig for about 16 hrs, then let it sit for an hour before baking. Taste is good but it’s just hollow..??!! Help!
I think you need a longer room temperature proof — try 2 to 2.5 hours before baking. That should eliminate the “tunneling”.
My Wife and I do alot of cooking.
We followed your recipe verbatim, and the result was spot on.
I’ve been looking for this type of bread since I was stationed in Vicenza way back in ’89.
Thank you.
So nice to read all of this Jeff! Thanks so much for writing and sharing this 🙂
Question.
I know this is blasphemy but I baked the bread today and need to serve it in two days with your insanely delicious whipped ricotta. What’s the best way to store it?
Love the bread, love the whipped ricotta!!!
Actually love all your recipes and Pizza Night.I might be a groupie😂
Awwww thank you, Cindy 🙂 🙂 🙂
I would just store it at room temperature in an airtight zip-top bag. Reheat it before serving: 15 minutes or so at 350ºF will revive it beautifully. No blasphemy at all! Thanks so much for writing and for your kind words, Cindy 💕💕💕
This recipe turned out fantastic – full of lovely big holes. I used a little less liquid and very strong Canadian bread flour.
Great to hear, Sue! Thank you for writing and sharing your notes 🙂
I have made this bread several times now and it always comes out perfectly. Absolutely everyone loves it and even though I’m not a big bread fan, I do like it. And it really is a very easy recipe. But if there are elements you don’t understand, just about every is on YouTube these days, so thank you for sharing 🙏🙏😊😊
Great to hear, Annie! Thanks so much for writing 🙂 🙂 🙂
Another amazing bread recipe! My starter produces smallish bubbles and has always seemed a little… tired. I followed your suggestion of giving it a final feeding at night and starting the dough the next morning, and that really seemed to do the trick! I used AP flour with a little less than 2% vital wheat gluten (I didn’t have bread flour), and while my dough was a little wetter than yours I forged ahead. My rolls didn’t turn out as pretty as yours but they had the same beautiful crumb and tasted delicious. Thank you for always including such detailed directions – at every step I always knew what to expect. Now that I have confidence in my starter I’ll be trying more of your sourdough recipes!
Great to read all of this, Sherry! Thanks so much for writing and sharing your notes and experience. Glad to hear that your starter is behaving 🙂
Might be too hydrated
This was my first recipe with my active sourdough and it was so easy and tasty. I was able to make this in my less than fancy stove and they turned out so great. My kids ate them all in 24 hours. I’m making it again tonight!
Woohoo! Great to hear, Marcy! Thanks so much for writing 🙂 🙂 🙂
These turned out great!! Crisp on the outside and a wonderful crumb on the inside. Thank you for the recipe 🙂
Great to hear, Angeli!
Love this recipe and have made it at least 20 times with great results! Is there any way to make the sourdough taste more pronounced? So it would be more sour?
Great to hear Mary! Try using 50 grams of starter. It’s counterintuitive, but using less starter usually means your bulk fermentation will be longer, which means your starter will go through its food source at a slower rate and therefore produce more acetic acid along the way.
I notice that you say to let the dough rise 75% before refrigerating, but have changed it to 50% in some other sourdough recipes. Is there a reason you want to allow it to rise more for cibatta?
I notice that you say to let the dough rise 75% before refrigerating, but have changed it to 50% in some other sourdough recipes. Is there a reason you want to allow it to rise more for cibatta?
If it gets late, can you stick it in the fridge before the 75% point? If so, how should you proceed from there?
Yes! Just be sure the vessel is tightly covered so the dough doesn’t dry out. When you are ready to proceed, remove the vessel from the fridge and let the dough continue making its bulk fermentation.
It’s really just a general range – 50-75% for any of the sourdough recipes is fine. I even let my dough double in volume, but I let it rise in a straight-sided vessel, and I monitor it very closely to ensure it doesn’t go beyond that point. Where people go wrong is that they don’t use a straigh-sided vessel and so they let their dough rise too much during the bulk fermentation. I find if I give the 50-75% range, people have more success.
This recipe is so easy and tastes amazing.
Great to hear, Foster! Thanks for writing 🙂
Love these! This is my second time making them and both times they came out with burnt bottoms. This time they were so burnt that the parchment paper stuck to the bottom of my breads. Any ideas ??
Oh no! It sounds as though you need to lower the oven temp or it’s possible that your baking sheet is contributing to the over-doneness. Is it a dark sheet? Also: I’d change brands of parchment paper. Unfortunately, they are all not created equally, and I’ve had disasters, too. Some just are not non-stick, which is maddening. I like Reynolds, If You Care, and King Arthur Baking.
My husband and I ate at a place that made sandwiches on a tomato ciabatta bread… how do you think adding super thin slices of tomato to the tops of the rolls before cooking would affect them? Would I need to reduce the hydration a bit to account for any liquid absorbed from the tomato or do you think the liquid from the tomatoes would all bake off as opposed to being absorbed by the bread?
I wouldn’t adjust the hydration of the dough! Just give it a shot… depending on your results you could adjust the recipe next time around but I don’t think it will be an issue.
Love your recipes, and was looking forward to serving these rolls with Thanksgiving (Canada) dinner. I followed the recipe, but increased the flour to 500g to help the dough come together better. Everything else the same as written. The dough looked spectacular. And they look great coming out of the oven, except that all the bottoms are burnt! 😞 Any ideas why this happened?? Haven’t tasted them yet, but I feel like the tops might be salvageable.
Hi! Bummer to hear this. What material is the sheet pan you are using? Is it dark colored?
Its a dark pan, and I used parchment to line it.
I’m wondering if I should have used a different kind of flour for the outside of the bun. I used bread flour. Should I have used rice flour?
I think the dark-bottomed pan is causing the bottom of your buns to burn. Do you have a light-colored aluminum sheet pan? Rice flour could help but I think it’s the pan that’s the culprit.
I have made the ciabatta recipe a few times and generally have good luck with it. i just like to make it in one large loaf.,although I cant get big hole distribution as pictured,no matter how hard I try.The crumb is coarse and open,so its ok. Latey, I have been using plain kefir in place of water and like the taste when used.
Great to hear, Fred! Kefir sounds delicious. For larger hole distribution, you could try letting the loaves proof at room temperature even longer before baking. It’s possible the kefir is interfering with the hole structure as well.
I’ve made this several times! Excellent recipe and easy. How many calories per ciabatta roll? Can you please post the nutritional information? Thank you!
Hello, Ali. I’m so grateful for the beautiful recipes you share in such detail and your writing is delightful. I can’t tell you how many times I’ve shared your peasant bread with beginner bakers! I make ciabatta weekly at 85% hydration, and today I’m just curious about something you wrote at the beginning of this post.
Why would you need to decrease the liquid if baking “in Canada or abroad”??🤔🙂
Hi! It has to do with the flour — when I’ve troubleshooted with many bakers from Canada and the UK and other places, often the solution to some of the problems they’ve had is to reduce the water. Not for everyone, but for some bakers. I think some Canadian and UK flours just don’t absorb water the way most US commercial bread flours do.
Made he best bread yet. Thank you for your recipe.
Great to hear, Paul! Thanks so much for writing.
I love these rolls and I’ve made them a few times. I was happy to find a recipe for a crustier roll, and the taste is wonderful. I’ve made them a few times. They don’t turn as brown as I would like, so I think I’ll bake them on the convection setting next time. Regardless, they are terrific!
Great to hear, Susan! And yes, convection should help with the browning.