 →
→ Simple Sourdough Ciabatta Bread
This post may contain affiliate links. Please read my disclosure policy.
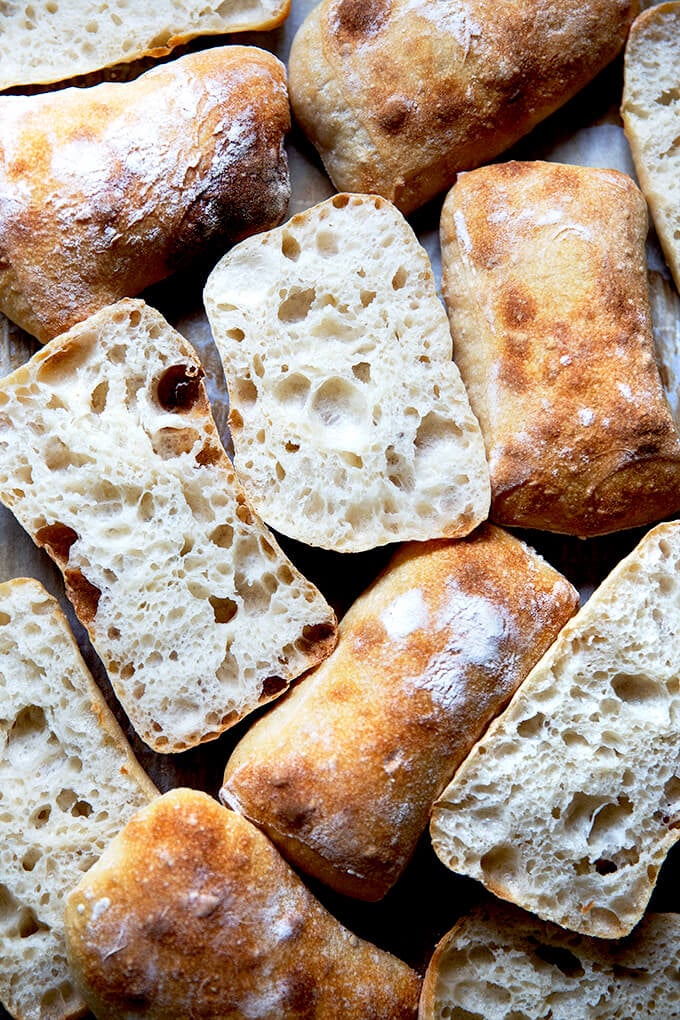
Made with four ingredients, this sourdough ciabatta has a crisp crust, a beautiful honeycomb crumb, and a lovely lightness and chew. The process is truly simple, and the ciabatta is so tasty, perfect for sandwiches of all kinds, for dunking into soup, or transforming into bruschetta.

Originating from the Lake Como region of northern Italy, ciabatta means “slipper” in Italian. Traditional ciabatta is characterized by its slipper shape and extremely porous, light texture, created with a biga (a preferment), a high-hydration dough, and a long, slow rise.
A biga is made with a small amount of yeast, flour, and water. In this recipe, I’ve replaced the biga with a sourdough starter, but kept the remaining elements the same: the high-hydration dough is made with four ingredients and requires a long, slow rise, which produces a crisp crust, a beautiful honeycomb crumb, and a lovely lightness and chew. This ciabatta is perfect for sandwiches.
Best of all: the process is truly simple. The dough does not require an autolyse, a preheated Dutch oven, or a baking stone. If you have a sheet pan, you’re good to go. What’s more, there’s no shaping, scoring, or balling up dough. After the bulk fermentation, you turn the dough out onto a floured work surface, pat it into a rectangle, and divide it into 8 pieces. You then transfer those pieces, irregularly shaped and all, to a sheet pan, and bake them one hour later.
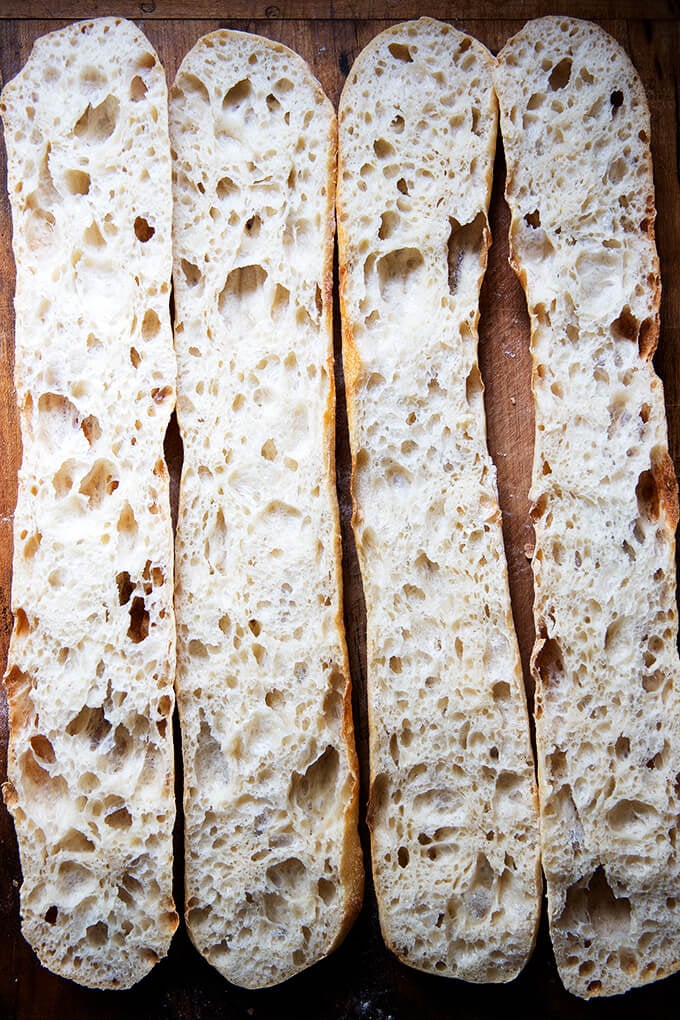
Can I tell you the most exciting part? This dough makes an excellent baguette! Unscored and flour-dusted, it has a crumb and flavor better than any other I’ve attempted previously. See photos below.
PS: If sourdough isn’t your thing, please try this yeast-leavened ciabatta bread recipe.
How to Make Sourdough Ciabatta, Step by Step
Gather your ingredients: bread flour, water, salt, and a sourdough starter. I am a proponent of buying a starter (see recipe box for sources), but if you are up for it, you can build a starter from scratch in just about 1 week.
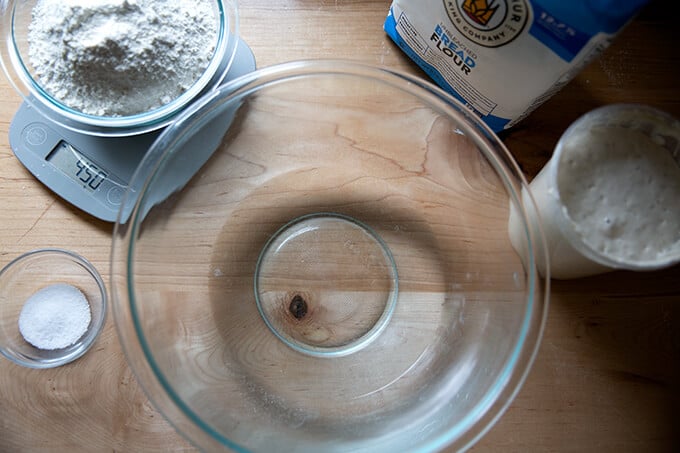
For this recipe, you’ll need: 100 grams sourdough starter, 360 grams water, 450 grams flour, and 12 grams salt. It’s 80% hydration.

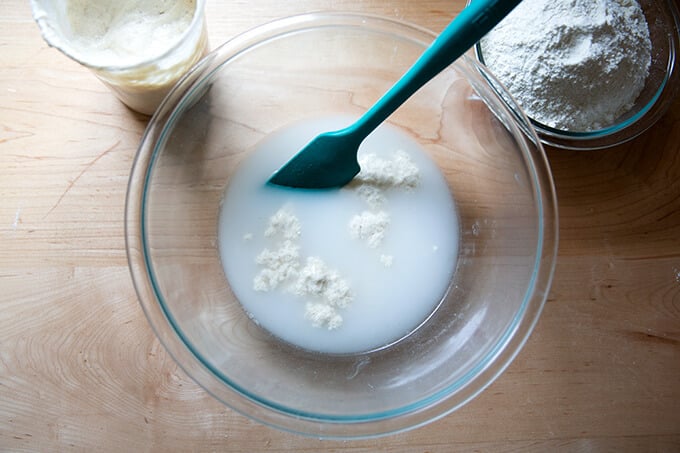
Mix together the water, sourdough starter, and salt.
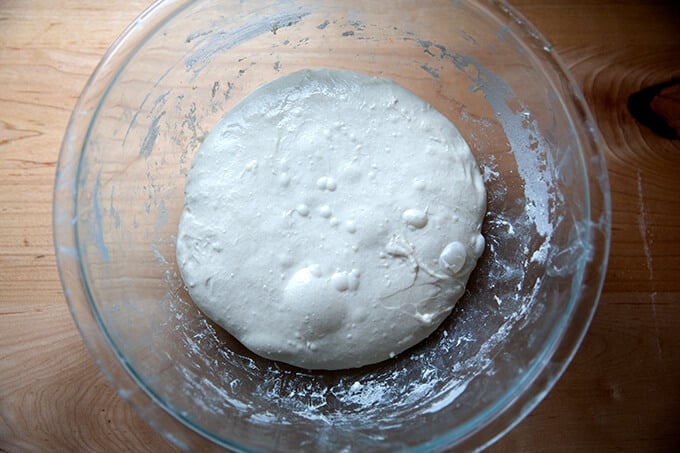
Add the flour and mix to form a sticky dough ball.
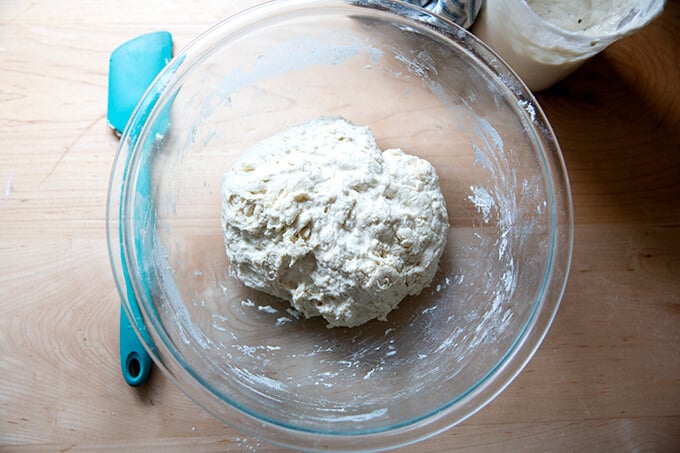
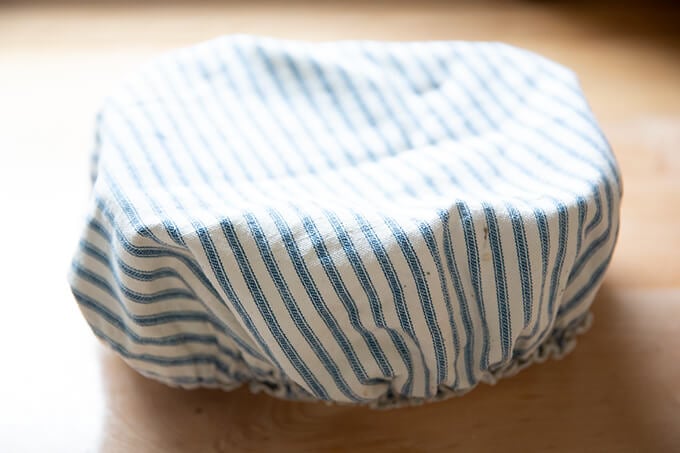
Cover the bowl and let rest for 30 minutes. Then perform a set of stretches and folds. See the video above or in the recipe box for guidance. This is what the dough will look like after one set of stretches and folds.
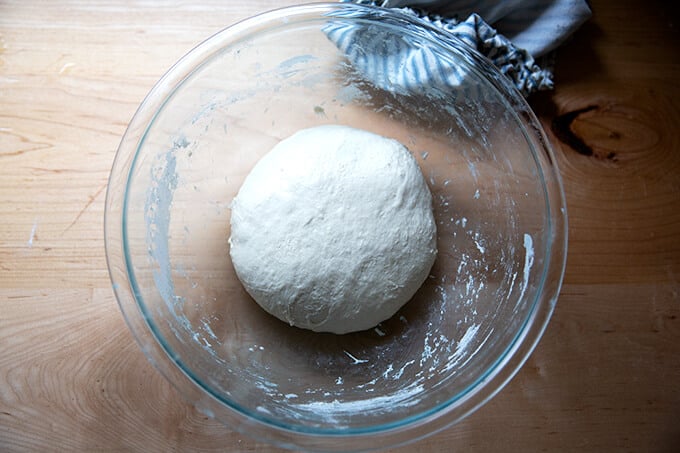
This is what the dough will look like after 4 sets of stretches and folds.
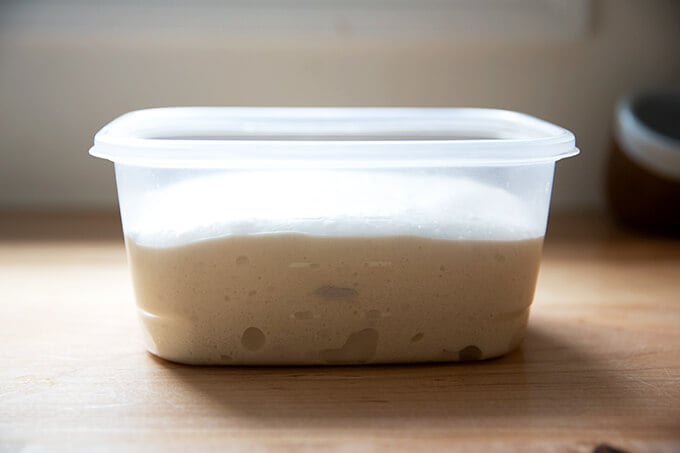
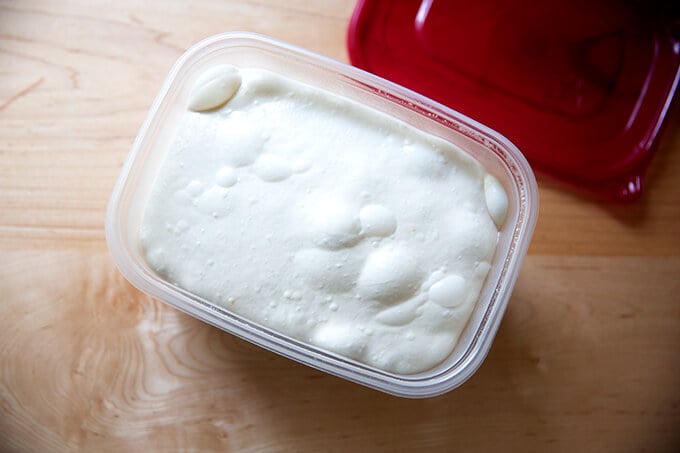
Transfer dough to a straight-sided vessel (this one is 8 cups, but anything similarly sized will do) for the bulk fermentation (the first rise):

Mark the height of the dough on the vessel, cover the vessel, and let the dough rise until it increases in volume by roughly 75%.
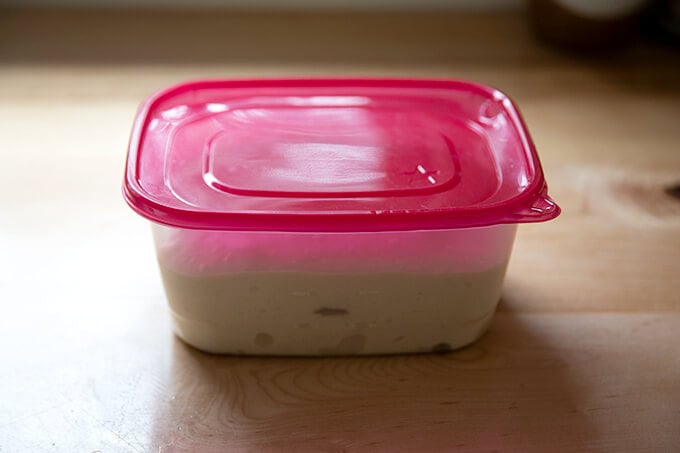
When the dough has increased by 75% (roughly), place a lid on the vessel, and transfer it to the fridge for 12-24 hours.
When ready to bake, remove the vessel from the fridge.
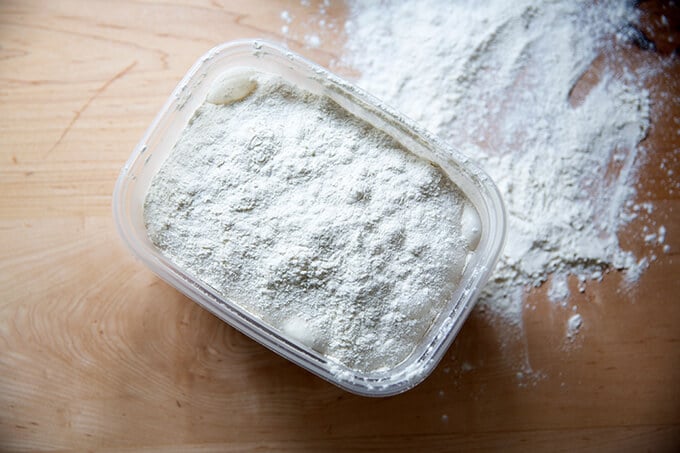
Dust the top of the dough liberally with flour. Dust a work surface liberally with flour, too.
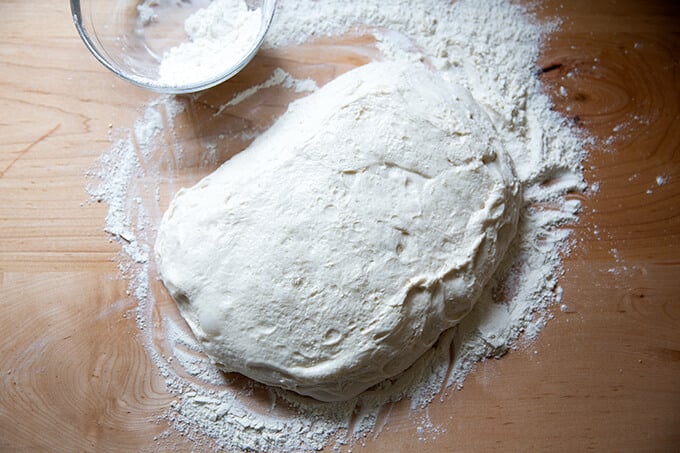
Turn the dough out onto the prepared work surface.
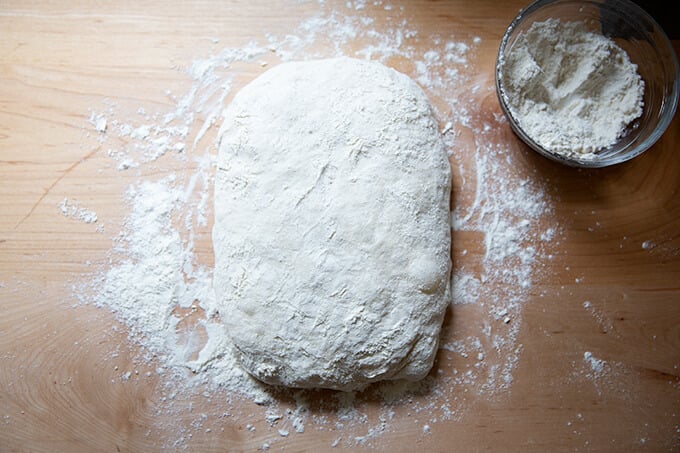
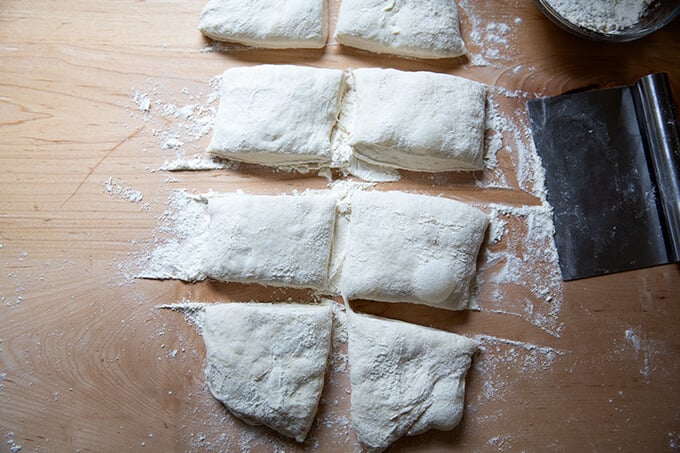
Pat the dough into a rectangle.
Cut the rectangle into 8 roughly equal portions.
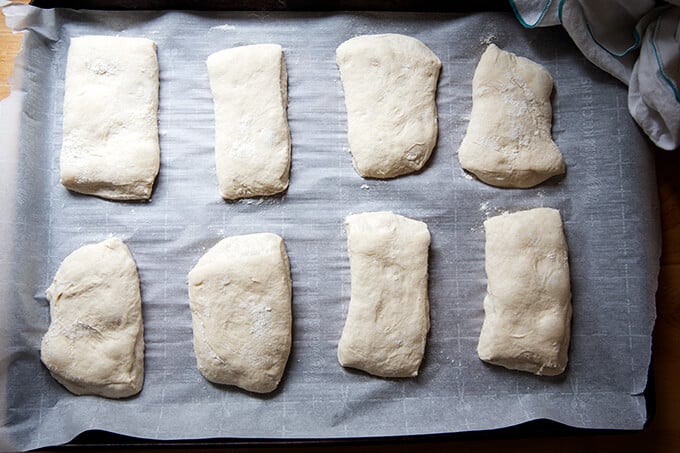
Transfer the portions to a parchment-lined sheet pan. Let rest for 1 hour. Then transfer to a 475ºF oven for 10 minutes. Lower the heat to 450ºF and bake for 10 minutes more.
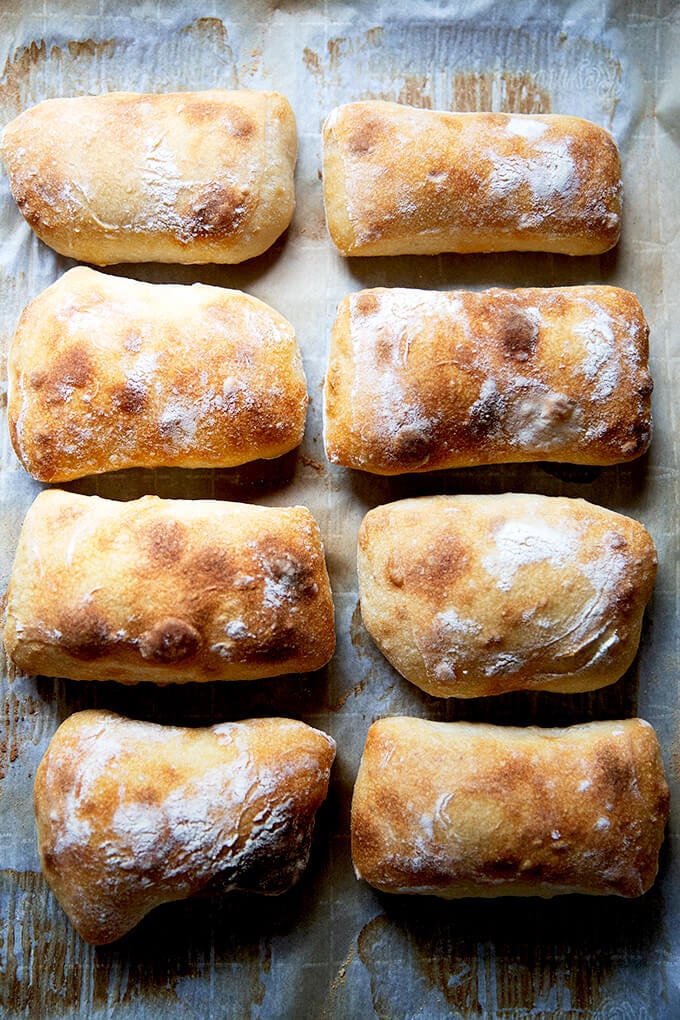
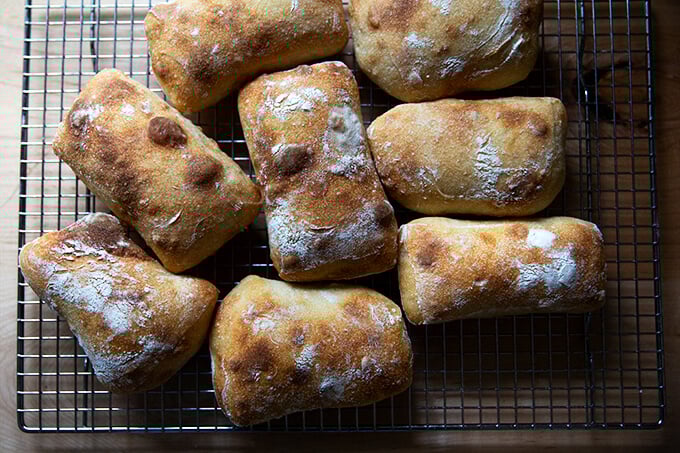
Transfer the rolls immediately to a cooling rack, and let cool for at least 20 minutes before cutting.
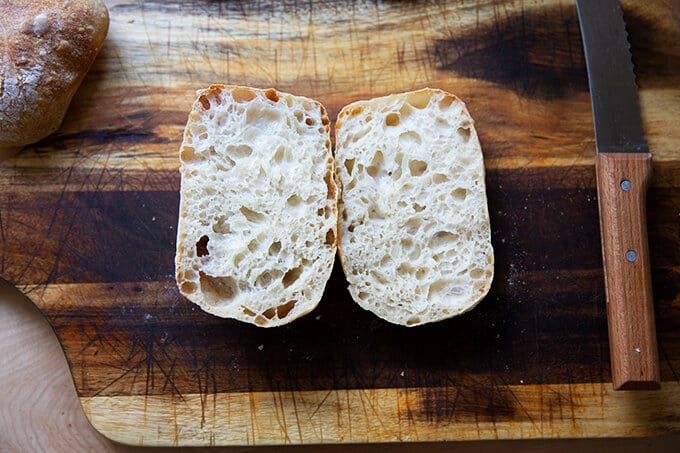
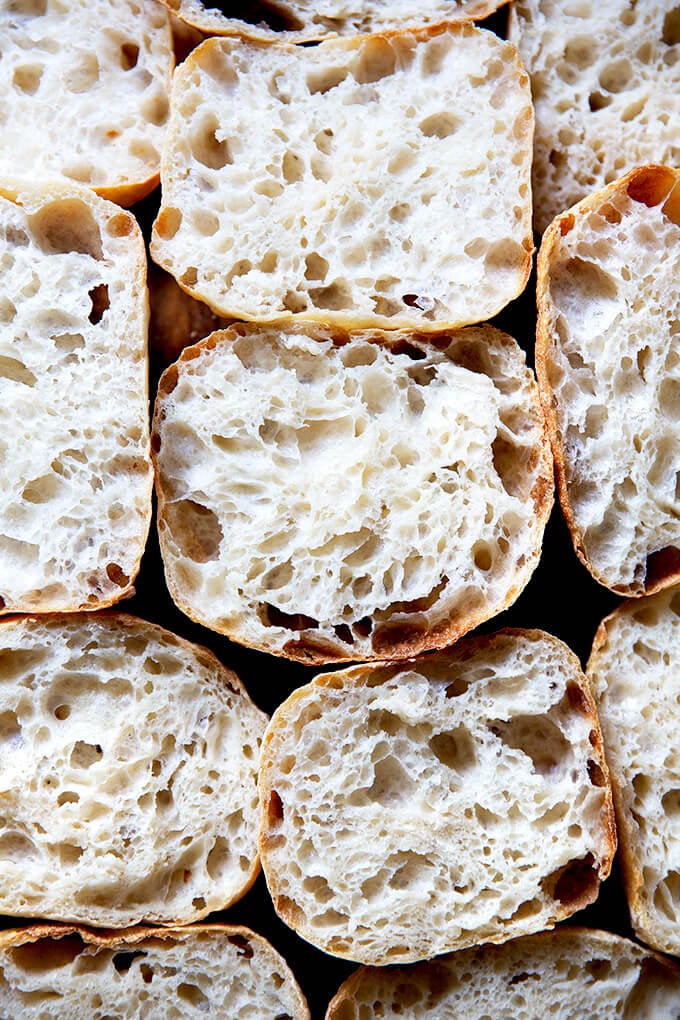
How pretty is that crumb?
Ciabatta sandwich: This recipe is inspired by Gabrielle Hamilton’s Blood, Bones, and Butter. In short, the success of the sandwich relies on a delicate balance: “the perfection of three fats together — butter, olive oil, and the white fat from prosciutto or lardo.” To make it, spread good bread with “cool waxy butter,” top with prosciutto (more than you think), and arugula. Drizzle it all with good olive oil.

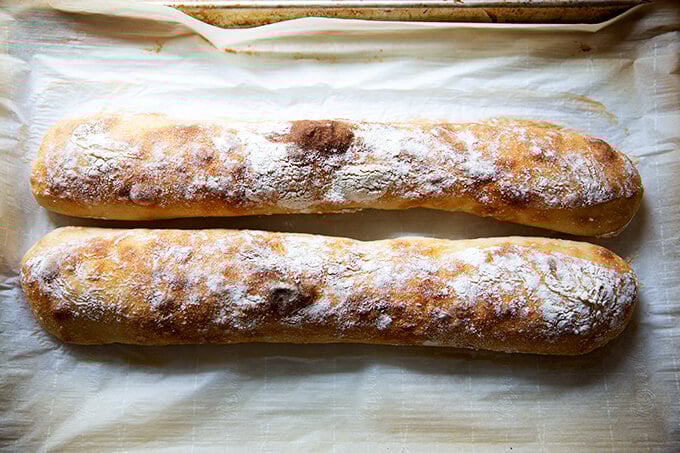
Sourdough Ciabatta “Baguettes” 🥖🥖🥖
To make baguettes, follow the same process, but instead of dividing the rectangle of dough into 8 portions, divide it into two. I find an extra-large sheet pan to be necessary to bake both baguettes at the same time. If you don’t have an extra-large sheet pan, I would bake one baguette at a time, and orient it at a diagonal angle from one corner to another.
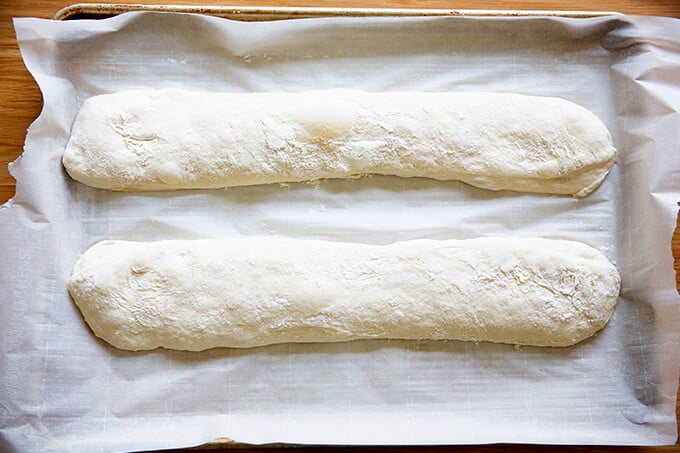
Bake the baguettes at the same temperature and for the same amount of time as the rolls.
Not bad for the effort, right?
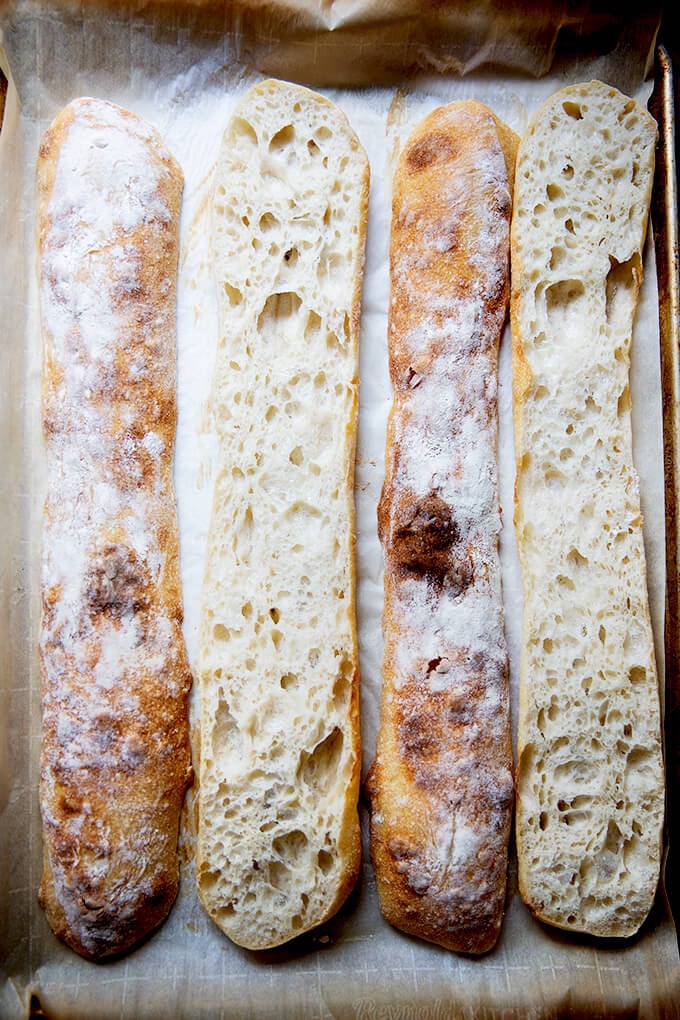
These ciabatta “baguettes” would be great vessels for giant sandwiches.

Simple Sourdough Ciabatta Bread
- Total Time: 24 hours 20 minutes
- Yield: 8 Rolls 1x
- Diet: Vegan
Description
Made with four ingredients, this sourdough ciabatta has a crisp crust, a beautiful honeycomb crumb, and a lovely lightness and chew. The process is truly simple, and the ciabatta is so tasty, perfect for sandwiches of all kinds, for dunking into soup, or transforming into bruschetta.
Notes:
- You need an active sourdough starter. You can build a starter from scratch in just about 1 week. But I am a huge proponent of buying a starter. Here are two sources:
- As always, I highly recommend investing in a digital scale before beginning any bread baking adventure.
Flour: I have had success using all-purpose flour, but if you can get your hands on bread flour, that is ideal, especially if you live in Canada or abroad. Moreover, if you live in Canada or abroad, you may need to reduce the water amount. Consider holding back some of the water during the mixing process to ensure you don’t end up with a soupy mess.
Straight-Sided Vessel:
- The vessel I use in this recipe, similar to this one, is 8 cups. Most grocery stores carry storage vessels similarly sized.
- Using a straight-sided vessel for the bulk fermentation will help prevent over-fermentation because it allows you to see when the dough has truly increased by 75% (or slightly more or less) in volume.
Ingredients
- 360 grams (about 1.5 cups) water
- 12 grams (about 2 teaspoons) salt
- 100 grams (about 1/2 cup) active sourdough starter, see notes above
- 450 grams (about 3.5 cups) bread flour, see notes above
Instructions
- Mix the dough: Place the water in a large bowl. Add the salt and stir briefly. Add the starter and stir briefly to incorporate. Add the flour, and stir until you have a wet, sticky dough ball. Knead briefly with your hands if necessary to incorporate the flour. Cover with a tea towel or cloth bowl cover and let sit for 30 minutes.
- Stretches and folds: With wet hands, grab one side of the dough, and pull up and to the center. Rotate the bowl a quarter turn, and repeat the grabbing and pulling. Do this until you’ve made a full circle. (Watch the video for more guidance. I do a few more pulls and turns in the video.) Cover the bowl. Repeat this process three more times at 30-minute intervals for a total of 4 sets of stretches and folds over the course of two hours. (In the video, I switch to coil folds for the last two sets of stretches and folds.)
- Bulk fermentation: Transfer the dough to a straight-sided vessel. Cover the vessel with a towel. Let rise at room temperature until the dough nearly doubles in volume (shoot for a 75% increase in volume). Times will vary depending on your environment and the strength of your starter. Recently, this has taken about 4 hours for me, but don’t worry if it takes longer for you. Cover vessel with a lid (ideally) or a towel (if you are using a towel, slick the top of the dough with oil to prevent it from drying out.) Transfer to fridge for 12-24 hours.
- Shape: Remove vessel from fridge. Remove lid. Sprinkle top of dough liberally with flour. Turn dough out onto a floured work surface. Pat dough into a rectangle. Sprinkle top with flour. Use a bench scraper to cut the dough in half vertically. Then make three cuts equally spaced in each half to create 8 small rectangles.
- Line a sheet pan with parchment paper. With floured hands, transfer each rectangle to the prepared pan, gently pulling outward. Cover the pan with a towel. Let stand for one hour.
- Bake: Heat oven to 475ºF. Transfer pan to oven and bake for 10 minutes. Lower heat to 450ºF, rotate pan, and bake for 10 minutes more. Remove pan from oven. Transfer ciabatta rolls to a cooling rack. Let cool for 20 to 30 minutes before slicing.
- Prep Time: 24 hours
- Cook Time: 20 minutes
- Category: Bread
- Method: Oven
- Cuisine: American, Italian
This post may contain affiliate links. Please read my disclosure policy.


804 Comments on “Simple Sourdough Ciabatta Bread”
I made these using KA bread flour and did a cold fermentation for 12 hours. They turned out great and were delicious but I didn’t get the beautiful large crumb on the inside that you did. Is there something else I can do to achieve a larger, bubbly interior? Thanks.
I would try increasing your final room temperature proof. See if a two-hour room temperature proof (covered) improves the hole structure. You could also try a longer cold ferment: 24-48 hours might help, too.
Sorry, I should add to my previous comment/question that I did do a bulk rise for approximately 6-7 hours, which is how long it took to get to 75% increase in volume, then the cold fermentation. Thanks for your help!
Great recipe! I’ve had a hard time finding one where the roll isn’t too dense but this was nice and airy. A couple of the rolls turned out a little too airy where there was a bubble on the top half of the roll. Not sure how to prevent that from happening but I’m definitely making this again.
Great to hear, Amy! Regarding the bubble, it’s possible that extending the final proof might help… try for 2 hours next time.
Thank you for the great recipe. I am a bit new to this but so far my starter seems to be doing what it is supposed to. I didn’t want rolls, just two ciabatta loaves so I cut in half after the cold proof and then folded them into thirds for the final proof. They came out tasty but a little too doughy. What would you suggest? Should I have proofed longer for the final rise, or not folded them, or something else perhaps?
Hi! I think next time, don’t fold into thirds or if you do, extend the final proof considerably. My first suggestion, however, would be to try without doing any folds. Additionally, try extending the final proof to two hours.
Can I bake after my bulk fermentation?
Yes, you can. They will need to proof at room temperature for several hours (I’d shoot for 2) before baking. They might not be quite as holey/airy, but they’ll still be delicious.
Thank you!
This recipe was a hit in my house! I sprinkled mine with water before baking then cooled them on a wire rack covered in foil and lightly wrapped with a towel to keep the crust softer for sandwiches. The bottoms of mine were a bit toastier than the tops (even with using a light sheet pan) so maybe next time I’ll try using a thin layer of kosher salt under the parchment during baking. Love love love this recipe!
Great to hear, Lindsay! Thanks for writing and sharing your notes. You could also try using two sheet pans (one on top of the other) next time around which will create some better insulation.
Hi! I started these yesterday at 4:30 pm got done with my stretch and folds at 6:30pm and then my bulk ferment wasn’t done until 5am this morning. My house is 69-70° so I’m thinking your house may be a little warmer😅 usually my bulk ferment takes a while. The dough has been in the fridge since 5am so if it stays in for 12 hours it would be 5pm and then 1-2 hours on the counter (mine would probably be 2 since my house is on the cooler side) would be 7pm. Then shape and bake.
I’m wondering if I could pull them out of the fridge earlier and proof on the counter so they can be ready earlier then 7pm. Do they need at least 12 hours in the fridge- or would it be okay to pull them out onto the counter and if so would they need longer than 1-2 hours on the counter?
Hi! You can pull them out sooner…. I’m probably too late here. What did you end up doing? I think the final proof is actually more critical — giving them 1 to 2 hours at room temperature will make sure they are light and airy. You may find for future bakes that a longer cold proof will make for an airier/lighter ciabatta.
I ended up waiting until 5pm to remove from the fridge and let them sit for 2 hours on the counter and they were perfect! Thanks for the recipe!
Great to hear, Jenna! Thanks for circling back 🙂
I’ve made these 3 times in 3 days trying to get them perfect. The last 2 rounds look perfect but the bottoms are just rock hard every time. Once I cut the bottoms off, the red of the roll is tasty. Great crumb and great rise, but the get so firm I can’t bite through them. I’ll try adjusting my oven racks tomorrow, or maybe a pan of ice below the rolls
What material pan are you using? You could try doubling up your sheet pans to create more insulation on the bottom.
Mine were like that, so I started leaving my pizza stone on the next rack directly below the sheet pan and they are great now.
Marcia, hi! And thank you. Are you placing the sheet pan on the pizza stone or on the rack above the pizza stone?
Thank you so much for this great video (love the background music!) and your clear instructions. I think I may be doing something wrong because I have big pockets when I cut them open… they are puffing a lot when I bake them. Does this have to do with the BF before they go into the fridge? I really want to get this right! Thanks for your help!
Hi! When you say “pockets” is it more like “tunnels”? If so, it likely has to do with the final proof. Try proofing them at room temperature for 2 to 3 hours (covered) before baking and see if that helps.
Turned out wonderful! Thank you for sharing!
Great to hear, Ronna! Thanks for writing 🙂
Great recipe. My crumb was no where near as open but I enjoyed the process! Will definitely keep trying … flavor is a little salty for me but won’t keep me from eating this deliciousness! Excited to try again!
Great to hear, Amy. You could try extending the final proof by an an hour or so. And depending on how long you cold proofed for, you may want to extend that as well. Definitely reduce the salt to your liking. Reducing it by a gram or two will help. Finally, if you are not using a scale to measure, that’s where you should start 🙂
Thanks, Ali, for your notes. Yes – I love using a scale; it makes things so much more consistent. I used bread flour. The first rise was about 5 hours after 3 hours of stretch/folds. I did the cold ferment for 27 hours. I am wondering if my starter just wasn’t ready yet; I had been prepping my established starter for at least 3 days and it was doubling/tripling in volume before discarding and feeding again. I am also wondering if it had anything to do with altitude. I live at about 4600 feet above sea level. Finally, perhaps my gas oven didn’t really get to 475 degrees. All great things to experiment with! I have only been doing sourdough for the last 4 months, so still learning. Thanks for the great recipes and instructional videos!
Well it sounds as though you are doing everything right! What type of flour are you feeding your starter with? Altitude could affect things for sure, but generally high-hydration doughs and long slow rises do well at high elevation.
I am using Dakota Maid Premium Bread Flour, which is 12.6% protein as well as some fresh ground whole wheat to develop the starter. I am going to keep working on the development of the starter and see if that is the key issue. I love the texture and the crust of your recipe. Even though I didn’t get the nice airy texture this time, I am determined to keep trying until I do. The texture this time was more like the yeast-based homemade ciabatta bread done by Mel’s Kitchen Cafe. Thanks for communicating with me; it means a lot to me!
Great to hear, Amy 🙂 Yeah, I think working on strengthening your starter is a great idea. Good luck with your next attempts!
Hi I really like the sourness of leaving baguette dough in the refrigerator for 2 days would this work or would it over proof ?
Should work great!
I made this bread yesterday and it is almost gone! My husband loves chibattIa bread.
I think it needs to be a little softer inside.
How can I achieve this?
Thank you
Rocky Aldridge
Great to hear, Rocky! Regarding your question, I’m not sure… I always find the inside of this bread to be very soft and the outside to be crusty. What kind of flour are you using and are you using a scale to measure? My first thought would be to extend the final proof to 2 to 3 hours (covered to ensure the dough doesn’t dry out).
These taste amazing but they became one with the parchment paper and we had to cut off the bottom of each roll since the paper wouldn’t come off. I’ve never had anything stick like that to parchment before. Any suggestions? I can try using a silicone mat or simply greasing a cookie sheet next time; just wondering what your suggestions might be.
Bummer to hear this! What brand parchment did you use? Unfortunately not all parchments are created equally, and I’ve had this issue using a box I bought in bulk online at some point. I have luck with Reynolds, If You Care, and KAF brands. Otherwise, I do think a Silicone mat will work, though the rolls may not crisp up as much on the bottom.
Thanks for your reply. I always buy my precut parchment sheets at a local kitchen supply store and don’t know the brand. I’ll try purchasing one of the brands you mentioned before I try again. Thanks so much!
Great! Good luck with your next attempts 🙂
This is an awesome recipe! I’ve made it several times, each time coming out perfect with soft / fluffy crumb. A few “must dos”…
– Definitely use an active / fed sourdough starter. Same day feeding has worked for me.
– Don’t shortcut the bulk ferment. Make sure it’s 1.75x to 2x in size before going to cold ferment.
– At least 12 hrs in the fridge. Don’t cheat here either!
– Barely handle these guys as you cut them. BE GENTLE.
– 2 hr rise before baking works for me every time.
I also wash with an egg white & water mix and top with various seeds and oats.
Great to hear, Jason! Thanks so much for writing and sharing these notes 🙂
I have been searching for years for a great ciabatta recipe and this one is by far my favorite! Very easy to follow and delicious bread!
Great to hear, Sarah! Thanks for writing 🙂
Wow!!!!!
This is an outstanding recipe! I formally owned a bread company, so people expect a lot when I bring bread. This has completely elevated my baking! Follow the directions, and you will be amazed. The bubbles! I have shared this website with all my friends. THANK YOU!!!!!
Great to hear, Debbie! Thanks so much for writing and sharing this 🙂
No need of steam in the oven?
Nope!
I followed this to the letter, including the double starter feed, and got perfect rolls. Very easy. Thanks!
Great to hear, Graeme! Thanks so much for writing 🙂
Just wanted take a minute to say thank you! All your recipes are pretty foolproof. I started with overnight focaccia a few years ago, and now it’s a staple in our house! I’m currently doing bulk rise on this recipe. We will use the ciabatta rolls for hamburger buns this 4th.
So nice to hear this, Pam! Thanks so much for taking the time to write. I hope the rolls turned out well. Happy Fourth!
These look really delicious, I can’t wait to try the recipe! Do you have any thoughts about making 12 rolls instead of eight? Bake them a little less? Or do you think it would be better to make the baguette and cut it into 12 pieces?
Hi! I think cutting into 12 pieces will work great. As you suggest, bake them a little less or until browned to your liking.
Oh and this recipe is excellent btw.
Great to hear, Serenity 🙂
I baked this just a little while ago. My house smells AMAZING. The taste is delicious and perfect!!!!
Great to hear, Harmony! Thanks for writing 🙂
Excellent recipe, step-by-step instructions and video were very helpful. I’m not sure if my dough was too runny. I just finished baking the ciabatta so I’ll find out when we eat it. I haven’t tried it yet but they look great. I have a bumper crop of tomatoes so I’m making bruschetta with this.
Ciabatta bruschetta sounds heavenly. Thanks so much for writing. Hope it was as delicious as anticipated 🙂
Hi! I love your simple sourdough recipes. I want to try this, but I would like to incorporate some fresh garlic cloves into the dough. Any tips on adding in a more moisture-content adding ingredient to this mix? Thanks in advance!
Hi! I always suggest making the recipe as written; then adjusting next time around based on your results. I don’t think fresh garlic will add enough moisture to adversely affect the dough. So my suggestion would be to not make any changes to the dough the first time around.
Great sourdough recipe(s)!!! For baking the ciabatta rolls, what size of sheet pan are you using?
Thanks!
Hi Scott! Sometimes I use my XLarge sheet pan and sometimes I use my standard 13×18-inch sheet pans. Either size is fine!
Mine did not come out as golden brown as yours. What should I do differently? Scared of overcooking.
Hi! It’s possible you just needed to back them longer. Next time you could start at a slightly higher temperature, too. Does your oven run cool? What type of flour did you use (brand included)?
I made this yesterday. I didn’t change a thing. I feel like a pro. This ciabatta was light and airy.
I brushed with garlic butter after baking because I wanted a softer crust. I would definitely make this again.
Thanks for sharing
Yum! Great to hear Carol. Thanks for writing and sharing these notes. Garlic butter sounds delicious 🙂
Have used this recipe a few times and the ciabatta comes out perfect each time (even when I forget it in the fridge an extra day). I’m sorry if you have already answered this question but I’m wondering how do you store the extra bread?
Great to hear Megan! I store the bread in an airtight bag or vessel at room temperature for up to 3 days, otherwise I would freeze it if you think it will be longer. Always reheat before using, either in the oven (350ºF for 15 minutes) or a toaster or toaster oven.
I love all of your recipes and have been using them for years. Thanks for taking the time to discover quicker, less complex methods for things that were once a bit tedious or time consuming (autolyze, for example).
On this recipe, can you cold ferment for longer, say 48 to 72 hours in the fridge?
My pleasure 🙂 Thank you for your kind words.
I think you could get away with 48 hours for sure. I find with sourdough that after 48 hours, things get unpredictable… sometimes it’s fine, sometimes it’s not, and I think it has to do with the strength of the starter and the length of the bulk fermentation, but regardless, I’d hate for you to go through the work to have things go awry due to overproofing in the fridge 🙂
Thanks, Alexandra. I had no real option and I have a very healthy startee, so I took the chance. About 72 hours in the fridge. I got great oven spring and good crumb.
Love the recipe!
Amazing! Great to hear and great to know for future reference. Thanks for circling back 🙂
This is the recipe I have been waiting for FOREVER! So light and airy, the crumb was absolute perfection. I’m becoming devoted to all your sourdough recipes. Precise enough to get an excellent outcome without overcomplicating things for the home baker. THANK YOU!
One note on this one, my oven might not be as hot as yours, but my loaves needed 15 min at each temperature.
Great to hear, Lisa! Thanks so much for writing and sharing all of this. And thanks for the note, too about oven temps — I do think everyone’s oven is different and ultimately it’s best to rely on visual cues… I will add a note to the recipe 🙂
Hi Ali. I love your recipes and have had great success with all of them except this one. My rolls always end up flat and dense. They look more like flatbread than ciabatta. Any suggestions? Thanks!
Hi Christine,
My first thought would be to extend the final proof. I suggest one hour, but I think if you extend that to 2 hours or perhaps longer, you will have better results. Questions: you are using a scale to measure, correct? And you are confident in the strength of your starter? And what type of flour are you using?
Thanks for responding. Yes, I’m using a scale to measure. My starter works well for other bread recipes so I’m pretty confident although I’ve always used plain tap water to feed. I always make sure my starter passes the float test before proceeding. I used KA bread flour.
Ok, great. After you feed your starter, how quickly does it double in volume? And do you use a straight sided vessel for the bulk fermentation? And if so, how much are you letting the dough increase in volume during the bulk fermentation?