 →
→ Simple Sourdough Ciabatta Bread
This post may contain affiliate links. Please read my disclosure policy.
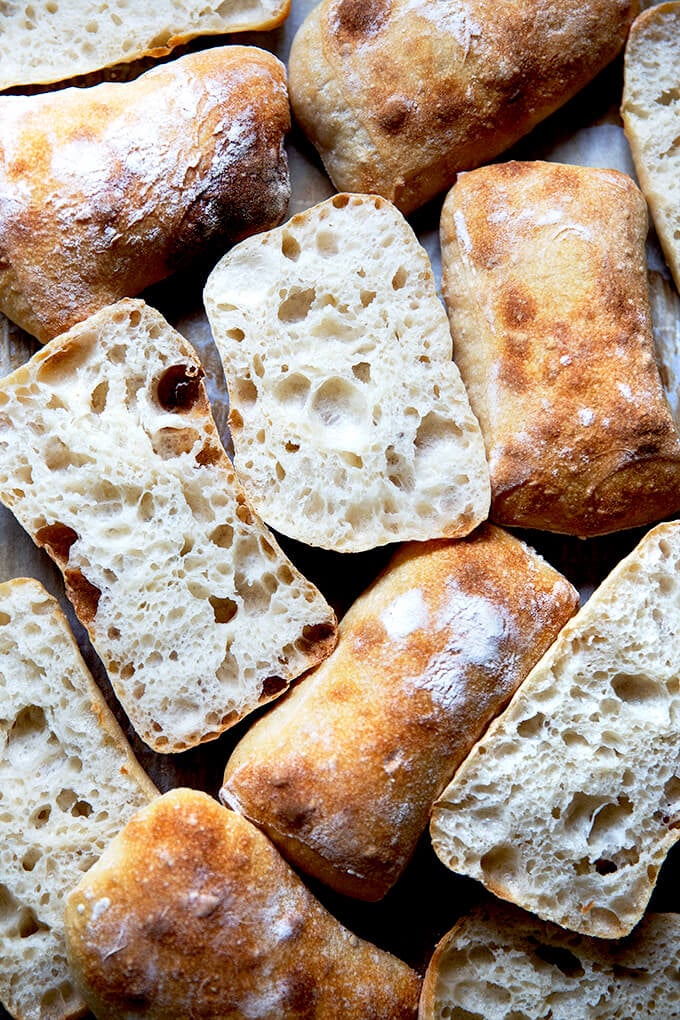
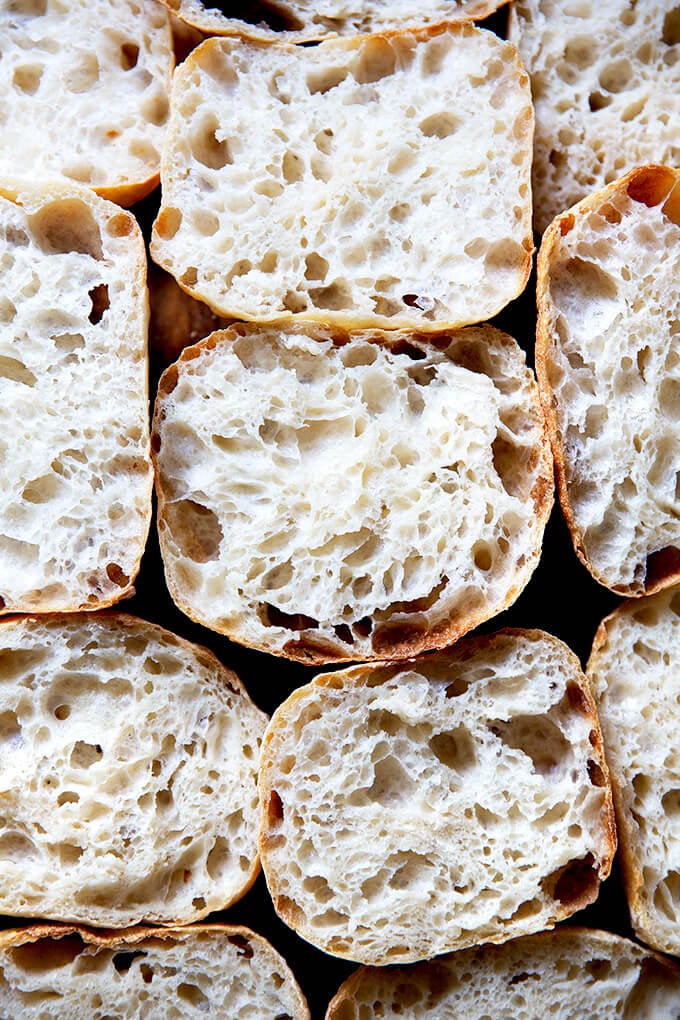
Made with four ingredients, this sourdough ciabatta has a crisp crust, a beautiful honeycomb crumb, and a lovely lightness and chew. The process is truly simple, and the ciabatta is so tasty, perfect for sandwiches of all kinds, for dunking into soup, or transforming into bruschetta.

Originating from the Lake Como region of northern Italy, ciabatta means “slipper” in Italian. Traditional ciabatta is characterized by its slipper shape and extremely porous, light texture, created with a biga (a preferment), a high-hydration dough, and a long, slow rise.
A biga is made with a small amount of yeast, flour, and water. In this recipe, I’ve replaced the biga with a sourdough starter, but kept the remaining elements the same: the high-hydration dough is made with four ingredients and requires a long, slow rise, which produces a crisp crust, a beautiful honeycomb crumb, and a lovely lightness and chew. This ciabatta is perfect for sandwiches.
Best of all: the process is truly simple. The dough does not require an autolyse, a preheated Dutch oven, or a baking stone. If you have a sheet pan, you’re good to go. What’s more, there’s no shaping, scoring, or balling up dough. After the bulk fermentation, you turn the dough out onto a floured work surface, pat it into a rectangle, and divide it into 8 pieces. You then transfer those pieces, irregularly shaped and all, to a sheet pan, and bake them one hour later.
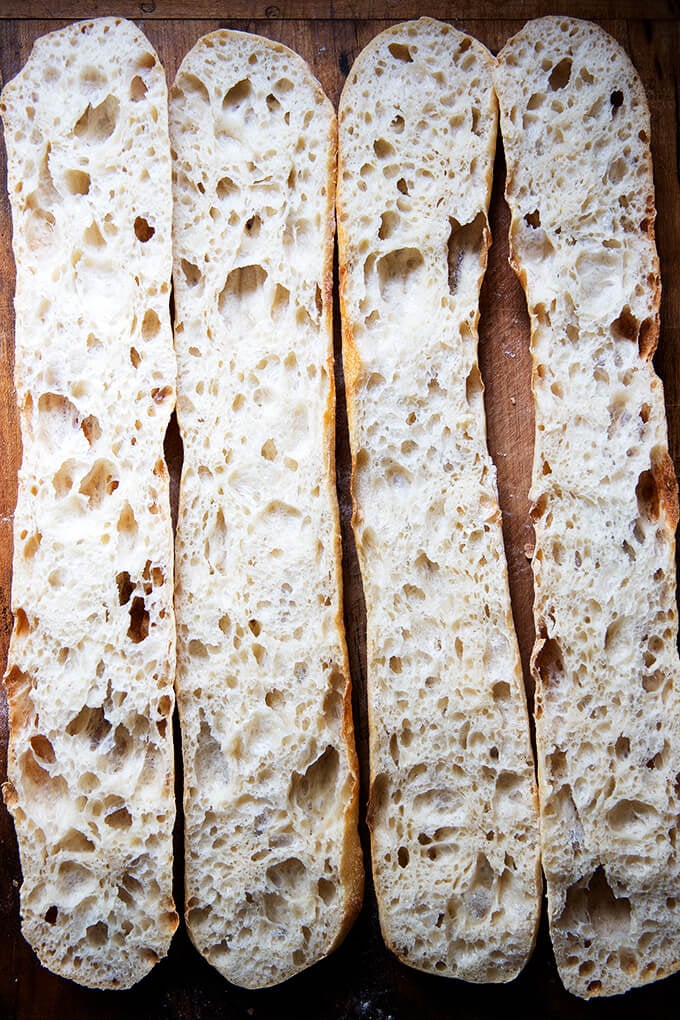
Can I tell you the most exciting part? This dough makes an excellent baguette! Unscored and flour-dusted, it has a crumb and flavor better than any other I’ve attempted previously. See photos below.
PS: If sourdough isn’t your thing, please try this yeast-leavened ciabatta bread recipe.
How to Make Sourdough Ciabatta, Step by Step
Gather your ingredients: bread flour, water, salt, and a sourdough starter. I am a proponent of buying a starter (see recipe box for sources), but if you are up for it, you can build a starter from scratch in just about 1 week.
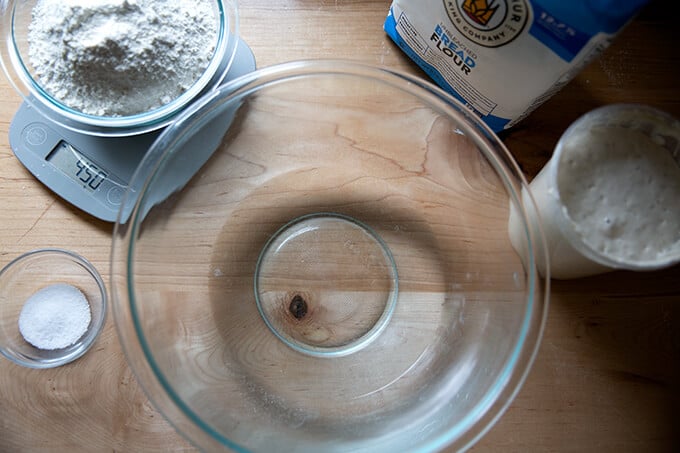
For this recipe, you’ll need: 100 grams sourdough starter, 360 grams water, 450 grams flour, and 12 grams salt. It’s 80% hydration.

Mix together the water, sourdough starter, and salt.
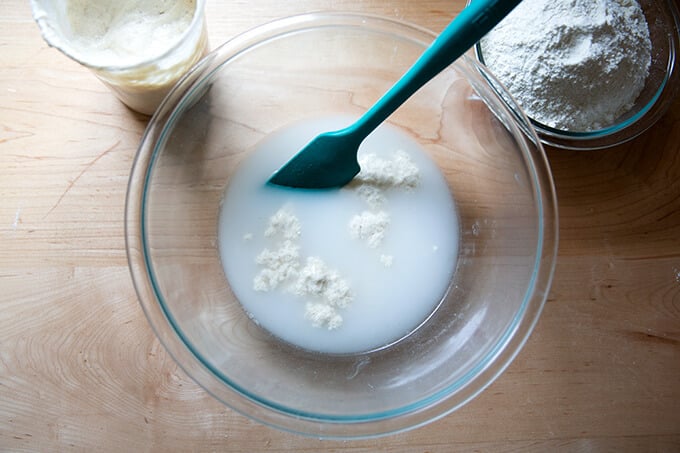
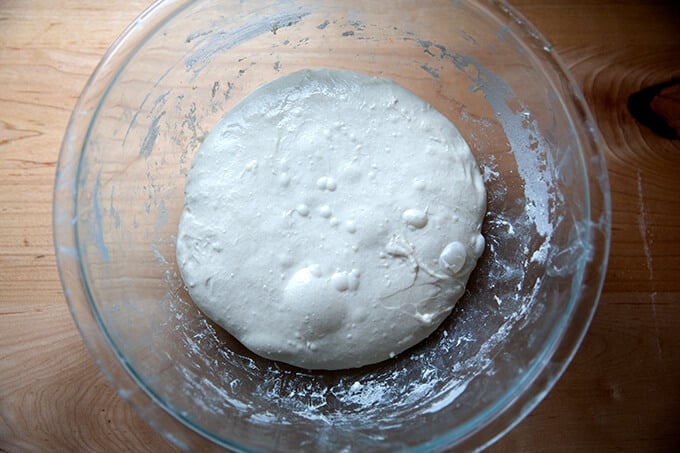
Add the flour and mix to form a sticky dough ball.
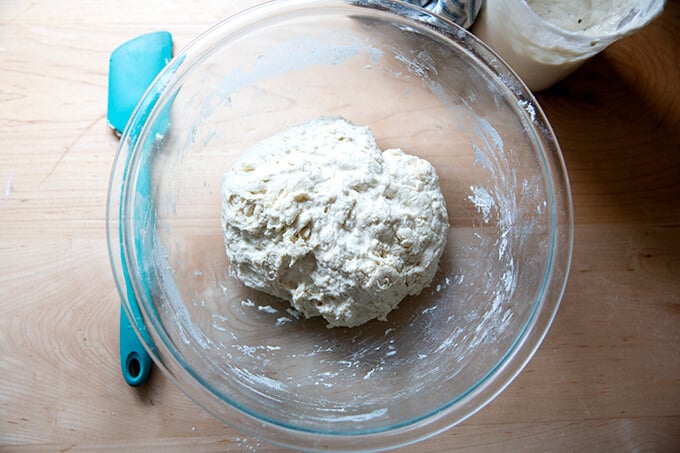
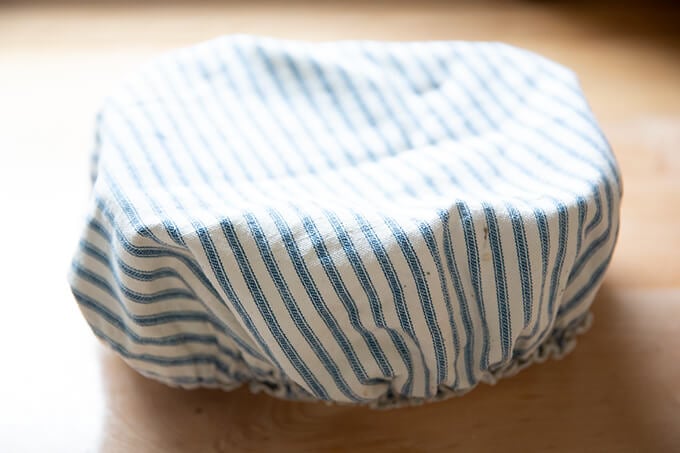
Cover the bowl and let rest for 30 minutes. Then perform a set of stretches and folds. See the video above or in the recipe box for guidance. This is what the dough will look like after one set of stretches and folds.
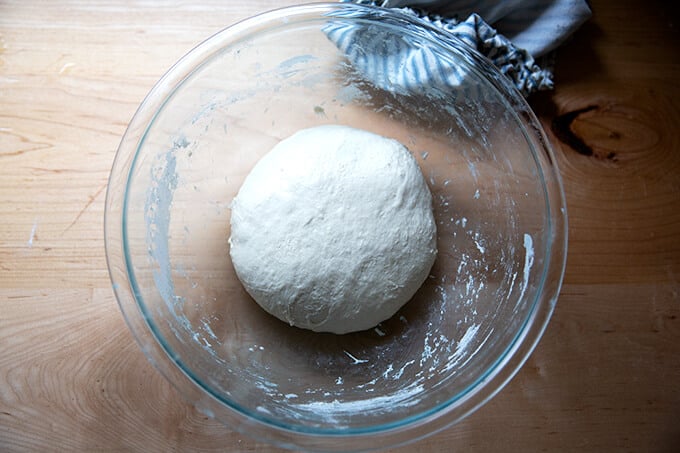
This is what the dough will look like after 4 sets of stretches and folds.
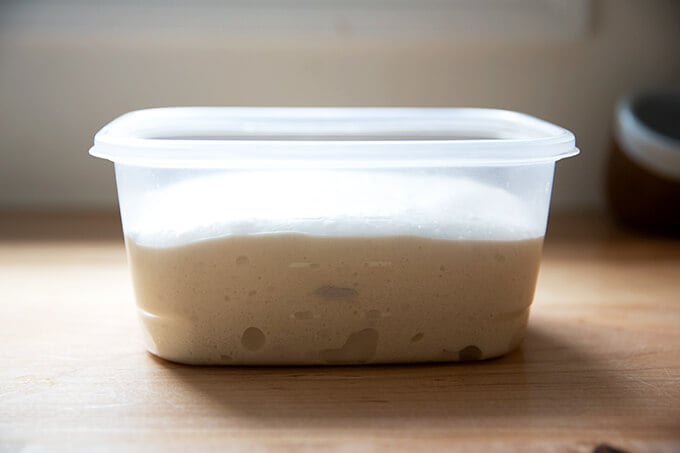
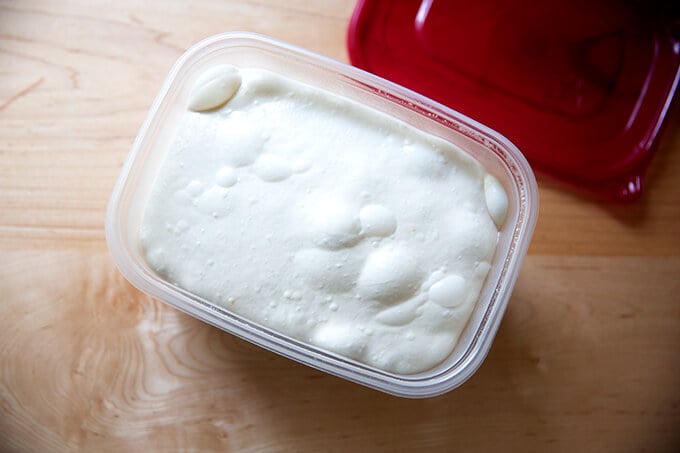
Transfer dough to a straight-sided vessel (this one is 8 cups, but anything similarly sized will do) for the bulk fermentation (the first rise):

Mark the height of the dough on the vessel, cover the vessel, and let the dough rise until it increases in volume by roughly 75%.
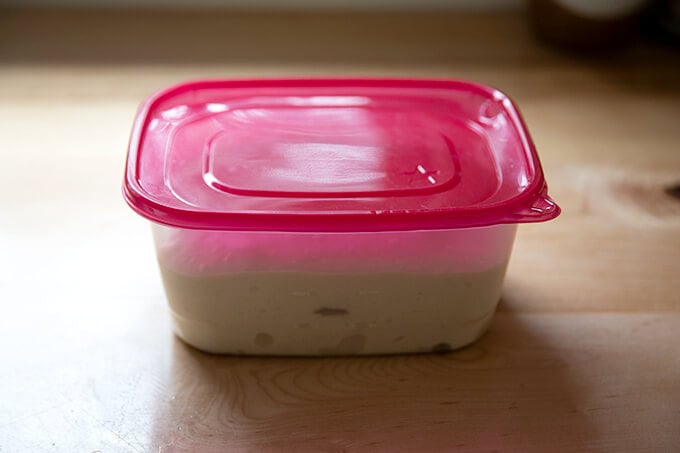
When the dough has increased by 75% (roughly), place a lid on the vessel, and transfer it to the fridge for 12-24 hours.
When ready to bake, remove the vessel from the fridge.
Dust the top of the dough liberally with flour. Dust a work surface liberally with flour, too.
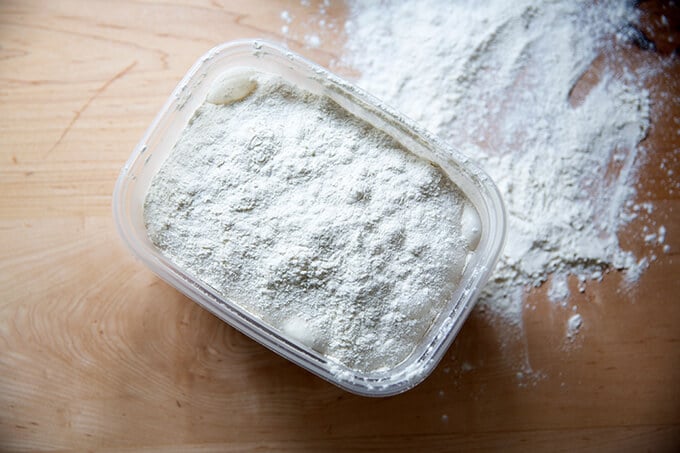
Turn the dough out onto the prepared work surface.
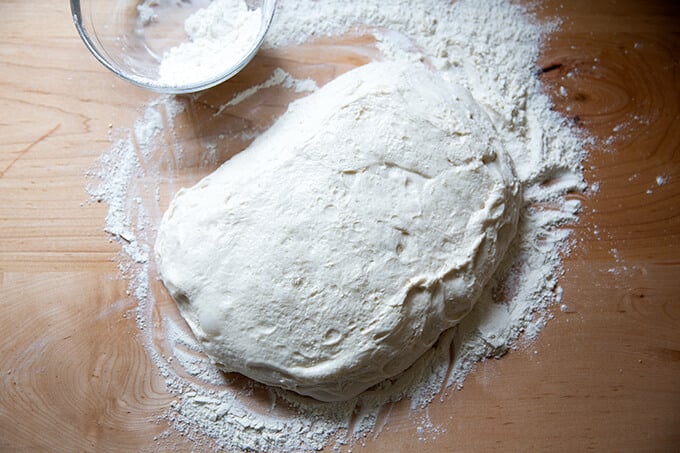
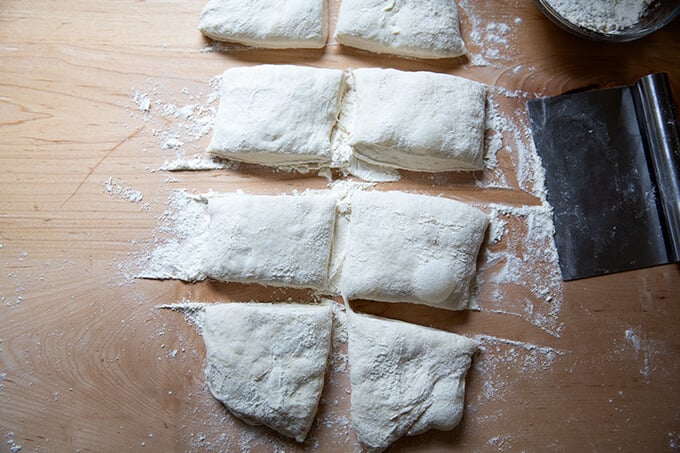
Pat the dough into a rectangle.
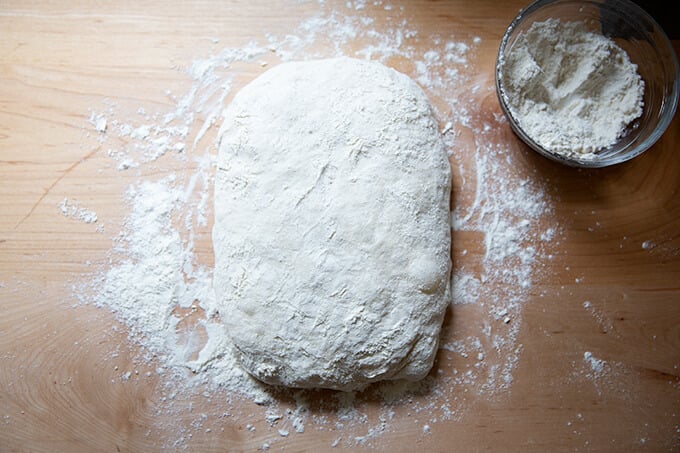
Cut the rectangle into 8 roughly equal portions.
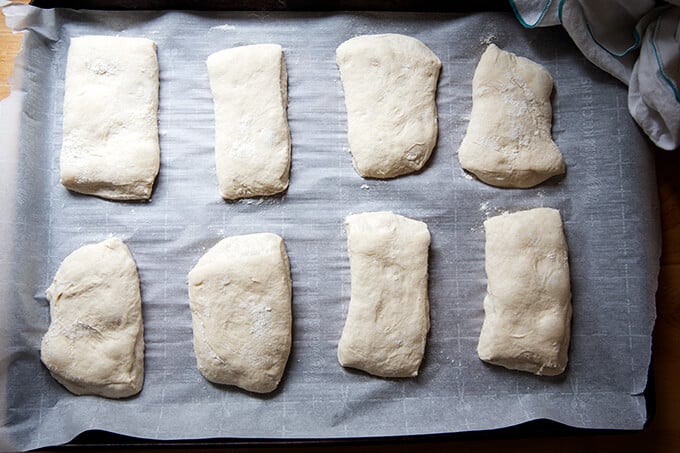
Transfer the portions to a parchment-lined sheet pan. Let rest for 1 hour. Then transfer to a 475ºF oven for 10 minutes. Lower the heat to 450ºF and bake for 10 minutes more.
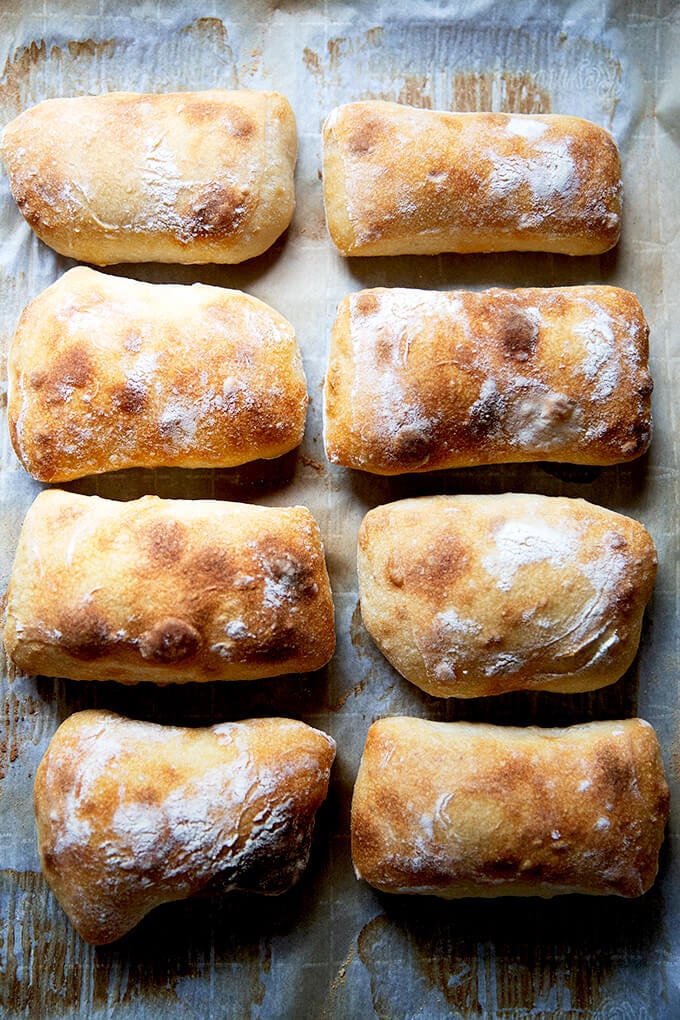
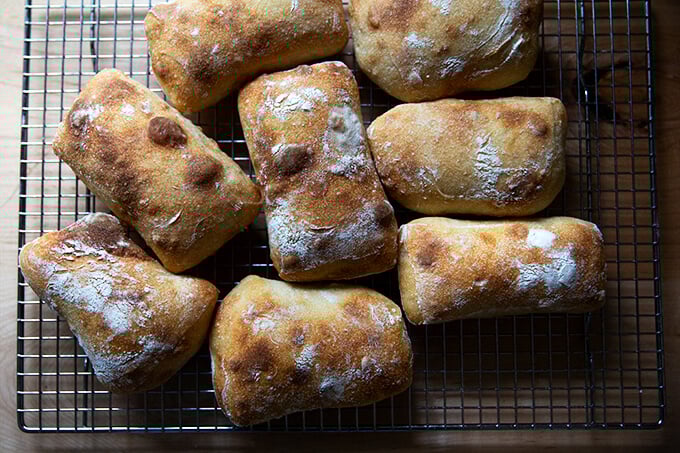
Transfer the rolls immediately to a cooling rack, and let cool for at least 20 minutes before cutting.
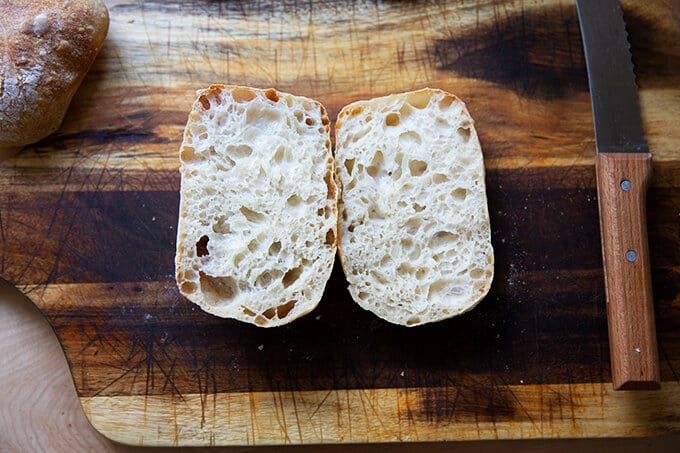
How pretty is that crumb?
Ciabatta sandwich: This recipe is inspired by Gabrielle Hamilton’s Blood, Bones, and Butter. In short, the success of the sandwich relies on a delicate balance: “the perfection of three fats together — butter, olive oil, and the white fat from prosciutto or lardo.” To make it, spread good bread with “cool waxy butter,” top with prosciutto (more than you think), and arugula. Drizzle it all with good olive oil.

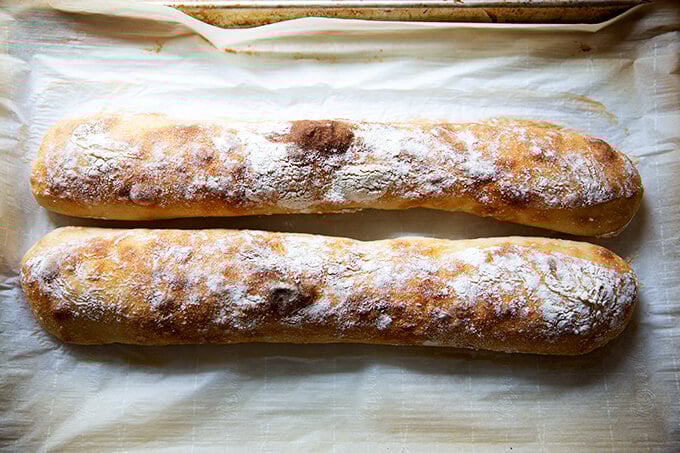
Sourdough Ciabatta “Baguettes” 🥖🥖🥖
To make baguettes, follow the same process, but instead of dividing the rectangle of dough into 8 portions, divide it into two. I find an extra-large sheet pan to be necessary to bake both baguettes at the same time. If you don’t have an extra-large sheet pan, I would bake one baguette at a time, and orient it at a diagonal angle from one corner to another.
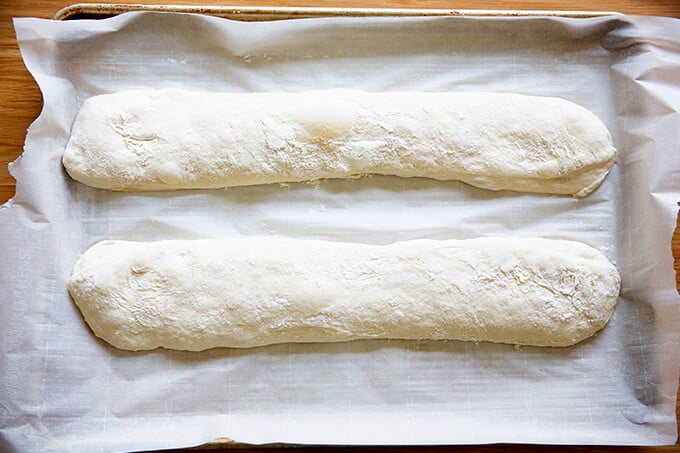
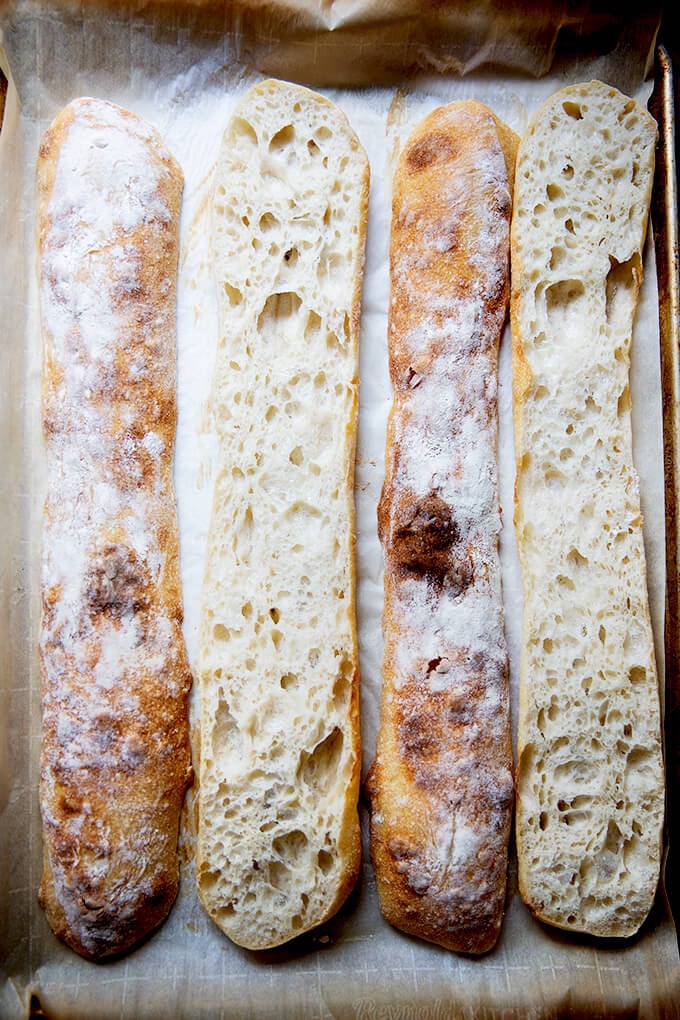
Bake the baguettes at the same temperature and for the same amount of time as the rolls.
Not bad for the effort, right?
These ciabatta “baguettes” would be great vessels for giant sandwiches.

Simple Sourdough Ciabatta Bread
- Total Time: 24 hours 20 minutes
- Yield: 8 Rolls 1x
- Diet: Vegan
Description
Made with four ingredients, this sourdough ciabatta has a crisp crust, a beautiful honeycomb crumb, and a lovely lightness and chew. The process is truly simple, and the ciabatta is so tasty, perfect for sandwiches of all kinds, for dunking into soup, or transforming into bruschetta.
Notes:
- You need an active sourdough starter. You can build a starter from scratch in just about 1 week. But I am a huge proponent of buying a starter. Here are two sources:
- As always, I highly recommend investing in a digital scale before beginning any bread baking adventure.
Flour: I have had success using all-purpose flour, but if you can get your hands on bread flour, that is ideal, especially if you live in Canada or abroad. Moreover, if you live in Canada or abroad, you may need to reduce the water amount. Consider holding back some of the water during the mixing process to ensure you don’t end up with a soupy mess.
Straight-Sided Vessel:
- The vessel I use in this recipe, similar to this one, is 8 cups. Most grocery stores carry storage vessels similarly sized.
- Using a straight-sided vessel for the bulk fermentation will help prevent over-fermentation because it allows you to see when the dough has truly increased by 75% (or slightly more or less) in volume.
Ingredients
- 360 grams (about 1.5 cups) water
- 12 grams (about 2 teaspoons) salt
- 100 grams (about 1/2 cup) active sourdough starter, see notes above
- 450 grams (about 3.5 cups) bread flour, see notes above
Instructions
- Mix the dough: Place the water in a large bowl. Add the salt and stir briefly. Add the starter and stir briefly to incorporate. Add the flour, and stir until you have a wet, sticky dough ball. Knead briefly with your hands if necessary to incorporate the flour. Cover with a tea towel or cloth bowl cover and let sit for 30 minutes.
- Stretches and folds: With wet hands, grab one side of the dough, and pull up and to the center. Rotate the bowl a quarter turn, and repeat the grabbing and pulling. Do this until you’ve made a full circle. (Watch the video for more guidance. I do a few more pulls and turns in the video.) Cover the bowl. Repeat this process three more times at 30-minute intervals for a total of 4 sets of stretches and folds over the course of two hours. (In the video, I switch to coil folds for the last two sets of stretches and folds.)
- Bulk fermentation: Transfer the dough to a straight-sided vessel. Cover the vessel with a towel. Let rise at room temperature until the dough nearly doubles in volume (shoot for a 75% increase in volume). Times will vary depending on your environment and the strength of your starter. Recently, this has taken about 4 hours for me, but don’t worry if it takes longer for you. Cover vessel with a lid (ideally) or a towel (if you are using a towel, slick the top of the dough with oil to prevent it from drying out.) Transfer to fridge for 12-24 hours.
- Shape: Remove vessel from fridge. Remove lid. Sprinkle top of dough liberally with flour. Turn dough out onto a floured work surface. Pat dough into a rectangle. Sprinkle top with flour. Use a bench scraper to cut the dough in half vertically. Then make three cuts equally spaced in each half to create 8 small rectangles.
- Line a sheet pan with parchment paper. With floured hands, transfer each rectangle to the prepared pan, gently pulling outward. Cover the pan with a towel. Let stand for one hour.
- Bake: Heat oven to 475ºF. Transfer pan to oven and bake for 10 minutes. Lower heat to 450ºF, rotate pan, and bake for 10 minutes more. Remove pan from oven. Transfer ciabatta rolls to a cooling rack. Let cool for 20 to 30 minutes before slicing.
- Prep Time: 24 hours
- Cook Time: 20 minutes
- Category: Bread
- Method: Oven
- Cuisine: American, Italian
This post may contain affiliate links. Please read my disclosure policy.


804 Comments on “Simple Sourdough Ciabatta Bread”
This is SO GOOD. I make it so much I finally “joined the community” because I felt guilty coming here all the time as an outsider. I have also shared this recipe with numerous people who also love it. Thank you for sharing!
I have a question though. Have you done a blog post n your kitchen design? I thought you had, but I can’t find it. We’ve moved and will need to renovate our new-not-new kitchen. I would very much like to know what stove/ oven you have? Thanks!
I’m so happy to hear this, Ruth! Thanks for writing in 🙂
Here’s my kitchen “reveal” posts which has links to a few other posts related to the kitchen renovation: https://vector-hatch.live/2018/10/03/kitchen-reveal/%3C/a%3E%3C/p%3E
Let me know if there’s another post you’re looking for.
Hi Ali..
What temperature is your kitchen at during this process… Thanks a million.
When it comes to yeast / starter it’s great to have this info.
Thanks a million.
Ruth O
Ireland
Europe
Hi Ruth! It really depends on the time of year. In the summer it can be 80ºF, in the winter it can be 68ºF. On average, I’d say it’s around 72-73ºF.
After several attempts making this recipe. My loaves look beautiful. I’ve had great results with taste but I never achieved beautiful colorful crust until tonight. Thank you so much for this recipe. My family loves it. I originally made this recipe when you mentioned the book blood bones and butter. I read this book awhile back and can’t forget the sandwich so I had to try this bread.
So nice to read all of this, Lena! Thanks so much for writing and sharing. Incidentally, Gabrielle Hamilton has a new memoire coming out very soon… I cannot wait to read it!
What helped you get a good color? I just made a batch and the bottoms were done but the tops are very blond.
I had the same outcome. Tried these for the first time and they smell great but are quite blond compared to the photo. Thoughts? I will definitely try again. I love your SD recipes!
Hi! And thank you 🙂 What kind of flour (brand included) are you using? And do you feel your oven generally runs cool? As in, do you find it generally does not brown things well?
Thanks for responding. I used King Arthur flour. My oven usually is fine (I make your SD bread a lot!). But it is probably time to invest in an oven thermometer to double check. I’ll try again! They were still delicious.
OK, great to hear! I just wanted to make sure you weren’t using bleached flour. An oven thermometer is a great investment — so cheap and so accurate. You can always increase the oven temp by 25 degrees to see if that helps.
I make this often. It beats regular ciabatta, because I love that sourdough flavor. Great for sandwiches. Great for toast! I even use some whole wheat flour to give it a little extra fiber and flavor.
Great to hear! Thanks so much for writing and sharing this 🙂
Made this recipe many times and it always comes out exactly as described. It’s super easy and satisfying. I love the cold ferment because it gives me more flexibility in when I can bake.
So nice to hear this! Thanks so much for writing 🙂
I want to make ciabatta dinner rolls for Thanksgiving. Do I just cut the sandwich rolls tin half? I have read to make small balls for the dinner rolls. I love your recipes. Thank you.
Hi Constance, Yes, that should work — divide the dough into 16 portions instead of 8. Those might be on the small side, which is fine, but you could also opt to do 12, which might be a nice in between size 🙂
Hi, Ali! Just wondering? Do I need to spritz the bread with water to get a good crust going> Or have a pan of water in the oven for steam to make a crust? Or does this just make a crust on its own?
No need here 🙂
My first time making these and they were super easy. I just chunked the dough into different shapes and baked it and they came out perfect.
Great to hear, Colette! Thanks so much for writing and sharing this.
Hi Ali,
Sending you greetings from Singapore! Came across this Ciabatta recipe and tried it and it’s a keeper! I have to reduce the water used as due to high humidity here, and have found my sweet spot.
Can I check if I could incorporate dried herbs or olives into this recipe during the stretch and fold stage?
Thank you again for sharing this amazing and great recipe with us!
Great to hear, Anna! Nice work reducing the water given your environment. Yes, you absolutely can incorporate other ingredients during the stretch and fold stage. I find that “less is more” with add-ins, so start light and adjust with more or less depending on your results the next time around 🙂
Hi What a great recipe!! Question when you make baguettes how long do you stretch them out for bulk ferment. Thanks
Hi John! Do you mean in actual length or time? They are roughly 20 inches long.
hello! can i extend the cold ferment to 48h? or even a bit longer?
48 hours will work! After that, it can be hit or miss.
Can they be baked a day ahead of using?
Yes, definitely. I always suggest reheating before serving: 350ºF for 15-20 minutes.
So far so good, the dough has gone into the fridge.
I wanted to ask whether the rolls are good for freezing after baking and cooling. Thanks.
Great to hear! And yes, they freeze beautifully. Thaw at room temperature, then reheat at 350F for 15-ish minutes.
Hi there! i’ve made this one a few times, consistantly reducing hydration by 20 Gr. after the 75% raise, it keeps raising in my fridge overnight and i end up with over proofed sticky dough. its a tasty flat ciabatta every time, so the tasty part is great, but how do i correct for this? bulk raise no more than 40-50%?
thank you.
Hi Dawn,
It sounds as though you have a very active starter. Why don’t you try 50 grams of starter next time around and see if you get better results?
I have a question, for the fridge fermentation, does having it in for 24 hours give it a more sourdough taste? Or will it cause it to overproof?
Yes: it will give it more sourdough flavor; it will not overproof.
Him can this be made in one big piece? If so does the baking time and temperature change?
That should be fine! Baking temperature will be the same, and I think the timing will be roughly the same as well — just rely on the visual cues… reference the photos above for guidance. It’s possible you may need to add 2-5 minutes or so to the baking time.
Really delicious and easy to make. Thank you so much!
Great to hear, Janet! Thanks for writing 🙂
This is a great recipe. I like to add 11/2 cups of shredded cheese. Sometimes just cheese but I add 1cup of jalapeños or 3 tbs of roasted garlic with the cheese for some flavored rolls. I have also substituted 10% of the bread flower with whole wheat flower and that works awesome also.
Great versatile recipe!
Amazing! Love reading all of this, Jerry. Thanks so much for writing and sharing your notes. ALL sounds delicious. Happy New Year!
I love the simplicity of the recipe and the flavor is amazing! It makes the most amazing Italian sandwiches! For some reason my crumb is not nearly as open no matter how I adjust the rise time. I am trying to handle it as gently as possible to not deflate. Do you have any suggestions?
Hi James! Great to hear. Questions: are you using a scale to measure? And what type of flour are you using? Does the dough appear similar in texture to the dough in the photos/video or is yours wetter?
Thank you so much for replying. Yes I am using a scale and King Arthur bread flour. It is really odd because I have been able to recreate loads of your other recipes but there seems to be some tiny detail I keep missing here. Everything is perfect except the crumb is much tighter with the largest holes being about the size of a pencil and even those are few and far between. It is winter here and my house is about 65F and 40-50% humidity so I tried really extending the rise. I am using the same starter for my regular bread and it is working fine. Maybe I will try increasing the amount for this recipe…
OK, great re scale and bread flour. One thing that has helped others with this recipe is to extend the final room temperature proof — instead of 1 hour, you could try 2 hours or even longer, especially since its on the cold side right now.
Do you use a straight-sided vessel for the bulk fermentation?
Your recipes are always EASY and DELICIOUS! Followed instructions exactly and watched the video – came out perfectly. Two more batches started!
I have a question for any Canadians if they’ve tried this recipe with all-purpose flour and if so which one and did you do a straight substitution of weight? (I live in the GTA for where to buy purposes)
Great to hear, Tina! I hope your fellow Canadian commenters have some suggestions for you.
Thanks for writing 🙂
Can I bulk ferment longer than 24 hours?
Yes! As long as 48 hours would be fine.
Hi Alexandra! I have made this ciabatta and it was super easy and delicious. I want to make it again but I was wondering if I can cold ferment for 4 hours instead of 12.
Thank you!
Hi! It’s worth a shot. You may find the finished ciabatta to be less airy/light, but it may be just fine. If you have time to proof longer than 1 hour at room temperature, that might help.
I made this today and turned out great!
Great to hear. Thanks for writing 🙂
A new fan from 🇨🇭Switzerland: just made your sourdough ciabatta – SUPERB! The best sourdough bread we’ve ever had. My only change: I used half light spelt flour and half regular white with my existing sourdough starter. Your directions and video were excellent. Thank you!!! Looking forward to more cooking/baking with you. Best, Karen
Great to hear, Karen! Thanks so much for writing and sharing your notes. I love spelt flour 🙂
Hi Alexandra, I absolutely love your recipes. Your sourdough bread is my go to!
I’m making these buns today and I was wondering if I should use steam when baking. I noticed you don’t mention anything in your recipe about steam. Thank you
Hi Sonya! Apologies for the delay here. I never use steam bc I never find it works that well in a home oven (meaning the various tricks that call for ice cubes or spritzing water, etc.). If you have success using steam, go for it. Otherwise, I’d just as soon make the recipe as written.
What a great recipe! The directions were easy to follow and I loved being able to watch the video as well. My rolls turned out amazing. Thank you!
Great to hear, Steph! Thanks so much for writing 🙂