 →
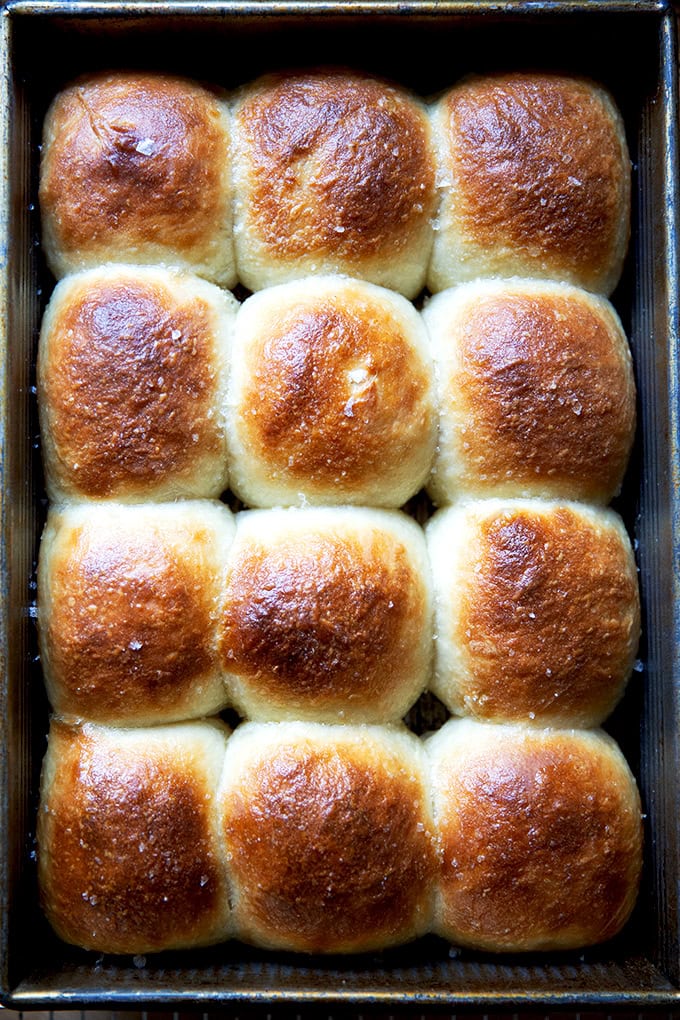
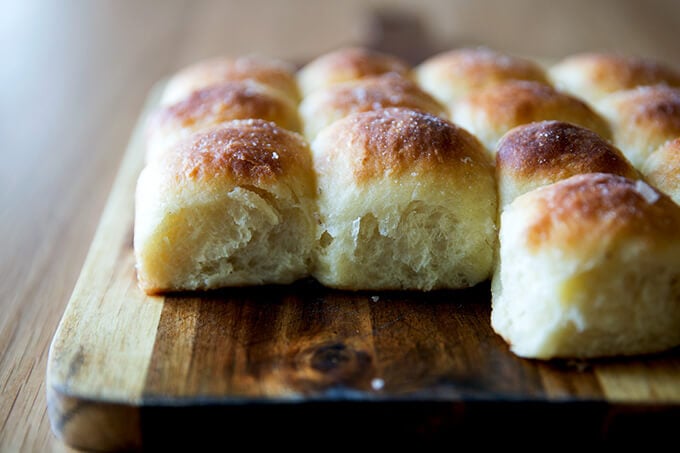
→ No-Knead Buttermilk Pull-Apart Rolls
This post may contain affiliate links. Please read my disclosure policy.
Soft and squishy, slightly sweet, these no-knead buttermilk pull-apart rolls resemble Parker House rolls in texture and taste. So easy and delicious!
Know this: any bread recipe you love can be mixed a day ahead of time and stashed in the fridge to rise. Or, if you like making rolls, you can make your recipe up to the point where you shape the rolls and stick them in the baking pan, at which point you can stick the pan in the fridge.
As I said, you can do this with any bread recipe you love, but if you don’t have one in mind, I have a thought: buttermilk pull-apart rolls. This is a recipe from Bread Toast Crumbs, my cookbook, and I made it recently with one small change: instead of splitting the dough and baking the rolls in two pans, I fit all 12 (or 24) rolls in one 9×13-inch baking pan.
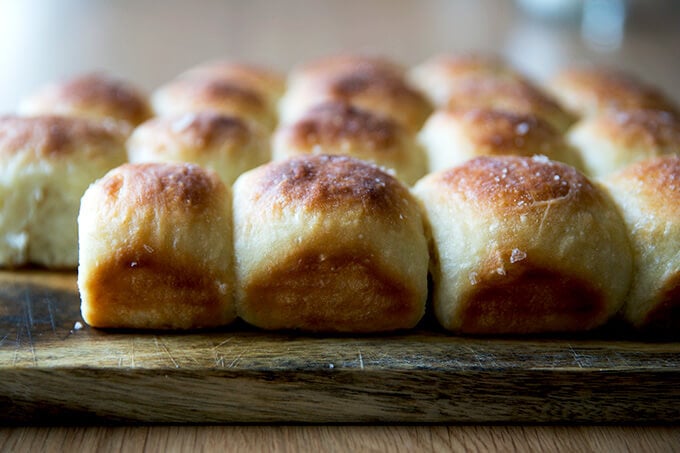
It’s fun seeing a whole mess of rolls all squished together, and my children enjoyed pulling the mass to pieces. Slightly sweet, soft and squishy, these pull-apart rolls resemble Parker House rolls in both taste and texture and are such a festive bread to serve at Thanksgiving or really any holiday gathering. Easy peasy, too. (There’s both video and photo guidance below.)
If you like to make bread for holiday gatherings or dinner parties, a great way to get a jumpstart on preparations is to make the dough a day in advance.
I’ve said it before, and I’ll say it again: Homemade Bread: Yes. You. Can. 🍞🍞🍞 Everyone will rave. (There’s nothing to it!)
Happy Thanksgiving, My Friends! I hope all of your preparations are going well. Happy to answer any bread (or other) questions you might have.
PS: No-Knead Thyme Dinner Rolls
How to Make Buttermilk Pull-Apart Rolls, Step by Step
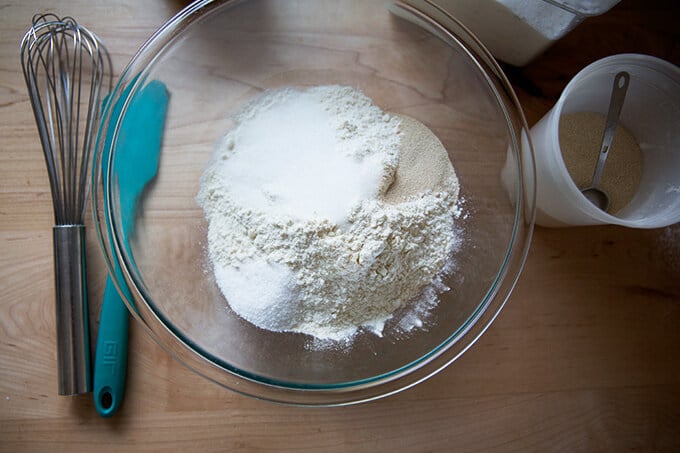
Mix together the dry ingredients: all-purpose or bread flour, instant yeast, kosher salt, and sugar. (Note: For best results use a scale! Metric measurements are given below.)
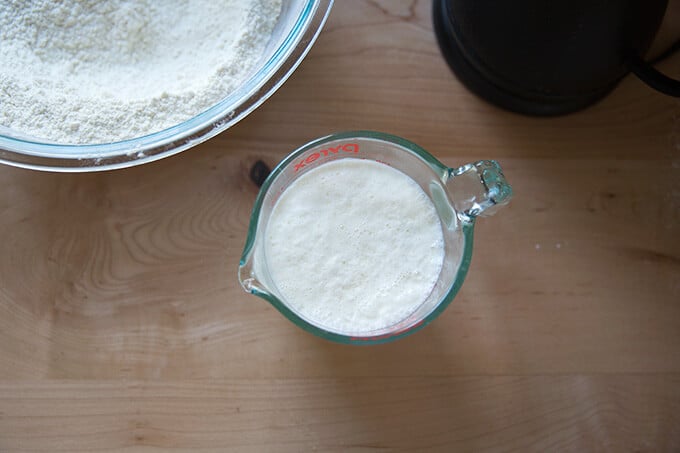
Pour a scant cup of boiling water over a scant cup of buttermilk and let stand for 10 minutes.
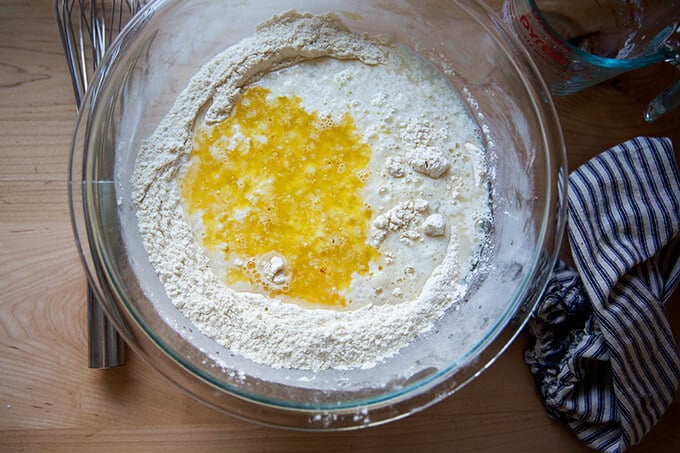
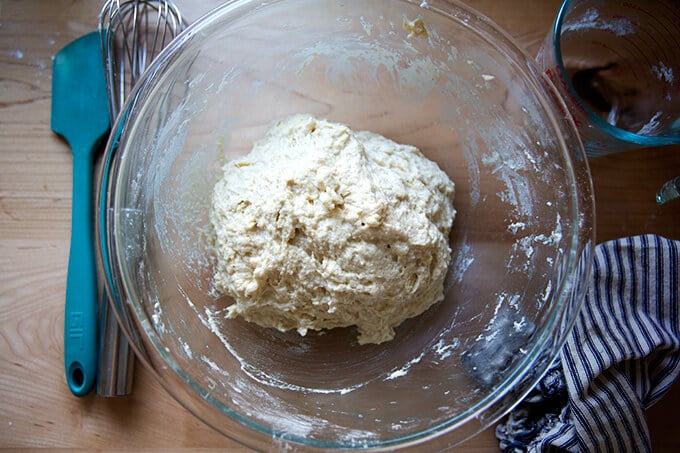
Add the buttermilk-water mixture along with 4 tablespoons melted butter to the bowl of dry ingredients.
Mix to form a sticky dough ball.
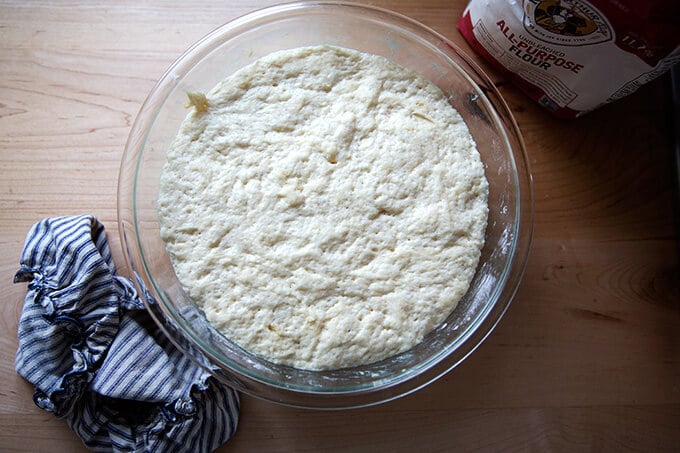
Let rise in a warm spot for 2 hours (see recipe notes for details). You can use a cloth bowl cover or a lid here — I love this 4-quart Pyrex bowl + lid set.

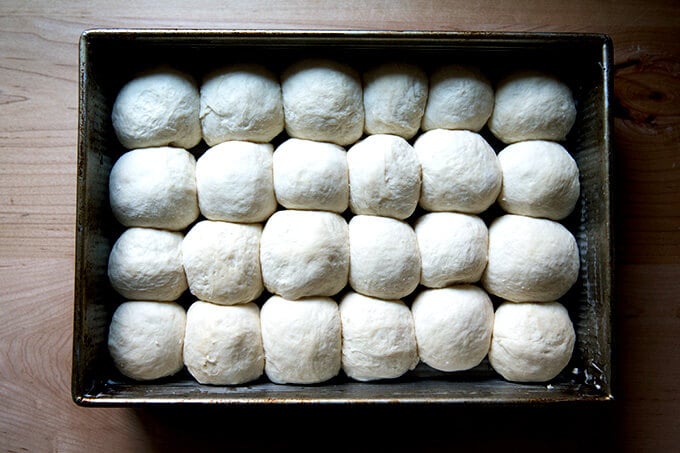
After 2 hours, the dough will look something like this:
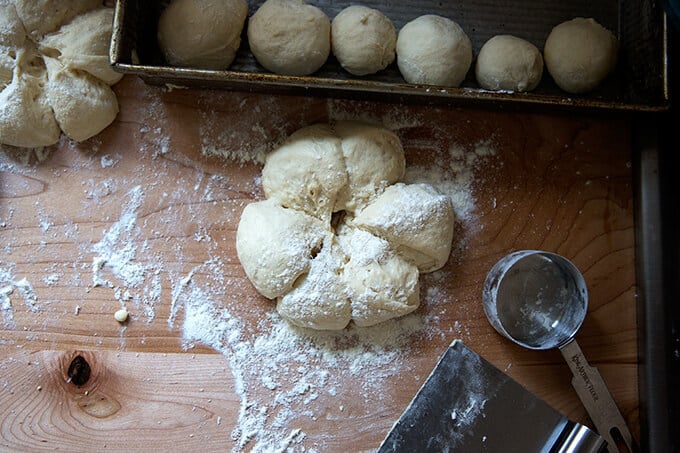
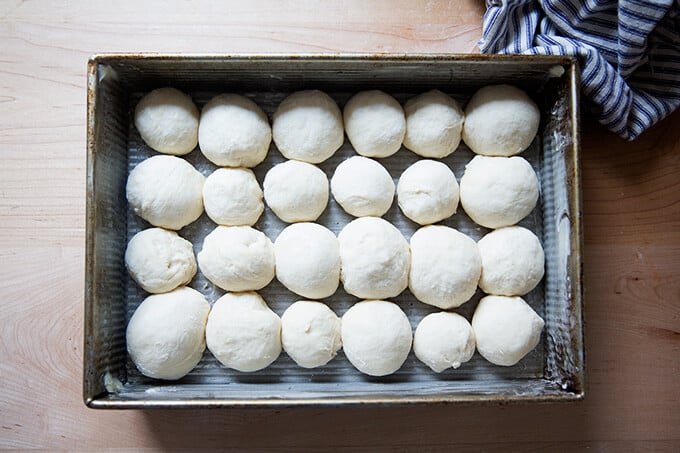
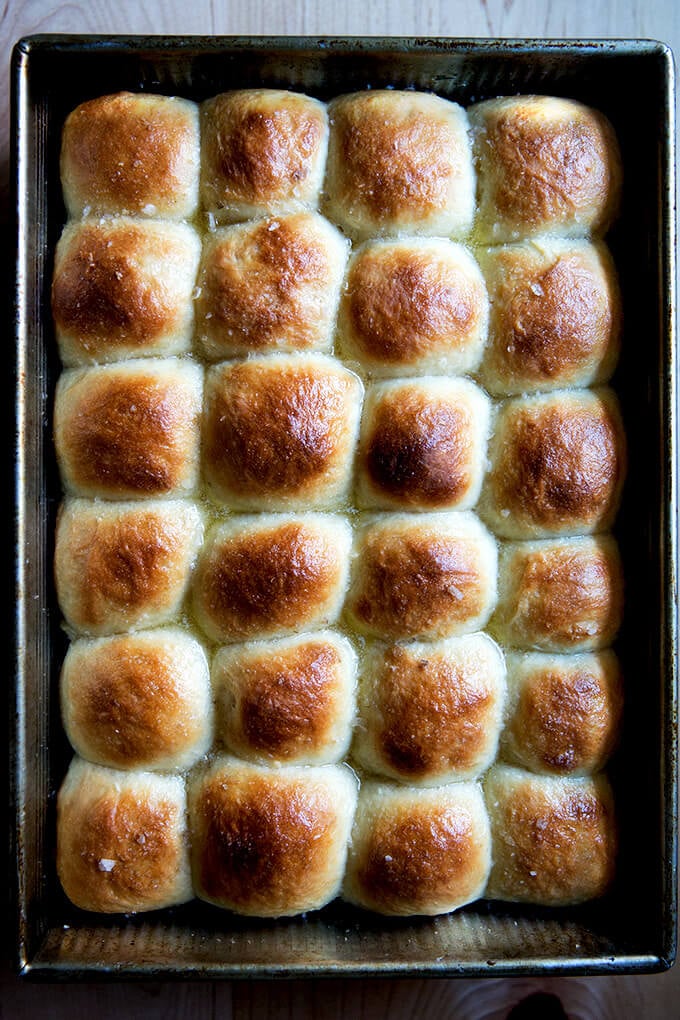
Turn it out onto a floured work surface. Divide the mass into 12 or 24 small pieces depending on what size roll you wish to make. I prefer the larger size for ease… shaping 24 rolls takes a long time. I typically make a double batch and make 24 larger rolls. Plus the larger size is better for leftover sandwiches. (Video guidance here.) Shape each piece into a round and fit into a buttered 9×13-inch pan. I love this 9×13-inch USA pan for so many things.
Cover and refrigerate overnight. I tuck the entire pan into a 2-gallon zip-top bag.
The following morning, let come to room temperature for 1 hour, then bake at 400ºF for 20 to 25 minutes.
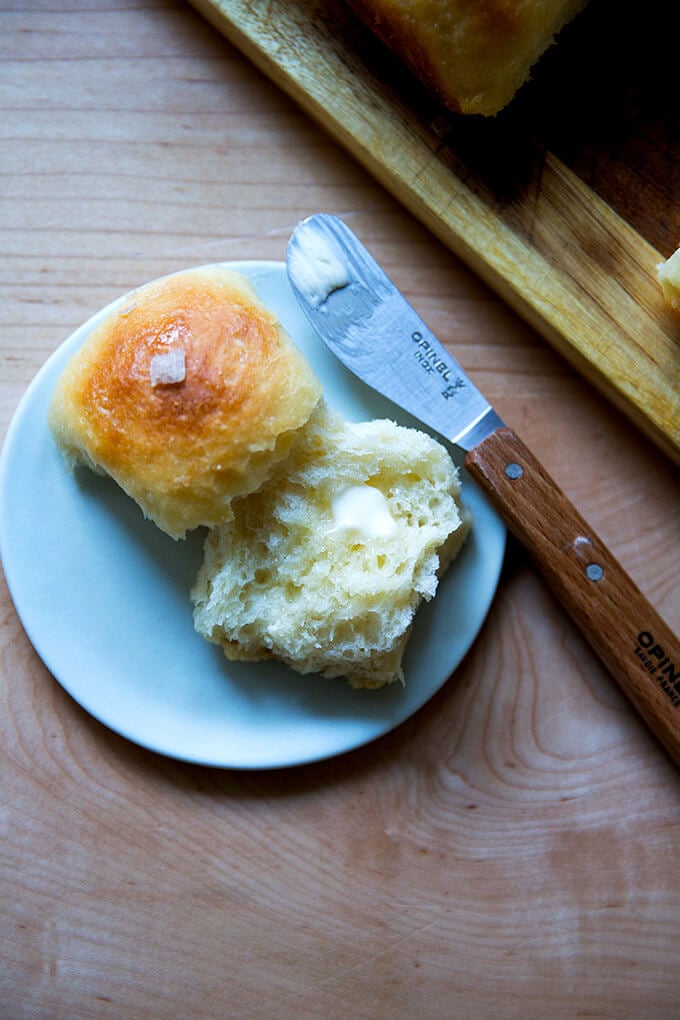
Out of the oven, brush the rolls with 2 tablespoons melted butter and sprinkle with sea salt.
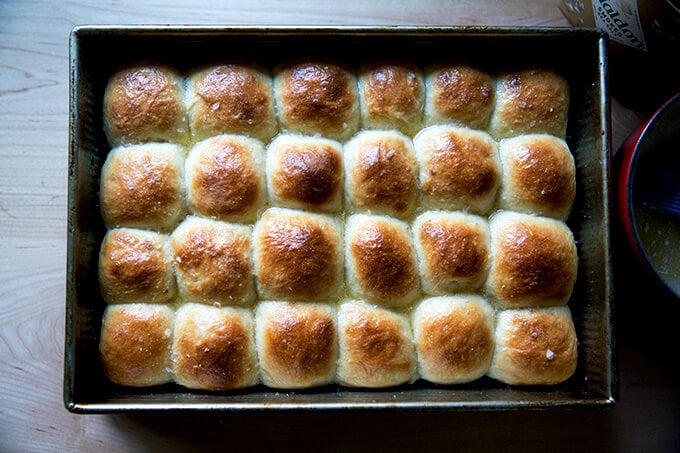
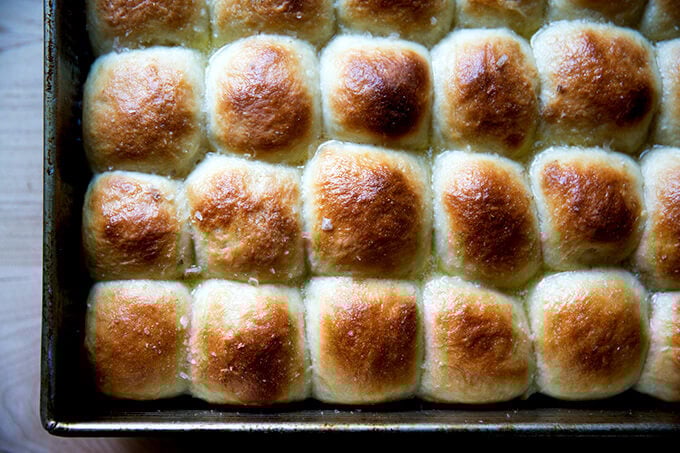
Serve immediately with softened butter.
No-Knead Buttermilk Pull-Apart Rolls
- Total Time: 3 hours 25 minutes
- Yield: 12 to 24 rolls 1x
Description
Adapted from Bread Toast Crumbs
11/15/2024 Update: I recently updated the recipe slightly in that I’ve upped the amount of flour from the start to 550 gram, and I’ve also, as a result, upped the salt. This higher amount of flour makes the dough slightly more manageable to work with and does not sacrifice any flavor.
Notes:
- Scale: For best results, please use a digital scale to measure.
- Salt: I now make these with 15 grams of kosher salt, which is about 5 teaspoons of Diamond Crystal kosher salt or 2.5 teaspoons of Morton. If you are sensitive to salt, use less: 12 grams or 4 teaspoons Diamond Crystal and 2 grams Morton. Note: 15 grams may seem like a lot but the rule of thumb for bread and pizza dough is that the salt should weigh 2 to 3% the weight of the flour. For this recipe, that’s 12 to 15 grams.
- Warm place to rise: To create a warm place for your dough to rise, preheat your oven for 1 minute, then shut it off.
- Other vessels: If you don’t have a 9×13-inch pan, you can use two 8- or 9-inch round or square pans. I love this 9×13-inch USA pan.
- Water: If you live in a humid environment, consider holding back 2 to 4 tablespoons of water (15 to 30 grams) — this dough is very wet and sticky, and while you can use as much flour as needed while shaping, you might save yourself some trouble by holding back some of the water from the start.
- Preparing the dough in advance: I have received questions about how many days the shaped rolls can stay in the fridge, and I recently experimented. I let the shaped rolls (with the pan wrapped in plastic wrap) sit in the fridge for 48 hours before baking them. While the texture was the same — as feathery light as ever — I did not like the flavor, which tasted sour, but not in a pleasant way. So, unfortunately, I cannot recommend stashing these in the fridge for much more than 18 – 24 hours. If you must make them ahead of time, I suggest baking them for 20 minutes — the rolls will not be completely brown. Let them cool completely; then wrap the pan. When you need them, place in a 400ºF oven for 5 to 10 minutes; then brush with the butter and sprinkle with salt.
Ingredients
- 4.25 cups (550 g) all-purpose or bread flour, plus more for shaping
- 4 to 5 teaspoons kosher salt (12 to 15 g), see notes above
- 2 tablespoons (25 g) sugar
- 2 teaspoons (8 g) instant yeast
- 1 scant cup (235 g) boiling water, or less, see notes above
- 1 scant cup (235 g) buttermilk
- 6 tablespoons melted butter, divided
- flaky sea salt
Instructions
-
In a large bowl, whisk together the flour salt, sugar, and instant yeast.
-
In a 2-cup liquid measure (or something similar), pour the boiling water over the buttermilk and let stand for 10 minutes. Give it a stir. The buttermilk will likely look curdled. This is okay.
-
Pour the buttermilk mixture and 4 tablespoons of the melted butter over the flour mixture. Stir until a sticky ball of dough forms. Cover the bowl with a tea towel or lidded vessel — I love this 4-quart Pyrex bowl + lid set, and set aside in a warm place to rise (see notes above) for 2 hours, or until doubled in bulk.
-
Grease a 9×13-inch baking dish. Flour a work surface and sprinkle flour lightly over the dough and around the edges. The dough will be very sticky, so use flour as needed. Gently coax the dough out of the bowl onto the floured work surface and shape into a rough ball (video guidance here) using flour as needed. Use a bench scraper to divide the ball into 24 portions (about 45 grams each if you feel like measuring) or 12 portions (about 90 grams each).
-
Using as much flour as necessary, shape each piece roughly into a circle. It’s okay if each piece is a little misshapen. Place the dough balls into the prepared pan, spacing them evenly apart.
- At this point, you can cover the pan and refrigerate overnight. Otherwise, heat the oven to 400ºF. Let the dough rise, uncovered, for 25 to 35 minutes, or until the dough pieces have puffed to almost fill the pan. (Note: If you refrigerate overnight, remove the pan at least 1 hour prior to baking.)
-
Transfer the pan to the oven and bake for 20-25 minutes, or until golden brown. Remove the pan from the oven and immediately brush the surfaces of the rolls with the remaining 2 tablespoons of melted butter. Sprinkle flaky salt over top to taste. Let the rolls cool in the pan for 5 minutes, then turn the pan out onto cooling racks and invert onto a plate or serving platter.
- Serve warm with more butter on the side.
- Prep Time: 3 hours
- Cook Time: 25 minutes
- Category: Bread
- Method: Oven
- Cuisine: American
This post may contain affiliate links. Please read my disclosure policy.


454 Comments on “No-Knead Buttermilk Pull-Apart Rolls”
These were amazing! I made them the afternoon before and refrigerated them overnight. We had them for Christmas Eve dinner and they were as much of a hit as the prime rib!! Could not have been easier and they were fantastic.
So nice to hear this! Sound like such a lovely dinner. Happy holidays to you and your family 🙂
I have made these rolls a couple of times now, the are delicious and so easy to make. Thank you Alexandra.
Karen
Great to hear, Karen! Thanks for writing 🙂
Hello – you don’t need to post this but I’m not sure how else to send feedback. Your lovely website has become so littered with ads that it is difficult to read a recipe and printing sometimes takes a few tries to print without weird spacing and other things that I can tell are related to the ads. The ads on the website wouldn’t be so troublesome if they were just on the right side, but they are at bottom, right side and in between content. I, for one, would gladly pay a subscription fee to have access to your website and content without ads. I’m not sure if this is doable or not! I’d love to support what you do somehow anyway! XO
I use Brave browser. Zero ads, also filters ads on YouTube.
I made these!! I usually buy the frozen rolls and let rise in the morning, just as my mother did. However, over the last few years, I have had terrible luck with those – usually over-proofed. After seeing this recipe on Ali’s IG, I decided to make these. They were sooo EASY! I was up early Christmas morning, made the dough and let rise, then rolled them out and stuck them in the fridge. I pulled them out an hour before baking. I am still surprised (and ridiculously proud of myself) that I made the beautiful rolls I put on our table!
I’m so happy to read all of this, Elle! Easy and rewarding is the best combo. Thanks so much for writing and sharing all of this. Happy New Year to you and your family 🎉
Hi! Been making these rolls over the holidays and they’ve become a favorite. Today I decided to use sourdough starter with reduced amounts of flour and liquids. Do you advise the same time in the fridge to avoid the unpleasant sour taste you mentioned? Or can these cold ferment longer? Will stick to your recipe but also interested in your opinion on making these with starter. Thank you!
Hi Laura! Yes, I do think a shortened fridge time (as in no more than 18-24 hours for the shaped rolls) is a good idea for a sourdough version too. Looking forward to hearing how they turn out!
They turned out beautifully after about 14 hours (fridge and counter) and I even added caramelized onions to the dough for sliders. Can’t wait to try them but I’m hopeful they taste like the original because your recipe needs zero tweaking!
That sounds fantastic! Thanks so much for circling back. Enjoy them!
Has anyone made this into a loaf of bread? My grandson loved these at thanksgiving…He was just three at the time, and was so upset that his dad tried to fob him off with dressing instead of another roll. He marched over to me to complain about the “spicy” bread, where oh where was the “regular bread”? Your recipes are an intergenerational hit at my house!
I have not, but I think if you have a 10×5-inch loaf pan, you could easily bake the whole thing as a loaf.
Absolutely love these rolls! I am considering using Buttermilk powder to make them. Do you think it best to reconstitute the powder in milk or water first or just add the powder to the dry ingredients and add additional water? Or should I just try each way and let you know how they turn out? 🙂
Hi! I would reconstitute it however it says to do so on the package (as in with milk or water). Then, I would use 235 grams of the reconstituted buttermilk in the recipe.
Is it possible to halve the recipe for half the number of rolls?
Yes!
My rolls came out very dense instead of light and fluffy. Any idea what i might have gotten wrong? Thanks!
Hi Maya! Questions: did you use a scale to measure? What type of flour did you use? And what type of buttermilk… was it very thick?
Maybe instant vs active dry yeast?
I had the same problem. My recipe didn’t double in size. Wondering if the oven was too hot after I turned it off to put in the bowl. Could have zapped the yeast.
Hi Mary! Did you preheat the oven for just 1 minute total?
no it was longer than that which makes me think the heat killed the yeast. SAD SAD.
Thank you for sharing this recipe. It was easy to follow and the bread rolls were soft and tastes perfect! Don’t know if it freezes well but I have wrapped a couple to try and stashed them in the freezer. Will definitely make these rolls again.
Great to hear, Rina! The baked rolls do freeze well 🙂
I have tried so many recipes for various rolls and they always come out too dense. I made this recipe today and oh my goodness, these are the BEST rolls ever! Easy to make and so soft and fluffy. I was starting to think I was the issue with the rolls but now I know I just needed the right recipe so thank you for giving me that! I already have your rye bread and focaccia on rotation and now these rolls top the list. Thank you for your amazing recipes and your always appreciated details, tips and tricks.
I have tried so many recipes for various rolls and they always come out too dense. I made this recipe today and oh my goodness, these are the BEST rolls ever! Easy to make and so soft and fluffy. I was starting to think I was the issue with the rolls but now I know I just needed the right recipe so thank you for giving me that! I already have your rye bread and focaccia on rotation and now these rolls top the list. Thank you for your amazing recipes and your always appreciated details, pictures, and tips.
Great to hear, Karyn! Thanks so much for writing and sharing all of this. And thank you for your kind words, too. Means a lot 🙂
Just made these rolls for a third time and I realized I didn’t have buttermilk so I used whole milk and white vinegar as substitute. They were even better than the first two times I made these! So don’t fret if you don’t have buttermilk on hand!
Hooray! So nice to read this, Hannah! Thanks so much for writing and sharing this… so encouraging for others who don’t have buttermilk on hand.
I love these rolls and I make them several times over the holidays. I’m wondering if anyone has tried them with some proportion of whole wheat flour?
Great to hear, Melissa 🙂 I have not, but I think you could successfully use as much as 25% whole wheat flour in place of the bread flour. You may need to slightly up the water, but my guess is that you won’t… just reference the video for the texture of the dough or draw from your previous experience and add water as needed.
Hi. I’d like to make these in advance. Would you recommend freezing the proofed individual rolls and then baking or cooking them all, freeze and reheat? In both events, when would you suggest taking each out of the freezer, refrigerating for how long and baking or reheating for how long?
I am wondering the same exact thing. I would like to make these tomorrow and freeze and reheat. My oven never has free time as after the turkey comes out, all the sides go in to reheat. Hoping this bumps the question up for Ali.
from another Robin
Hi other Robin! This is what I suggested to the other Robin:
I would make them fully and bake them as directed but underbake them slightly — just by 2-3 minutes. Do not brush with butter or sprinkle with sea salt out of the oven. Let them cool completely. Do not separate them. Freeze them. Remove them from the freezer on Thanksgiving morning and let them sit at room temperature. To reheat: bake at 350ºF for 15-20 minutes; then brush with butter and sprinkle with sea salt out of the oven.
Note: You can definitely stick this pan of rolls in with other sides as they reheat… 350 is just a rough/suggested temp. If it’s higher or lower, that’s fine.
Thank you so much! I had not seen the reply to the first Robin but so glad you responded. Going to make today!! Very excited!
Great! Enjoy 🙂
OMG! A true star to my dinner table. Everyone said they need to be a permanent addition. Plus I plan to make them often. Thank you again for the quick response on how to reheat them.
Great to hear, Robin! Thanks so much for circling back with your results 🙂
Hi Robin! I would make them fully and bake them as directed but underbake them slightly — just by 2-3 minutes. Do not brush with butter or sprinkle with sea salt out of the oven. Let them cool completely. Do not separate them. Freeze them. Remove them from the freezer on Thanksgiving morning and let them sit at room temperature. To reheat: bake at 350ºF for 15-20 minutes; then brush with butter and sprinkle with sea salt out of the oven.
Hi Ali! Your site is a favorite of mine! I’ve made these roll before and loved them. My sister has celiacs disease and I am wondering if anyone has had success with a GF substitute flour like cup for cup or Bob’s Red Mill. Thanks so much!!
Hi Sarah! I have not tried, and I don’t recall a comment on this post from someone how has had success using gf flour here. GF bread baking is a little trickier than just swapping in gf flour. Rolls are particularly tricky bc of the shaping required, and gf dough is more like a batter than a dough. One thought is to use this gf peasant bread recipe, but to bake it in muffin tins as suggested here: Easy, No-Knead Dinner Rolls
Perfect suggestion! Thank you!
Happy Thanksgiving!
My pleasure! Happy Thanksgiving 🙂
Hi there, I’m looking forward to making this for our group on Thanksgiving. I’m wondering if I wanted so substitute 40-50% of the AP flour with fresh milled flour (white), do you think the recipe needs to be adjusted in any other way? Thank you!
Hi Alyssa, It’s really hard to say. How has your experience been with other breads you’ve made with 50% freshly milled flour. And is it home milled flour or from a mill? I have very little experience using freshly milled flour. My aunt has a countertop mill, and she’ll substitute roughly 20% of the ap flour in this peasant bread recipe with freshly milled flour without making any other changes, and it is so, so tasty. The bread is a little denser, but that doesn’t bother me. With a higher percentage of freshly milled flour, you may need to increase the liquid — generally, freshly milled flours are a little thirstier. That said, this is a very high hydration dough, so you might not need to. All flours absorb water a little differently, so it’s really hard to advise, and it might be something that takes a little trial and error to get right. I might also suggest doing one set of stretches and folds 30 minutes after you mix the dough to help build some strength.
I made these rolls to have with Thanksgiving dinner. They were a big hit and not difficult to make.
A friend ate one right after I took the rolls out of the oven and said, if given a choice between the two, she’d pick this roll over a brownie (her favorite dessert). 🍞 🤩
Awww, it’s so nice to read this, Kathleen! Thanks so much for writing and sharing this. Love it. Happy Thanksgiving!
These were beautiful and delicious! Perfect for our Thanksgiving feast, and and doubled the recipe so we could make little sandwiches with the leftovers! Thank you for any easy delicious dinner roll.
Great to hear, Katie! Thanks so much for writing and sharing this. We made a double batch as well yesterday but I’m making more today to satisfy our leftover needs. Happy Thanksgiving!
I tried out this recipe for Thanksgiving and the rolls turned out great. This recipe is a keeper!!
Great to hear, Sheila! Thanks so much for writing. Happy Thanksgiving!
Ali
I was reading your email this morning and saw these rolls. We are having a holiday party and would love to serve these rolls. Can I make them today, bake them tomorrow and then freeze them well wrapped for a week? Thanks for any advice!
Yes, you can! See my notes above to Robin regarding reheating them.
Thanks so much Ali! I see I can use either bread or all purpose flour and I have both (since your sourdough bread recipe is in constant rotation in our house). I live in Florida so know to reduce the hydration but do you have a flour preference?
Hi! I generally tend to use KAF bread flour for all of my breads and KAF all-purpose flour for cakes, cookies, quickbreads, etc. But in a pinch, either flour works for any of those applications.
Thanks I did 24 using AP flour and 24 bread flour. I par cooked them as you recommended (or slightly shortened the cooking time) and they both came out looking the same so will report back after my party next week!! Tucking them in the freezer gave me peace of mind! Now onto your crab dip next week!!
Oh yay! Cheers to getting ahead… it is the best feeling. Enjoy your party!!
This was my second time making this recipe and it was again a winner! I prepped the rolls after the first rise on Wednesday afternoon, refrigerated, then took them out on Thanksgiving morning to rise on the back of the stove for 3 hours while the turkey was roasting. Then baked them while the turkey was resting. They were also perfect for sandwiches the next day. I’ve decided I need to be baking your bread recipes year round instead of just for holidays.
Thank You for all you do to make these recipes accessible and successful!
Awww, Stefanie, thank you so much 🙂 🙂 🙂 It’s wonderful to read this. I appreciate you writing and sharing your notes/results/experience, and I do hope you find a few “everyday” bread recipes you like. Happy holidays!
Wow! These were the best rolls I have ever made. So soft and fluffy! I shaped 15 rolls (about 73 grams each) and thought the 3×5 pattern worked nicely in the 9×13 pan. My dinner roll search is over. Thank you so much!
Great to hear, Robin! Thanks so much for circling back and sharing your notes/results.
We’ve made these as Thanksgiving dinner rolls for a couple of years now. I have extra buttermilk on hand — do you think this dough would be suitable for a burger bun (larger than the roll size)?
Absolutely! Go for it 🙂
Thanks for the encouragement – burger buns here we come.
YES🍔🍔🍔
I have a get-together coming up next week for a group of people and your recipe for Buttermilk Pull Apart Rolls would be perfect for the event. We will be making turkey sandwiches. I will need to double the recipe because I want to create much larger rolls. Do the rolls have to be baked in a pan? Also, I do not know how to form and bake the larger rolls. Can you please help? Thank you so much.
Hi Linda! Apologies for the delay here. Doubling the recipe works great. And you can definitely make larger rolls. If you needed to bake them on a sheet pan, that would be fine — what pan are you envisioning baking them on? The bake temp will be the same. Larger rolls might take slightly longer.
You’re not too late. Thank you for your help. I have narrowed the pan down to one of two sheet pans, a 11 1/2 x 16 1/2 or a 9 1/2 x 14 1/2. When placing dough on the pan, should there be a large or small space between the rolls?
Hi! If you’re doubling the recipe, you’ll want to use the 11 1/2 x 16 1/2. Be sure to butter it. I would just try to spread the rolls out evenly on your pan and let that determine how much space you leave between them — it is totally fine if they end up rising into one another. They will break apart easily.
We had two Thanksgiving celebrations this year and served these rolls at each. They were a HUGE hit with all. They will be on our menu for years to come. In fact, we served them last night at our supper club and everyone wanted the recipe. Every recipe I have ever tried from Ali (who I have never met, but feels like a friend) has been wonderful. I love her thoughtful steps and teaching and her whole persona. I recommend her to friends all the time.
Awww, Irene, thank you! You are too sweet. It means a lot to read all of this. I’m so glad the rolls were a hit. Thank you for your kind words. Grateful for readers like you!
These rolls came together so quickly. Everything you want in a pull-apart. Soft, fluffy, and delicious. I offset some flour and water to account for some added sourdough discard. Mistakenly added all the butter into the dough (oh well!), so topped with egg wash. I may not go back to long process enriched recipes. This one hits all the marks with minimal effort. Another winner – Thanks, Ali!
Great to read, Francine! Love that you incorporated some sourdough discard into the dough as well as ALL the butter… I’ve done that, too, actually. Oh well is right! Happy holidays! Thanks so much for writing 🙂
Hi Renee! I don’t think that pan is quite large enough. I make a single batch in a 13×9 inch pan which is just slightly smaller. If you don’t have two pans roughly that size, do you have two pie plates? You could use one 14×11 pan and two pie plates.
Yes I do have those with me. I’m actually cooking at my brother’s in Florida and his kitchen equipment is limited. 😂 I usually make just a single batch and use two round 8-in pans like you recommend in your book. But I saw on this thread that you typically double and I thought I might as well too since I’m cooking for 14 people. So perfect, I will use his 11×14 and then my two 8-in rounds. Thank you so much! I love these rolls. They’re the best! Wishing you and your family a wonderful Christmas!
Great to hear, Renee! It’s always an adventure cooking in someone else’s kitchen. Glad you the pans to make the rolls work. Merry Christmas to you and your family as well!
These are so delicious! They turned out perfectly the first time I made them. Made them Christmas Eve and into the fridge overnight. Baked on Christmas. Couldn’t be easier. Used 12g salt, I think I’ll try13g next time.
Great to hear, Mary Ann! Thanks so much for writing and sharing this. Happy holidays!
HI, I am not a baker and tried three batches of these for Christmas. Two turned out amazing but one was so sticky that they were very hard to work with. I used a scale, bread flour. In the future if this happens what should i try? Thanks
Hi Susan! That is so perplexing that 2 batches worked well and one was sticky and you used a scale? If it happens again, just be very generous with the flour when you are shaping. If you notice the dough ball itself looks especially wet when you are stirring it with a spatula, you can add more flour, just a few tablespoons at a time, until the dough looks like the sticky dough ball it should be — sticky but not soupy.