 →
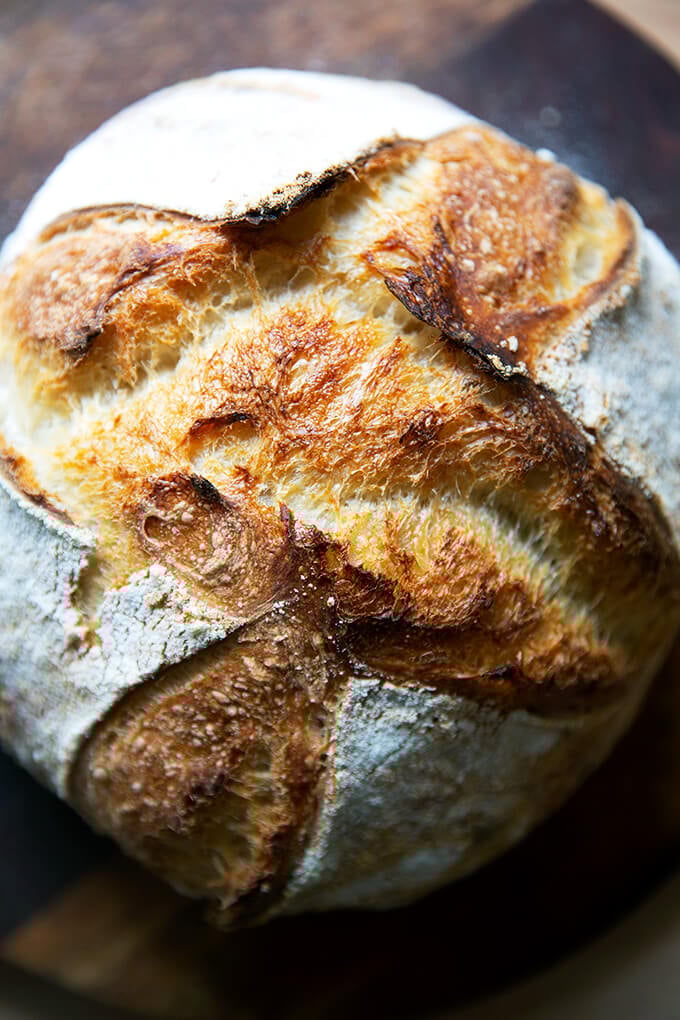
→ Easy Sourdough Bread (Whole Wheat-ish)
This post may contain affiliate links. Please read my disclosure policy.
Made with a small portion of stone-milled whole wheat flour, this sourdough bread is so flavorful, aromatic, and tasty. Using a mix of both bread flour and whole wheat flour keeps the texture light while providing a nutritional boost and lovely flavor. 🍞🍞🍞🍞
If you are looking to add more nutrition to your bread, a logical first step is to replace some of the white flour with whole wheat flour. The trouble with this idea is that not all whole-wheat flours are created equal.
Let’s get straight to it. Most commercial flour (both white and whole wheat) is made from roller-milled wheat, meaning a roller mill has separated the wheat kernel into three parts: the endosperm, germ, and bran. White flour is made from the endosperm. Whole wheat flour is made from a combination of the endosperm, germ, and bran. Much research shows that as soon as the wheat kernel is separated into the various parts, much of the nutritional value is lost — even when the bran and germ are added in after the fact.
So what’s the solution? Seek out stone-milled flour, which is flour made from wheat that passes through a stone mill, the process of which keeps the endosperm, bran, and germ together. Much research shows that keeping the components together preserves the nutritional value.
What’s more, the bran and germ present in stone-milled flours lend so much by way of flavor, texture, aroma and hue:
The recipe below calls for a mix of both bread flour and stone-milled flour. Using a small amount of stone-milled flour gives your bread a boost of nutrition while preserving its light texture. Once you’ve made the recipe once, if you like what the whole wheat flour is contributing to your loaf, you can increase the proportion of stone-milled flour next time around.
How to Make Whole Wheat-ish Sourdough Bread, Step by Step
First, gather your ingredients: you need an active/fed sourdough starter:
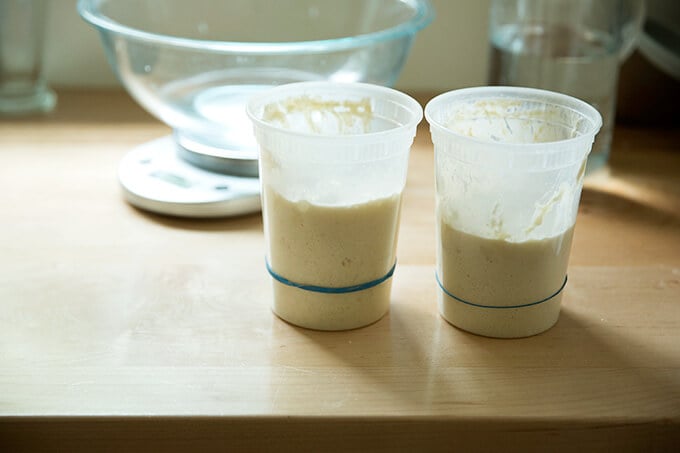
To ensure it is ready, drop a spoonful into a glass of water. If it floats, it’s ready:

Place 300 g of water, 100 g of starter, and 10 g of salt into a bowl.

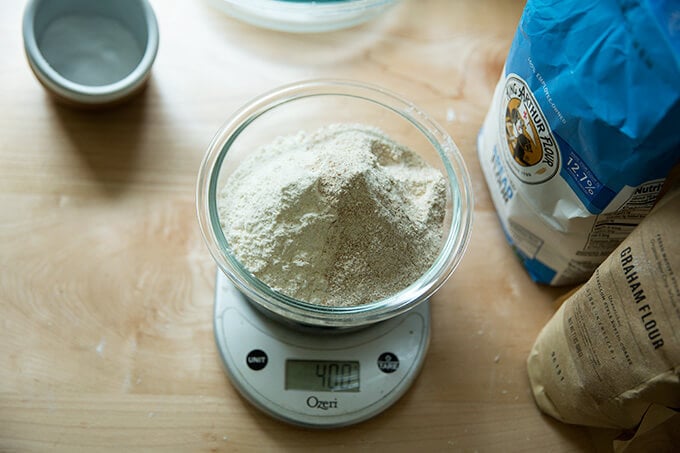
Next, weigh your flour: you need 400 grams of flour. For this whole-wheat-ish loaf, my preference is 350 grams of bread flour (King Arthur Flour) and 50 grams of stone-milled, freshly milled flour (I use a mix of Anson Mills rye and graham).

Mix until a sticky dough forms.
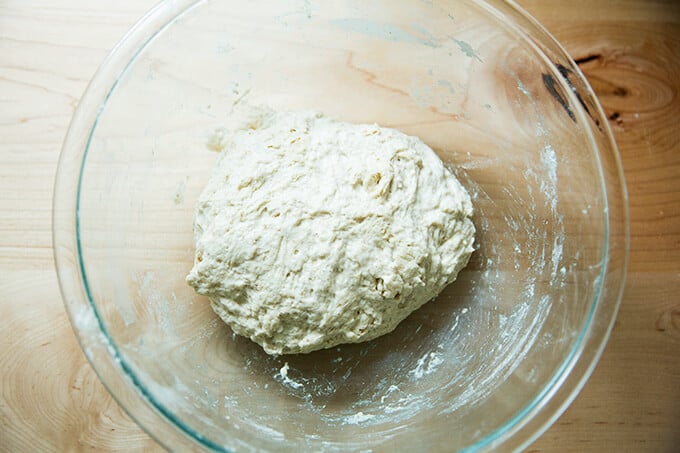
Then transfer to a straight-sided vessel for the bulk fermentation (the first rise).

After 30 minutes, stretch and fold the dough:
You’ll repeat this stretching and folding 3x at 30-minute intervals…
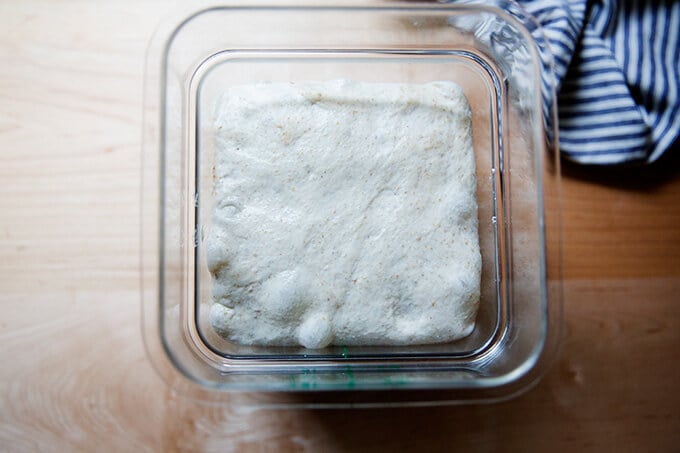
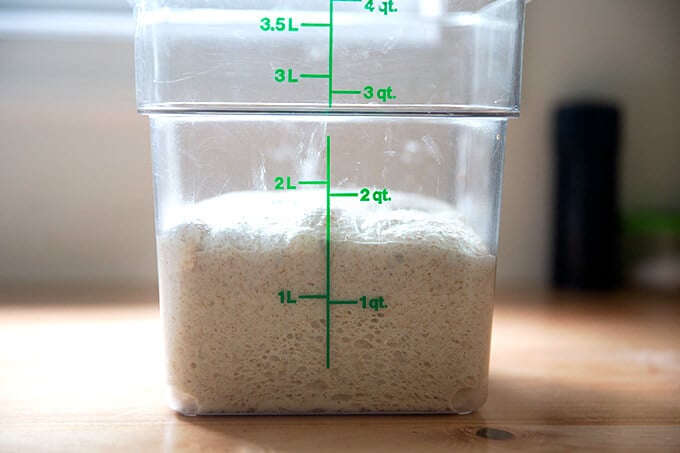
… then you’ll leave the dough to rise until it increases in volume by 50-75%:
Transfer dough to a clean work surface. I prefer to use no flour and minimal handling to shape it into a ball.
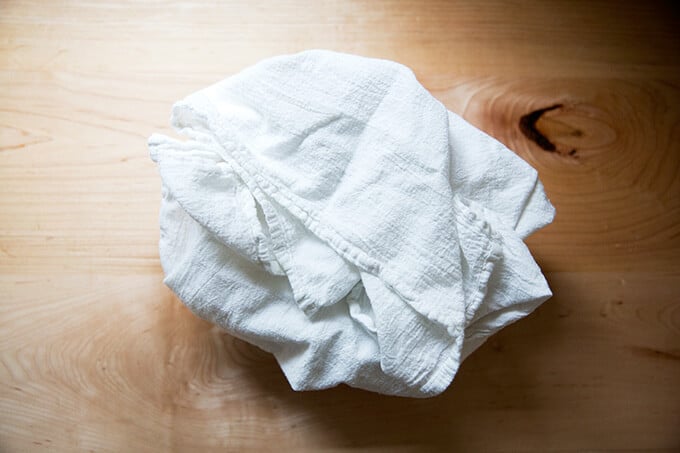
After the initial shape, let the dough rest for 20-40 minutes; then shape again and transfer to a flour sack-lined bowl.
Transfer bowl to fridge to proof (second rise) for 18 to 24 hours

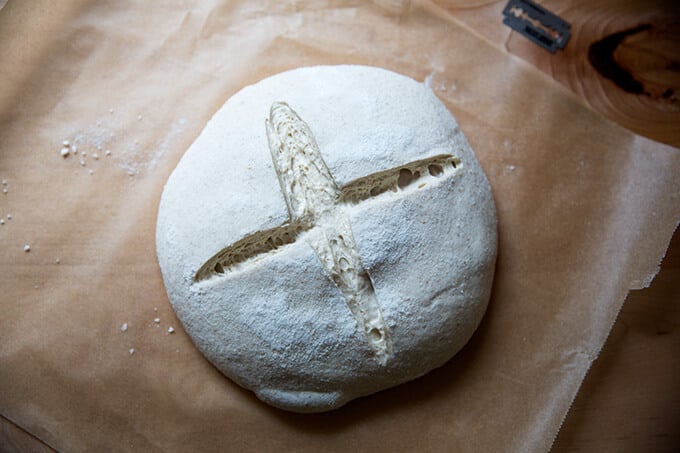
After 18 to 24 hours, transfer dough to a sheet of parchment paper. This video shows how:
Score as you wish; simple is fine.
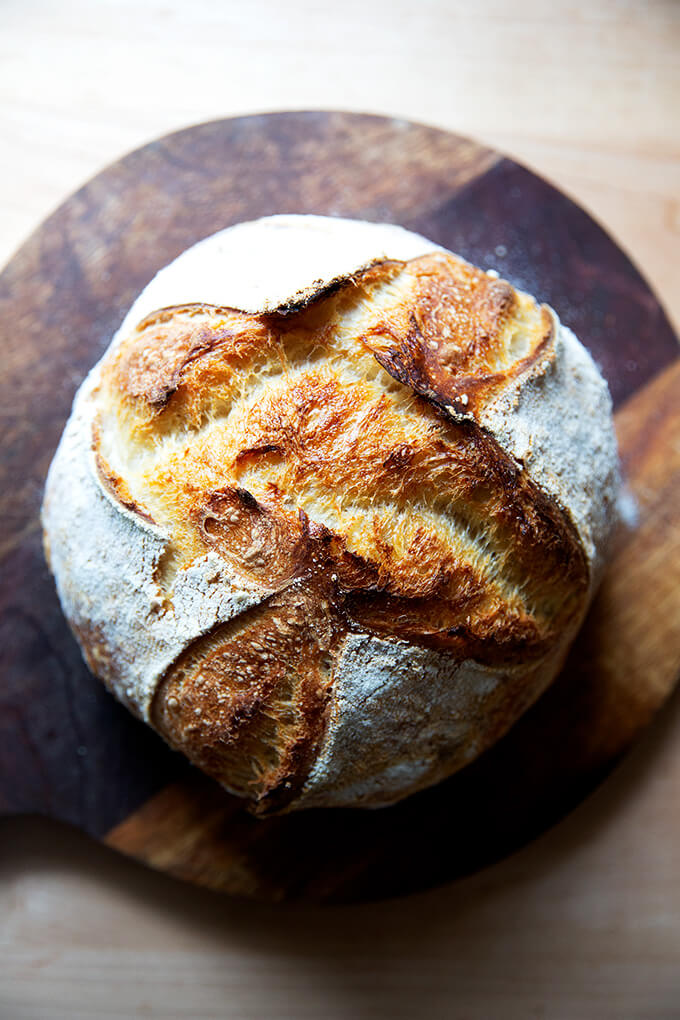
Transfer to a Dutch oven and bake, covered, at 450ºF for 30 minutes, then uncover and bake at 400ºF for 10 minutes.

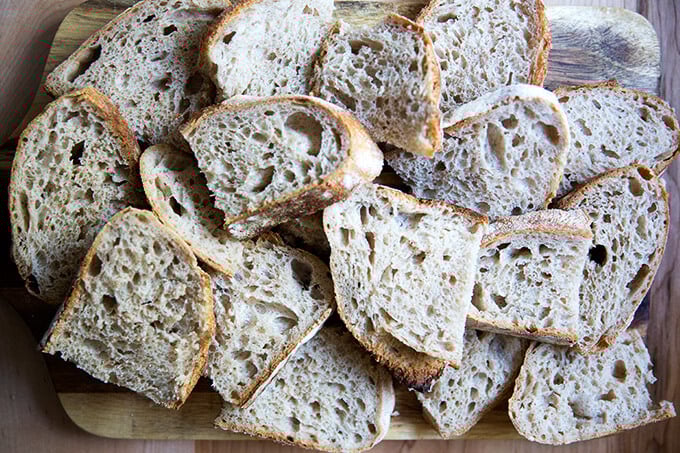
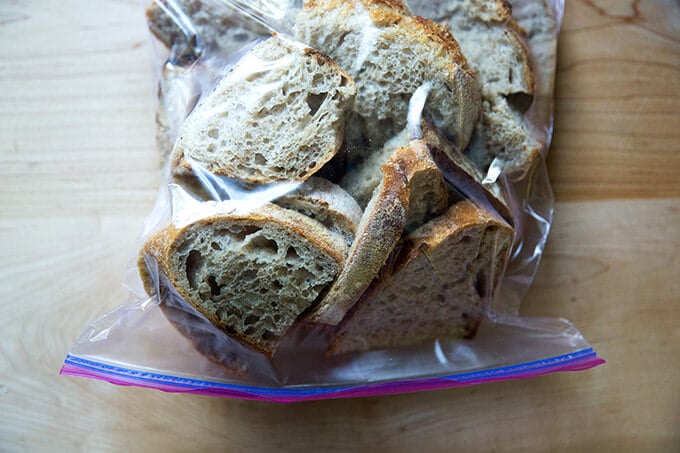
Store the bread at room temperature in a ziptop bag for 3 to 4 days or in the freezer for up to 3 months:
Easy Sourdough Bread (Whole Wheat-ish)
- Total Time: 48 hours 45 minutes
- Yield: 1 loaf 1x
Description
Made with a small portion of stone-milled whole wheat flour, this sourdough bread is so flavorful, aromatic, and tasty. Using a mix of both bread flour and whole wheat flour keeps the texture light while providing a nutritional boost and more flavor.
Notes:
Special equipment: Straight-sided vessel for the bulk fermentation, Dutch oven, flour-sack towel
Digital Scale: Do not attempt this recipe without a scale. This one costs $10. Troubleshooting what goes wrong with sourdough bread is impossible if you’ve measured with cups. They’re simply not accurate.
Troubleshooting: If you have issues with your dough being too sticky, please read this post: Why is my sourdough so sticky? The 4 common mistakes.
Flour:
-
- I prefer making this bread with 350g bread flour and 50g of freshly milled, stone-milled flour, which provides both flavor and color. I love using a mix of Anson Mills graham flour and rye flour, but there are many great stone-milled flours out there, and you may have a local source, which is even better.
- Where to buy stone-milled flour? In the past few years, it has become easier to find stone-milled flour, and if you are up for it, you should seek out locally, stone-milled flour. Why? Because if you’re buying locally milled flour, you likely can find out how recently it was milled. Because stone-milled flour perishes more quickly than roller-milled flour, it’s best if you can find a local source, which will ensure it will be fresh. Note: Store stone-milled flour in the freezer if you don’t bake regularly.
- I find locally milled stone-milled flours at a local co-op, Honest Weight Food Co-op, and I also order online from various sources. Here are a few I love: Cairnspring Mills, Anson Mills, and Community Grains
- 50g may seem like a tiny amount of stone-milled flour for this recipe, but I am constantly amazed by how much flavor this small amount of freshly milled flour adds.
Ingredients
*Please read notes above before proceeding. Watching the video is helpful, too.*
- 300 g water
- 100 g active sourdough starter
- 10 g kosher salt or sea salt
- 350 g bread flour, see notes above
- 50 g whole wheat flour, preferably stone-milled, see notes above
- rice flour, for dusting
Instructions
- Mix the dough. In a large bowl, combine the water, starter, and salt. Stir with a rubber spatula to loosely combine. Add the flours, and stir with a spatula to combine — it will be a wet, sticky dough ball. Transfer to a straight-sided vessel and cover with a tea towel or bowl cover for 30 minutes.
- Stretch and fold. After 30 minutes, grab a corner of the dough and pull it up and into the center. Repeat until you’ve performed this series of folds 4 to 5 times with the dough. Let the dough rest for another 30 minutes and repeat the stretching and folding action. If you have the time, do this twice more for a total of 4 times in 2 hours. [Video guidance here.] Note: Even if you can only perform one series of stretches and folds, your dough will benefit. So don’t worry if you have to run off shortly after you mix the dough.
- Bulk fermentation: Cover the vessel with a tea towel or bowl cover and let rise at room temperature (70ºF/21ºC) for 4 to 18 hours (times will vary based on the time of year, the humidity, and the temperature of your kitchen). The bulk fermentation will end when the dough has nearly doubled in volume, and you can see bubbles throughout the dough and on the surface. (Note: Do not use your oven with the light on for the bulk fermentation — it is too warm for the dough. To determine when the bulk fermentation is done, it is best to rely on visual cues (doubling in volume) as opposed to time. A straight-sided vessel makes monitoring the bulk fermentation especially easy because it allows you to see when your dough has truly doubled.)
- Shape: Gently transfer the dough to a clean work surface. I prefer to use no flour and a bench scraper at this step, but if you find an unfloured work surface to be difficult, feel free to lightly flour it. [Video guidance is especially helpful for this step.] Fold the dough, envelope style: top third over to the center; bottom third up and over to the center. Then repeat from right to left. Turn the dough over and use your bench scraper to push the dough up, then back towards you to create a tight ball. Repeat this pushing and pulling till you feel you have some tension in your ball. Place the dough ball top side down and let rest 30 to 40 minutes. (FYI: This is called the bench rest.)
- Proof. Line a shallow 2-qt bowl (or something similar) with a tea towel or flour sack towel. Flour sack towels are amazing because the dough doesn’t stick to them, and therefore, you need very little rice flour, but if you only have a tea towel, you will be fine. If you are using a tea towel, sprinkle it generously with rice flour. If you are using a flour sack towel, you can use a lighter hand with the rice flour. After the 30-to 40-minute bench rest, repeat the envelope-style folding and the bench scraper pushing and pulling till you have a tight ball. [Video guidance here.] Place the ball top side down in your prepared towel-lined bowl. Cover bowl with overhanging towel. Transfer bowl to the fridge for 12 to 24 hours. (Note: When you remove your dough from the fridge, visually it will likely look unchanged. This is OK. You do not need to let it then proof at room temperature before baking.)
- Bake. Heat oven to 500ºF. Remove your sourdough from the fridge. Open the towel. Place a sheet of parchment over the bowl. Place a plate over the parchment. With a hand firmly on the plate and one on the bowl, turn the dough out onto the parchment-paper-lined plate. [Video guidance here.] Carefully remove the bowl and towel. Carefully remove the plate. Brush off any excess rice flour. Use a razor blade to score the dough as you wish. I always do a simple X. Grab the ends of the parchment paper and transfer to the Dutch oven. [Video guidance here.] Cover it. Lower oven temperature to 450ºF, bake covered for 30 minutes. Uncover. Lower the temperature to 400ºF. Bake for 10 minutes more or until the loaf has darkened to your liking. Transfer the loaf to a cooling rack.
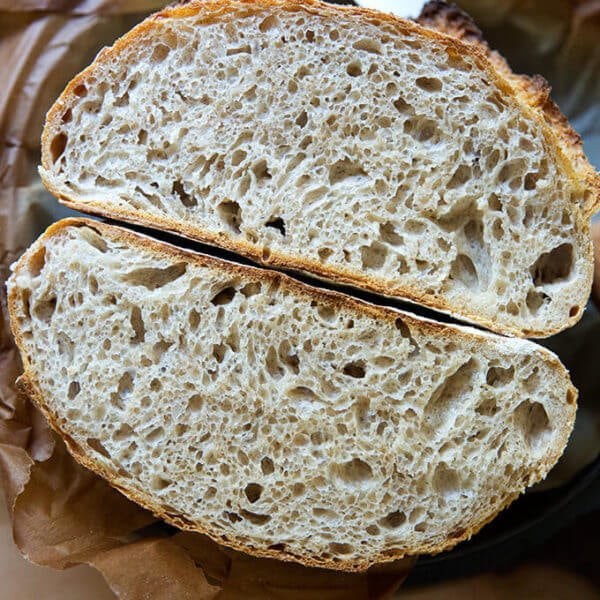
- Cool. Let the loaf cool for at least 30 minutes before cutting.
- Prep Time: 48 hours
- Cook Time: 45 minutes
- Category: Bread
- Method: Sourdough
- Cuisine: Global
This post may contain affiliate links. Please read my disclosure policy.


1,106 Comments on “Easy Sourdough Bread (Whole Wheat-ish)”
My first sourdough but when it’s
time to stretch and fold, the dough was too wet. Can I add more flour the next time I stretch and fold? (I’m using AP flour).
Hi Christina!
How many stretch and folds did you do? The dough should get more manageable — stronger, more elastic — after every set of turns. But it is definitely a wet dough. Yes, you can use a little bit more flour when you are shaping or even when you are mixing initially. It might be easier to just start with less water, however. I would try starting with 280 g of water. You can always add the 20 g of water back in slowly if it seems too dry when you mix the dough.
I’ve baked 3 loaves now and they are turning out awesome so thanks for this great recipe. However after the bulk fermentation 10-16ish hours my dough has doubled and is looking nice and bubbly but it is super sticky and really hard to shape. Do you have any tips I could try to make it slightly less sticky and more manageable. I thought about adding a touch more flour?
So great to hear this, Alex! You can definitely use a little bit more flour when you are shaping or even when you are mixing initially. It might be easier to just start with less water, however. I would try starting with 280 g of water. You can always add the 20 g of water back in slowly if it seems too dry when you mix the dough (which is unlikely).
Update this worked a charm I added 20g less water and the loaf turned out perfect!! Thanks again
Wonderful to hear this, Alex!
Can I use this recipe for straight whole wheat, no white flour?
Michael, you can try but I worry it will be very, very dense. Are you hoping to incorporate more whole wheat into your breads or is it a flour availability issue?
Thanks Alexandra. This is a fantastic recipe. It is really light and soft with a perfect crust. My whole family said that they want me to make this bread every time.
Wonderful to hear this, Tim! 🍞🍞🍞🍞
I thought I saw a time line to follow hours wise to be able to have a hot load for dinner but I can’t find it. Just because so many rest periods it’s hard to line up.
Hi Elizabeth! I think I had that on an older post … I’ll add something now.
Here’s an example “baker’s schedule” if you want bread on Friday night:
• Feed starter Wednesday morning or early afternoon.
• Mix dough on Wednesday (when starter has at least doubled in volume). I like to mix my dough in the evening. Do 2 to 4 turns if time permits before bed. Let it rise overnight at room temperature. My kitchen is 68ºF, so I don’t have a problem with over fermenting if I leave my dough on the counter.
• Shape dough into a boule Thursday morning. Transfer to the fridge.
• Bake boule on Friday whenever I am ready for it.
Thank you so much for this detailed and simple to follow recipe. <3 I will be making my first sourdough bread for the first time tomorrow, my starter is going to be ready soon!
1. What is your room temperature that you used in the video for bulk fermentation? I live in Malaysia and is typically around 28 degrees celsius as is pretty warm here.
2. Can I just substitute 50 g of wholewheat flour? Will it affect the hydration of the dough?
Look forward to your reply! 🙂
Warm regards,
Rebecca
Exciting! 🎉🎉🎉🎉
For the past month or so my kitchen has consistently been at around 68ºF or cooler, so about 20ºC. If you have a straight-sided vessel, please use it for the bulk fermentation as it will help prevent you from over fermenting during the bulk fermentation. If your dough is growing, but not yet doubled and you need to go to bed, stash it in the fridge, and pull it out in the morning.
Yes, re 50 g wholewheat flour!
Hi! Love this recipe! Can I just double it to make two loaves? Or would any other adjustments need to be made? Thanks!
So happy to hear this! And yes, absolutely! I wouldn’t make any adjustments. As always, just rely on the visual cues with the bulk fermentation.
Hi Ali,
My loaves turn out with a great flavor, they just don’t rise enough. My starter passes the float test. Is there something else in the process to get a better rise during the bake?
Hi Jane! Questions about your starter: how old is it? Does it double in volume after feedings within 8 hours or so?
Also: what type or types of flour are you using?
Hi thank you for your detailed explanation. your sour dough bread looks super amazing! And I can’t wait to try it:)
May I ask,do you have to let the dough rest for a few hrs after taking out from the fridge? Or I cn just directly bake?
Thank you! 🙂
Hi Kelly! You can bake it directly from the fridge.
Thank you so much. Sorry another question, I did a float test for my sour dough starter, some sinks and some floats. Does that mean it’s not ready yet? The starter doubled in size and it’s bubbly.
It’s so hard to know. If you have the patience, I would discard most of it, and feed it again with equal parts water and flour by weight. Let it rise, and when it doubles or more than doubles, test it with the float test.
How quickly is it doubling in volume? Within 8 hours?
Yes on the starter! I got it from a chef friend so I’m not sure how old it is, but it seems to be very happy and active.
I’m using Giusto’s Vita-Grain Artisan Bread Flour and for the wheat Arrowhead Mills organic stone ground wheat.
It is possible that it won’t rise a lot if you don’t score it deep enough?
Great to hear re starter Jane! And it sounds as though those combination of flours is very nice. It’s possible that scoring could be part of the issue, but I don’t think that’s everything. Let’s troubleshoot some more:
How long is your bulk fermentation going?
And it the dough doubling (roughly)?
When you turn it out to shape it, does the dough have some nice spring to it?
Do you feel you are getting some good tension when you shape the dough?
Let me know!
Thanks Ali!
How long is your bulk fermentation going?
8-10 hours
And it the dough doubling (roughly)?
I believe so. I might need a better container to better see that.
When you turn it out to shape it, does the dough have some nice spring to it?
Maybe not enough since I don’t feel like I notice that it is springy.
Do you feel you are getting some good tension when you shape the dough?
I think I need to get it tighter when I work in this stage!
Maybe I’ll try these last 2 items in the next recipe to see if it helps.
Sure thing!
How long is your bulk fermentation going?
8-10 hours OK
And it the dough doubling (roughly)?
I believe so. I might need a better container to better see that. Great. I sound like a broken record, but these straight-sided vessels are so helpful for this purpose. It allows you to truly see when the dough has doubled, which helps prevent over-fermentation.
When you turn it out to shape it, does the dough have some nice spring to it?
Maybe not enough since I don’t feel like I notice that it is springy. OK. This potentially is a sign of over fermenting. Did I ask already: How warm, roughly, is your kitchen? It’s possible that 8-10 hours is too long for the bulk fermentation.
Do you feel you are getting some good tension when you shape the dough?
I think I need to get it tighter when I work in this stage! It’s definitely tricky to get tension when the dough has over fermented, but when it still has some spring, you should be able to get good tension. I love using a bench scraper for this purpose.
Maybe I’ll try these last 2 items in the next recipe to see if it helps. Great! Keep me posted!
Hi Ali:
My first attempt came out beautifully; I baked in a small dutch oven and the loaf rose and crusted well. I would like to bake another loaf with added seeds in the dough and on top. How much seed mixture by weight would you suggest? When should they be added? Any other adjustments you would recommend? THANKS!
So great to hear this! You can add the seeds directly with the flour. I’ll give a range for the seeds 70-100 g (about 1/2 – 3/4 cup). I wouldn’t make any other adjustments. Let me know how it turns out!
Finally A Recipe that I’m not completely terrified of!!! I’m a beginning bread maker and all the recipes I’ve seen nearly make me want to quite before I’ve started. I do have a question though about the types of flour as (at the moment) flour has been hoarded from all of the stores. I have whole wheat flour but I don’t have any white bread flour. Can all purpose flour be substituted for this?
Thanks!
Wonderful to hear this Courtney!
Yes, all-purpose flour can be substituted. More often these days I am using all-purpose flour as bread flour is hard to come by. If you are in a humid environment, you might want to consider reducing the amount of water, but if not, no changes need to be made.
Hi Ali and thank you for a beautiful demonstration on how to make Sourdough.
I have made a start and she is currently resting covered in the fridge however my dough was very wet and very difficult to manage (no ball shape at all). Some details below for your reference…
Mother is approx 2mnths old & wholemeal organic flour.
Mother doubles in size 6-8hrs
Room temp 15-28 deg.
White Bakers flour used for loaf
4 folds completed with 1/2hr rest in between Each.
Bulk ferment-overnight (14hrs)in glass bowl, dbled size (top of dough appeared dry) small bubbles below surface.
Tried to fold and roll but very wet.
I have managed to flop (lol) her into a bowl lined with a tea towel covered in rice flour & expect to keep her in the fridge for at least 22hrs 🤞🤞
I would absolutely love to get some feedback from you if you have the chance to reply.
Many thanks and much gratitude 🙏
Mel
Hi Mel! Thanks for all of the background info — so helpful!
Question: what temperature is your kitchen now? 14 hours of bulk fermentation in a 28ºC kitchen is probably too long; but in a 15ºC kitchen, it might be fine.
I am unfamiliar with “white bakers flour”. Can you give any more details? Is it bread flour? Or pastry flour? Does it tell you the protein content on the packaging?
Right now, my worry is that it over fermented during the bulk fermentation. When you went to shape it, was there any spring left in the dough? Or was it completely slack, as in without strength?
Nice work getting it into the bowl 😍 Keep me posted on how it bakes.
Hi Ali
Thanks heaps for getting back to me. I am very keen to sort out this problem.
My Bulk ferment was majority 18deg (overnight) and the dough was in the same condition 5hrs in as it was at 14hrs. I was worried about an over ferment.
White Bakers flour is our Bread flour & 12.2gm per 100gm of protein.
Unfortunately no spring in the dough and after poking the dough no indent was left however it didnt spring either.
She has been in the fridge for 13 hrs now, however when i bake it will be 23hrs. I will still see how she goes but i am not expecting too much.
I will update you again and hope we can eliminate the issue.
Thank you so much for your time… Mel
Hi Mel! OK, 18ºC should be just fine for a long bulk fermentation, but the way you are describing the dough makes me think it over-fermented. At 5 hours, had the dough doubled?
Great that you are using bread flour. Keep me posted on how it bakes. And if you are willing to give this another go, I think you’ll be in great shape if you shorten the bulk fermentation.
Thanks Ali
During proving the dough appeared to have doubled however i used a bowl not a straight sided vessel (i will invest in one).
The bake has just happened and oh dear!! Lets just say I WILL try again 🙏🤞
Thank you for your feedback and encouragement… Mel
Thanks so much for this easy to follow recipe!
I’ve made 2 loaves now with great success.
I am planning on making this larger loaf with the quantities above, but wondering does this affect the cooking time?
Also, is there a way to know whether its cooked? I used a different oven for the second loaf and it came out a little blonde…I gave it 10 mins longer but it was still very slightly undercooked.
Thanks again!
Hi Kate! I would keep the cooking time the same: covered for 30 minutes, uncovered for 15 minutes. You can extend the baking time till you are happy with the color.
The only sure-fire way I know of testing if a loaf is done is to use an instant-read thermometer. I invested in a Thermapen a few years ago because I was baking in all sorts of kitchens, and the visual cues sometimes mislead me. With a good, instant read thermometer, you’ll know right away if the bread is done: if it registers 205ºF or above, it’s done.
This was my first ever attempt at sourdough (covid-19 lockdown-induced). I made a starter using 50% stoneground rye and 50% stoneground wholewheat, and I made the bread with 50% white, 25% rye and 25% wholewheat (all stoneground). It was such a mission, I kept doubting that it would be worth it. But it was honestly the best sourdough i’ve ever tasted. Disinctly sour, chewy and aerated. We couldn’t believe it; it was such a thrill! The instructions left nothing out, and the videos were invaluable for a beginner. Thank you!
I’m so happy to hear all of this Amy! And super impressed, too, that you used all stoneground flour — nice work! The flavor of stoneground flour is truly remarkable. Thanks for writing and sharing all of this.
Followed these instructions step by step, it rose only about a 1/4 up from the container during phase 2 (bulk fermentation) after 24 hours – tried to take it out and it was difficult, all stuck to the container. Difficult to stretch and make into a ball – way too sticky. Didn’t use flour, as you mentioned. In last proofing phase – put it on parchment instead as it was way too droopy to form a ball and place it on floured cloth. It will probably be too droopy to score in 24 hours from now. Any suggestions on what happen this time, as I followed this step by step as you suggested this link to me from your other website.
Hi Franca!
Can you give me a little more background info? You said in the old post that your starter is fairly new. How quickly is it doubling in size? Within 8 hours? The fact that your dough is not rising at all during the bulk fermentation makes me think your starter is the issue.
Yes, my starter is 3 weeks old now – fairly new. It seems fine, smells fine, and when I test the starter before starting – it floats in water. Lots of bubbles and has doubled in size.
Not sure if I am missing anything else with the starter ??
My last loaf didn’t rise at all in the last phase in the fridge for 24 hours. It was flat like pancake batter. In the first phase of rising, it didn’t rise much at all – only a tiny bit (not double the size, that’s for sure) Not sure what I am doing wrong as I followed by testing the starter first – making sure it floated before going ahead – then following step by step in your instructions.
Honestly, Franca, I’m a little bit stumped. This is what concerns me: “In the first phase of rising, it didn’t rise much at all – only a tiny bit”
What is the temperature of your kitchen? What type of flour are you using?
This is normal: “My last loaf didn’t rise at all in the last phase in the fridge for 24 hours.” Sourdough does not change much visually in the refrigerator.
ali, hi. thanks for the recipe! made 1 loaf last week, it was nice and chewy, i like!
question, if i were to cut the dough during proofing to be baked into 2 smaller loaves, should i alter the timing and temperature of baking (with lid, and without lid)? or is there anything that i should take into account for?
and i find it not easy to slice even after 1 hour out from oven – the crust is abit tough to break in though im using serrated / bread knife, is there any solution for this?
thanks!
Hi Ling! Great to hear this.
I would definitely reduce the baking time for a smaller loaf. Maybe: bake covered for 20-25 minutes, then uncover and bake 5-10 minutes. I would rely on visual cues for doneness unless you have a digital instant read thermometer … it should register 205ºF or above.
Regarding the crust: are you using flour or rice flour to dust the tea towel with? Are you getting nice loft in your loaf? Or is it squat. Is your bread knife sharp?
Hi Ali.
I am on week two of my sourdough adventure, and really enjoyed your recipe.
Beautiful pictures and very clear instructions.
I gave birth to my sourdough two weeks ago. I keep it in the fridge and take it out 24 hours before I use it to feed twice.
Following your recipe, I doubled the amounts for two loaves and put the dough in a big crock pot (I didn’t have that great plastic container you have) and left it over night. It about tripled in size in a cool apartment. (I have in the past used a bowl, but much easier to just stretch and fold the dough right in the crock-Thanks for that tip).
I then proofed in the fridge and cooked one loaf in a dutch oven and one right on a stone (I only have one dutch oven). Both came out beautiful and delicious, although I wish both had risen more.
So a few questions:
Would it have risen more if I proofed at room temp instead of the fridge?
If doing it at room temp, how long do I need to proof for?
Can I do a combination of fridge and room temp. Put in fridge before I go to bed and then take out and leave at room temp?
Also, can you overcook sourdough. I left one loaf in the over 15 mins longer then the other (for a total of 55 mins) as I wanted a darker crust. But the internal temp still was about 210. If I want my crust even darker, what signs so I need to beware of so I don’t dry out inside.
Thanks so much for your help and guidance!
Adley (from Brooklyn, NY).
P.s. Is there a way to post our pics of our finished product?
So great to hear all of this Adley!
Nice job using your crock pot for the bulk fermentation. Smart.
Regarding your questions:
Would it have risen more if I proofed at room temp instead of the fridge? Not necessarily — so many things affect rise: the strength of the starter, the strength of the dough, the slashing, the baking vessel, etc. But sometimes, yes, a room temperature rise may give you more loft. It’s definitely worth experimenting with. I would stick the dough in the towel-lined bowl, and let it sit at room temp for 3-4 hours. Keep an eye on it. You will notice a visual change in the dough (unlike when the dough is in the fridge, where it won’t change visually). When it feels light/airy/springy to touch, it’s ready to be scored and baked.
Can I do a combination of fridge and room temp. Put in fridge before I go to bed and then take out and leave at room temp? Yes! Follow the same process as noted above.
Regarding overcooking, my experience is that sourdough is very forgiving, at least in terms of the crumb. I have forgotten to remove a loaf of bread from the oven, and the exterior got crustier than I prefer, but the interior was still moist. I don’t think the internal temp of a loaf of bread ever gets much higher than 210ºF, so in terms of signs at that point, it’s really up to you and your preferences. If you want it darker, leave it in longer. I wouldn’t have the oven much hotter than 400ºF at this step… you don’t want to burn it.
Regarding posting pics, I don’t have a spot here, but you can email me: alexandra@alexandracooks.com or you can tag me on Instagram: @alexandracooks
💕💕💕
I’m excited to try my first loaf of homemade sourdough, but I don’t have any rice flour. Are there any viable substitutes?
Hi! You can use ap flour. I suggest rice only bc it doesn’t burn the way regular flour does. When you use regular flour to dust, be sure to dust off as much as you can just before baking … a pastry brush works well for that purpose.
Hi Alexandra,
First I just want to say that I love your recipes – I’ve been making peasant bread for my family 2-3 times a week for the past couple months under quarantine. I’ve also had great success with your bialy recipe and the Lahey pizza dough.
I had to put away my sourdough starter when my daughter was born (could only keep one thing alive at a time!) but am now wanting to revive it and would like to give this recipe a go. Unfortunately I only have a 3qt dutch oven with lid – do you have any recommendations on modifying the recipe to make it work within that size? Thanks so much!
Hi Nick,
So nice to hear all of this. Love that you’ve made the bialy recipe, too … it’s one of my faves, and it doesn’t get a ton of attention.
Regarding your 3-qt pot, part of me thinks it might be big enough … your loaf might be a little bit snug in it, but it might work. Can you tell me how wide it is?
If you are worried, you could scale back the recipe. You could do something like this:
• 225 g water
• 75 g starter
• 7 to 8 g salt
• 300 g flour
That will give you a smaller boule. You may need to decrease the baking time, but the rises/general process should all stay the same.
It’s about 10 inches wide, which makes me think it might work sans modification.
I think so too. Mine is 10 inches wide and about 4.5 inches tall. Good luck!
This is the best recipe I have used as a beginner sour dough maker – every loaf I have made has been consistently great. The numbers just work and the advice about the starter floating really helped.
many thanks for sharing this.
So nice to hear this, Scotia! 💕💕💕
I made this start to finish but I tried it with whole wheat and it turned out great! I am going to experiment to get a more crusty loaf.
Thanks Ali for the helpful links and videos!
SAm
Wonderful to hear this, Sam! Thanks for writing 😍😍😍
So excited to try this – my dough has just been placed in the refrigerator for proofing. Only my second loaf and my first was a bust – tasted great but was hideous (though recipe was from another site and not as easily digested as yours, so thank you for that!)… question though. In comparing your high hydration recipe and this one, the hours changed for the proof. Is there a reason they went from 6 to 12-24+ in the refrigerator? Just trying to learn all I can and would love to know the reasoning, other than maybe it just develops better after more time? Thanks so much!!!
Hi Mallory! Yes, I find a longer proof in the refrigerator improves both the flavor and the texture of the crumb — the crumb is lighter with a longer refrigerator proof.
I hope your second loaf turns out well! Keep me posted!
HUGE success! Not quite as browned as I’d hoped for, but my oven is the issue. Tastes great, great crumb structure and the perfect chewiness! Thank you so much for this easy to understand recipe.
So happy to hear this, Mallory! Thanks so much for reporting back 🍞🍞🍞😍😍😍
I am a total beginner to sourdough – the yeast shortage forced my hand and I have had a starter going for a couple of weeks. This recipe has been amazing. I have tried a couple of others but this one is giving great results every time. My bread making in the past has always been a disaster and my hot cross buns this year were terrible but finally I have managed to make something really yummy. So excited to make something the family are nearly finishing in a single sitting. The tips and links here are excellent. Thank you!
Wonderful to hear this, Catherine!
Loved this bread – it was my first time making sourdough, and it turned out amazing!
I have been looking at your “High Hydration Sourdough Bread” recipe, and it looks like a much simpler, quicker recipe…. but now that I’ve had success with this recipe, that one makes me nervous.
Why does it skip the “stretch and fold” sequence?
Why only 50g of starter for the 500g of flour, when the loaf in this recipe calls for 100g of starter for only 400g of flour?
Why not the long proofing period in the refrigerator?
Because I’ve only ever made sourdough the one time, I don’t have any experience to draw on to formulate any theories.
I’m now a big fan of your recipes and have shared a link to your site with my friends on social media – looking forward to trying as many of your recipes as I can!
Wonderful to hear this, Dan!
Your questions are great:
Why does it skip the “stretch and fold” sequence? Not sure! That recipe was my first attempt at sourdough, and I was following a recipe from a cookbook. After making it a number of times, I wanted a lighter crumb and more flavor, so I did some research. The research led me to add the stretch and folds to the process, which creates strength in the dough, which ultimately is important during the shaping phase, during which you want a strong, springy dough that will allow you to get some nice tension while you are shaping.
Why only 50g of starter for the 500g of flour, when the loaf in this recipe calls for 100g of starter for only 400g of flour? Again, not exactly sure. I like to use more starter for a few reasons: 1. When I’m using more starter, I feel I’m wasting less, because I don’t always get around to making things with the discard. 2. It’s counterintuitive, but when you use more starter, the flavor of the dough is actually less sour. I love sourdough flavor, but I don’t always want it super sour tasting.
Why not the long proofing period in the refrigerator? Again, that recipe just reflects what that author was doing. I find when I do a longer proof in the fridge, I get a lighter crumb and better flavor.
Hope that helps! Let me know if there is anything else!
Hi,
Thank you for the fantastic recipe! I was super successful in the first attempt and I’m very happy 🙂 Just one question, when I remove the cold dough from the refrigerator after 12-24 hours, should I wait for the dough to reach the room temperature or It’s ok if I directly put it in the oven?
Thank you again!
So wonderful to hear this, Behnaz! You do not need to let it come to room temperature. Simply slash it, and bake it. Yay 🎉🎉🎉🍞🍞🍞
I made this over the weekend with some sprouted spelt that I need to use (and I love the flavor of it) in the 350 bread flour/50 spelt ratio and it came out pretty good. We cut it when it was lukewarm and it was ever so slightly gummy which is a problem I have because I tend to pull out loaves early because my oven makes them look darker – I should stick them with my instant read! But good reviews from the family and there’s only a tiny bit left a day later.
When I was shaping, it was night time and my 7 year old was stressing me out and I don’t really have a bench scraper and I was having a hell of a time getting it into a nice ball, I wound up throwing some flour down and eventually got it, the second shaping was easier. My daughter, though, wanted to do it herself, so yesterday we started again – it was so much easier to shape (I was showing her how and it just came together) she messed with it after, flipped it over, not sure what else, but I did the second shaping and it’s in the fridge now (I’m at work, she’ll just have to wait). I don’t know what we did differently, maybe it was my stress level?
I’m loving these recipes!
Thank You!
So interesting, Lauren! Dough can behave mysteriously 😍 My one thought is that perhaps your dough during your first batch over fermented a bit during the bulk fermentation. When the dough is very slack/without strength after the bulk fermentation, it’s a sign of over fermenting. Do you remember, roughly, if your first bulk fermentation was longer than the second time? Or did it seem to rise higher the first time compared to the second?
Maybe it’s the stress 😂😂😂😂 These are trying times.
Also: it is absolutely OK to use flour during the shaping process.
It turned out great, I have the last of the old loaf with me for lunch and we wound up eating half of the new loaf once it had cooled. I put my pizza stone in the oven to preheat (we reduced it to 475) because I had read that it might help with the bottom crust (it was hard to cut, didn’t make any difference). I forgot to turn it down when I put the bread in and I didn’t until I took off the lid. It was pretty much identical – I’m thinking it was stress! I was thinking it would be more “sour” since it had a longer rise, but the taste was the same. I gotta say, I’ve screwed up many loaves of bread in my baking life and this loaf seems to defy my attempts at screwing it up!
So great to hear all of this, Lauren 😍😍😍 Thanks for sharing your experience with temperatures/pizza stone/etc. … that’s so helpful for others. Happy happy baking to you and your daughter 🍞🍞🍞
Hi Alexandra
Love the recipe. Best one I’ve found yet however I am struggling with oven spring.
My starter is fine, I’ve handed it out to many friends who have had much success.
I’ve tried proofing/bulk ferment at room temp, at slightly above room temp (hot water in lit off oven) , and in the friend for fear that I was over proofing (the dough rises fine). I’ve also tried various different baking vessels and ways of introducing steam into the oven still barely any spring.
It seems to get up in the oven about half the way and start to dip in the middle. Also it appears as I have to bake it much longer than the recipe. I have a thermometer in the oven that says I’m doing all the temps right.
As you can see I’m really struggling here. On about loaf 5 And having little luck with oven spring. Taste is great but not such a great shape for toasts/ sandwiches. Also frustrating seeing my friends having success with the same starter (about 6 weeks old now).
Hope you can help.
Much love.
Hi Toby!
We’re going to get to the bottom of it. I need to ask a few questions, however, to troubleshoot:
1. How long roughly is your bulk fermentation? And how warm is your kitchen (roughly)?
2. After the bulk fermentation, do you feel you are getting good tension in your dough, when you go to shape it into a boule? Does the dough have a nice spring? Or does it feel slack and without strength?
3. What type or types of flour are you using?
4. Are you baking in a Dutch oven?
I have read so much about sour dough, watched way too many videos, tried many varied methods, but not until I read Alexandra’s did I truly understand the essentials. You explain everything so clearly and simplify. I was wary of eliminating the autolyse for example, but you made me realize that this is not at all necessary, discovered when I compared loaves with and without and recognized that yours is superior. I am so grateful for the guide and the videos, too. I must say I’m a fan of adding some Anson Mills flour to the mix as you suggest. It really imparts flavor and color. For people just starting their sour dough journey, patience is required until you figure out the rising times for your environment and learning the quirks of your oven. Patience, too, is required as you learn the knack of shaping a loaf. Finding a schedule, too, that works for you is essential, but as Alexandra notes, the fridge is your friend. I’ve left a rising loaf in the fridge for two days when something interfered with my schedule. All this said, I love making the overnight sour dough focaccia and find adding some Anson mills red fife to the mix works well.
So nice to hear all of this, Mary!
Hi! I am a new sourdough Baker and I just acquired a 50lb bag of grain craft high gluten power flour unbleached. I have not been able to find bread flour anywhere. Will I be able to use this for this bread recipe? Would I change the amount of flour and/or water?
Thank you!
Jennifer
Absolutely! I wouldn’t make any changes. Simply use 400g of that flour.
Hi Ali!
I’ve made this recipe a number of times over the last few months with great success! I’ve recently run out of bread flour and whole wheat flour due to flour shortages in my area (and what seems like the rest of the country) and ordered ground whole grain millet flour from Bob’s Red Mill only to find that it’s gluten free!!! I think it could lend great flavour to sourdough but I’m worried about the lack of gluten. I’ve still got some unbleached AP flour.. would a ratio of AP flour and millet flour still produce a nice crumb?
Hope you’re staying safe!
Sal
Hi Sal! I think a combination of ap flour and millet flour will be great. I would use no more than 50 g millet flour. I would see how the texture looks with 350 g ap flour. If it seems too wet when you mix it, add another 25 g flour. Keep me posted! My fingers are crossed. Also, if you’re OK with ordering a 50-lb bag of flour, Baker’s Authority has great prices even with shipping added.
Enjoying all your videos – just trying this recipe tonight. Question does the proofing phase for this ‘easy’ recipe you have it proofing for 12 hours and the other so simple sourdough has almost no proofing time. Does it have to proof for that amount of time? Would 5 or 6 hours in the fridge be enough time? I know the quantities of starter and water are different in both recipes – just trying to understand why the different proofing times? Thank you so much
Hi Annette! Wonderful to hear this.You can try a shorter proof, but in my experience a longer proof yields better results: the crumb is lighter/airier, and I think the flavor is better, too.