 →
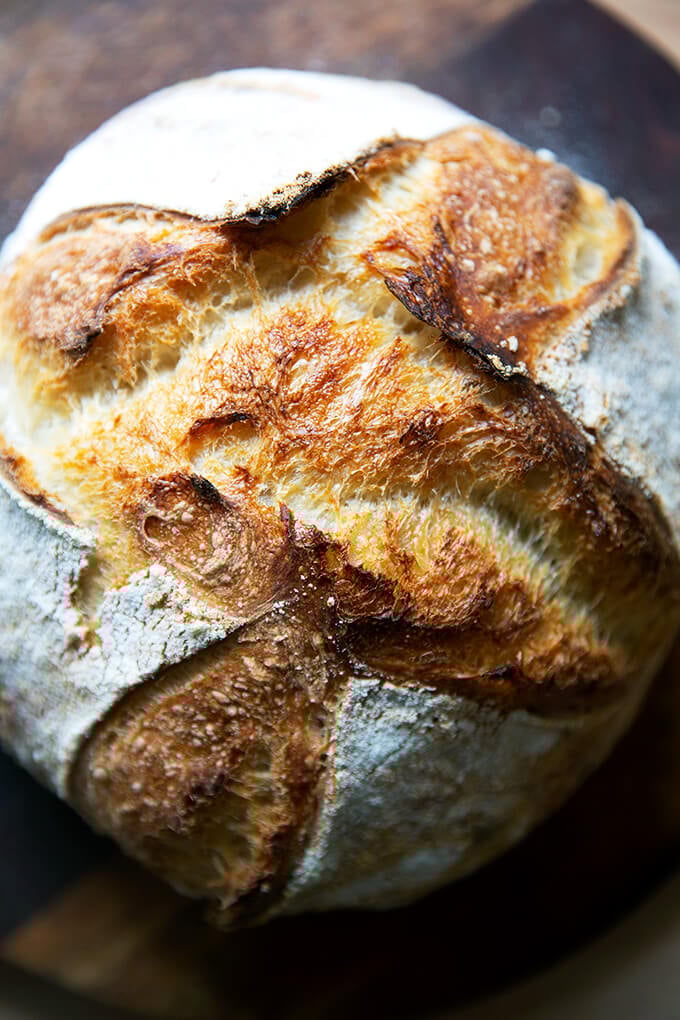
→ Easy Sourdough Bread (Whole Wheat-ish)
This post may contain affiliate links. Please read my disclosure policy.
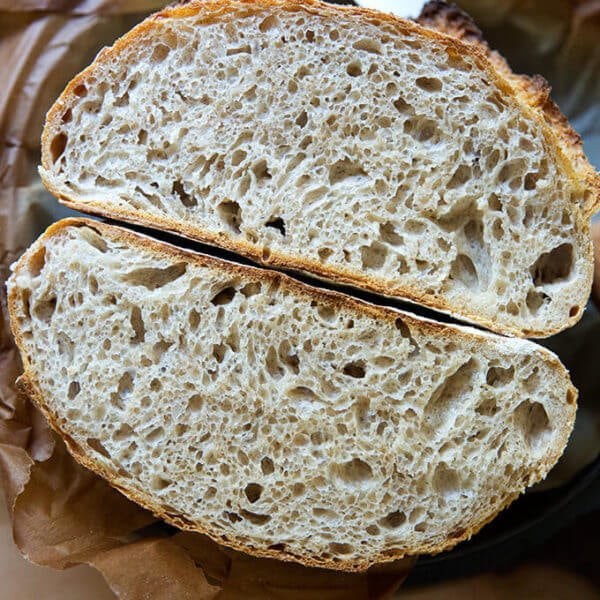
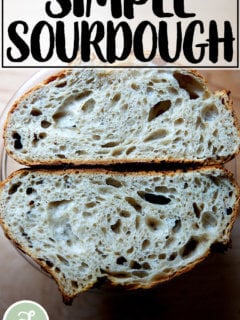
Made with a small portion of stone-milled whole wheat flour, this sourdough bread is so flavorful, aromatic, and tasty. Using a mix of both bread flour and whole wheat flour keeps the texture light while providing a nutritional boost and lovely flavor. 🍞🍞🍞🍞
If you are looking to add more nutrition to your bread, a logical first step is to replace some of the white flour with whole wheat flour. The trouble with this idea is that not all whole-wheat flours are created equal.
Let’s get straight to it. Most commercial flour (both white and whole wheat) is made from roller-milled wheat, meaning a roller mill has separated the wheat kernel into three parts: the endosperm, germ, and bran. White flour is made from the endosperm. Whole wheat flour is made from a combination of the endosperm, germ, and bran. Much research shows that as soon as the wheat kernel is separated into the various parts, much of the nutritional value is lost — even when the bran and germ are added in after the fact.
So what’s the solution? Seek out stone-milled flour, which is flour made from wheat that passes through a stone mill, the process of which keeps the endosperm, bran, and germ together. Much research shows that keeping the components together preserves the nutritional value.
What’s more, the bran and germ present in stone-milled flours lend so much by way of flavor, texture, aroma and hue:
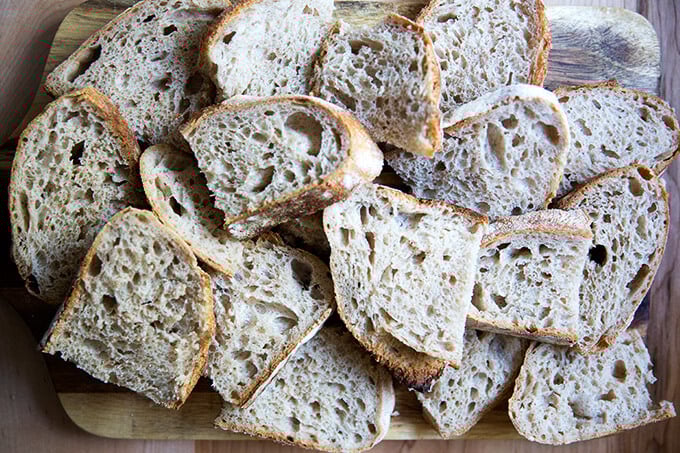
The recipe below calls for a mix of both bread flour and stone-milled flour. Using a small amount of stone-milled flour gives your bread a boost of nutrition while preserving its light texture. Once you’ve made the recipe once, if you like what the whole wheat flour is contributing to your loaf, you can increase the proportion of stone-milled flour next time around.
How to Make Whole Wheat-ish Sourdough Bread, Step by Step
First, gather your ingredients: you need an active/fed sourdough starter:
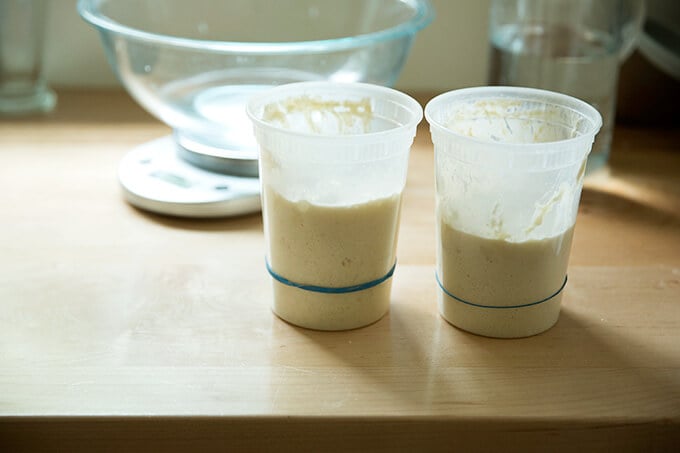
To ensure it is ready, drop a spoonful into a glass of water. If it floats, it’s ready:

Place 300 g of water, 100 g of starter, and 10 g of salt into a bowl.

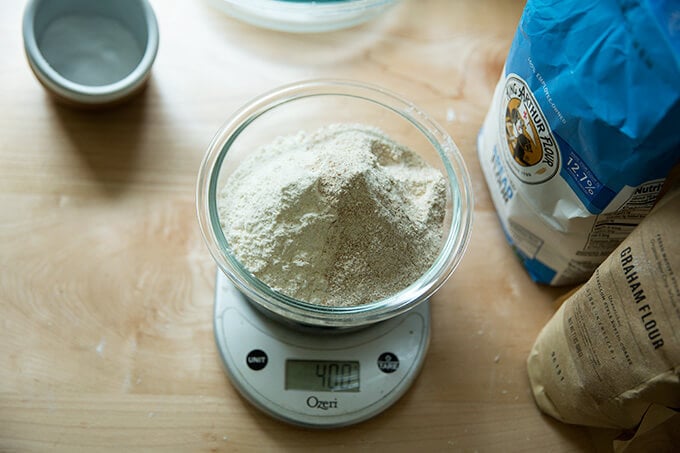
Next, weigh your flour: you need 400 grams of flour. For this whole-wheat-ish loaf, my preference is 350 grams of bread flour (King Arthur Flour) and 50 grams of stone-milled, freshly milled flour (I use a mix of Anson Mills rye and graham).

Mix until a sticky dough forms.
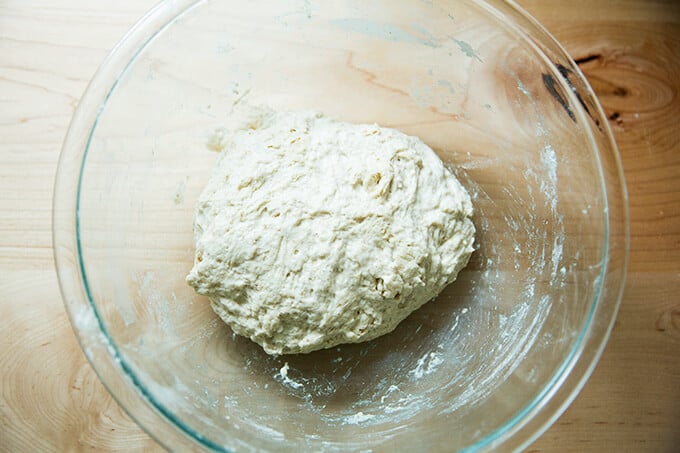
Then transfer to a straight-sided vessel for the bulk fermentation (the first rise).

After 30 minutes, stretch and fold the dough:
You’ll repeat this stretching and folding 3x at 30-minute intervals…
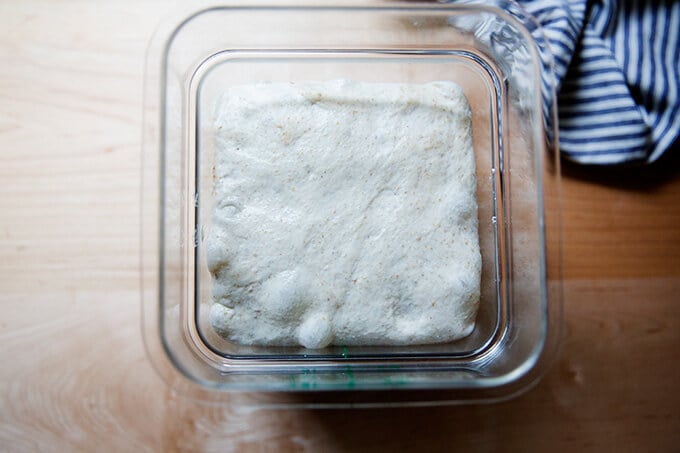
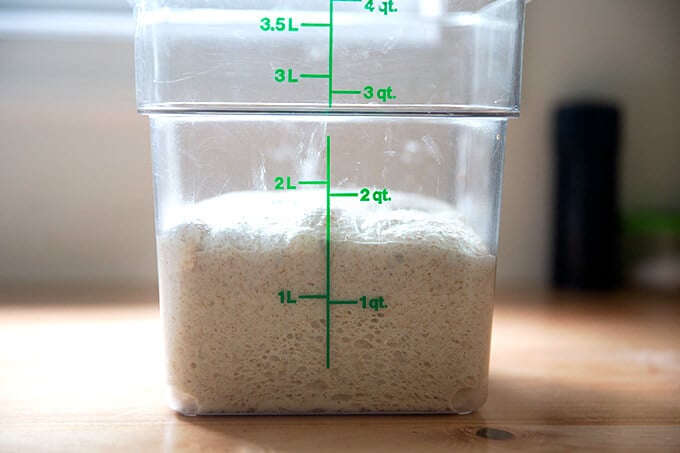
… then you’ll leave the dough to rise until it increases in volume by 50-75%:
Transfer dough to a clean work surface. I prefer to use no flour and minimal handling to shape it into a ball.
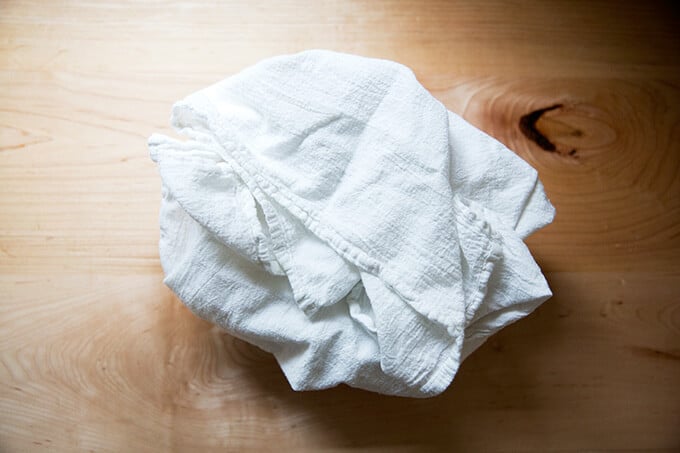
After the initial shape, let the dough rest for 20-40 minutes; then shape again and transfer to a flour sack-lined bowl.
Transfer bowl to fridge to proof (second rise) for 18 to 24 hours

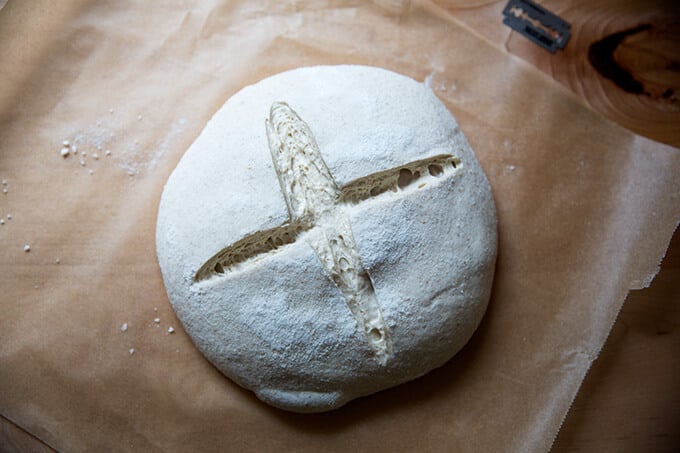
After 18 to 24 hours, transfer dough to a sheet of parchment paper. This video shows how:
Score as you wish; simple is fine.
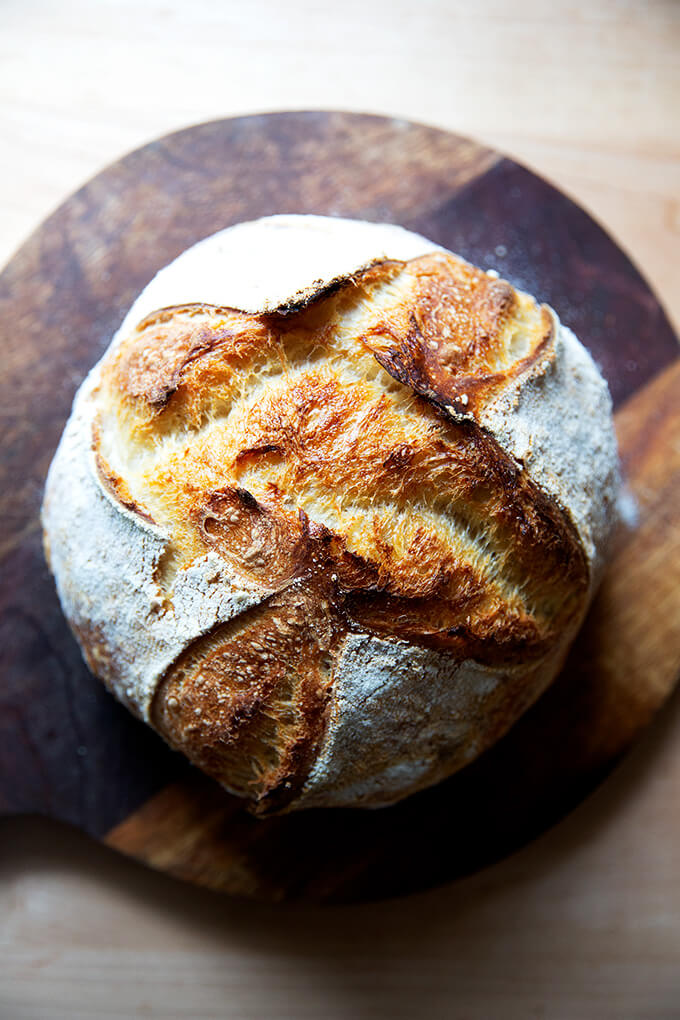
Transfer to a Dutch oven and bake, covered, at 450ºF for 30 minutes, then uncover and bake at 400ºF for 10 minutes.

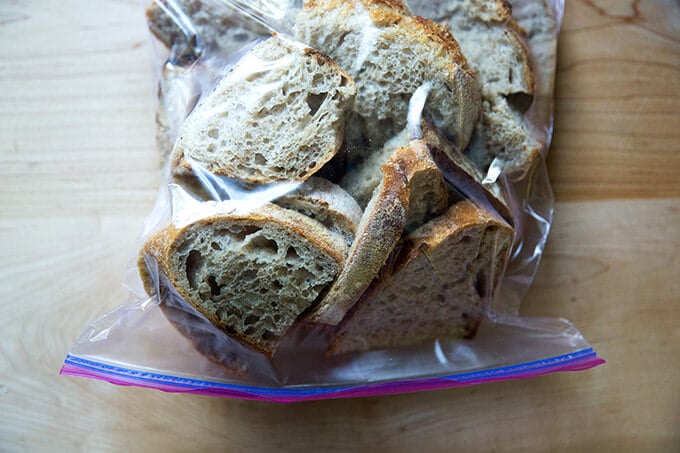
Store the bread at room temperature in a ziptop bag for 3 to 4 days or in the freezer for up to 3 months:
Easy Sourdough Bread (Whole Wheat-ish)
- Total Time: 48 hours 45 minutes
- Yield: 1 loaf 1x
Description
Made with a small portion of stone-milled whole wheat flour, this sourdough bread is so flavorful, aromatic, and tasty. Using a mix of both bread flour and whole wheat flour keeps the texture light while providing a nutritional boost and more flavor.
Notes:
Special equipment: Straight-sided vessel for the bulk fermentation, Dutch oven, flour-sack towel
Digital Scale: Do not attempt this recipe without a scale. This one costs $10. Troubleshooting what goes wrong with sourdough bread is impossible if you’ve measured with cups. They’re simply not accurate.
Troubleshooting: If you have issues with your dough being too sticky, please read this post: Why is my sourdough so sticky? The 4 common mistakes.
Flour:
-
- I prefer making this bread with 350g bread flour and 50g of freshly milled, stone-milled flour, which provides both flavor and color. I love using a mix of Anson Mills graham flour and rye flour, but there are many great stone-milled flours out there, and you may have a local source, which is even better.
- Where to buy stone-milled flour? In the past few years, it has become easier to find stone-milled flour, and if you are up for it, you should seek out locally, stone-milled flour. Why? Because if you’re buying locally milled flour, you likely can find out how recently it was milled. Because stone-milled flour perishes more quickly than roller-milled flour, it’s best if you can find a local source, which will ensure it will be fresh. Note: Store stone-milled flour in the freezer if you don’t bake regularly.
- I find locally milled stone-milled flours at a local co-op, Honest Weight Food Co-op, and I also order online from various sources. Here are a few I love: Cairnspring Mills, Anson Mills, and Community Grains
- 50g may seem like a tiny amount of stone-milled flour for this recipe, but I am constantly amazed by how much flavor this small amount of freshly milled flour adds.
Ingredients
*Please read notes above before proceeding. Watching the video is helpful, too.*
- 300 g water
- 100 g active sourdough starter
- 10 g kosher salt or sea salt
- 350 g bread flour, see notes above
- 50 g whole wheat flour, preferably stone-milled, see notes above
- rice flour, for dusting
Instructions
- Mix the dough. In a large bowl, combine the water, starter, and salt. Stir with a rubber spatula to loosely combine. Add the flours, and stir with a spatula to combine — it will be a wet, sticky dough ball. Transfer to a straight-sided vessel and cover with a tea towel or bowl cover for 30 minutes.
- Stretch and fold. After 30 minutes, grab a corner of the dough and pull it up and into the center. Repeat until you’ve performed this series of folds 4 to 5 times with the dough. Let the dough rest for another 30 minutes and repeat the stretching and folding action. If you have the time, do this twice more for a total of 4 times in 2 hours. [Video guidance here.] Note: Even if you can only perform one series of stretches and folds, your dough will benefit. So don’t worry if you have to run off shortly after you mix the dough.
- Bulk fermentation: Cover the vessel with a tea towel or bowl cover and let rise at room temperature (70ºF/21ºC) for 4 to 18 hours (times will vary based on the time of year, the humidity, and the temperature of your kitchen). The bulk fermentation will end when the dough has nearly doubled in volume, and you can see bubbles throughout the dough and on the surface. (Note: Do not use your oven with the light on for the bulk fermentation — it is too warm for the dough. To determine when the bulk fermentation is done, it is best to rely on visual cues (doubling in volume) as opposed to time. A straight-sided vessel makes monitoring the bulk fermentation especially easy because it allows you to see when your dough has truly doubled.)
- Shape: Gently transfer the dough to a clean work surface. I prefer to use no flour and a bench scraper at this step, but if you find an unfloured work surface to be difficult, feel free to lightly flour it. [Video guidance is especially helpful for this step.] Fold the dough, envelope style: top third over to the center; bottom third up and over to the center. Then repeat from right to left. Turn the dough over and use your bench scraper to push the dough up, then back towards you to create a tight ball. Repeat this pushing and pulling till you feel you have some tension in your ball. Place the dough ball top side down and let rest 30 to 40 minutes. (FYI: This is called the bench rest.)
- Proof. Line a shallow 2-qt bowl (or something similar) with a tea towel or flour sack towel. Flour sack towels are amazing because the dough doesn’t stick to them, and therefore, you need very little rice flour, but if you only have a tea towel, you will be fine. If you are using a tea towel, sprinkle it generously with rice flour. If you are using a flour sack towel, you can use a lighter hand with the rice flour. After the 30-to 40-minute bench rest, repeat the envelope-style folding and the bench scraper pushing and pulling till you have a tight ball. [Video guidance here.] Place the ball top side down in your prepared towel-lined bowl. Cover bowl with overhanging towel. Transfer bowl to the fridge for 12 to 24 hours. (Note: When you remove your dough from the fridge, visually it will likely look unchanged. This is OK. You do not need to let it then proof at room temperature before baking.)
- Bake. Heat oven to 500ºF. Remove your sourdough from the fridge. Open the towel. Place a sheet of parchment over the bowl. Place a plate over the parchment. With a hand firmly on the plate and one on the bowl, turn the dough out onto the parchment-paper-lined plate. [Video guidance here.] Carefully remove the bowl and towel. Carefully remove the plate. Brush off any excess rice flour. Use a razor blade to score the dough as you wish. I always do a simple X. Grab the ends of the parchment paper and transfer to the Dutch oven. [Video guidance here.] Cover it. Lower oven temperature to 450ºF, bake covered for 30 minutes. Uncover. Lower the temperature to 400ºF. Bake for 10 minutes more or until the loaf has darkened to your liking. Transfer the loaf to a cooling rack.
- Cool. Let the loaf cool for at least 30 minutes before cutting.
- Prep Time: 48 hours
- Cook Time: 45 minutes
- Category: Bread
- Method: Sourdough
- Cuisine: Global
This post may contain affiliate links. Please read my disclosure policy.


1,106 Comments on “Easy Sourdough Bread (Whole Wheat-ish)”
Hi Ali,
Thank you for the recipe.
This is my second time trying to make sourdough. I used bread flour and 50 g of red fife. I was really excited because my bulk fermentation looked exactly like yours I waited for it to double (13.5 hours) and pour it out to shape it.
It was a sticky batter that just spread out over the cutting board. Impossible to shape, I tried Do more folding but it didn’t help. So I added more flour to make it more manageable, but still didn’t shape into a ball. I put it into the bowl and fridge for the second proof anyways.
Can you please advise me where I went wrong? 🙁 what do I do with it now?
Thank you so much for sharing your knowledge. The videos are truly appreciated, so helpful!
Hi Angelika! Ok, it sounds as though you need to reduce the water a bit. Do you live in a humid area? It sounds as though you are doing everything right and that you are so, so close to getting it. Also, I would definitely try baking the bread anyway. The fridge might help it firm up a bit. Do you have a Dutch Oven to preheat and bake it in?
Thank you so much for your quick response! How sweet of you 🙂
We live in Toronto, but I keep my starter and I put my mixture for the bread to ferment in our warmest place – on top of the fridge ( we have heating in the ceiling) so I think it’s around 24• there. Should I keep everything on the counter (21.5•)? How much water would you put next time?
Yes, we have a duch oven! And it is firmer now after sitting in the fridge, should I try to shape it into a ball?
Thank you so much for your help and your beautiful, inspiring blog x
Of course!
I think what you’re doing with your starter is fine… keep doing that.
I have a few thoughts: Once, I placed my dough in a slightly warm oven (that I had preheated very briefly to create a warm spot), and when I went to shape it, it was as you described. I think the warm spot was just too warm, and I think it over-fermented and just lost strength. There was nothing I could really do to fix it. So now, I always just do the bulk fermentation at room temperature, and I’m patient with the rise.
I think you should try to bake the dough … worth a shot, right? If you find the dough completely unmanageable, you could stick it in a loaf pan and let it rise in that at room temperature. It may take 4-6 hours. Once it has doubled or once it approaches or crowns the rim of the pan, you could stick it in the oven.
It’s possible that it is beyond repair 😩😩😩😩 but I think it’s worth a shot. If you feel like snapping a picture of the dough and emailing it to me, I might be able to assess better: alexandra@alexandracooks.com
Thank you! I will try again today:) How much water would you add?
Try 275 g. If the dough seems too stiff while you’re mixing, add another 10 g water.
Wonderful recipe that’s easy to follow. Very successful first attempt. Nice airy interior with crisp crust.
So happy to hear this, Maria!
Hey Ali, this is a great recipe. The flavour of the bread is amazing and the colour too. however I’ve tried it five times and still can’t get oven spring in the bread. They never rise in the oven like they do in the proving stage overnight. I’ve checked every stage and done it five times over and still no good spring in the bread. The bread is still really nice and useable but is slightly dense and not super light. My starter is near tripled in size when I use it too. Everything seems perfect except the lack of rise in cooking stage. Any ideas?
Many thanks Ben
Hi Ben!
OK, great to hear your starter is active. Question: after you feed it, does it double in a timely manner? As in, within 8 hours or so? And does it pass a float test? I imagine it does … just making sure.
Also: what type or types of flour are you using?
When you shape it, are you using a bench scraper? Do you feel you’re getting good tension on the dough? Or do you feel you are deflating the dough during the shaping period?
The shaping step, I am learning more and more, is such a delicate balance of creating tension, while not deflating the dough too much. I try to use a delicate hand turning the dough out of its container; but I find I can be pretty aggressive with the bench scraper in order to create tension.
One note: overnight in the fridge, the dough doesn’t change much visibly; things are happening, however, and that cold proof should promote some good rising.
Let me know your thoughts. I have some other ideas, too, but want to hear your answers first.
Hello – I have the same problem
as Ben however I find the shaping way too difficult with the wet dough. I have a big sloppy dough that I end up just putting in the banneton
Hi Gabriella! Can you tell me about your bulk fermentation process: How does the dough look when you mix it? Like the video? How long is the bulk fermentation? Are you doing it at room temperature? What type of flour are you using?
I also have a sloppy mess! Should
I even bother with the next step of putting it in the bowl in the fridge?
Does the dough feel really slack, as in without any strength at all? Or is there a little bit of spring? You can try adding some more flour and see if you are able to shape it into a ball.
Hi! I’ve been really enjoying your site, thanks for all your tips and sharing! After a couple of successful all white sourdough loaves I decided I wanted to try this recipe to add a little bit of whole wheat into the mix. All was going well until the 6-18 hours of bulk fermentation. I just went to work with the dough and it’s as runny as pancake batter. We live in a dry climate so I don’t think humidity is an issue, and the starter (though not as vigorous as I’ve seen it did float in the “water test”. Is this batter salvageable or should I start over? Any theories on what might have gone wrong?
Thx!
Interesting! What kind/brand of whole wheat flour flour did you use and how much? Are you weighing your flour and water? I’m likely too late here, but my suggestion would be to try to shape it into a ball; then transfer it to a large loaf pan and let it rise in the loaf pan or to try to make focaccia. What did you end up doing?
Thanks for the respons! I used this: https://anitasorganic.com/product/sprouted-wheat-flour-2/
Did weigh flour and water, and after much head scratching I realized the one factor that was different was this time I used AP flour as opposed to bread flour. The store was almost sold out of all flours (and had no bread flour, thanks coronavirus) so I grabbed the AP figuring it must not be “that different” I’ve since read some stuff online that would suggest otherwise. It’s the only factor that isn’t the same (unless for some reason that particular WW flour isn’t ideal). I stuck it in my fridge hoping it would firm up and maybe become easier to work with. Just got started this morning so haven’t taken a look at it yet. But assuming it’s still not going to be in an ideal condition I’ll explore the focaccia idea!
It’s crazy what a difference bread flour and all-purpose flour can make — this makes sense that the dough was wet because bread flour absorbs more water. I can’t tell what the protein content is on the sprouted wheat flour, but it looks like a really nice flour, and I don’t think that was the issue. Nice plan re focaccia! I have a video on this post that might be helpful … you can fast forward to the part you need: Simple Sourdough Focaccia
Thanks! I’ll give it a shot! And hopefully will soon get my hands on some bread flour. In the mean time I’ve now got a few pounds of AP flour I need to figure out how to turn into bread! Thanks for the help!
Hi Ali: ❤️ Your explanations and easy to follow recipes!
Attempt #2- couple of questions- you mentioned you had scaled the recipe back to a 400g flour bread- were the ratios all the same if you did a bigger bread? Given pandemic and everyone home, we fly through this bread quickly so wouldn’t mind a larger loaf. Just wondering if you would increase everything by 20% including the starter- or just the flour and water ratios, and salt.
Also- I noticed in this recipe you add the salt to the water and starter, but in your white sourdough it’s added to the flour. Does it matter? My first attempt was really dry but I probably was off on my ratios – i wasn’t re-zeroing my scale and I’m sure I lost count. But wondering if the salt to the starter might shock it?
In any case I added water to it after the bulk fermentation (had to knead it in) and it was still delicious although not as airy.
Thanks for keeping me busy during the pandemic and and making my kids love sourdough!
Deborah, good morning! So happy to hear this. And I hear you: we are flying through bread here as well 🙂
OK: This is my mixing process process: put bowl on scale; add water, then starter, then salt, mix; then add flour and mix. I really don’t think it matters when you add the salt, because it all gets mixed together shortly after the salt is added (either to the flour or the water). But I can do some more research on this.
For a larger loaf, this is what I would do:
500 g flour
11g salt
100 g starter
375 g water
Happy Baking!
Thanks so much for thus easy to follow recipe!
I’ve made 2 loaves now with great success.
I am planning on making this larger loaf with the quantities above, but wondering does this affect the cooking time?
Also, is there a way to know whether its cooked? I used a different oven for the second loaf and it came out a little blonde…I gave it 10 mins longer but it was still very slightly undercooked.
Thanks again!
On my second attempt. First one, I had the same issue a lot of people had – the dough too wet after the bulk rise so I couldn’t shape it for the bench rise. I put in the proofing bowl anyway and proofed it for 24 hours then baked it. I came out pretty flat – no perceivable rise in the fridge or in the oven. But it was light and delicious! Just skinny.
My second attempt is in the fridge now. The shaping went much better – I used a little flour and it looks just like the video. But I have a question: Should it expect it to rise in the fridge while it’s proofing? Do I wait for it to double or something, or do I just use the time (18-24 hours)? I checked it this morning, about 8 hours in, and it’s still pretty small. Should I expect it to rise in the oven this time? I’m worried I’ll get another flat loaf.
Thanks! New to this, but it’s pretty fun! and the videos are super-helpful!
Great to hear the shaping went better the second time around! Did you make any changes from the second attempt compared to the first? What kind of flour are you using? Do you live in a humid climate? Depending on how this one turns out, you might want to decrease the water next time around.
The dough barely changes at all in the fridge. It should look mostly how it looked when you put it in the fridge. I find the 18-24 hour fridge rise makes for a lighter crumb.
Keep me posted!
It came out perfectly this time. I’m not sure what the difference was. I don’t think I did anything different. My starter is only about 10 days old, so even though it past the float test the first time, maybe it wasn’t quite ready. Maybe I mis-measured the first time and didn’t know it. I wish I could post a photo! Here’s a link to Flickr if you want to see how it came out:
https://www.flickr.com/photos/35068361@N04/49736149087/in/dateposted-public/
Thanks! So exciting!
Oh my goodness Ben it’s gorgeous!! Thanks so much for sending the photo. I’m so happy to hear this worked out. And it’s so hard to pinpoint why bread turns out perfectly one day and not so perfectly the next, but in any case, yay for your success 🍞🍞🍞🍞🍞🍞
I think I may have the same/similar issue with the dough being too wet. It was really hard to shape even after adding more bread flour and even rice flour – I probably spent way too long (at least half an hour) trying to shape it and dealing with dough sticking to my hands… it was a mess. Trying to let it bench rest after attempted shaping didn’t seem to help either as it would gradually just flatten back out. Anyway, I shaped as best I could then put in a smaller mixing bowl w/ cheesecloth and rice flour. Hoping that it will magically just retain its shape but I have a feeling it’ll flatten out once I release it. I tried following the measurements (by weight) as best I could btw.
This is my third go at sourdough now – hoping I can find more flour soon as the supply is starting to run low from all these attempts lol..
Hi Jeremy! Sorry to hear about the difficulties with the shaping.
Questions for you: What type of flour or flours are you using? How long was the bulk fermentation (roughly?) Do you live in a humid environment? Are you using a straight-sided vessel for the bulk fermentation?
Thanks! I ended up reshaping once more after putting it in the fridge for the last step – I couldn’t help myself haha. As far as flours being used: I used 350g of King Arthur Bread Flour and 50g of King Arthur Stone Ground White Whole Wheat flour. The bulk fermentation I think was somewhere around 12 hours? I’m in Southern California so it’s not really humid here. I let the dough bulk ferment inside the oven overnight with the oven light on though (so it was probably sitting at around 85F for that period of time). I was just using a round mixing bowl during that process. I do have a straight-sided vessel so can try that next time if it makes a difference, however it’s kind of a wide vessel (used for sous vide normally).
Oh, I just took it out of the fridge, scored, and popped it into the dutch oven/oven btw. So we’ll see how it turns out! It looked like it deflated a slight amount after removing it from the mixing bowl I was keeping it in though.
Quick update: took the lid off at 30 minutes and it looks pretty amazing! So I think reshaping may have helped a bit and also keeping it in the smaller shaped bowl where the dough could sit up higher and kept in the form of the original ball (it had no room to flatten out). I guess the other ‘test’ with this will be how it looks on the inside though – I’m eager to see!
Oh great! I’m so happy to hear this. Try to be patient with the cooling … at least 30 minutes. And just so it doesn’t get lost in the chain of responses, see my note below (or above?) too regarding the warm oven for future reference.
Hi Jeremy, I think the issue is the oven with the light on — I think that’s too warm for a 12-hour rise. The one time my dough “pooped out” (for lack of better words) on me was when I tried to do the bulk fermentation in my oven. When I turned it out onto my work surface, it was super liquidy and had lost all strength. If you are willing to give this another go, I would do the bulk fermentation at room temperature and just be patient. If you mix the dough at night and can sneak in 2 or 3 turns before bed, I think your dough will be in great shape in the morning. It might be doubled, it might not, it might be more than doubled, but I think the room temperature environment will be more forgiving on your dough. Your mix of flours sounds great. I would maybe stick to the bowl next time as opposed to the sous vide vessel, as I worry the sous vide vessel will be too wide.
Keep me posted on your experiments! Hope the loaf turns out OK.
It turned out awesome! Not sure if pics are allowed but here’s the finished product: https://photos.app.goo.gl/GB7FAD4aTAwcqwT89
Thanks for the awesome recipe! Definitely takes some time but it’s so worth it 🙂
oh yay! I’m so happy to hear and SEE this. Pics are totally allowed 🙂 🙂 🙂
The bread is delicious! Dense but not too dense and has that nice “chew” to it. BTW: not just this loaf but the prior couple loaves I’ve done in the dutch oven the bottom crust always seems to come out a bit on the thick side and a little too crispy (it’s tough to slice through). Is there something I can do to prevent this?
So happy to hear this, Jeremy! Question: are you preheating the Dutch oven? And what type of Dutch oven are you using?
I suspect that if you give this another go with the suggested changes (room temperature bulk ferment), your dough will have more strength and will therefore have a lighter crumb. This will also help with the bottom crust not being so dense.
Absolutely LOVE this recipe! So foolproof (and I would know, as a self-proclaimed fool in the kitchen). I really appreciate all the background information, too. For anyone interested in taking their sourdough game to the next level, I’d also highly recommend Ali’s 5-day email course “Sourdough Demystified” — amazing!
One question: I’m wondering if I could use a proofing basket instead of a tea towel in a bowl. Any concerns? (My only worry is that the dough may dry out in a basket after such a long, cold proof.)
So great to hear all of this, Stephanie! I’m so glad you enjoyed the course. [To anyone reading through the comments, you can sign up right here: Sourdough, Demystified!]
Regarding your question, I can’t say for sure because I haven’t tried, but I have been meaning to get my hands on some proofing baskets, so as soon as I do, I’ll let you know. In the meantime, I’ll do some research, too, and let you know what I learn 🙂
Thank you. My first ever sourdough bread and it came out perfectly – instructions were so, so helpful, I used a bit less salt – around 6g, which was right for me. Will try adding seeds next time. I don’t have a Dutch oven, but used a heavy duty stainless steel saute pan with a domed lid and heated it first and it worked out brilliantly. Also, as I only have a fan oven, I reduced all heat by 20c.
So happy to hear this, Rikke! Nice work improvising on the pan, too.
Just about to try this! So excited 🙂
I don’t have rice flour at home right now, what do you suggest?
Regular flour is fine, be sure to be generous … you can always brush off the excess after you turn the dough out. Be warned though … another commenter just had issues sticking. Rice flour + flour sack towels will prevent any kind of sticking. I’m going to research some other options. Stay tuned!
do you knead the dough in this recipe at all? TIA
Hi! And nope 🙂 You’ll perform a series of folds every 30 minutes or so after the dough is mixed, for the first 2 hours.
Help! I went to bake my bread today and it was totally stuck to the towel, despite the flour. I was able to salvage most of the dough but it is deflated now. Should I wait and let it rise again?
Oh no, I’m likely too late here … what did you do? I would have suggested letting it rise again. I’m so sorry to hear this … I’ve been there. I know specific flours and tools are so hard to rationalize spending $$ on right now, but if you can get your hand on some rice flour and the flour sack towels, it will prevent this from every happening.
First time baking sourdough and I would consider myself a novice baker. I found this recipe very easy to follow and it turned out great! It could be more airy- any suggestions for this?
Great to hear this, Francesca!
Questions: is your starter very healthy/active? It should definitely pass the float test, but additionally, does it look very bubbly before you use it?
What type of flour or flours are you using? And finally: how long was your bulk fermentation and how long was your refrigerator proof (roughly)?
This is a great easy to follow recipe! Thank you so much for sharing.
One question (and apologies if you’ve already answered this somewhere else): how would you modify this to work with standard all purpose flour? Bread flour is impossible to find at the moment. Thanks!
Great to hear this Dan! Truthfully, I don’t make any modifications when I use ap flour, but I don’t mind working with wet doughs. If you find working with wet doughs frustrating and especially if you live in a humid climate, you’ll want to reduce the water a little bit. I might start with 280 g water. You can slowly add the remaining 20 g of water in until the dough looks right — you can reference the video or recall your previous experiences. It should be sticky, but not soupy.
Let me know if this makes sense!
So helpful! Thanks!
Hi Ali,
Tried your recipe and followed all the exact measurements and ingredients but after the bulk fermentation, the dough was too sticky to shape. It stuck to my hands and the bench, it was impossible to work with. I left it out overnight for 14 hours, was this too long? It probably did double its volume or perhaps even more. My starter passed the float test too. Is it normal for the starter to rise and fall? When do you store the starter in the fridge?
The sticky dough is proving in the fridge at the moment (I managed to put it in my dutch oven) and I’ll bake it tomorrow morning to see what happens.
Hi Lisa! Sorry to hear about the stickiness. Great that your starter passes the float test. And yes, your starter should be rising and falling. You want to use your starter when it is rising and ideally at its peak — when it’s about doubled in volume from when you fed it. Is that when you used your starter here? Store your starter in the fridge after you measure it/use it for a recipe and you don’t have plan to use it in the next day or two.
It’s possible that it over-proofed, which is attributing to the stickiness. Questions: did the dough look comparable to the video after mixing? Were you able to do a few stretch and folds? Also: regarding it being in the Dutch Oven now: did you butter it well? I’m worried about it sticking.
This recipe is my 3rd attempt. It turned out amazing! I used all bread flour and the baking took a bit longer. But the loaf itself is shiny, has little bubbles on the surface and smells like sourdough. Can’t wait to dig in. Thank you!
oh yay! So happy to hear this, Lyndia!
After reading a bunch of online recipes and looking at photos of the finished product, I decided to make this one! I love how well written the instructions are, and the videos linked to each step are a HUGE help. Will update and rate once it is done!
Wonderful! And yes, please report back 🙂
It turned out great! Took a little longer than 10 min and didn’t get as dark as yours, I think in my oven next time I would leave it at 450 to get the darker color. Thanks for such an easy to understand and follow recipe!!!
So happy to hear this, Taryn!
Hello!! I am currently proofing this sourdough recipe as we speak! I cannot wait to see how it turns out! Firstly I’d like to thank you for providing clear and easy instructions as well as a video especially for first time sourdough bakers (myself included). Secondly, I am curious as to what to use for the baking process (I realize I should have thought of this BEFORE making the dough) I have a half sheet I bought from Costco that is pretty good quality but probably not high end. I also have a pizza pan with holes in it (that I could lie the parchment paper on) and I have a pretty thick griddle that I am afraid will burn the bottom of the bread loaf as it does my cookies when I make them. No Dutch oven 🙁 do you have experience baking with either of these? Can most baking sheets (granted they’re not poor quality) withstand high temperatures of 500 degrees? Yesterday I wanted to use my half sheet and underneath put ice cubes in a cast iron skillet to get that steam but now I am having doubts and don’t want to ruin my pan and/or the bread. Thank you in advance!!
Hi Sarah! So great to hear all of this. My suggestion is to use your griddle. Heat it at 450ºF for at least 45 minutes. Do you have rice flour for dusting? I ask only bc regular flour is more prone to burning. I think if you use the parchment paper on the griddle, you won’t burn the bottom of your loaf. Now, you need some sort of pot you can turn upside down and place over top of the loaf once you get it on your griddle. Do you have a pot (or an oven safe bowl?) that will sit flush against the griddle?
Hi Ali! Thank you for your response! I am just now reading it after my first loaf but before my second! First loaf turned out good. Very chewy and gummy though so I will have to refrain from cutting it open too early. Idk if shaping it with the dough scraper wasn’t enough or that I let it proof in a shallow bowl but it did not rise to my liking. It rose but not poofy. I read that my technique may not have been good while shaping it so I will have to read more into that. Read I need to shape it until the dough barely bounces back? Maybe it didn’t rise enough because I don’t have a Dutch oven. Any tips?
I do not have rice flour and used all purpose. I pulled out the parchment paper after the initial 20 minutes. Only metal bowl I have is a kitchen aid stainless steel. Or a pot that has Teflon on it which I am unsure would be safe or not.
I’m making your recipe for the second time because it was so simple to follow. Thanks again!
Hi Sarah! OK: Try covering the loaf with the stainless steel bowl. I think the Teflon will melt. It is possible that the gummy texture of the dough is partially due to not having a Dutch oven … it really creates such a nice environment for the dough to rise/steam and then finish cooking. But hopefully the griddle + bowl combo will help with this issue a little bit.
Questions: How vibrant is your starter? Does it double after feedings within 8 hours or so? Does it pass the float test? Also: what type of flour are you using? When you shaped the boule with the bench scraper, did you feel as though you got some good tension in the dough? Letting it proof in a shallow bowl is fine … I do this all the time. After you shape the boule and transfer it to the towel-lined bowl and stick it in the fridge, it will barely change much visibly in the fridge but lots of action is happening in the dough even so 🙂
You are AMAZING for your responses! I will try the bowl and griddle!
I don’t mean to toot my own horn but my starter (named Bran) is pretty good. After just two hours of feeding he starts to nearly double and produces lots of big bubbles. I’m feeding him 25g whole wheat, 15 King Arthur all purpose with 40g water. Passed the float test today, too. Unfortunately the store is out of bread flour so I am using all purpose (which is probably another reason it’s not rising as much). I did NOT feel like I had a lot of tension in the boule so that could be another problem I had. I need to work on my technique. Can’t wait for bread #2!
Sure thing, Sarah! I hope the griddle + bowl combo works well for you!
Great to hear your starter is vibrant and active … so often that can be the culprit for dense loaves.
All-purpose flour is fine … I use it all the time in my sourdough loaves. The dough can be a little wetter than a loaf made with the equivalent amount of bread flour, but you should still be able to get a good rise.
I’m sure you’ve watched the videos, but this one in particular might help with the shaping. It’s such a balance between not deflating the dough too much while also creating tension.
Keep me posted!
My wholewheat version of this bread turned out amazing! I had to add quite a lot more flour as my starter is liquidy. I have made a lot of bread so I understood that I needed to add flour to be able to work with the dough properly. Other than this point, and using almost 100% wholewheat flour, I followed the recipe exactly and it was great. I’m new to sourdough. Thank you!
I’m so happy to hear this Gretchen! Nice work on adding flour as needed 🍞🍞🎉🎉
Hello,
I’ve just started getting into making sourdough bread and I have used your great recipe and tips to do so. So far I have made two loaves using my homemade sourdough starter.
The second loaf was better than the first, it properly rose during the bulk fermentation step. So every step of making my bread seems to be fine and looks like your pictures but once I bake my bread it doesn’t really rise.
Do you have any idea why that may be happening?
Could it have something to do with the type of flour I’m using?
Just wanted to add that the bread still ended up tasting super good, it was quite moist and had bubbles throughout, so the only problem is just that it doesn’t rise in the oven 🙁
Hi Helia,
I think you’re really close to getting the loaf you are after, as it sounds as though you are doing everything right. My question for you first has to do with the starter: How long has it been since you first started building it? I ask because I am currently building as starter from scratch, and I’ve used it a few times, and even though it passes the float test and rises to double in volume after feedings, the loaves I have baked from it do not spring as hight as the the loaves I have baked when I use the starter I purchased online, which is just a bit more vibrant. After you feed your starter, how many hours (roughly) does it take for it to double?
What type of flour are you using?
I started building my starter about two weeks ago, maybe a bit more. It usually takes about 4-5 hours to double in size when it is in a warm spot.
To make my bread I have been using whole wheat and spelt bread flour.
It’s the only bread flour I can find when I go shopping, things like flour sell out pretty quickly at the moment.
However today I just bought organic T65 wheat flour. Can I use that to make bread?
Thank you for your help!
Hi Helia! Your starter sounds as though it is very vibrant and in great shape. I think the rising issue 100% has to do with the flours you are using. From the bit of googling I have done, it sounds as though T65 wheat flour will be great … it sounds as though it is similar to bread flour.
A few thoughts: Either use 100% of this T65 flour or 350 g of it and 50 g of the wheat flour.
Consider cutting back the water to start. Maybe measure 260 g of water into the bowl. Add the starter, salt, flour or flours. Mix together. If it is very stiff, add the remaining 40 g water slowly. I just don’t know much about T65 flour, so it may absorb water differently. With that in mind, if you end up using the 300 g of water total, and it seems dry, you may want to add more water until it looks like the consistency in the video.
Hope that helps!
Thank you so much for your reply!
I will make a new bread tomorrow using the tips you’ve given me and fingers crossed it will work!
Awesome! Keep me posted 😍
Wow. This turned out beautifully! The crust, the chewiness of the bread. Perfect. Except – I don’t like it tangy (my husband does). Do you think I could get MY ideal bread by decreasing the bulk fermentation time and doing it at room temperature instead of fridge?
I think I mean the proofing stage – not bulk fermentation stage – in fridge. New to all of this!
So happy to hear this Lisa! There are a number of ways you can control the sourness of a loaf, and there is a lot of contradictory information on the web if you do a search. One method I know for sure, which is a little more involved, is the Tartine method. If you are unfamiliar, the Tartine method has you make a levain the night before you plan on baking. In short, you take about a tablespoon of your starter and feed it with 200 g each flour and water. You let it sit overnight, then this essentially becomes your starter in the morning. The main Tartine recipe makes a massive loaf, so if you are interested in doing this, I do have a scaled down version of the recipe, I can add to the comments.
But, there are simpler measures you can take, too. I think ensuring that the dough doesn’t grow beyond double during the bulk fermentation is one thing, and I think shortening the proofing phase, by either shortening the time in the fridge or doing it at room temperature could also potentially work. There are also things you can do to your starter. When I “catch” my starter just as it doubles, it barely smells sour; when I catch it hours after it has doubled and it is approaching the time when it will collapse, it smells sour. Depending on how my starter smells when I use it, affects the taste of the final dough.
Hope this helps! Let me know about the Tartine recipe. Because you like less sour loaves, you might really enjoy the process outlined in Tartine Bread. The Tartine breads are known for being not-sour sourdoughs.
Thanks ever so much, Ali! As you described in your post, this is certainly a journey. I swore I was done with sourdough until your recipe. 🙂 Yes, I would love that scaled-down version of the Tartine recipe. And thank you for your other tips. I’ll keep you updated!
Oh, and btw, I used 350g King Arthur Bread Flour and 50g King Arthur Whole Wheat Flour. The taste is perfect and I found it a wet dough, but not too wet.
Great to hear Lisa! OK, this is an adaptation of the Tartine recipe. It makes a little bit larger of a loaf, but once you make it once, you’ll be able to figure out if you want to scale it down.
To make the leaven, mix together:
1 tablespoon (20 g) sourdough starter
50 g flour
50 g water
I like to do this in the evening before bed. Cover it with a tea towel. Let sit overnight at room temperature.
The next morning, pour 375 g water into a bowl. Add 100 g of the leaven. (The remainder of the leaven can be stirred into your sourdough starter stash or you can use that as the start of a new sourdough starter.) Add ll g salt and stir with a spatula to combine. Add 500 g flour. (You can use a mix of white and whole wheat flour here.) Mix to combine.
From here, proceed with the recipe as written, doing turns every 30 minutes for the first 2 hours if possible. Once the dough has doubled, again, proceed with the shaping and refrigerated proofing step (for up to 12 hours) or proof at room temperature for 3 to 4 hours.
Let me know if you give this a go! The leaven step makes it a little more involved, but overall it’s not too complicated, and the flavor is definitely less sour.
Ali – I’m sure this is going to be too late. First, thank you! Second, at this very moment, the dough is doing its initial rest. The original recipe says to then add salt (which I already did) and 50 grams of water. “Use hands to integrate salt and water into dough thoroughly. The dough will begin to pull apart, but continue mixing; it will come back together.” Am I adding 25 grams of water at this point with no salt?
Hi! I don’t think you’ll need to add more water. And you are right to not add any more salt. Can you tell me how much water you’ve added thus far?
I just re-read our comment thread … you shouldn’t have to add any more water. Hope it’s working out OK!
Thank you ever so much! I did not add more water. Still in the midst of folding. It looks and feels great. 🙂 I also have your biscotti in the fridge and I’m onto your Chai. OMG. I do have a business to run. It’s a shame it’s not about cooking!
Wonderful! I’m so happy to hear all of this, Lisa. Good luck get getting your work done. It it’s any consolation, I feel like I need to make myself at least 5 cups of tea before I do anything productive 😂😂😂
One other thing. I’d like to get the Dansk butter warmer and your link (I’m assuming affiliate) goes to an unavailable red one. If it is an affiliate link, feel free to share a link to the teal one (19 oz butter warmer) from BB&B. I’ll use it. I know it’s not much, but…
Lisa, thank you 🙂 🙂 :). I just updated the link to go to Amazon, which is an affiliate link 🙏🏽🙏🏽🙏🏽🙏🏽 Here it is: Dansk Butter Warmer
I love my butter warmer and use it all the time. A word of caution if you have a gas stove, just keep an eye on it. The handle burns, so you have to keep the flame low or position the warmer off to the side a bit.
The verdict is… The bread is delicious and the texture is fantastic. My husband wanted it to be tangy (hee hee). He also immediately said, “My favorite is still the bowl bread!” Thank you so much for the scaled recipe. It was fun to make. And thanks for the Amazon link!
So great to hear all of this, Lisa!! I know so many people who go down the sourdough path only to discover they too prefer the bread bowl 😂😂
Just trying this recipe tonight as my neighbour gifted me sourdough starter the other day. I’ve never cooked sourdough before, but I have been making bread a long time.
Like someone else in the comments, I used AP flour, so when I used the proportions in the recipe, my dough was like a batter. So I just kept adding flour until I got to the consistency that I like when I normally bake bread (having watched the video, looks like the texture of yours).
Folded and left it to rise. I think it took about 7 hours. When I went to shape it, the ball was massive! Hemmed and hawed and decided to cut some off. So the boule is in the fridge proofing overnight, and I’ve got a baguette proofing on the counter that I will bake tonight as an experiment. We’ll see what happens!
Nice work on adding flour as needed to get it to look like the consistency in the video! Please keep me posted. I’m so curious as to how both the boule and the baguette turn out.
They both worked great! A super short proof of the baguette didn’t seem to hurt it. And the boule was amazing.
Next time I just need to add less water 🙂
So great to hear this, Heather!! Thanks for reporting back.
I’m midway through your process, the dough is in the fridge. I don’t have a Dutch over but do have a deep Bessemerware dish with a lid – can I use this? Bessemerware is heavy and I have nothing else anyway, fingers crossed. I also only had plain white flour so dough seems wet and will probably stick to the tea towel. I had tons of starter so made your crumpets, totally delicious and will make the pancakes tomorrow. Your instructions are wonderful. Thank you?
Good morning Irene! I think the Bessemerware dish should be great … I’m not familiar with the material, but heavy is great. My fingers are crossed for you regarding the tea towel and sticking. Please keep me posted. If you experience sticking, you use a bench scraper to gently coax the dough away from the towel.
Thank you so much for your response. The bread was delicious and I’ll definitely be maki g again!
Wonderful to hear this, Irene!
Thank you for a great recipe and video tutorial! Made a very intimidating endeavor so much easier! I just took my second loaf out of the oven and it looks good, even better than my first attempt! And I have a third (bigger) loaf proofing in the fridge for tomorrow! Can you tell my family loves this bread?! Since I used 500 g flour for my next loaf, how should I alter the baking duration? Thanks again for the great recipe/tutorial!
Wonderful to hear this, Laurie! With your larger loaf, I don’t think you’ll need to bake it for much longer: I would still preheat the Dutch oven at 500F. Lower the temperature to 450ºF when you transfer your loaf to it. Bake it covered for 30 minutes. Uncover it, lower the temperature to 400F, and at this point you may want to bake it for 15 minutes (as opposed to 10) or until it looks done. It shouldn’t take much longer to be done than the smaller loaf.
Thanks for writing!
For me, this bread was PERFECT! Many many thanks to you 🙂
So happy to hear this, Misha!
“Stone-milled flour, contrary to roller-milled flour, is flour made from wheat that passes through a stone mill, the process of which keeps the endosperm, bran, and germ together. Much research shows that keeping the components together preserves the nutritional value.”
I’ve heard that roller-milled destroys the vitamin E, but I haven’t heard anything else. I’m curious to see what the scientific literature says about this.
Hi Peter! Learning about the differences between roller-milled flour and stone-milled flour was eye opening. As I said above, it was Dan Barber’s The Third Plate that piqued my interest. If you are looking for some more information, google: “The Bread Lab”. This article, Bread is Broken, is an interesting read.
Hi Ali,
How do you manage to keep your dough so manageable when shaping? Mine is generally quite sticky and challenging to shape into a boule like that. I use a bit of flour but I always fear I use too much and I never have that feeling of the top stretching properly and with the right tension… Any hint?
Your bread looks fantastic!
Hi Leo! Shaping definitely is a little tricky with high hydration doughs such as this one, and it’s OK to use a little bit of flour. Question: do you have a bench scraper?
Hi Ali,
Thanks for the recipe it’s very timely. I do not have parchment paper. Any tips on how to do the transfer to a the Dutch Oven? Thank you!
Hi Kat! Hope I’m not too late here! Do you have a pizza peel? Some cornmeal or rice flour should do the trick … be generous. Let me know if you need more guidance. Good luck!
This is the first sourdough boule I’ve ever made, and it turned out WONDERFULLY by using this recipe. I used all-purpose flour since I didn’t have bread flour on hand, with the recommended 50g of whole wheat. I let it chill for 24 hours after the bulk fermentation and the flavor is incredible. Nice, fluffy texture inside and a beautiful golden crust. I couldn’t be happier. I feel like a real baker now! Thank you for such great content, Ali, and thank you for making sourdough so approachable!
I’m so happy to hear this, Sara 🎉🎉🎉🎉 Thanks so much for writing. Sourdough is fun 😍😍😍
This was my first time making a sourdough ever and it turned out amazing. I used the king arthur starter recipe and made this one with ap flour (couldn’t find bread flour) followed the easy directions- let it sit 14hrs during bulk 24 in fridge on the last step before baking. It takes a while but is super easy and worth it. The crust was incredible. I would also agree and on the 10g salt. Thank you for the recipe!
So great to hear all of this, Taylor! Thanks so much for writing 😍😍😍🍞🍞🍞🍞
Hi – I’ve made this a bunch of times and looooove it. I gave a half loaf to my parents yesterday and they couldn’t believe i baked it myself! Such a great recipe – thank you for it. i do have a question – do you think this would work with half whole wheat flour and half bread flour? Running very low on bread flour and it’s sold out everywhere 🙁 hoping i can make it work with more whole wheat since i have a lot.
So great to hear this Jessica! I think you can definitely make this work with more whole wheat flour, just keep in mind, the more whole wheat flour you add, the denser it will get. It will still be delicious, but the texture will be affected.
I did it and it turned out great! A little dense but still filled with lots of bubbles and holes when I cut into it. Thanks for such a tasty and adaptable recipe!
So great to hear this, Jessica!
What brand/type of salt do you use when giving the amount of salt in the recipe? I have Diamond kosher and think I under salted.
I use Diamond Crystal kosher salt as well. If you like it saltier, you could try 11g next time around 😍