 →
→ Easy Sourdough Bread (Whole Wheat-ish)
This post may contain affiliate links. Please read my disclosure policy.
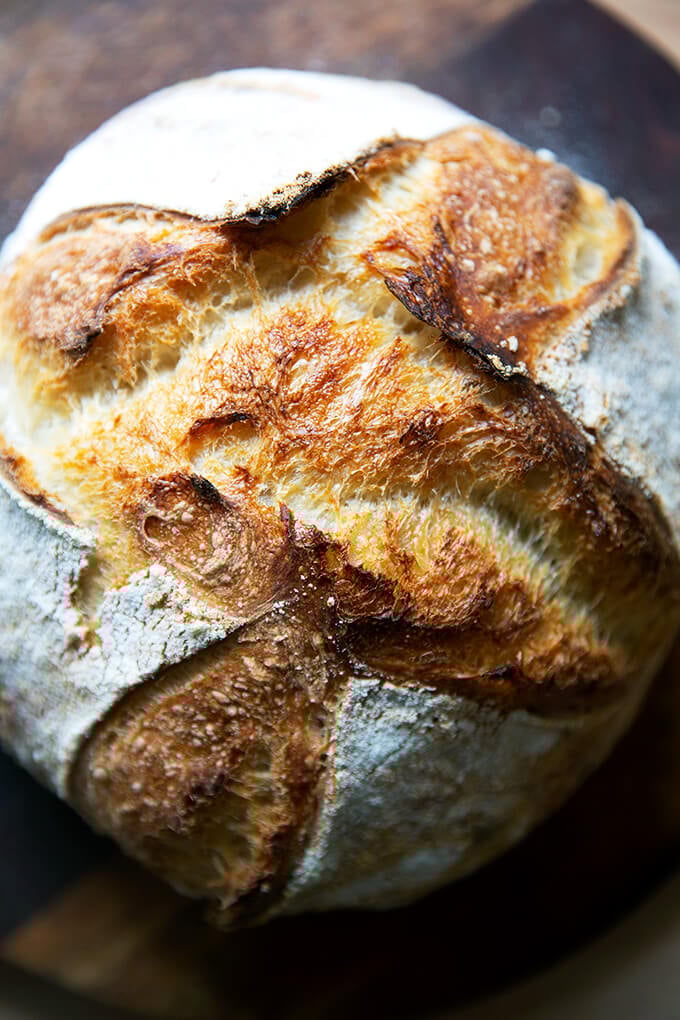
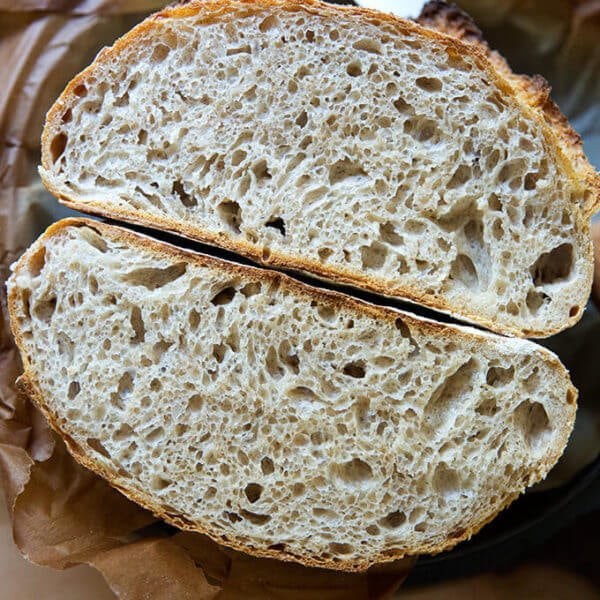
Made with a small portion of stone-milled whole wheat flour, this sourdough bread is so flavorful, aromatic, and tasty. Using a mix of both bread flour and whole wheat flour keeps the texture light while providing a nutritional boost and lovely flavor. 🍞🍞🍞🍞
If you are looking to add more nutrition to your bread, a logical first step is to replace some of the white flour with whole wheat flour. The trouble with this idea is that not all whole-wheat flours are created equal.
Let’s get straight to it. Most commercial flour (both white and whole wheat) is made from roller-milled wheat, meaning a roller mill has separated the wheat kernel into three parts: the endosperm, germ, and bran. White flour is made from the endosperm. Whole wheat flour is made from a combination of the endosperm, germ, and bran. Much research shows that as soon as the wheat kernel is separated into the various parts, much of the nutritional value is lost — even when the bran and germ are added in after the fact.
So what’s the solution? Seek out stone-milled flour, which is flour made from wheat that passes through a stone mill, the process of which keeps the endosperm, bran, and germ together. Much research shows that keeping the components together preserves the nutritional value.
What’s more, the bran and germ present in stone-milled flours lend so much by way of flavor, texture, aroma and hue:
The recipe below calls for a mix of both bread flour and stone-milled flour. Using a small amount of stone-milled flour gives your bread a boost of nutrition while preserving its light texture. Once you’ve made the recipe once, if you like what the whole wheat flour is contributing to your loaf, you can increase the proportion of stone-milled flour next time around.
How to Make Whole Wheat-ish Sourdough Bread, Step by Step
First, gather your ingredients: you need an active/fed sourdough starter:
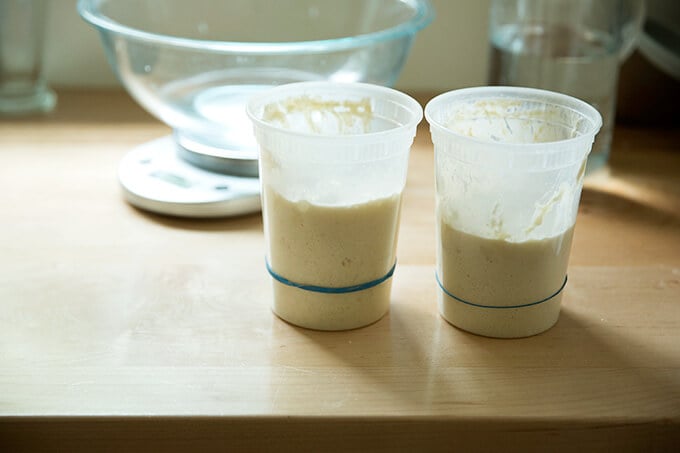
To ensure it is ready, drop a spoonful into a glass of water. If it floats, it’s ready:

Place 300 g of water, 100 g of starter, and 10 g of salt into a bowl.

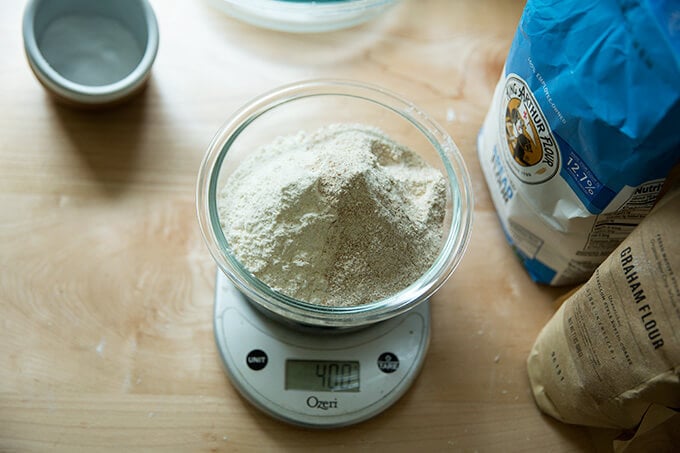
Next, weigh your flour: you need 400 grams of flour. For this whole-wheat-ish loaf, my preference is 350 grams of bread flour (King Arthur Flour) and 50 grams of stone-milled, freshly milled flour (I use a mix of Anson Mills rye and graham).

Mix until a sticky dough forms.
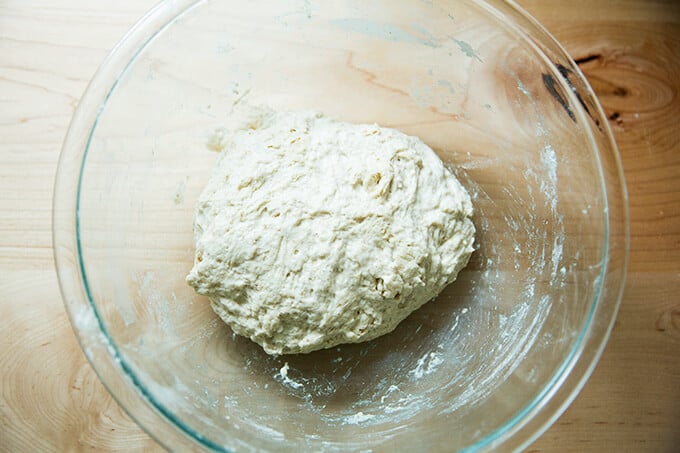
Then transfer to a straight-sided vessel for the bulk fermentation (the first rise).

After 30 minutes, stretch and fold the dough:
You’ll repeat this stretching and folding 3x at 30-minute intervals…
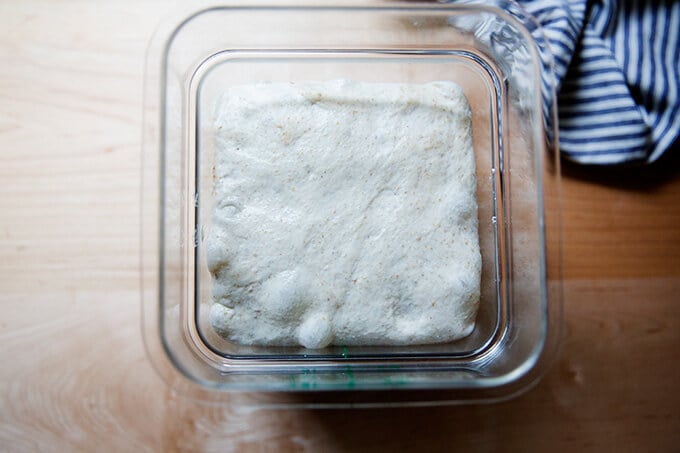
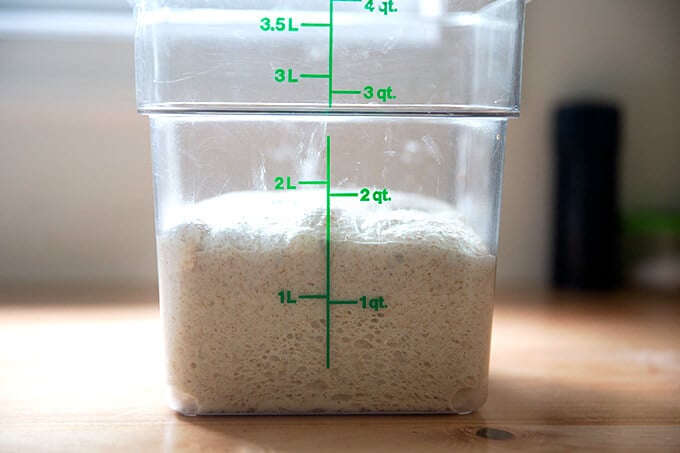
… then you’ll leave the dough to rise until it increases in volume by 50-75%:
Transfer dough to a clean work surface. I prefer to use no flour and minimal handling to shape it into a ball.
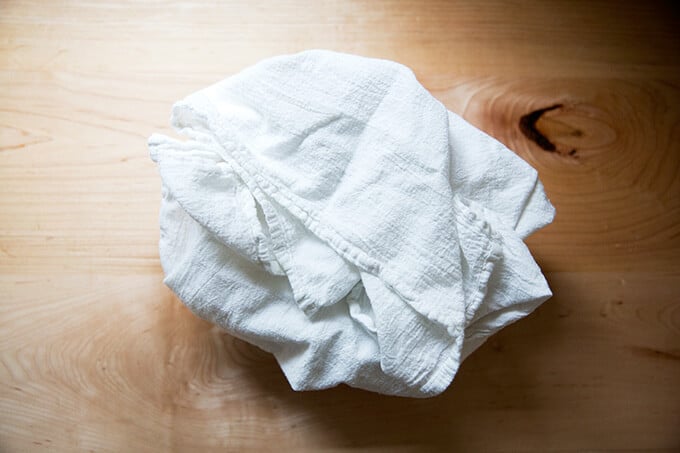
After the initial shape, let the dough rest for 20-40 minutes; then shape again and transfer to a flour sack-lined bowl.
Transfer bowl to fridge to proof (second rise) for 18 to 24 hours

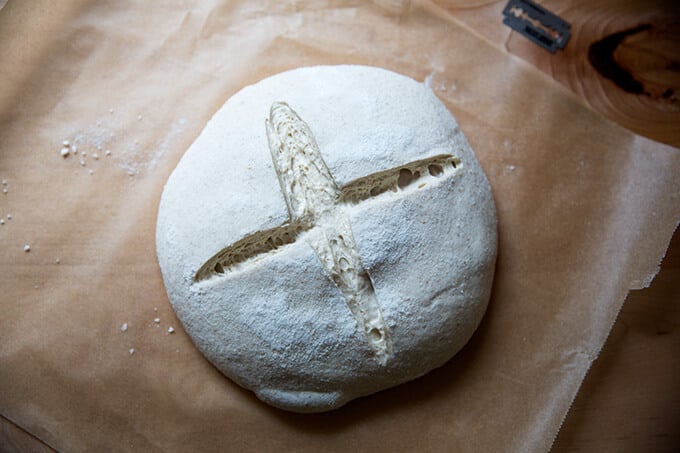
After 18 to 24 hours, transfer dough to a sheet of parchment paper. This video shows how:
Score as you wish; simple is fine.
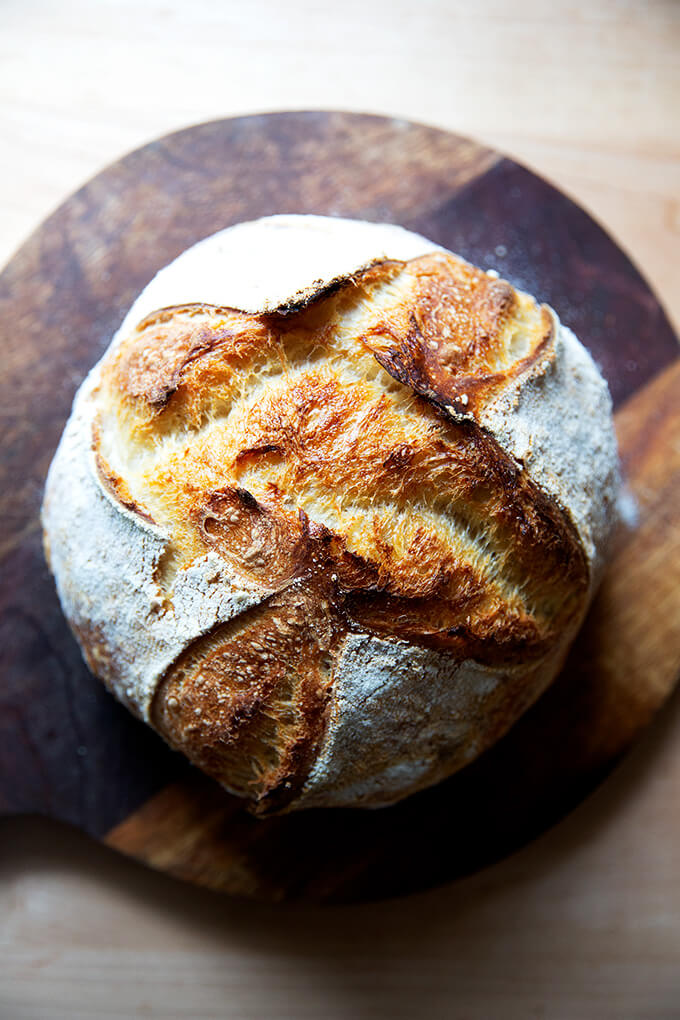
Transfer to a Dutch oven and bake, covered, at 450ºF for 30 minutes, then uncover and bake at 400ºF for 10 minutes.

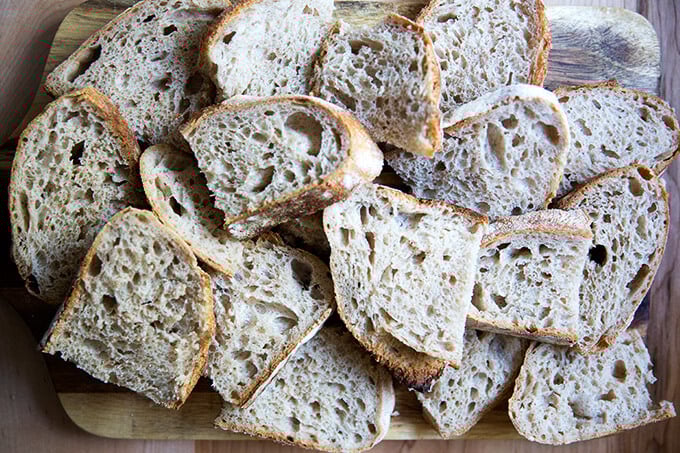
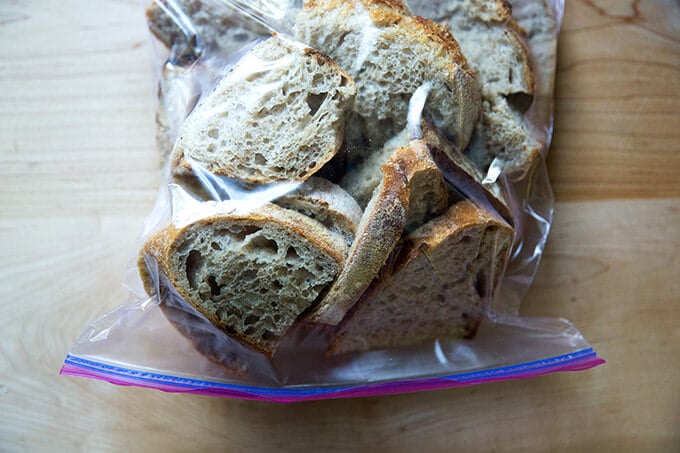
Store the bread at room temperature in a ziptop bag for 3 to 4 days or in the freezer for up to 3 months:
Easy Sourdough Bread (Whole Wheat-ish)
- Total Time: 48 hours 45 minutes
- Yield: 1 loaf 1x
Description
Made with a small portion of stone-milled whole wheat flour, this sourdough bread is so flavorful, aromatic, and tasty. Using a mix of both bread flour and whole wheat flour keeps the texture light while providing a nutritional boost and more flavor.
Notes:
Special equipment: Straight-sided vessel for the bulk fermentation, Dutch oven, flour-sack towel
Digital Scale: Do not attempt this recipe without a scale. This one costs $10. Troubleshooting what goes wrong with sourdough bread is impossible if you’ve measured with cups. They’re simply not accurate.
Troubleshooting: If you have issues with your dough being too sticky, please read this post: Why is my sourdough so sticky? The 4 common mistakes.
Flour:
-
- I prefer making this bread with 350g bread flour and 50g of freshly milled, stone-milled flour, which provides both flavor and color. I love using a mix of Anson Mills graham flour and rye flour, but there are many great stone-milled flours out there, and you may have a local source, which is even better.
- Where to buy stone-milled flour? In the past few years, it has become easier to find stone-milled flour, and if you are up for it, you should seek out locally, stone-milled flour. Why? Because if you’re buying locally milled flour, you likely can find out how recently it was milled. Because stone-milled flour perishes more quickly than roller-milled flour, it’s best if you can find a local source, which will ensure it will be fresh. Note: Store stone-milled flour in the freezer if you don’t bake regularly.
- I find locally milled stone-milled flours at a local co-op, Honest Weight Food Co-op, and I also order online from various sources. Here are a few I love: Cairnspring Mills, Anson Mills, and Community Grains
- 50g may seem like a tiny amount of stone-milled flour for this recipe, but I am constantly amazed by how much flavor this small amount of freshly milled flour adds.
Ingredients
*Please read notes above before proceeding. Watching the video is helpful, too.*
- 300 g water
- 100 g active sourdough starter
- 10 g kosher salt or sea salt
- 350 g bread flour, see notes above
- 50 g whole wheat flour, preferably stone-milled, see notes above
- rice flour, for dusting
Instructions
- Mix the dough. In a large bowl, combine the water, starter, and salt. Stir with a rubber spatula to loosely combine. Add the flours, and stir with a spatula to combine — it will be a wet, sticky dough ball. Transfer to a straight-sided vessel and cover with a tea towel or bowl cover for 30 minutes.
- Stretch and fold. After 30 minutes, grab a corner of the dough and pull it up and into the center. Repeat until you’ve performed this series of folds 4 to 5 times with the dough. Let the dough rest for another 30 minutes and repeat the stretching and folding action. If you have the time, do this twice more for a total of 4 times in 2 hours. [Video guidance here.] Note: Even if you can only perform one series of stretches and folds, your dough will benefit. So don’t worry if you have to run off shortly after you mix the dough.
- Bulk fermentation: Cover the vessel with a tea towel or bowl cover and let rise at room temperature (70ºF/21ºC) for 4 to 18 hours (times will vary based on the time of year, the humidity, and the temperature of your kitchen). The bulk fermentation will end when the dough has nearly doubled in volume, and you can see bubbles throughout the dough and on the surface. (Note: Do not use your oven with the light on for the bulk fermentation — it is too warm for the dough. To determine when the bulk fermentation is done, it is best to rely on visual cues (doubling in volume) as opposed to time. A straight-sided vessel makes monitoring the bulk fermentation especially easy because it allows you to see when your dough has truly doubled.)
- Shape: Gently transfer the dough to a clean work surface. I prefer to use no flour and a bench scraper at this step, but if you find an unfloured work surface to be difficult, feel free to lightly flour it. [Video guidance is especially helpful for this step.] Fold the dough, envelope style: top third over to the center; bottom third up and over to the center. Then repeat from right to left. Turn the dough over and use your bench scraper to push the dough up, then back towards you to create a tight ball. Repeat this pushing and pulling till you feel you have some tension in your ball. Place the dough ball top side down and let rest 30 to 40 minutes. (FYI: This is called the bench rest.)
- Proof. Line a shallow 2-qt bowl (or something similar) with a tea towel or flour sack towel. Flour sack towels are amazing because the dough doesn’t stick to them, and therefore, you need very little rice flour, but if you only have a tea towel, you will be fine. If you are using a tea towel, sprinkle it generously with rice flour. If you are using a flour sack towel, you can use a lighter hand with the rice flour. After the 30-to 40-minute bench rest, repeat the envelope-style folding and the bench scraper pushing and pulling till you have a tight ball. [Video guidance here.] Place the ball top side down in your prepared towel-lined bowl. Cover bowl with overhanging towel. Transfer bowl to the fridge for 12 to 24 hours. (Note: When you remove your dough from the fridge, visually it will likely look unchanged. This is OK. You do not need to let it then proof at room temperature before baking.)
- Bake. Heat oven to 500ºF. Remove your sourdough from the fridge. Open the towel. Place a sheet of parchment over the bowl. Place a plate over the parchment. With a hand firmly on the plate and one on the bowl, turn the dough out onto the parchment-paper-lined plate. [Video guidance here.] Carefully remove the bowl and towel. Carefully remove the plate. Brush off any excess rice flour. Use a razor blade to score the dough as you wish. I always do a simple X. Grab the ends of the parchment paper and transfer to the Dutch oven. [Video guidance here.] Cover it. Lower oven temperature to 450ºF, bake covered for 30 minutes. Uncover. Lower the temperature to 400ºF. Bake for 10 minutes more or until the loaf has darkened to your liking. Transfer the loaf to a cooling rack.
- Cool. Let the loaf cool for at least 30 minutes before cutting.
- Prep Time: 48 hours
- Cook Time: 45 minutes
- Category: Bread
- Method: Sourdough
- Cuisine: Global
This post may contain affiliate links. Please read my disclosure policy.


1,106 Comments on “Easy Sourdough Bread (Whole Wheat-ish)”
I tried not preheating the pan, and was disappointed with the results. The crust is tough and rubbery, not crisp. The inside is a bit damp.
Oh bummer! I’m sorry to hear this. I just removed that note from the directions … I always preheat and prefer preheating but some people have trouble handling the hot pot, which is why included that note. I honestly had forgotten that that note was still in there … totally my bad. So sorry your loaf didn’t bake up well.
Hi Alexandra!
Thank you so much for sharing your recipe – I am brand new to bread baking, and I feel really lucky to have found your page! After just 1-2 attempts, I’m now making a loaf weekly to use for lunches, and it’s such a great feeling 🙂
I had a quick question – is there any guidance on baking times if you make larger or smaller loaves? E.g., if I make a loaf that is half as big, does that decrease the baking same by the same proportion? Was hoping to do this to be able to bake multiple to share with friends.
Thanks again for all your great insights!
Hillary
Great to hear all of this, Hillary! The baking time will be shorter but not cut in half. Try baking the loaf covered for 20 minutes, then uncovered for 15 minutes or until it is browned to your liking.
Hello! I had my first take on this recipe and, despite some mistakes, it still gave a pretty good result. I have some questions, if possible. If I use my fridge during bulk fermentation, how do I proceed afterwards? Do I go straight to the shaping part or do I wait for the dough to come to room temperature? Also, if I want to bake this in a tin loaf do I shape into the tin loaf and then put it in the fridge for proofing? Do I bake immediately afterwards? Thank you for this wonderful, flexible recipe and I hope my questions are not too silly!
Hi Maria! No such thing as a silly question 🙂 Answers are below.
how do I proceed afterwards? Do I go straight to the shaping part or do I wait for the dough to come to room temperature?
If the dough has doubled in volume or nearly doubled while it’s in the fridge or before it entered the fridge, you don’t need to let the dough come to room temperature. Move on with the next steps. If the dough still needs to complete the bulk fermentation, let it hang out at room temperature until it does.
Also, if I want to bake this in a tin loaf do I shape into the tin loaf and then put it in the fridge for proofing? Do I bake immediately afterwards?
If using a tin, shape the loaf and place it in the tin. Transfer the entire pan to a large ziplock bag or produce bag or something that will prevent the dough from drying out. And yes, transfer it to the fridge immediately. When you are ready to bake, if the dough has started to crown the rim of the pan, you can bake it immediately. If it has not, let it sit at room temperature until it crowns the rim of the pan.
Let me know if this all makes sense 🙂
It did make sense, this was the first time my kids liked and actually ate a loaf I made – that’s a huge success! This time I baked it in a Dutch oven, I guess the oven temperature would change if I were to bake it in a tin? Also, it’s getting really hot where I live (around 95 degrees). Do you recommend using cold water to help prolong the bulk fermentation process? Again, thank you for this recipe – it’s the only one that has worked for me!
Great to hear! For a tin, I would do this: Heat oven to 425ºF. Transfer pan to the oven and bake for about 20 minutes. Reduce heat to 375ºF. Bake for 20 to 25 minutes more or until golden all around.
Cold water is a great idea in the summer 🙂
Hi! I just stumbled upon Mark Bittman’s Whole Wheat No-Knead bread that allows for substituting sourdough starter for yeast – resulting (obviously) in Whole Wheat sourdough. Has anyone tried it? It just seems almost too simple lol.
Great recipe!
Great to hear, Kat! Thanks so much for writing 🙂 🙂 🙂
This is recipe is outstanding. First time trying sourdough with some whole grain flour. The crust and crumb are perfection.
Thanks for sharing.
So great to hear this, Calvin! Thanks so much for writing and sharing 🙂 🙂 🙂
I was wondering if I can use spelt flour for the 50 grams whole grain. Would I have to adjust the amount of water?
Yes! No adjustments needed.
Hi Ali !
We love your sourdough bread recipes. I would say the sourdough focaccia and the sandwich bread are our favorites. I want to try making a cracked wheat sourdough similar to the one at Trader Joes. I’ve made your bulgar bread from BTC and was thinking of incorporating bulgar into this recipe. Do you have any suggestions on if that might work?
My family thanks you for all the fabulous recipes! 😊
Hi Lisa! Great to hear all of this… thank you 🙂 🙂 🙂 Regarding adding bulgur, I might consider cooking 1/2 cup of dried bulgur, letting it cool, and drain. Once cool, I think you could incorporate the cooked bulgur into the dough after one or two sets of stretches and folds. I don’t think you need to change the water level because this is pretty high hydration as it is. Let me know if you give it a go! My only other thought is that 1/2 cup of dried bulgur might yield too much cooked bulgur… I just don’t want your bread to be dense. So use your judgement about how much of the cooked bulgur to incorporate.
I read the book and really did change my life! I was browsing around Anson Mills and found Bread Lab too. I will definitely try their flour. I’m not a baker at all but I bet it’s hard to ruin the bread!
LOVED the recipe. Great tasting bread. It’s the first time that I did the final rise in the fridge overnight.
I used about 20g of rye and 30g of whole wheat flour in addition to the bread flour. The only problem I have that the inside is very soft (maybe even a bit “damp?”) and the bread is difficult to cut. Should I slightly reduce the amount of water?
Hi Christiane! Yeah, it sounds as though you may need to reduce the water slightly. Try holding back 50 to 75 grams.
Thank you for your reply. I will give that a try.
Since making this bread, I baked a sourdough rye bread which I have made multiple times in the past. Since leaving the dough in the fridge overnight is so convenient, I also did the final rise in the fridge which I hadn’t done before. And while the bread had a nice height and even interior, it is also difficult to cut. So now I’m wondering if it has something to do with leaving the dough in the fridge. Any thoughts?
Hi! When you do the fridge rise, are you covering the dough? I always have the dough wrapped in a flour sack towel, which protects it, but if the dough is developing a crust in the fridge, you should tuck the whole thing in a plastic bag — plastic produce bags work great.
What do I do if I don’t want to put it in the fridge? Can I go from bench rest straight to bake?
You’ll need to do a room temperature proof for about 4 to 6 hours, depending on the temperature of your kitchen. I would keep the loaf covered — like in a produce bag loosely tied — and check on it periodically. When you press on the dough lightly, it should spring back slowly.
I’ve made this recipe multiple times and it’s been amazing… but this time it proofed longer than usual… and when I put in the baking pan… it was not poofy… kinda flat… baked it … very flat. Is my starter no good?proofed it too long? Bulk fermentation was a bit longer too… that an issue?
Hi Tuula, It could have been any of those issues, starting with either a weak starter or a too-long bulk fermentation. I would check out this troubleshooting post to pinpoint where things might have gone wrong.
This is more of a question. On Wednesday I mixed my bubbly starter with the right proportions of water, flour, and salt, completed a bunch of folds. I ran out of time and stored it in the fridge. I’ve noticed that the dough has already almost doubled in the fridge. I think my bulk fermentation is pretty much done. I won’t have time to bake it until Sunday.
So, now what? Should I let the dough come to room temp today, complete any more bulk fermentation outside the fridge, then shape the dough and let it proof for more than 24 hours?
Or, leave the dough in the fridge for another day and then let the dough come to room temp, shape it, and then proof it, so the proof time is shorter?
Hi Andrea,
I am likely too late here, but I would have either removed the dough and shaped it (no need to bring it to room temp) and returned it to the fridge or I would have left it in the fridge until I had time to shape it.
What temp is your fridge?
After shaping, can you cold proof for longer than 24 hours or does that create issues?
Yep! 48 hours is about how long I push it.
Thanks for the reply! I ended up letting it cold proof for around 30 hours and it baked up beautifully. For my next boule I am interested in adding poppyseeds and hemp heart seeds. Do you think I could get away with keeping the water/starter ratio the same, or would you suggest adding more or less to account for thirsty seeds? I’ve only ever followed your sourdough recipes and haven’t done any inclusion loaves yet, so I’m curious what you would recommend for ratios. Thanks so much!
Hi Deanna! Great to read all of this. I might try increasing the water by 5 to 10 grams. It’s pretty high hydration as it is, so I’d hate for you to increase it so much that it becomes unmanageable. It’s possible you could get away with not increasing the water at all. Good luck!
So, I ended up adding an extra 3 grams of water to the recipe for my seeded version, plus around 2tbsp hemp hearts, 2tbsp poppyseeds. The loaf tasted awesome but didn’t bake as tall as the one I baked previously without seeds. I think it was just too much water? I did everything else the same. So I’m attempting a seeded version of this recipe again tonight only this time I’m not adding more water. Hopefully it bakes up taller than the last one.
OK, interesting, Deanna! Initially I thought it might just be too many seeds, but 1/4 cup of seeds does not seem like too many. And 3 grams of water does not seem as though it would affect the dough either. I will be curious to hear how the next batch goes. Good luck! Thanks for reporting back.
Question: I know you state not to use the oven with the light for the bulk fermentation, but how about using a Brod and Taylor proofer set to 75 degrees? I am in Minnesota, and in the winter, we keep our house at 63 degrees to hold down heating costs.
Absolutely: go for it! I think 75-78ºF is perfect. The oven light will get the oven to about 100ºF or even hotter, which can be too hot.
I did not see your reply before I used your recipe, and I went ahead and did use the proofer. Turned out fantastic! As mentioned in another post, I will be using this recipe from now on. Also as per your suggestions, I am looking forward to using some local stone ground flour. Found a place not too far from me where I can order online and pick up in person! Finally, I have used your sourdough pizza crust for the past couple years, and it has spoiled everyone in my family; simply the best! Thanks so much.
So nice to read all of this, Mark! I have seriously considered buying a Brod and Taylor proofer over the years given that my kitchen is so cold for most of the year (Upstate New York), and your comment is encouraging me to really go for it. Great to hear about having a source for local flour and, of course, about the pizza 🙂 Thanks so much for writing!
The Brod and Taylor is a good call; especially when it is minus 20 here in Minnesota! Quick story that prompted me to get the proofer. Earlier this winter, I needed to start a new batch of sour dough starter, and I was using our oven with the light on to keep it warm (roughly 80 degrees). I was on the last day of a 7 day routine to get the starter up to speed when my wife forgot I had it in the oven and preheated it for some meal she was making. Well, that killed the starter and I bought the Brod and Taylor-and no more worries about a really frigid kitchen messing with my baked goods! Take car.
Oh, I have so done that with bread keeping cozy in a draft-free spot … it’s crushing! But especially crushing with a homemade sourdough starter, which is no easy task. I’m on day 14 of a homemade starter, and only just this morning, I saw some rise — it was thrilling! With that in mind, do you have tips regarding your 7-day routine? I have been trying to get a homemade starter recipe up on this blog for years, but I have never been able to make one in under 2 weeks, which has convinced me that buying one is the way to go for ease and simplicity. If you have time to share, I’d love to hear your thoughts. Thank you!
Regarding a 7 day starter, I used a recipe from another website that would have worked had my wife not inadvertently sentenced it to death. I am unsure what your protocol is for posting another source here, so for now I will refrain from doing so. That said, I have no doubt that the starter recipe I used would easily come to life in the Brod and Taylor proofer in 7 days, but I went ahead and purchased a starter from King Arthur as I had in the past.
Oh I’d love to hear about whatever site you are using — I always give credit if I use another website or book. Thank you! Smart re purchasing a starter 🙂 🙂 🙂
The site is called The Perfect Loaf (and it is a great, informative site!), and there is a page dedicated to making a starter from scratch. https://www.theperfectloaf.com/7-easy-steps-making-incredible-sourdough-starter-scratch/#tasty-recipes-10771-jump-target
Oh I love Maurizio! I made his English muffins from his new book recently. Thanks for sharing. Incidentally, I started a new starter using pineapple juice yesterday, but I will check out Maurizio’s post as well. He has some great info in his book as well. Thanks so much for sending!
Easy to get lost in the weeds in his site-and that is not a complaint!
Absolutely! Been there 🙂 🙂 🙂
So much easier than messing around with a levain! I used a Brod and Taylor proofer (set at 72) to keep the dough in until putting in in the fridge for about 18 hours, and it turned out perfect. I also really appreciate that this recipe makes one loaf.
What a brilliant recipe! I can’t thank you enough for making my first loaf of sourdough such a success. Tonight, I did my second and third lofa, and I notice it’s perfect BUT it’s not a crispy tan/brown color. Is it due to the flour I am using or do I need to keep it in the oven longer? I did 30 minutes in covered dutch and another 21 minutes uncovered.
Great to hear, Meredith!
What type of flour are you using? It could definitely be the flour; it could also be the timing.
This recipe was amazing! So easy to follow and produced such a beautiful crumb. Do you have an suggestions on how to keep the bottom from browsing too much? I’ve tried the sheet pan on a lower rack and just can’t seem to fix this issue.
Great to hear! Here are a few thoughts you can find in this post moving forward: Why is my sourdough so sticky? 4 Common Sourdough Mistakes + Answers to FAQ’s
If you are using a preheated Dutch oven, consider lowering the temperature.
Before you make changes to the temperature, however, next time you bake, check the dough after 30 minutes. If the dough is browning too much on the bottom, you know that it’s happening during these first 30 minutes, in which case, you should lower the temperature from the start. Decrease it by 25ºF.
If the dough is not browning, then you know the burning is happening during the last 15-20 minutes of baking, in which case you could remove the loaf from the pot after 30 minutes and bake it on a sheet pan.
Another option: place your Dutch oven on two sheet pans. I do this with challah to prevent the bottom from burning. The extra layer of sheet pans will prevent the bottom of your sourdough from burning, too.
Another option: place your Dutch oven on a broiling pan.
Finally: Use rice flour for dusting — it makes all the difference. It does not burn the way wheat flour does. It also doesn’t coat the loaves with an unpleasant raw flour taste. One bag will last you a long time.
I have been baking bread for decades and have developed lots of “secrets” over the years. But sourdough has been my nemesis. I have tried so many different methods and have achieved a decent sourdough loaf. But a consistent, nicely shaped, tangy loaf with those great sourdough holes has evaded me. Until now! My daughter gave me a loaf of this sourdough bread Ali, and it was one of the best I have ever had! The first time I made it, it turned out great. But I was wondering is it a “one-off” experience? Second, third, fourth, fifth, and subsequent loaves fantastic too! Bread baking is art/science combo with variables so that even the most “perfected” recipe can keep you guessing until you actually cut the loaf. This recipe yields a consistent and repeatable outcome, environmental variables notwithstanding. The flavor is phenomenal. Beautiful varied crumb with a spectacular chewy crust!
After experimenting a bit my personal preference is to forego the dutch oven and bake directly on my oven bricks with steam including several additional blasts of steam the first five minutes or so. And when I’m in the mood for a super tangly loaf I’ll go with a super active starter and adjust to 150g starter and back the water off to 275g.
BUT – your recipe stands on it own and is wonderful just as is! Thank you for sharing this fantastic recipe with us.
Ezekiel, it’s so wonderful to read all of this. Thank you so much for writing and sharing your notes regarding the bricks, steam, and more starter. I’m dying to try making a loaf in my outdoor pizza oven (a gozney dome), which has a way to add steam… haven’t figured that out yet, but I imagine it’s simple. Thanks for the inspiration!
Super Newbie here, as in only one sourdough under my belt. Can I use this recipe with just unbleached all purpose? Or all purpose/rye mix? I like the ease I feel following this recipe and would love to try it! Lol.
Yes! I definitely recommend if you are a newbie using all bread flour or all all-purpose flour or the suggested 350 g ap/bread flour and 50 g rye or other whole wheat/stone-milled flour.
Hello from Canada. I’m a newbie to baking and want to learn how to bake sourdough bread. How cold should the fridge be for the bulk fermentation and proofing?
Hi! I’d say 37-40ºF is about right.
I just over proofed my dough. I let it rise in the greenhouse and it had tripled in size. I would have been better off indoors with it. I wonder if my bread rises quickly and I am using 100 g of starter, is it better to decrease the amount of starter or decrease the amoiunt of time I wait for it to rise? By the way, I love your recipes!
Thank you,
Linda
Hi Linda! I think using 50 grams of flour might be a good idea to slow down the rise. Good things happen in the dough with a longer, slower rise.
But, you could also experiment: do one batch with 50 grams starter; do another with a shorter rise. If you still do the long, cold proof, you’ll probably get very similar results.
Thank you for your kind words 🙂
Ali’s recipe and her process instructions creates fantastic sourdough bread loaf’s! I have been baking sourdough for 10 years and have tried various recipes and methods. By far Ali’s recipe is lightest texture with a strong crust. I used Cairnspring whole wheat flour and King Arther organic all purpose flour mixed as recommended.
Great to hear, Susan! And yay for using Cairnspring flour! Love their flours so much.
Really lovely thanks for the great instructions
Great to hear Elizabeth 🙂
I started to post a comment here but hit the wrong button…and it is lost! I came back to be sure I left a 100-star rating, but it only goes 5-star! Thanks for all your great recipes, especially your bread!💜
Thank you, Priscilla 🙂 🙂 🙂 So nice to read all of this.
I started with you recipe and have been experimenting – I’m looking to get to about 2/3 whole wheat to 1/3 bread flour. Today I did a 50/50 – 100 grams spelt, 100 grams einkorn, and 200 grams KA bread – I also use the Emile Henry bread pan (the clay one) – wow! Beautiful and delicious.
So nice to read this Victoria! Thanks for writing and sharing your notes 🙂
I have used this recipe for a couple of years now, and it is THE BEST. I can’t even count how many friends have eaten my bread and asked for me to forward this recipe. So many!
I loved all the pictures and videos which allowed me to really understand how to do each step. Now, I don’t even have to think about it, and it takes so little effort to make an amazing loaf of sourdough. I would love to learn how to make sourdough dinner rolls, but I don’t see any recipes that make sense to me. Ali, I’d love to get your take on a sourdough dinner roll recipe! (I would imagine it’s the same recipe, but with different gear for baking…?)
Thank you so much for all of this, Ali 🙂 🙂 🙂 It’s so nice to read.
I DO need to get a sourdough dinner roll recipe up here. I will get on it. And yes: I think I would basically do the same, but shape the rolls after the bulk fermentation and nestle them in a 9×13-inch pan or two 8-inch pans or something of the like… stay tuned!
Can I proof it in a 9″ banneton or is that too big?
It might be slightly too big, which could contribute to a flatter loaf, but the texture and flavor will be the same.
I tried this recipe with 50 grams of freshly ground wheat. Should I count on the 50 grams of whole wheat making it not rise as much as an all white loaf? It rose some, but not as much as all white. And should I count on a longer bake time? It ended up with the tunneling. I read that tunneling is a sign of underproofing. I did the 2nd rise or proof in the refrigerator for 24 hours. Is it still possible for sourdough to be underproofed even after 24 hours in the fridge? Thank you!
Hi! 50 grams will affect the rise somewhat, but you should still be able to get a nice, lofty loaf. Regarding the tunneling, how long was the bulk fermentation? and how much did the dough increase in volume? Did the shaping step go OK? Did your dough feel strong?
I’m not sure how many hours for the Bulk fermentation bc it’s very cold here. So it was most of the day. I would say it doubled. The shaping went good and the dough felt strong to me. I followed the times on the baking and added 5 or 10 minutes, but wondered if I still underbaked it. It temped correctly at 205-210. I made 2 loaves. The loaf in the loaf pan didn’t have the tunneling, but the one I baked in the Dutch oven did have the tunneling.
That’s interesting! It does make me think the dough was slightly underproofed, but 24 hours in the fridge is definitely sufficient. I’m sort of stumped here. If your dough doubled during the bulk fermentation, and you gave it sufficient time to cold proof… I dunno! My only thought would be to give it some time at room temperature before baking it next time around — let it rise for an hour or two before baking.
hi! I’m new to sourdough so learning as much as I can… I have a few questions as what you do seems to be different to the “normal”? Please note I’m just trying to understand, not question!
1. incorporate salt immediately – doesn’t that slow down fermentation?
2. you seem to only do 3 stretch and folds, without any kneading or slap & fold at the beginning. Interested in how this results in strong enough dough?
3. you also don’t incorporate an autolyse phase?
many thanks! David
Hi David! Your great questions are answered below.
1. Incorporate salt immediately – doesn’t that slow down fermentation?
I don’t find it does.
2. you seem to only do 3 stretch and folds, without any kneading or slap & fold at the beginning. Interested in how this results in strong enough dough?
I find the stretches and folds strengthen the dough beautifully. I do 4 sets of stretches and folds. (I’ll double check the recipe, but that is my intention.)
3. You also don’t incorporate an autolyse phase?
No autolyse! I just don’t find it to be necessary especially when using mostly bread or ap flour, which are strong flours. I think an autolyse is especially helpful when using a higher percentage of freshly milled or whole wheat flour, where there is a lot more bran present, which cuts through the gluten-structure. The autolyse step can provide strength to these sorts of doughs.
Here, however, when I am using 25% freshly milled flour at the most, it’s just not necessary. I’ve never loved the process of an autolylse — I find it really hard to incorporate salt and more water/flour to the autolysed dough, and so I avoid the step if possible.
I’d suggest making this recipe once and evaluate how you like it. Then make it with an autolyse and see if you notice any difference.
I waited over 18 hours for the bulk fermentation and my bread did not rise at all. there was a bubble but I think with it sitting out, it formed a bit of a crust on top so I am wondering if that contributed to it not rising? The starter was peaked and was floating on the top of the water when I started so I don’t think that was the issue… It’s in the oven now and I’m hoping for the best! haha
Update:
It’s a bit dense and gummy compared to soft and fluffy. Not sure where I went wrong, i did notice my dough was slightly less hydrated than the one in the video looked but hopefully I’ll have better luck next time!
OK, thanks for the update.
Are you using a scale to measure? What type of flour are you using? Are you new to sourdough? Or an experienced sourdough baker?
I am very new to sourdough haha. I did use a scale and measured everything perfectly. I did use all-purpose flour so maybe that had something to do with it too.
OK, great to hear! It sounds as though you are doing everything right and that your starter is healthy, which is great. I might suggest investing in a bag of KAF bread flour as soon as your run out of your ap flour. This troubleshooting post might help you too: Why is my sourdough so sticky? 4 Common Sourdough Mistakes + Answers to FAQ’s
Hello, I have made this recipe many times before using purchased stone mill wheat flour and have always had success. But I recently received a home mill as a gift and plan on milling my own flour to use in addition to commercial bread flour in this recipe. Any advice or forewarning? I have seen your recommendations about possibly holding back some water? Thanks in advance! I can’t wait to try this recipe using my own flour blend!
Exciting! Yes, I would consider maybe using 20% home-milled and hold back some of the water at the start — you can always add it back in upon mixing if the dough looks too dry/stiff. Good luck!