 →
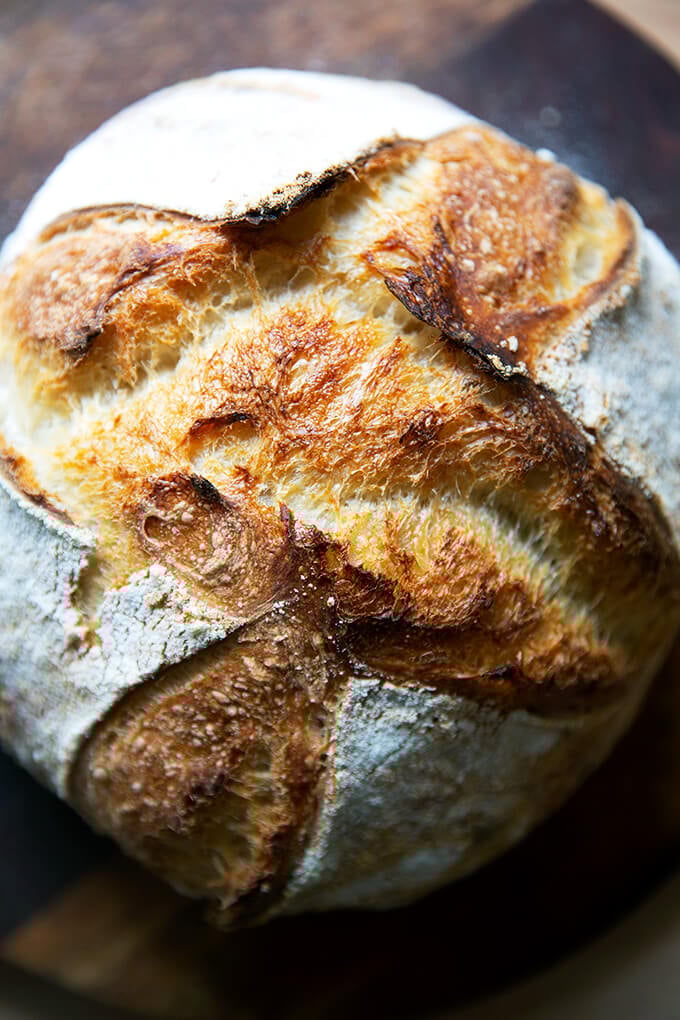
→ Easy Sourdough Bread (Whole Wheat-ish)
This post may contain affiliate links. Please read my disclosure policy.
Made with a small portion of stone-milled whole wheat flour, this sourdough bread is so flavorful, aromatic, and tasty. Using a mix of both bread flour and whole wheat flour keeps the texture light while providing a nutritional boost and lovely flavor. 🍞🍞🍞🍞
If you are looking to add more nutrition to your bread, a logical first step is to replace some of the white flour with whole wheat flour. The trouble with this idea is that not all whole-wheat flours are created equal.
Let’s get straight to it. Most commercial flour (both white and whole wheat) is made from roller-milled wheat, meaning a roller mill has separated the wheat kernel into three parts: the endosperm, germ, and bran. White flour is made from the endosperm. Whole wheat flour is made from a combination of the endosperm, germ, and bran. Much research shows that as soon as the wheat kernel is separated into the various parts, much of the nutritional value is lost — even when the bran and germ are added in after the fact.
So what’s the solution? Seek out stone-milled flour, which is flour made from wheat that passes through a stone mill, the process of which keeps the endosperm, bran, and germ together. Much research shows that keeping the components together preserves the nutritional value.
What’s more, the bran and germ present in stone-milled flours lend so much by way of flavor, texture, aroma and hue:
The recipe below calls for a mix of both bread flour and stone-milled flour. Using a small amount of stone-milled flour gives your bread a boost of nutrition while preserving its light texture. Once you’ve made the recipe once, if you like what the whole wheat flour is contributing to your loaf, you can increase the proportion of stone-milled flour next time around.
How to Make Whole Wheat-ish Sourdough Bread, Step by Step
First, gather your ingredients: you need an active/fed sourdough starter:
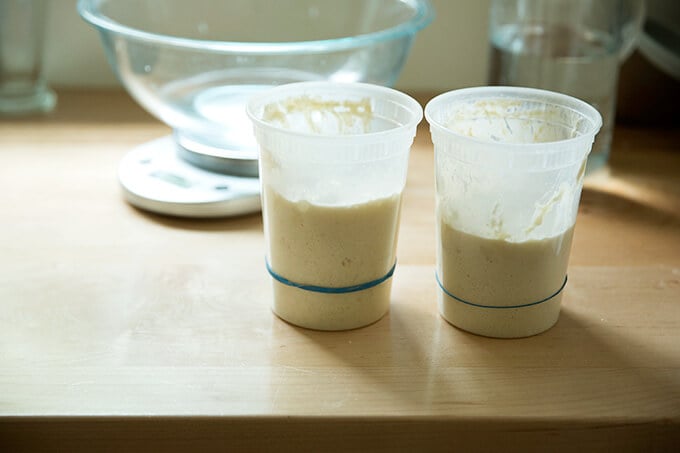
To ensure it is ready, drop a spoonful into a glass of water. If it floats, it’s ready:

Place 300 g of water, 100 g of starter, and 10 g of salt into a bowl.

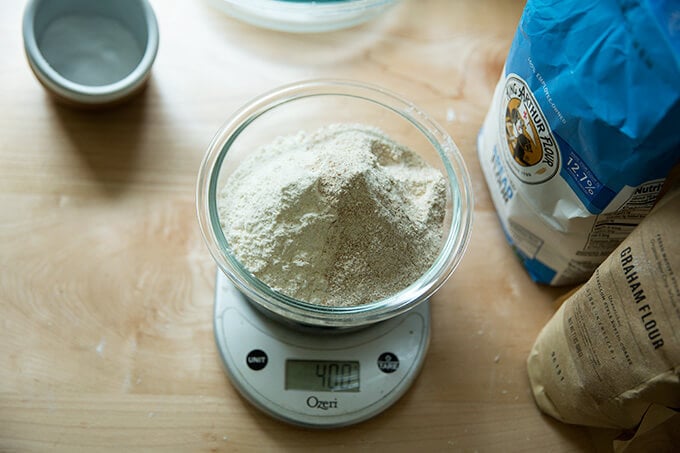
Next, weigh your flour: you need 400 grams of flour. For this whole-wheat-ish loaf, my preference is 350 grams of bread flour (King Arthur Flour) and 50 grams of stone-milled, freshly milled flour (I use a mix of Anson Mills rye and graham).

Mix until a sticky dough forms.
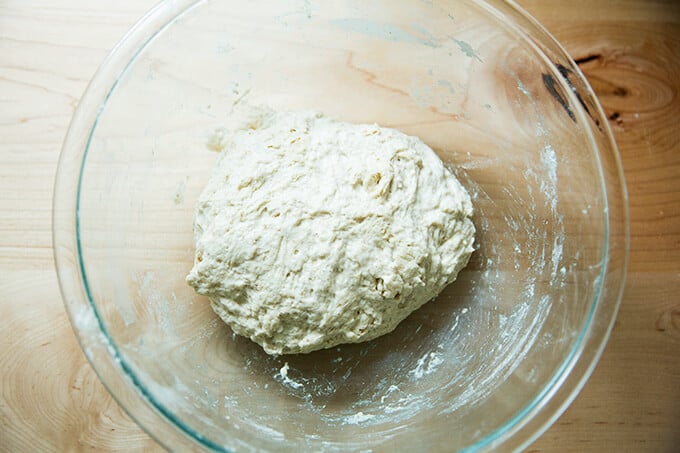
Then transfer to a straight-sided vessel for the bulk fermentation (the first rise).

After 30 minutes, stretch and fold the dough:
You’ll repeat this stretching and folding 3x at 30-minute intervals…
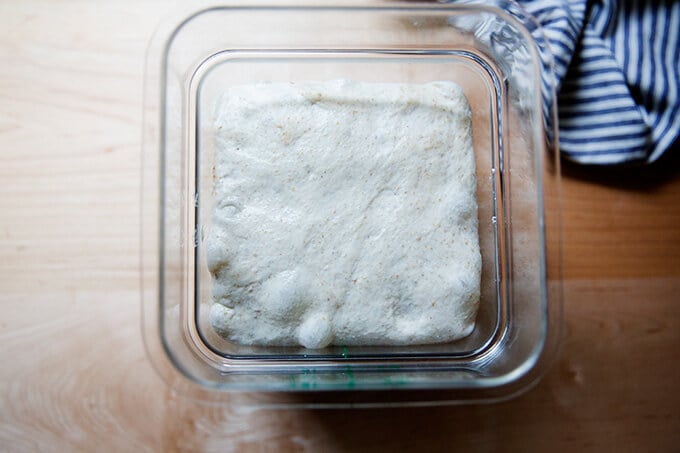
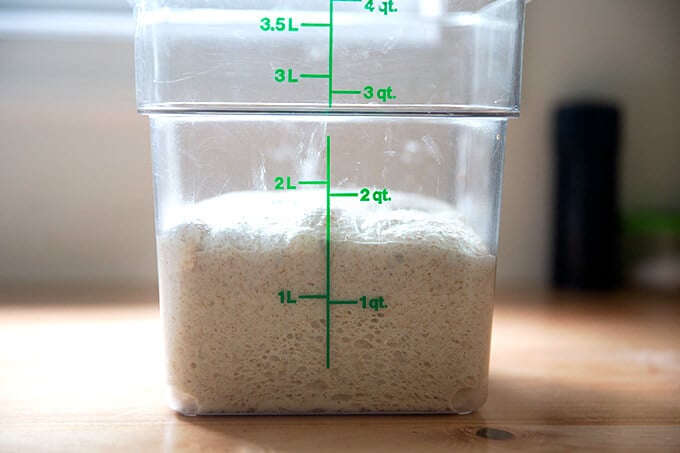
… then you’ll leave the dough to rise until it increases in volume by 50-75%:
Transfer dough to a clean work surface. I prefer to use no flour and minimal handling to shape it into a ball.
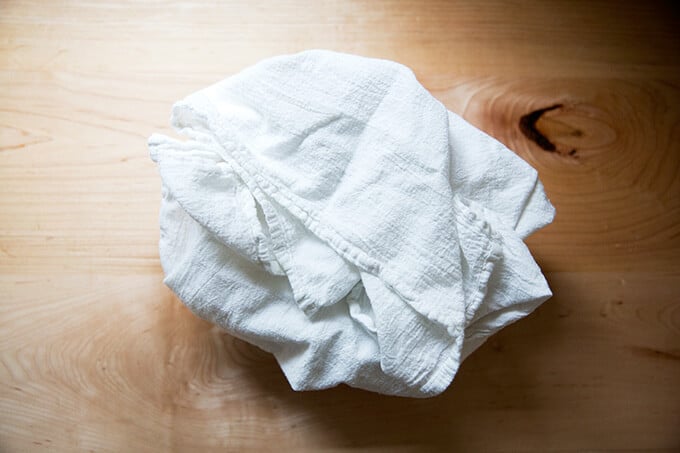
After the initial shape, let the dough rest for 20-40 minutes; then shape again and transfer to a flour sack-lined bowl.
Transfer bowl to fridge to proof (second rise) for 18 to 24 hours

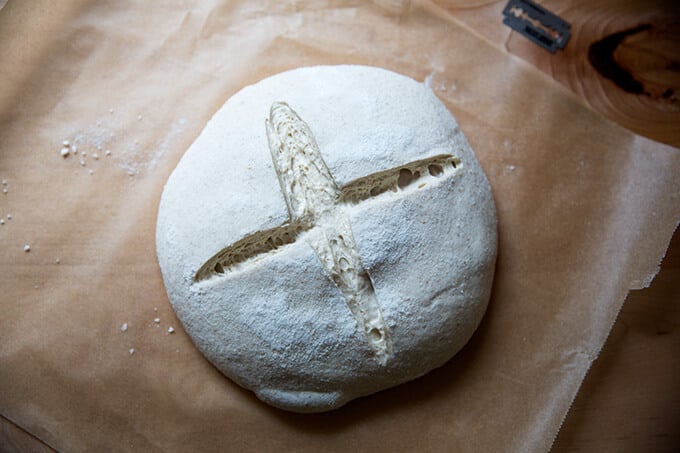
After 18 to 24 hours, transfer dough to a sheet of parchment paper. This video shows how:
Score as you wish; simple is fine.
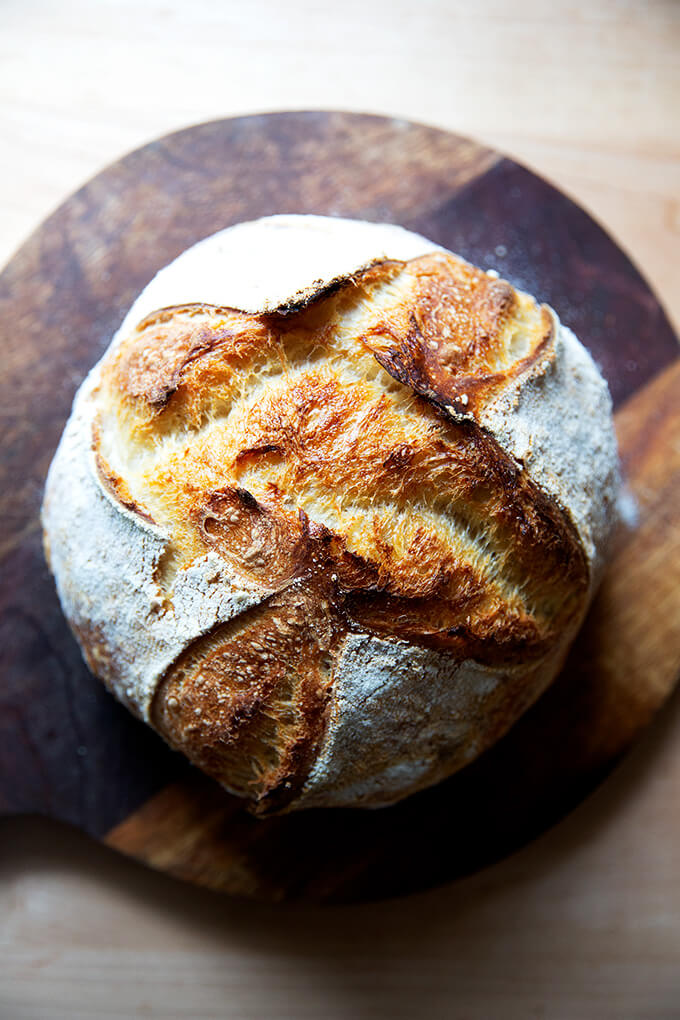
Transfer to a Dutch oven and bake, covered, at 450ºF for 30 minutes, then uncover and bake at 400ºF for 10 minutes.

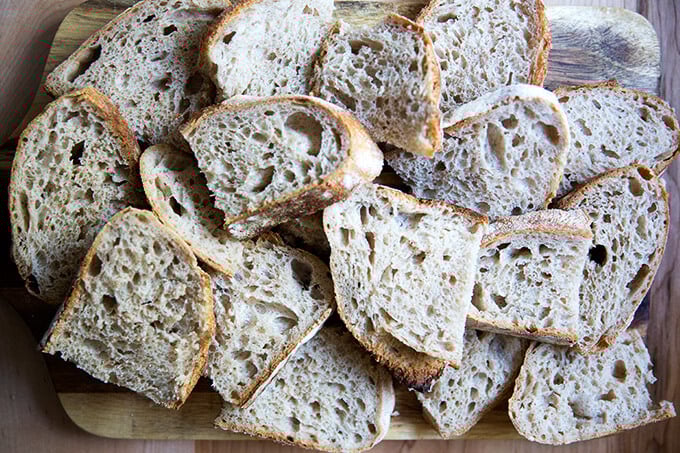
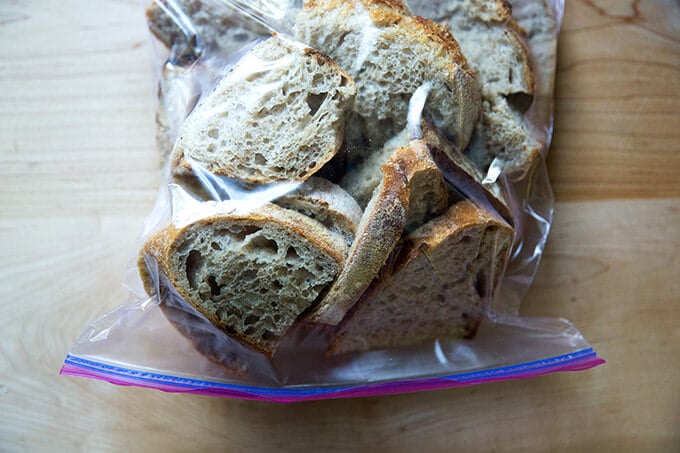
Store the bread at room temperature in a ziptop bag for 3 to 4 days or in the freezer for up to 3 months:
Easy Sourdough Bread (Whole Wheat-ish)
- Total Time: 48 hours 45 minutes
- Yield: 1 loaf 1x
Description
Made with a small portion of stone-milled whole wheat flour, this sourdough bread is so flavorful, aromatic, and tasty. Using a mix of both bread flour and whole wheat flour keeps the texture light while providing a nutritional boost and more flavor.
Notes:
Special equipment: Straight-sided vessel for the bulk fermentation, Dutch oven, flour-sack towel
Digital Scale: Do not attempt this recipe without a scale. This one costs $10. Troubleshooting what goes wrong with sourdough bread is impossible if you’ve measured with cups. They’re simply not accurate.
Troubleshooting: If you have issues with your dough being too sticky, please read this post: Why is my sourdough so sticky? The 4 common mistakes.
Flour:
-
- I prefer making this bread with 350g bread flour and 50g of freshly milled, stone-milled flour, which provides both flavor and color. I love using a mix of Anson Mills graham flour and rye flour, but there are many great stone-milled flours out there, and you may have a local source, which is even better.
- Where to buy stone-milled flour? In the past few years, it has become easier to find stone-milled flour, and if you are up for it, you should seek out locally, stone-milled flour. Why? Because if you’re buying locally milled flour, you likely can find out how recently it was milled. Because stone-milled flour perishes more quickly than roller-milled flour, it’s best if you can find a local source, which will ensure it will be fresh. Note: Store stone-milled flour in the freezer if you don’t bake regularly.
- I find locally milled stone-milled flours at a local co-op, Honest Weight Food Co-op, and I also order online from various sources. Here are a few I love: Cairnspring Mills, Anson Mills, and Community Grains
- 50g may seem like a tiny amount of stone-milled flour for this recipe, but I am constantly amazed by how much flavor this small amount of freshly milled flour adds.
Ingredients
*Please read notes above before proceeding. Watching the video is helpful, too.*
- 300 g water
- 100 g active sourdough starter
- 10 g kosher salt or sea salt
- 350 g bread flour, see notes above
- 50 g whole wheat flour, preferably stone-milled, see notes above
- rice flour, for dusting
Instructions
- Mix the dough. In a large bowl, combine the water, starter, and salt. Stir with a rubber spatula to loosely combine. Add the flours, and stir with a spatula to combine — it will be a wet, sticky dough ball. Transfer to a straight-sided vessel and cover with a tea towel or bowl cover for 30 minutes.
- Stretch and fold. After 30 minutes, grab a corner of the dough and pull it up and into the center. Repeat until you’ve performed this series of folds 4 to 5 times with the dough. Let the dough rest for another 30 minutes and repeat the stretching and folding action. If you have the time, do this twice more for a total of 4 times in 2 hours. [Video guidance here.] Note: Even if you can only perform one series of stretches and folds, your dough will benefit. So don’t worry if you have to run off shortly after you mix the dough.
- Bulk fermentation: Cover the vessel with a tea towel or bowl cover and let rise at room temperature (70ºF/21ºC) for 4 to 18 hours (times will vary based on the time of year, the humidity, and the temperature of your kitchen). The bulk fermentation will end when the dough has nearly doubled in volume, and you can see bubbles throughout the dough and on the surface. (Note: Do not use your oven with the light on for the bulk fermentation — it is too warm for the dough. To determine when the bulk fermentation is done, it is best to rely on visual cues (doubling in volume) as opposed to time. A straight-sided vessel makes monitoring the bulk fermentation especially easy because it allows you to see when your dough has truly doubled.)
- Shape: Gently transfer the dough to a clean work surface. I prefer to use no flour and a bench scraper at this step, but if you find an unfloured work surface to be difficult, feel free to lightly flour it. [Video guidance is especially helpful for this step.] Fold the dough, envelope style: top third over to the center; bottom third up and over to the center. Then repeat from right to left. Turn the dough over and use your bench scraper to push the dough up, then back towards you to create a tight ball. Repeat this pushing and pulling till you feel you have some tension in your ball. Place the dough ball top side down and let rest 30 to 40 minutes. (FYI: This is called the bench rest.)
- Proof. Line a shallow 2-qt bowl (or something similar) with a tea towel or flour sack towel. Flour sack towels are amazing because the dough doesn’t stick to them, and therefore, you need very little rice flour, but if you only have a tea towel, you will be fine. If you are using a tea towel, sprinkle it generously with rice flour. If you are using a flour sack towel, you can use a lighter hand with the rice flour. After the 30-to 40-minute bench rest, repeat the envelope-style folding and the bench scraper pushing and pulling till you have a tight ball. [Video guidance here.] Place the ball top side down in your prepared towel-lined bowl. Cover bowl with overhanging towel. Transfer bowl to the fridge for 12 to 24 hours. (Note: When you remove your dough from the fridge, visually it will likely look unchanged. This is OK. You do not need to let it then proof at room temperature before baking.)
- Bake. Heat oven to 500ºF. Remove your sourdough from the fridge. Open the towel. Place a sheet of parchment over the bowl. Place a plate over the parchment. With a hand firmly on the plate and one on the bowl, turn the dough out onto the parchment-paper-lined plate. [Video guidance here.] Carefully remove the bowl and towel. Carefully remove the plate. Brush off any excess rice flour. Use a razor blade to score the dough as you wish. I always do a simple X. Grab the ends of the parchment paper and transfer to the Dutch oven. [Video guidance here.] Cover it. Lower oven temperature to 450ºF, bake covered for 30 minutes. Uncover. Lower the temperature to 400ºF. Bake for 10 minutes more or until the loaf has darkened to your liking. Transfer the loaf to a cooling rack.
- Cool. Let the loaf cool for at least 30 minutes before cutting.
- Prep Time: 48 hours
- Cook Time: 45 minutes
- Category: Bread
- Method: Sourdough
- Cuisine: Global
This post may contain affiliate links. Please read my disclosure policy.


1,106 Comments on “Easy Sourdough Bread (Whole Wheat-ish)”
Hi Alexandra 🙂
I really wanted to take the time to write you a comment but you truly deserve it! I really loved your explanation in dept on what works and why it works, why it doesn’t, how you explain your preferences.
I’m in Canada, more precisely in Montreal and the weather has been the most hectic the past weeks, which made my loaves inconsistant. I then stumbled on this recipe and it just changed everything. The first time I made the recipe, I started off with 250g of water, as per your recommandation because it was a very humid day, but ended up adding 10 more g because it was really tough and it ended up being a 65% hydration. Then, I did the folds and went in for bulk ferment, and exclusively relied on visual cue to know when it would be ready to shape. All that said, it went perfectly well until I went to transfer it onto my work surface. I didn’t take in account that my room temp was way too hot and my dough ended up being too wet and became a litteral unworkable pancake haha. That being said, I still managed to put the blob into a batard shape and cold proof it for 14 hrs. I baked the loaf and… it was a flop… it sunk it the middle and it really was the funniest loaf I had make thus far, but by far the one where I learned and understood the most the process.
You taught me that my sourdough bread didn’t have to be a 75%+ hydration to be great bread loaf, that temperature had everything to do with the process, that visual cue just tells you everything you needed to know and that taking notes was the most important tool in the process to keep improving. That being said, I tried again, same recipe, slightly different process and controlled room temp. Here’s how it went in case anybody else wanted to know :
350g of bread flour
50g of rye flour
260g of water
100g of mature sourdough starter
8g of salt
I did some slaps and folds before going into a fold process because I felt like it gave more strenght to my dough. My house was at a 22C and 34% humidity. I knew today was going to be quite a long day of bulk ferment (including the folds) it took me a total of 6,5hrs to reach a decent rise. I then transfered the dough to my work surface, preshaped it and let it rest for 20mins. It kept a nice height while resting which gave me and indicator that it would be a great loaf. I then turned the dough, used the shoelace method to shape it in a shape that would fit my batard and cold proofed for 14 hours. I preheated my oven at 500F with the DO in, at the 13 hours mark (which I think I could play with and maybe preheat at 475F because tasted fairly bitter and burnt), took the loaf out, scorr it, put the DO back to the oven, covered, lower the temp at 450F and baked it for 20mins before removing the cover and keep the bake at the same temp for 20mins. The result was incredible! The loaf was a decent dark color, it has a great rise, a great ear, the inside was soft and chewy just like I’ve always dreamed of and for this, a thousand thank you for teaching me the basic instinct of baking sourdough!
Oh wow, great to read all of this Melissa! It’s a great feeling when you realize the visual cues tell you everything. So nice to hear you weren’t discouraged by the first go around and that your second attempt was a success.
Regarding the burning, you can definitely preheat your oven at 475ºF. I do this now bc my new DO gets so hot, and I find 475ºF is the perfect temperature for creating a nice, golden not-burnt crust 🙂
Thanks for writing!
How can I adjust this recipe to accommodate high altitude? I recently moved from Arizona to colorado and am now loving at nearly 8000 ft. I use King Arthur Flours.
In Arizona your recipe worked out perfectly every time. Thank you for your great instructions, troubleshooting, and videos!
Hi Ann! Great to hear this and apologies for the delay here.
I would give the recipe a shot once without making any adjustments — I have heard from a number of people recently who have been making a few of my sourdough recipes at high altitude and who have been having success without making any adjustments. I think because the recipes are relatively high hydration, they work well at altitude.
Once you make it once at high altitude, let me know how it turns out, and I can troubleshoot any issues you encounter.
Yay, success with the recipe as written even at 8000 ft elevation.
Thank you again for such a great, foolproof recipe!
Wow, amazing! Great to hear this, Ann! Thanks so much for writing and sharing this 🙂 🙂 🙂
Thank you for sharing your sourdough wisdom! I tried the recipe (well sort of, I doubled it so I would have enough bread for my husband and I for the week). Overall, the flavour of this recipe was the best ive made so far! Ive always been scared of a long bulk/proof worried I would over do it and the bread would start to deflate, but I had no such problems. The sourdough had a beautiful crust, chewy and not so crunchy that you tear off the roof of your mouth.
I still have some improvements to make, I struggled with such a high hydration dough and should have followed your recommendation to cut back on the water. I didn’t get a good oven spring, but I think I may not be developing enough gluten in the fold and stretch phase. I’ll try the window pane test next time and maybe just stick to a half batch 🙂
Thanks again for sharing!
Great to hear all of this Lynzey! I think reducing the water will make the dough much more manageable for you. Good luck next time around! And thanks for writing 🙂 🙂 🙂
This is a wonderful easy to follow recipe! The bread is awesome! It’s was the first SD bread I tried. I have since tried one other but this is the best and easiest for me! Thank you!
Great to hear, Denise! Thanks so much for writing 💕💕💕💕
Thank you for sharing the recipe. Its my first attempt with sourdough stater and your instructions are very useful. May I have a question. After I take the dough out of fridge and make a X cut, how long should it rest before I can put it in the oven?
Thank you!
Great to hear, Loan! After you make the X, it goes straight into the oven.
Hi Alexandra,
I’m wondering if there is a way to speed up the refrigerator proofing if one does not have quite the 18 hour proofing time. I’ve had great success with your recipe but have not tried shorter times, and have had occasionally been short on time and then needed to alter my schedules due to waiting for 18 hours..
Thank you for the wonderful recipe. My kids and I love this bread!
Toma
Hi Toma! Great to hear you and your family like the bread.
You can definitely try for a shorter proof. I would just experiment. Next time, bake it when you need to to make it fit with your schedule and note the time. If it comes out fine, then you know you can do that moving forward; if the crumb is very dense on the other hand, next time around you’ll know you need to extend the proof.
Alternatively, you could always sneak in a little instant yeast if you are really pressed for time. 1/4 teaspoon or so would speed up the timeline.
I’ve been making sourdough and other breads for a few years with a mix of success and failure. This is an EXCELLENT recipe. My loaf (made with 350g of white bread flour and 50g of rye) turned out light and lovely. I will be using this technique from now on. Thank you!!!
Wonderful to hear this, Jessica! Thanks so much for writing 🙂 🙂 🙂
Thank you for your fantastic website and videos. If I wanted to use the pullman loaf pan what would be the process? Would the quanties be the same? I have the same pan as indicated on your post. Many thanks!
Thank you for your kind words, Sherry!
Yes, use the same quantities here. After the bulk fermentation, turn the dough out and shape it into a round. Let it rest for 20-40 minutes. Then shape it into more of a batard. (I have a video that demonstrates this process here.) Transfer the dough to a buttered Pullman loaf. You can either transfer the pan with the dough in it (wrap the top with plastic wrap to prevent a crust from forming) for as long as 24 hours or simply let the dough rise at room temperature until it crowns or just about crowns the rim of the pan — this may take 5-6 hours. Then bake at 400ºF for 40-45 minutes or so.
Let me know if you need clarification!
Many thx. Instructions very clear. Going to give it a try soon.
Thank you so much for your recipes! I hardly ever write reviews but I’ve made 3 of your sourdough bread recipes and they’ve all come out amazing thank you 😊
So nice to hear this, Maia! Thanks so much for writing. Means a lot 🙂
Hi Ali, sourdough beginner here with 10 loaves baked so far, and I’m about to start on your recipe tomorrow (from strict covid lockdown here in Sydney, Australia).
When you talk about the first fermentation “doubling in size” and then you mention it increasing by 50% in volume. I am taking it that doubling in size actually means growing in volume by 100%?
Here’s my math, 50% growth would mean that a clump of dough in your straight-sided canister (great idea!) that grows from 5cm tall initially to 7.5cm tall has grown by 50%, while a 5cm dough that has grown to 10cm has grown by 100%.
Sorry about the metrics, but that’s how we measure stuff in Australia these days.
So is that right, am I aiming for 100% actual growth?
(And by the way, my local wholefoods supplier has some lovely stone-milled wholegrain flour grown from heritage wheat varieties which had gone out of circulation for many years, but which artisan bakeries in South Australia have revived by growing and stone-milling their own flours).
Hi Jamie!
Sorry for the confusion with my instructions and sorry for your lockdown situation … hope you are faring OK!
So, when I say doubling in volume I do in fact mean a 100% increase in volume. I often let my dough double in volume, but through troubleshooting with people over the years, I’ve found that sometimes letting the dough double in volume causes over fermentation. I think what happens is that people think the dough is doubling when in fact it’s more than doubling because they’re using a bowl, which makes it hard to truly tell when the dough has doubled or not.
So, I’ve changed my instructions in nearly all of my sourdough posts to suggest letting the dough increase in volume by 50% or 75%, which has helped a lot of people prevent over fermentation and therefore led to more successful loaves.
Great to hear you have a source for stone-milled flour! So nice.
Please let me know if you have any more questions and good luck with everything!
I made this today and it came out very tasty (great toast!), but my exterior/crust looked nothing like yours. It was not smooth and crisp like yours; it was more a soft matte-looking finish. Ideas why? I used 100g white flour and 300g wheat. I don’t think I scored it deep enough, I’ll add. Thanks for any thoughts! I’m a sourdough n00b. Your videos are amazing! I finally shaped a great boule thanks to them. 🙂
So nice to hear this, Maja! I think the ratio of wheat flour to white flour is doing it. Are you open to making a loaf with 300 g white flour and 100 g wheat flour?
It worked perfectly, thank you for your response/advice! Beautiful and more flavorful than ever. 🙂
So nice to hear this, Maja 🙂 🙂 🙂
Alexandra, my first Sourdough loaf today! thanks to you and it came out amazing…posted it on instagram and and mentioned #alexandracooks…so i hope you see it….thanks so much…your instructions are the best!
Wonderful to hear this, Kalani! I’ll try to find your picture on IG … thanks so much!
I’ve been baking sourdough bread with almost the same ingredient ratio as you (100 g. starter, 350 g. water, 500 g. flour, 11 g. salt) for a year and a half now and, although my bread is yummy, I’ve had really inconsistent results with the height of the final loaf. I tried your method (only rising 50% and refrigerating for 24 hours, then baking in an inverted dutch oven) and I’m amazed at how much taller my loaf came out! Thanks for the tips. This is just what I needed!
Oh yay! Wonderful to hear this, Carolyn! Thanks so much for writing and sharing 🙂
HI Ali after the cold proving flip out on plat, the dough looks a little flat, can I reshape it to tighten it up?
Hi Nico! I wouldn’t at this step … you risk deflating all of those lovely air bubbles that have accumulated during the cold proof. I would just bake it. Next time, work on getting a tighter round. You may need to reduce the water next time.
Love love love this recipe. I’ve been making a double batch 3 days a week for a year. My schedule is changing a bit and I find I have more time to do the proofing in baskets. If I do t want to put them in the fridge overnight. How much time do you think they need to proof?
So nice to hear this, Summer! Thanks so much for writing. You’ll have to rely on visual cues more than timing. The boule won’t necessarily double, but it will puff and feel soft and airy… I would imagine at least 4-6 hours at room temperature … it might take some trial and error to get right. Good luck!
Hi!! I love this recipe and have used it several times!!! It works super well when i do a single batch but for some reason I have yet to be successful when doubling it. Could you please suggest anything?
I double all the ratios, and I have tried using different quantities of starter (from150-200gr) to see if that would be better. The dough ends up very weak and doesn’t rise in the end 🙁
I dont have any problems when i do it as a single batch though. It always comes out perfect and I just wish I could double it.
Hi! A few suggestions: really make sure your starter is active and at its peak before using: feed it at night before bed; feed it again in the morning; then use it once it doubles/triples in volume. Second: try using 100 grams of starter and see if that helps.
What type of starter are you using? Is it made with bread flour exclusively or rye or a mix?
Hello! I have a question about using the fridge as your friend. Late last night I was only able to do two 30 minute Stretch & Folds. I covered the dough and put it in the fridge overnight. My question is what to do this morning with the cold dough? Do I immediately start two more Stretch & Folds, or do I wait X number of hours for the dough to come to room temperature and THEN resume with two more stretch and folds, and then bulk fermentation?
Thank you so much for this recipe!
Great question! I would remove the dough from the fridge, and skip the remaining stretches and folds … just let the dough rise until it completes its bulk fermentation (i.e. it increases in volume by 75% or so). Then proceed.
Hope I’m getting to you in time!
Such a great recipe, and so easy
To understand especially for a newbie sourdough maker, I can only say I’m in love!!
Great to hear, Charlotte! Thanks so much for writing!
This is the best recipe for a delicious sourdough I have found. And you have made it so easy! Thank you. I have made the loaf many times and want to try the pullman loaf style. What size was your loaf pan? Mine is the smaller of the 2 sizes, approx 9.5 x 4.5. Did ou bake at same temp? Any time change? Love, love, love your site. Your videos are so helpful, the piano music in the background is always great and you cover a good range of topics.
So nice to hear this, Char 🙂 🙂 🙂 Your pan will work. The one I used here is 9x4x4. I baked it at 400ºF for about 40 minutes. Cold proofed in the fridge overnight after the bulk fermentation; then let it rise at room temperature for 5-6 hours before baking. No other changes! Let me know if you have any other questions. Thank you for your kind words … means a lot!
More of a curiosity question….So does this recipe not require a true kneading? I see other sourdough recipes that want you to knead for like 10-15 minutes to activate the gluten until you get the windowpane. So that is not actually necessary to get a nice open crumb? Thanks, looking forward to making this today!
Exactly! No kneading necessary, just stretches and folds.
Alexandra!! I’ve made your sourdough bread twice this past week, and they have turned out wonderfully!! First time with all bread flour, second time with 12.5% wholegrain rye – both so light and airy after a 36hr coldproof. My question is – if I try to increase the rye to 25%, would that affect the amount of water I include or would it stay the same amount? Thanks so much for such a tasty and clear recipe. 🙂
So nice to hear this, Anne! Thanks so much for writing and sharing your notes.
Regarding adding more rye, the general rule is that you might want to add some more water, but I don’t like these generalizations because all rye flours are different, and if it’s a freshly milled, stone-milled rye flour it might behave different than a commercial, roller-milled rye. So, you’ll have to experiment: I would not add any more water to start, but what’s nice is that you have a baseline of how the texture of the dough should be. So, if it looks dry, add a few more tablespoons of water until the dough looks/feels right.
I hope that helps!
Love this sourdough bread recipe. I was gifted a 100 year old sourdough starter from Ron Silver, owner of Bubbies in NYC, and your recipe just brings it to life! I live in SLC and have adjusted the temperature and time up a little to account for our altitude! Great bread every time!
Wonderful to hear this Thomas! Thanks so much for writing. And wow: what a treasure to have such a storied starter to bake with. Fun!
I have made your sourdough focaccia, ciabatta rolls and sandwich loaves, all mostly successful. It does take practice. This boule is next. I have learned so much from you, beginning with your peasant bread. I would like the option of baking this sourdough bread in a loaf pan like your pullman pan. Accompanying the photo, you said you proofed it for several hours after taking it out of the fridge. But in your instructions for the boule, you noted it is scored and baked out of the fridge without any rise time. Can you clarify?
Great to hear Wendy! Thank you so much 🙂
That is confusing. So with the pullman loaf, I transferred the dough to the pan and let it rise at room temperature until the dough nearly crowned the rim of the pan; then I baked it. This might take 3 to 4 hours… or longer. Rely on the visual cues more than the timing. Hope that helps!
Hi – trying this recipe with an autolyze first and wondering why your don’t employ that technique. Do you find it unnecessary or not worth the extra time?
Always trying to make my sourdough recipes easier!
And I’m with you on the salt – I also like to use unsalted butter on my bread and sprinkle salt on that!
Hi Annie! Yes, I don’t find an autolyse to be worth the effort — I really dislike the process in fact… I find it challenging to add the salt and more water after the initial mixing, and again, I just don’t find the effort makes a real difference in the sourdough bread recipes I share here.
Just an amazingly simple wonderful recipe. I watch the videos multiple times before starting, but followed the directions exactly (also decided to buy that straight plastic vessel – it’s great!). Will for sure make this recipe again.
Woohoo! This is my favorite sourdough boule recipe. Thanks for writing again 🙂 🙂 🙂
The bread came out beautiful, I only increased the amount of flour to 450g.
Great to hear this! Thanks so much for writing 🙂 🙂 🙂
Hi Ali!
I would love to try making this because most breads contain too much sodium for me – and many don’t actually seem to sit that well with me. I’m hoping maybe sourdough will be easier to digest, but wanted to ask what you think in terms of salt? Think I could go with maybe 4 g or what would you recommend? Thank you always! ❤️
You can definitely reduce the salt, but the dough does need some salt. 4 grams should be fine. Go for it!
Hi, Can I just double this recipe? to make 2 loaves
thanks
Lorrain
Yes!
Straight forward recipe. Simple enough for a beginner. Tasty bread.
Great to hear! Thanks for writing 🙂
Hola Ali – thanks for a great tutorial and instructive video. I live on the coast in Ecuador so high humidity and 70-80F is pretty much a constant. I changed 1 thing (reduced H2O to ~67%, ie. 275g) and then screwed another thing up. I went to my local for a beer (maybe 2) during bulk fermentation and when I got home the dough had more than doubled. I proceded but it was pretty floppy to work with and after a refrigerator proof overnight it still didn’t shape up nice.
The end result was OK but I’d like a bit more oven rise ( actually I have to bake in my charcoal Akorn Grill because the kitchen ovens available in Ecuador are crap).
Do you think reducing the hydration to ~62% (250g H2O) would help or should I just not go to the bar and pay more attention to my bulk fermentation step??
Thanks
🤣🤣🤣🤣🤣
I love this comment so much. It does sound as though the dough over fermented during the bulk fermentation (while at the bar 🍺). The floppiness of the dough and the lack of rise are both signs of over fermentation.
Next time, before you leave for the bar, you can stick your dough in the fridge. It sounds as though dough rises very quickly where you are, so monitoring the bulk fermentation will be key. You may find your dough rises in the fridge as well.
Reducing the hydration is fine. I would try again using the same hydration you used. Good luck!