 →
→ Easy Sourdough Bread (Whole Wheat-ish)
This post may contain affiliate links. Please read my disclosure policy.
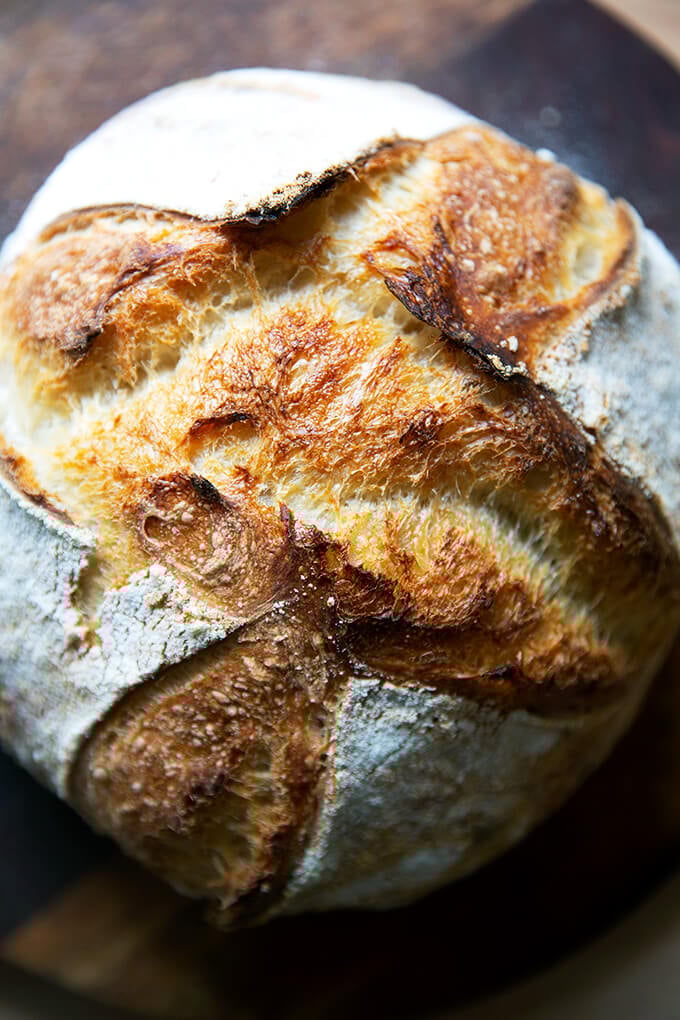
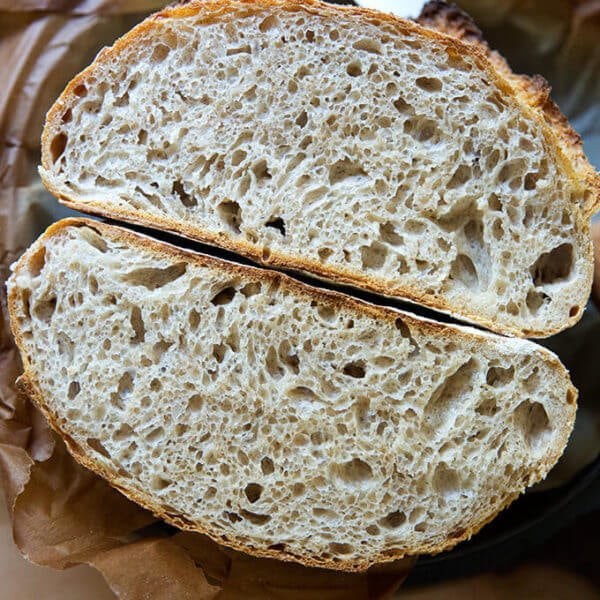
Made with a small portion of stone-milled whole wheat flour, this sourdough bread is so flavorful, aromatic, and tasty. Using a mix of both bread flour and whole wheat flour keeps the texture light while providing a nutritional boost and lovely flavor. 🍞🍞🍞🍞
If you are looking to add more nutrition to your bread, a logical first step is to replace some of the white flour with whole wheat flour. The trouble with this idea is that not all whole-wheat flours are created equal.
Let’s get straight to it. Most commercial flour (both white and whole wheat) is made from roller-milled wheat, meaning a roller mill has separated the wheat kernel into three parts: the endosperm, germ, and bran. White flour is made from the endosperm. Whole wheat flour is made from a combination of the endosperm, germ, and bran. Much research shows that as soon as the wheat kernel is separated into the various parts, much of the nutritional value is lost — even when the bran and germ are added in after the fact.
So what’s the solution? Seek out stone-milled flour, which is flour made from wheat that passes through a stone mill, the process of which keeps the endosperm, bran, and germ together. Much research shows that keeping the components together preserves the nutritional value.
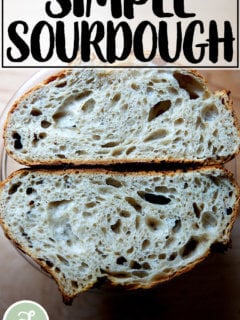
What’s more, the bran and germ present in stone-milled flours lend so much by way of flavor, texture, aroma and hue:
The recipe below calls for a mix of both bread flour and stone-milled flour. Using a small amount of stone-milled flour gives your bread a boost of nutrition while preserving its light texture. Once you’ve made the recipe once, if you like what the whole wheat flour is contributing to your loaf, you can increase the proportion of stone-milled flour next time around.
How to Make Whole Wheat-ish Sourdough Bread, Step by Step
First, gather your ingredients: you need an active/fed sourdough starter:
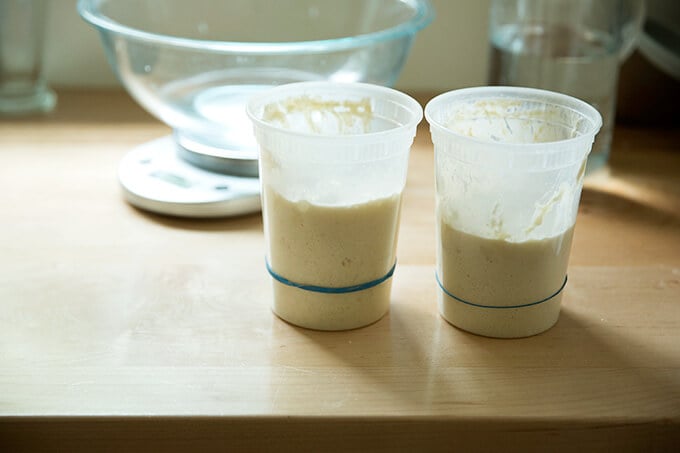
To ensure it is ready, drop a spoonful into a glass of water. If it floats, it’s ready:

Place 300 g of water, 100 g of starter, and 10 g of salt into a bowl.

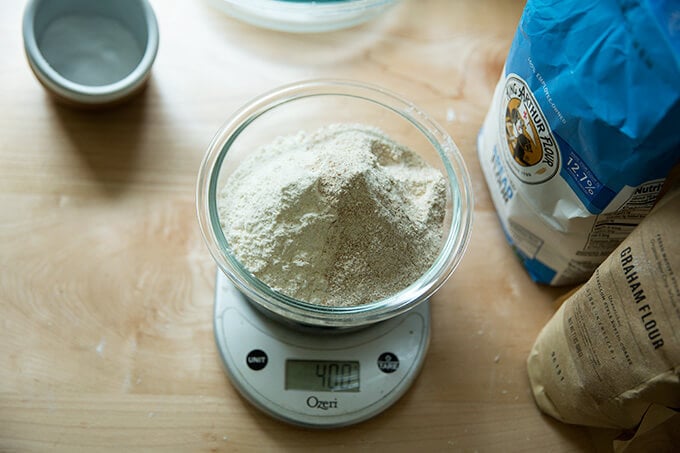
Next, weigh your flour: you need 400 grams of flour. For this whole-wheat-ish loaf, my preference is 350 grams of bread flour (King Arthur Flour) and 50 grams of stone-milled, freshly milled flour (I use a mix of Anson Mills rye and graham).

Mix until a sticky dough forms.
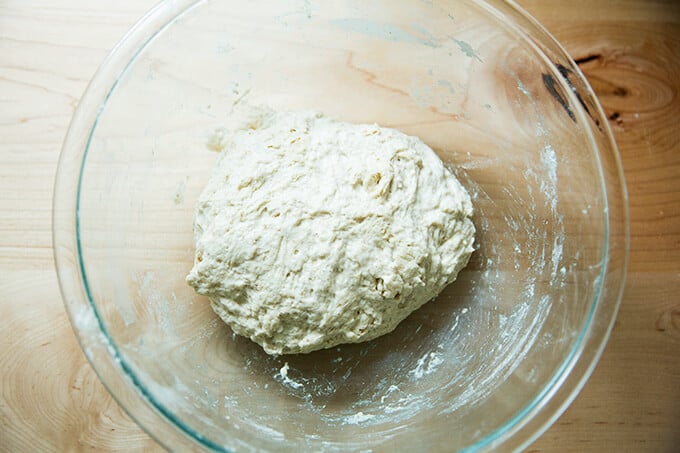
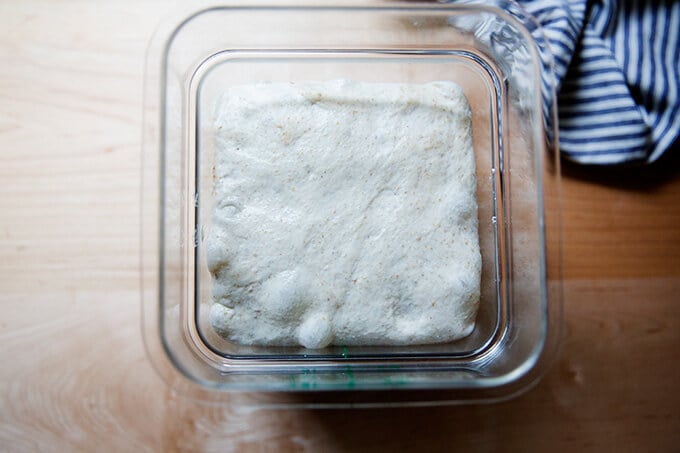
Then transfer to a straight-sided vessel for the bulk fermentation (the first rise).

After 30 minutes, stretch and fold the dough:
You’ll repeat this stretching and folding 3x at 30-minute intervals…
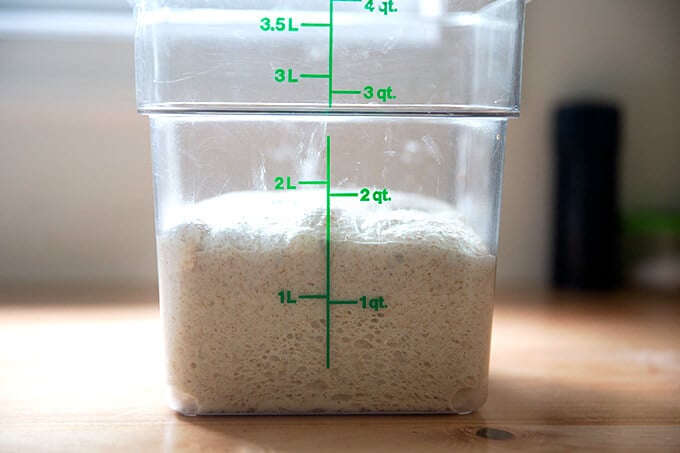
… then you’ll leave the dough to rise until it increases in volume by 50-75%:
Transfer dough to a clean work surface. I prefer to use no flour and minimal handling to shape it into a ball.
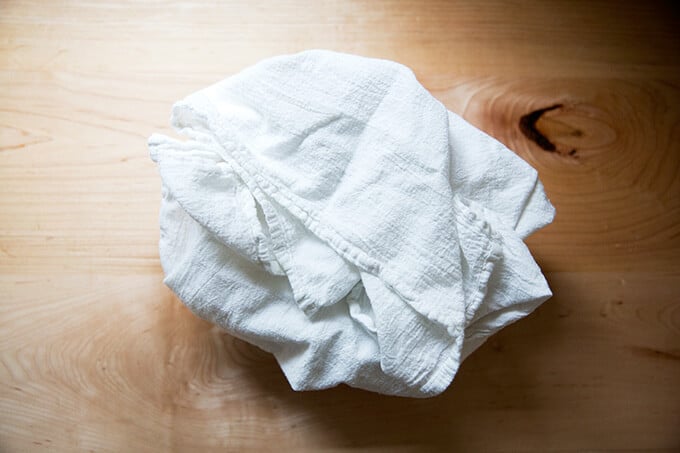
After the initial shape, let the dough rest for 20-40 minutes; then shape again and transfer to a flour sack-lined bowl.
Transfer bowl to fridge to proof (second rise) for 18 to 24 hours

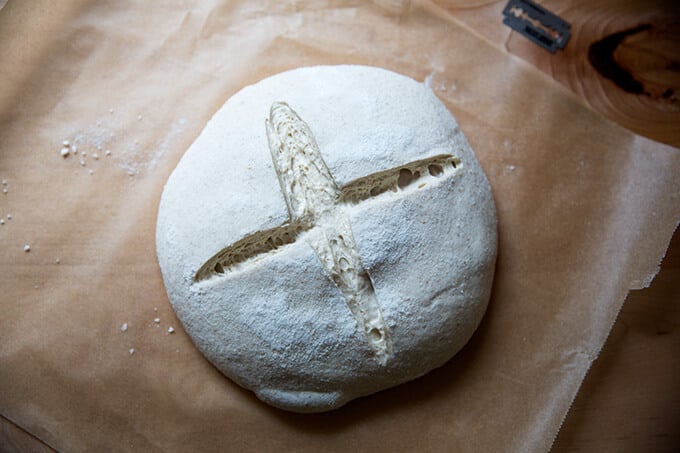
After 18 to 24 hours, transfer dough to a sheet of parchment paper. This video shows how:
Score as you wish; simple is fine.
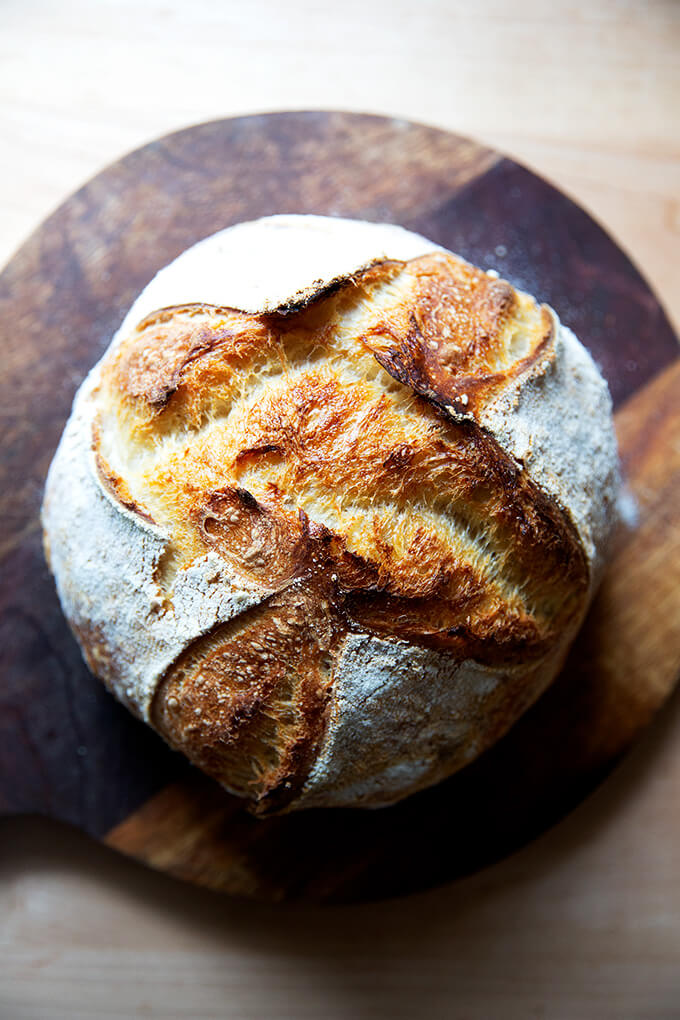
Transfer to a Dutch oven and bake, covered, at 450ºF for 30 minutes, then uncover and bake at 400ºF for 10 minutes.

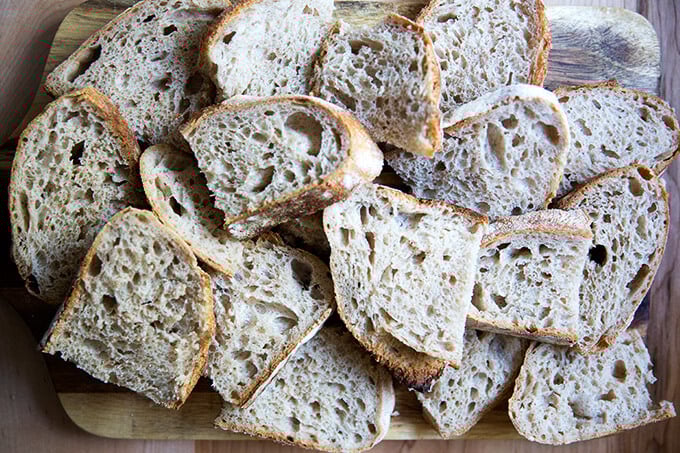
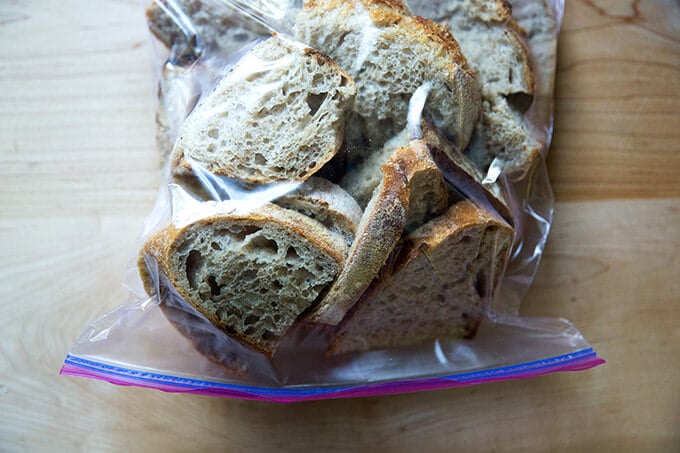
Store the bread at room temperature in a ziptop bag for 3 to 4 days or in the freezer for up to 3 months:
Easy Sourdough Bread (Whole Wheat-ish)
- Total Time: 48 hours 45 minutes
- Yield: 1 loaf 1x
Description
Made with a small portion of stone-milled whole wheat flour, this sourdough bread is so flavorful, aromatic, and tasty. Using a mix of both bread flour and whole wheat flour keeps the texture light while providing a nutritional boost and more flavor.
Notes:
Special equipment: Straight-sided vessel for the bulk fermentation, Dutch oven, flour-sack towel
Digital Scale: Do not attempt this recipe without a scale. This one costs $10. Troubleshooting what goes wrong with sourdough bread is impossible if you’ve measured with cups. They’re simply not accurate.
Troubleshooting: If you have issues with your dough being too sticky, please read this post: Why is my sourdough so sticky? The 4 common mistakes.
Flour:
-
- I prefer making this bread with 350g bread flour and 50g of freshly milled, stone-milled flour, which provides both flavor and color. I love using a mix of Anson Mills graham flour and rye flour, but there are many great stone-milled flours out there, and you may have a local source, which is even better.
- Where to buy stone-milled flour? In the past few years, it has become easier to find stone-milled flour, and if you are up for it, you should seek out locally, stone-milled flour. Why? Because if you’re buying locally milled flour, you likely can find out how recently it was milled. Because stone-milled flour perishes more quickly than roller-milled flour, it’s best if you can find a local source, which will ensure it will be fresh. Note: Store stone-milled flour in the freezer if you don’t bake regularly.
- I find locally milled stone-milled flours at a local co-op, Honest Weight Food Co-op, and I also order online from various sources. Here are a few I love: Cairnspring Mills, Anson Mills, and Community Grains
- 50g may seem like a tiny amount of stone-milled flour for this recipe, but I am constantly amazed by how much flavor this small amount of freshly milled flour adds.
Ingredients
*Please read notes above before proceeding. Watching the video is helpful, too.*
- 300 g water
- 100 g active sourdough starter
- 10 g kosher salt or sea salt
- 350 g bread flour, see notes above
- 50 g whole wheat flour, preferably stone-milled, see notes above
- rice flour, for dusting
Instructions
- Mix the dough. In a large bowl, combine the water, starter, and salt. Stir with a rubber spatula to loosely combine. Add the flours, and stir with a spatula to combine — it will be a wet, sticky dough ball. Transfer to a straight-sided vessel and cover with a tea towel or bowl cover for 30 minutes.
- Stretch and fold. After 30 minutes, grab a corner of the dough and pull it up and into the center. Repeat until you’ve performed this series of folds 4 to 5 times with the dough. Let the dough rest for another 30 minutes and repeat the stretching and folding action. If you have the time, do this twice more for a total of 4 times in 2 hours. [Video guidance here.] Note: Even if you can only perform one series of stretches and folds, your dough will benefit. So don’t worry if you have to run off shortly after you mix the dough.
- Bulk fermentation: Cover the vessel with a tea towel or bowl cover and let rise at room temperature (70ºF/21ºC) for 4 to 18 hours (times will vary based on the time of year, the humidity, and the temperature of your kitchen). The bulk fermentation will end when the dough has nearly doubled in volume, and you can see bubbles throughout the dough and on the surface. (Note: Do not use your oven with the light on for the bulk fermentation — it is too warm for the dough. To determine when the bulk fermentation is done, it is best to rely on visual cues (doubling in volume) as opposed to time. A straight-sided vessel makes monitoring the bulk fermentation especially easy because it allows you to see when your dough has truly doubled.)
- Shape: Gently transfer the dough to a clean work surface. I prefer to use no flour and a bench scraper at this step, but if you find an unfloured work surface to be difficult, feel free to lightly flour it. [Video guidance is especially helpful for this step.] Fold the dough, envelope style: top third over to the center; bottom third up and over to the center. Then repeat from right to left. Turn the dough over and use your bench scraper to push the dough up, then back towards you to create a tight ball. Repeat this pushing and pulling till you feel you have some tension in your ball. Place the dough ball top side down and let rest 30 to 40 minutes. (FYI: This is called the bench rest.)
- Proof. Line a shallow 2-qt bowl (or something similar) with a tea towel or flour sack towel. Flour sack towels are amazing because the dough doesn’t stick to them, and therefore, you need very little rice flour, but if you only have a tea towel, you will be fine. If you are using a tea towel, sprinkle it generously with rice flour. If you are using a flour sack towel, you can use a lighter hand with the rice flour. After the 30-to 40-minute bench rest, repeat the envelope-style folding and the bench scraper pushing and pulling till you have a tight ball. [Video guidance here.] Place the ball top side down in your prepared towel-lined bowl. Cover bowl with overhanging towel. Transfer bowl to the fridge for 12 to 24 hours. (Note: When you remove your dough from the fridge, visually it will likely look unchanged. This is OK. You do not need to let it then proof at room temperature before baking.)
- Bake. Heat oven to 500ºF. Remove your sourdough from the fridge. Open the towel. Place a sheet of parchment over the bowl. Place a plate over the parchment. With a hand firmly on the plate and one on the bowl, turn the dough out onto the parchment-paper-lined plate. [Video guidance here.] Carefully remove the bowl and towel. Carefully remove the plate. Brush off any excess rice flour. Use a razor blade to score the dough as you wish. I always do a simple X. Grab the ends of the parchment paper and transfer to the Dutch oven. [Video guidance here.] Cover it. Lower oven temperature to 450ºF, bake covered for 30 minutes. Uncover. Lower the temperature to 400ºF. Bake for 10 minutes more or until the loaf has darkened to your liking. Transfer the loaf to a cooling rack.
- Cool. Let the loaf cool for at least 30 minutes before cutting.
- Prep Time: 48 hours
- Cook Time: 45 minutes
- Category: Bread
- Method: Sourdough
- Cuisine: Global
This post may contain affiliate links. Please read my disclosure policy.


1,106 Comments on “Easy Sourdough Bread (Whole Wheat-ish)”
How much should I adjust the water for stone milled whole wheat flour?
Hi Clint, It’s so hard to say because all flours absorb water differently, and freshly milled flours I find to vary dramatically in how they behave. I would start by adding the water slowly. Maybe hold 50 g of it, and add it in slowly. If you add it all at once, it may be soupy and more like batter.
Hi Ali,
I finished my second bake after implementing the changes we discussed. The crumb was definitely less sticky. Again, the flavor was great and we are enjoying the bread. I need some advice before I bake again. My batard loaf opened up explosively on the side even thought it was scored with 5 cuts at 45 degrees across the top. The holes in my crumb (both boule and batard) were also not as even as your picture. Mostly nice small to medium but also some larger irregular and some more vertically shaped.
It is starting to feel like I might need to increase the bulk ferment. There also isn’t much volume change in the dough after the cold retard but that compares similarly to other prior formulas I have baked.
I know you changed from doubling to 50% increase during bulk. Can you explain why you ended up changing and any thoughts on my experience?
Once again, thanks for your help and wonderful recipes. I have shared many of them with family and friends so I found your website.
Hi again,
I just completed my third bake.
I let the dough bulk ferment to 60%. Both of my loaves showed signs of over expansion and tearing even though both we well scored. Is there any way to send you a picture? Maybe you could telling by seeing them what is going wrong?
I would love you to send me photos! Here is my email: alexandra@alexandracooks.com
I’ve been meaning to respond to your previous comment … sorry for the delay. I’ll wait to respond more until I see the photo. Thanks, Bruce!
Wowza! Following this recipe (mostly, I made one little error/deviation when I had to chuck the lot into the fridge for a few hours directly after the initial mix), made the most gorgeous loaf of bread I’ve ever produced! And I’ve been trying for years!!!!
So wonderful to hear this, Amy! Thanks so much for writing 🙂 🙂 🙂
This is the best sourdough recipe that I have ever used. As First time sourdough baker I tried for over two years to bake a successful loaf and then I came across this one. It is very forgiving and one can consistently produce an excellent result. Over the last six months I have added my own touches along the way. I have added around 10 grams of sugar and instead of using 300 grams of water, I use 150 grams of butter milk and 150 grams of water. I find that this gives a nice soft texture and the bread remains fresh for 2 to 3 days after which I keep the left overs in the fridge, which keeps it in good condition up to 6 days.
It truly is the best, my heart felt thanks to Alexandra.
So nice to hear this, Daniel! Love the idea of using buttermilk here! Can’t wait to give that a try. Thanks for writing 🙂 🙂 🙂
excellent tutorial with easy to follow instructions! I’m going to utilize the tips here and looking forward to improving my breadmaking techniques!
Hi Ali,
The sourdough is going great thank you but when I turn it out of the proofing basket goes very flat. The flavour and structure is great, its just a bit pancake like 😂. Do you have any advice please?
Hi Lisa!
When you mixed the dough, did it feel very wet? If not, it’s possible that your dough over-fermented. How long roughly was the bulk fermentation?
If it was very wet when you first mixed the dough, I think you need to reduce the water quantity. I find that a lot of people I converse with from the UK in regard to sourdough have this same issue: the dough being too wet. There’s not much you can do at this point, but next time around, I would hold back 50 g of water or more to start … you can always add it in slowly.
I am using your recipe and it is time for me to go to bed and my dough has not doubled in volume before I can shape it. Can I put it in the frig at 10 p.m. and take it out in the morning, shape it and then bake it?
Yes! Do that.
I have a comment and question! GREAT GREAT instructions – so very helpful for this first time Sourdough Bread maker.
My bottom crust seems very tough to cut….nothing like the top and sides of the loaf coming out of Dutch Oven. Is there anything that can help softened that for the cut?
pgauld@uga.edu
Hi Pam! If you jump to the FAQs on this post: Why is my sourdough so sticky? 4 Common Sourdough Mistakes + Answers to FAQ’s and then scroll down to the section titled “My crust is so tough. What can I do to prevent this?” you’ll find some ideas there.
Lovely looking bread, may I ask if you are using white bread flour for this recipe? its looks very white in colour.
Leif
Hi Leif! I use King Arthur Flour bread flour or all-purpose flour as well as a mix of Anson Mills stone-milled flours here.
Five star recipe. I’m a sourdough and bread baking newbie and this recipe has helped me understand baking sourdough bread so much better. Made this 3 times and people are in awe of how beautiful my loaves are. One loaf had a harder tougher bottom – what causes this?
Hi Nancy! Great to hear this. Thanks for writing. Regarding the one loaf that had a tougher bottom, were you using the same baking vessel? Recently I’ve been preheating my DO at 475ºF; then lowering it to 450ºF when I transfer the bread to it. I lowered the preheating temperature because I found my loaves were getting too dark on the bottom. You might just need to play around with the temperature and the timing a bit. You can also bake your bread directly on the oven rack after you bake it for 30 minutes covered in the DO.
Hi there, I baked my first loaf with your recipe a couple of weeks ago but it didn’t quite turn out as I had hoped.
The flavour was great (might up the salt next time) but it was sticky inside with some big air pockets at the top – so much so that it was hard to cut slices without it collapsing. I baked the loaf in my Dutch oven and I actually ended up adding nearly 20+ minutes with the lid off to get the top browned. Unfortunately the extra time didn’t seem to cook the inside enough but the bottom was hard as a rock! I probably had a 20hr bulk ferment in the fridge.
Would using convection help at all? I’m also not sure what kind of whole wheat flour mine is as it doesn’t say anywhere on the bag. Any assistance you can provide for this rookie sourdough baker! I could also share some photos I took to show what it looked like.
Thanks in advance!
Hi Hillary! I don’t think it’s necessarily an issue with your Dutch oven — it sounds as though the dough was not quite right. You may need to reduce the water quantity a bit; it’s possible the dough was underfermented; it’s possible your starter isn’t strong enough.
I would read this troubleshooting post before you make another loaf: Why is my sourdough so sticky? 4 Common Sourdough Mistakes + Answers to FAQ’s
I’ve been baking sourdough for a long time and your method and recipe goes far beyond anything I’ve made in the past. Thanks for putting together your excellent site.
Wonderful to hear this! Thanks so much for writing 🙂
I usually never leave a review. But this was my first VERY successful loaf after a couple years of MEH loaves. Thank you! I’m added cinnamon, pecans and maple sugar to this recipe to Rey something new. Proofing in the fridge is a game changer.
So nice to hear this, Jasmine! I love the fridge proof, too 🙂 Your additions sound wonderful!
This looks fabulous!! I’ve just made a loaf with 415g strong white, 85g whole wheat and 340g water. Used 100g starter and 12g salt. I did second proof for about 15/16 hrs in fridge. Just find the dough very difficult to shape into a ball and even after the fridge proof it’s quite messy. I don’t have a scraper and must get one. Yours looks so together – any tips please. Loaf tastes lovely but maybe is a tiny bit sticky
Hi! It sounds as though it might have over fermented. How long was the bulk fermentation? And when you shaped it to get it into the pan, did it have any strength? or was it kind of a puddle of dough without structure? This troubleshooting post might offer some guidance.
Great recipe I use it all the time! One question, at what point would it be best to add some herbs or roasted garlic?
Great to hear, Ryan! I would add them after you’ve completed at least two sets of stretches and folds — when the dough is starting to feel stronger and more elastic. Sprinkle them over top; then continue with a few more sets of stretches and folds.
Dear Ali,
Thank you so much for this wonderful sourdough recipe. About 8 months ago I started this journey by making my first starter,,, which I have named “Rise and Shine”. From there it has been a path filled with discoveries and learning experiences that have helped to lead me here to your sourdough bread. I think like you I really appreciate the fridge time and the freedom it gives me to bake this bread when the family is out and about. What attracted me to your recipe was the visual confident, yet relaxing cadence of your hands taking us through the process of making the bread. Just wonderful. The measurements worked perfectly for me and I found that it created less mess than if I were using my measuring cups. As a thank you I purchased you book and look so forward to reading through it and trying a few more of your recipes. Your Sourdough recipe will become a staple in our home and I look forward to it for many more years to come. Thank you very much.
Ron, thank you so much — your comment means the world. I’m so glad you found the videos helpful. In my own sourdough journey, the videos I’ve watched along the way have been tremendously helpful, so it’s so nice to hear this. Great to hear, of course, that the bread turned out well, and I can’t thank you enough for purchasing my book. Happy Baking! Have a wonderful weekend.
Amazing recipe! 1st bite Hit all the endorphin notes….
Thank you
So nice to hear this 🙂 🙂 🙂
Do you need to let the dough come to room temperature before baking?
Nope! Just remove from the fridge, score it, then bake it 🙂
Thanks for such a lovely recipe! 🙂 One question: my starter is very active and peaks usually within 2-3 hours after feeding. Do you think I need to adjust my timeline accordingly? Less time for bulk fermentation etc. Thank you and happy easter!
Hi Soo! Yes, definitely rely on the visual cues as opposed to the timeline outlined in the recipe. When your dough increases in volume by 50-100%, it’s time to shape it.
Question: I am on a severely sodium-restricted diet. Can I make this with significantly less salt? And will it still taste good? I’m struggling to find bread – even homemade – with low sodium content.
Thanks for a great recipe! I can’t wait to dig into it!
Hi Nicole! I think you can definitely cut the salt back. What’s tricky with bread is that salt tightens gluten, so it helps give the dough strength. If you don’t use any salt, it will be terrible — gummy and dense. I think it might just take some trial and error to get the amount of salt right, though I do think you could get away by cutting it in half.
I have been using your recipe for over a year and it rarely fails (and only when I do something silly). So thank you! Can you give advice on steps to make rolls or baguettes using the same recipe? Should I shape the rolls and put them in the fridge overnight? What would you do to keep the humidity high as they won’t fit in a Dutch oven?
Hi Rikke! Great to hear this! I would maybe try shaping the dough into rolls or baguettes and then doing a room temperature proof (if time permits) for 3 to 4 hours; then baking. If not, you can definitely shape and do a cold proof, just be sure to cover the pan tightly so that the bread dough doesn’t dry out.
For baguettes, I would probably use a preheated Baking Steel or stone.
For rolls I think you could bake them on a sheet pan and place the sheet pan on a heated Baking Steel or stone or just bake them without the stone underneath.
To create steam, there are a few things you can do. Tartine Bread recommends lining a pan with water soaked towels and placing the pan in the oven while the bread bakes. You can also use a spray bottle or a pan with ice cubes.
Your easy sourdough recipes have been a saviour – I love them so much, and they are foolproof recipes it seems. However, I would now love to tinkle with it abit and add seeds to my ‘whole wheatish’ loaf. Is there any seeds you would recommend to add to this recipe? And at what point should I add them? Thank you 🙂
So great to hear this, Kiera! I would add seeds with the flour. I love using a mix of sesame, sunflower, and pumpkin seeds, but you truly can use anything you love!
I made this with King Arthur Whole Wheat flour because I have a huge bag and didn’t know about stone milled flour before reading this. I couldn’t believe how good the flavor was even with the commercial whole wheat flour! My only complaint is that the loaf came out kind of wavy around the edges (indented all around from the parchment). Any tips on how to avoid this? It makes it more difficult to slice, especially when the bread is so airy 🙂
Hi Kallan! Apologies for the delay here. Great to hear re KAF whole wheat flour.
Regarding your issue, I wonder if you sprinkle some cornmeal on the parchment, it might provide a bit of a barrier between the dough and the parchment and would prevent the waviness?
Did the parchment stick to the bread? Or did it release easily?
Hi, do you have a blog that I can follow and have new entries sent to my email address please?
Hi Suzanne! If you want to sign up for my email newsletter, do so right here: Never Miss a Recipe
Been making sour dough bread for 40 plus years but mine is a sweet sour dough bread. I feed with sugar, potato flakes and hot water. I also use oil and sugar and lil salt when I mix up the dough. Like to try yours too! Yours is probably more healthy, ha.
Hi,
I can imagine that somebody asked this question but 814 comments?!
So let me ask you: why do you invert the dutch oven? Is there a special reason that you put the dough on the lid?
Thanks.
Hi Hans! I just find it easier and less dangerous to lower the bread onto the shallow part of the pot rather than have to drop it into the deep part. Whichever side of the pot you use, the results will be the same as far as texture and shape of bread goes.
I love this recipe! I’ve been working on sourdough for a while and your site made it all come together for me. Thank you! Question–do you use the small Pullman pan or the large?
So great to hear this, Molly! It’s the small Pullman 🙂
I’ve been making this recipe for over a year now and I’m finally feeling adventurous by wanting to add flavor. What do you recommend for figuring out percentages of, let’s say olives, or raisin and cinnamon? Would I keep the ratios the same and the just add 100g of olives or would I need to increase the amount of flour?
Hi Rebecca! No need to increase the amount of flour. Add things like olives or raisins after you’ve done a few sets of stretches and folds; then do a few more sets of stretches and folds after you’ve added the ingredients to ensure they’re incorporated fully.
Hi! Is the 30-50% increase in rise for bulk measured from the start, or from after the last set of folds?
Hi Julia! You’re looking for a 50% (or slightly more) increase in rise total … I never see much rise during those first two hours of stretches and folds. If you do see a rise during the stretches and folds, that’s fine, but you’re looking for a 50% increase in rise from how the dough looks immediately after it is mixed together.
just amazing recipe. I tried enormous recopies to get a perfect loaf. already baked this bread couples of times and it comes just perfect every time. thank you for all tips, they just cover all troubleshoots. I want to bake rye sourdough bread I thought just to increase water. If this right? thank you
Great to hear, Inna! Regarding rye, it will take a little bit of trial and error to get right, and I wouldn’t suggest using all rye flour as the loaf will be very dense. I would start with 100 grams rye at the very most. Keep the water the same to start; then adjust next time around. You may find you actually need to reduce the amount of water.