 →
→ Simple, 4-Ingredient Homemade Pizza Dough
This post may contain affiliate links. Please read my disclosure policy.
Made with 4 ingredients — flour, water, salt, and yeast — this simple, no-knead pizza dough recipe can be ready start to finish in 3 hours. It produces a pizza with a ballooned edge and crisp but pliable crust. You can use the dough the same day you mix it or store it in the fridge for up to 5 days (or freeze it!). 🍕🍕

Let’s get straight to it. This is a 4-ingredient, high-hydration, no-knead dough. It is the simplest of the simple homemade pizza recipes and, in my opinion, the tastiest, too. If you have time to prep your dough a few days in advance, you’ll be setting yourself up for serious pizza bliss (read on to learn why) but know that you can make excellent pizza, start to finish, in 3 hours.
The first step to making excellent pizza at home is to get comfortable working with high-hydration pizza doughs. Here’s why:
Why High-Hydration Pizza Dough is Best For a Home Oven
High-hydration doughs, such as this overnight focaccia, are doughs made with a high proportion of water relative to the flour. This high proportion of water creates a pizza crust that stays crisp but moist during the cooking process with beautiful air pockets throughout.
How? Understand this relationship, understand everything:
The lower the oven temperature, the higher the dough hydration. And conversely: The higher the oven temperature, the lower the dough hydration.
A great way to understand this concept is to look at the makeup of a classic Neapolitan-style pizza dough. Neapolitan-style pizza is characterized by a blistered and ballooned outer edge with a soft, thin (and sometimes wet) center. Contrary to what you might expect, Neapolitan-style pizza dough is on the lower end of the hydration spectrum: 60 to 65%.
The reason Neapolitan pizzas emerge light and airy with nearly wet centers is because they cook in 60 to 90 seconds in 900ºF ovens. In this short period of time, very little water evaporates from the dough, which allows it to retain its moisture.
When you bake pizza in a home oven, which can only get up to 550ºF, the baking time is longer, during which time a lot of water will evaporate. If you were to bake a 65% hydration Neapolitan pizza dough in your home oven, you will be left with a dry, tough crust due to all of the moisture loss during the long bake.
So, in sum: to prevent your crust from being dry and tough in a home oven, it needs more water from the start.
Working With High Hydration Dough
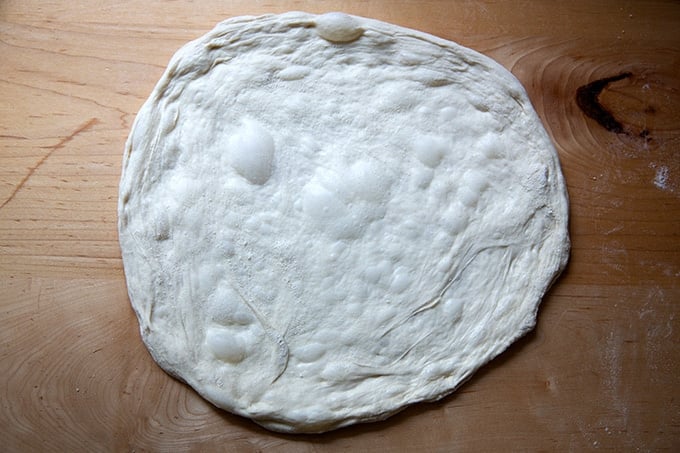
Working with high-hydration dough can be tricky, and the best way to deal with it is to handle it gently. During the shaping process — the point at which you are stretching your ball of dough into a 10- to 12-inch round — take care to use a light touch. When you handle the dough minimally, you preserve the bubbles created during the rising. See these bubbles? …
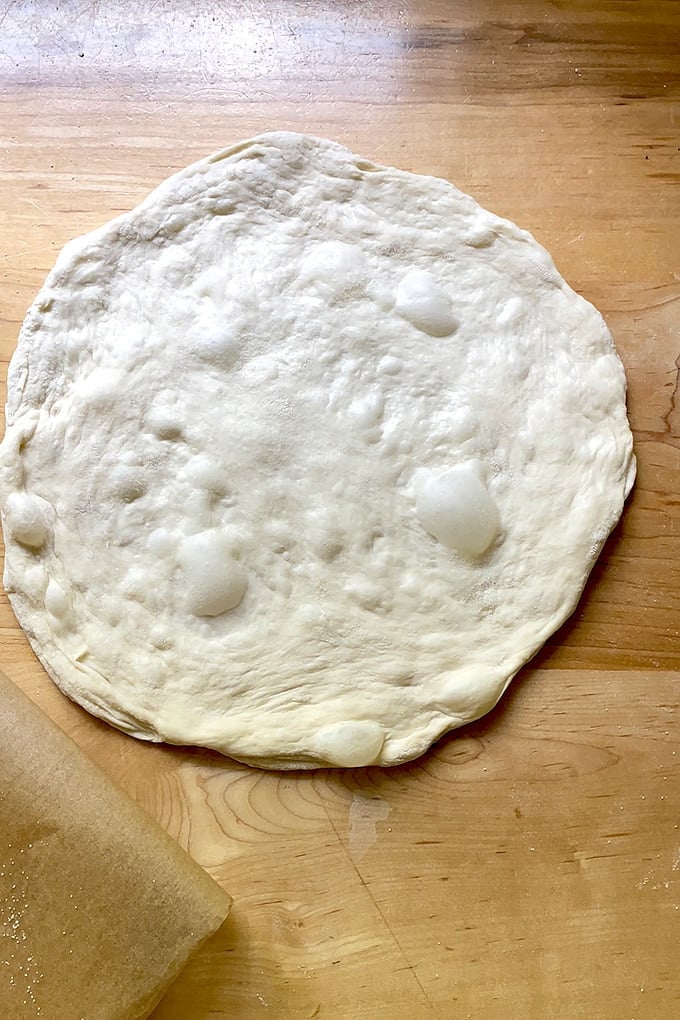
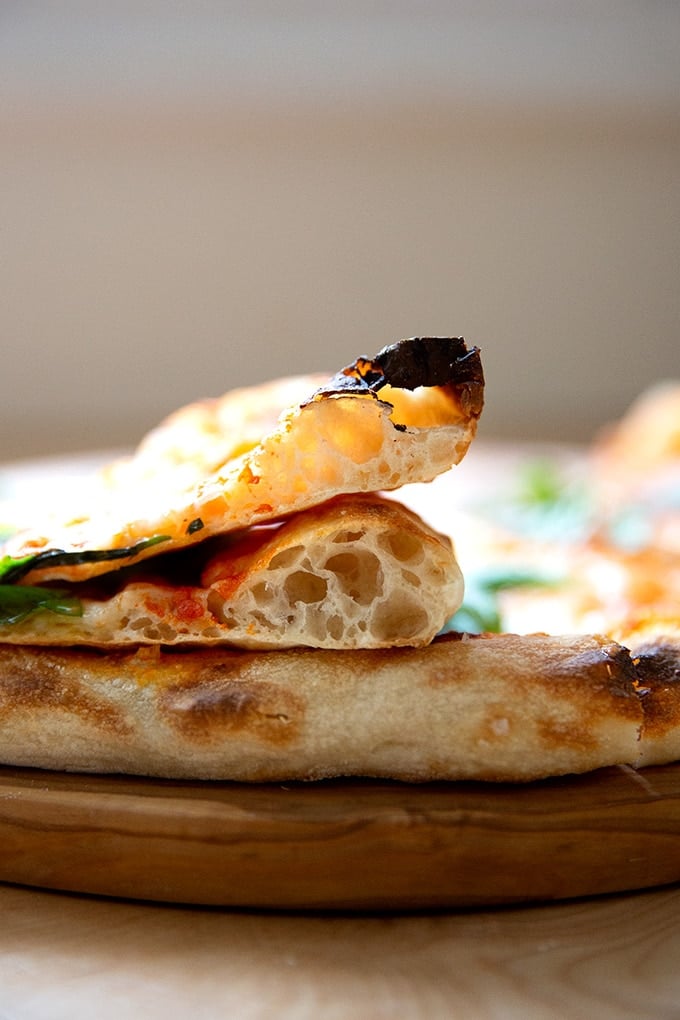
Those bubbles become these ballooned textures throughout the dough:
4 Tips for Making Excellent Pizza at Home
1. Use good, unbleached, and unbromated flour. King Arthur bread or all-purpose flour is my favorite.
What is the difference between bread and all-purpose flour? Mostly the protein content. KAF bread flour has a higher protein content (12.7% protein) than the all-purpose flour (11.7% protein). A dough made with bread flour as opposed to all-purpose flour will absorb slightly more liquid and will therefore be slightly stiffer. If you live in a humid environment and often find your dough to be too wet, using bread flour may help.
What about Tipo 00 Flour? Tipo 00 flour is the flour required in the production of D.O.C. Neapolitan pizza. Contrary to popular belief, the “00” is not an indicator of protein content. It refers, rather, to the fineness of the milling, “00” being the finest grade in the Italian classification system. It is known for the extensible gluten structure it creates in pizza dough. When you use Tipo 00 flour, you may find your dough to be much wetter than when you use bread flour, so you may need to adjust the recipe slightly: use less water or more flour.
While I love using tipo 00 flour (Petra 5063 being my favorite) in my outdoor oven, today I find I get better results — better oven spring and browning — in my home oven when I use bread flour or all-purpose flour, namely KAF, whose flour contains a small amount of malt, which helps with browning.
2. Don’t be afraid of salt.
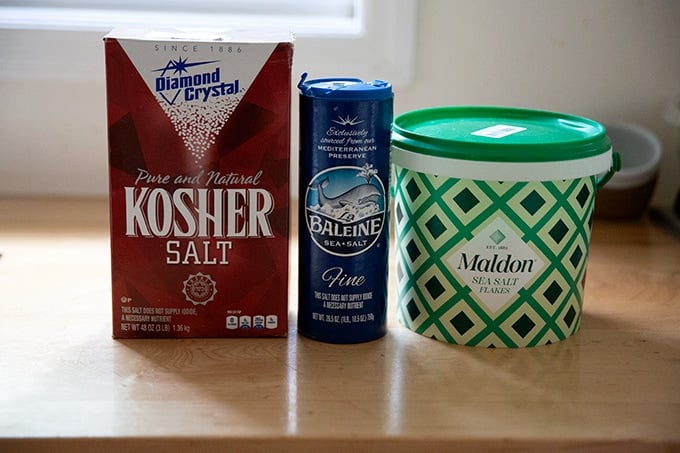
Salt is important in pizza dough not only for flavor but also for strengthening gluten and controlling fermentation. My preference is Diamond Crystal kosher salt or Baleine fine sea salt, both of which dissolve quickly.
How Much Salt to Use: The rule of thumb with pizza dough is that the weight of the salt should be 2 to 3% the weight of the flour. For this recipe that is 10 to 15 grams. I use 15 grams of salt, and I do not find the dough to be too salty.
Flaky sea salt for finishing. I sprinkle every pizza I bake with Maldon Sea Salt just before it sliding it into the oven.
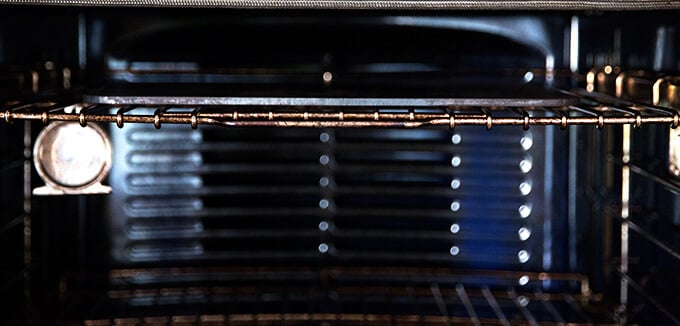
3. Invest in a Baking Steel.
The single best and easiest/most affordable step you can take to make better pizza at home is to invest in a Baking Steel. In short, steel is a more conductive cooking surface than stone. This means heat transfers more quickly from steel to food than it does from stone to food. Why is this important for pizza? Serious Eats’ Kenji J Lopez Alt offers this explanation:
“How does the baking surface affect hole structure? Well those crust holes develop when air and water vapor trapped inside the dough matrix suddenly expand upon heating in a phenomenon known as oven spring. The faster you can transfer energy to the dough, the bigger those glorious bubbles will be, and the airier and more delicate the crust.”
4. If time permits, make your dough several days in advance.
Why? Because: during a long, slow, cold fermentation, enzymes in both the flour and the yeast will break down the starches in the flour into simple sugars, which will contribute both to flavor and to browning. Moreover, during this time in the fridge, the dough will relax, making it easier to stretch into rounds on baking day.
PS: Simple Sourdough Pizza Crust Recipe
How to Make Pizza Dough, Step by Step
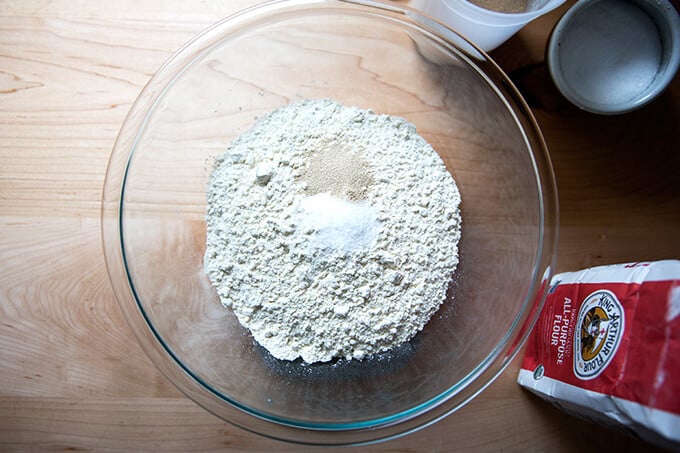
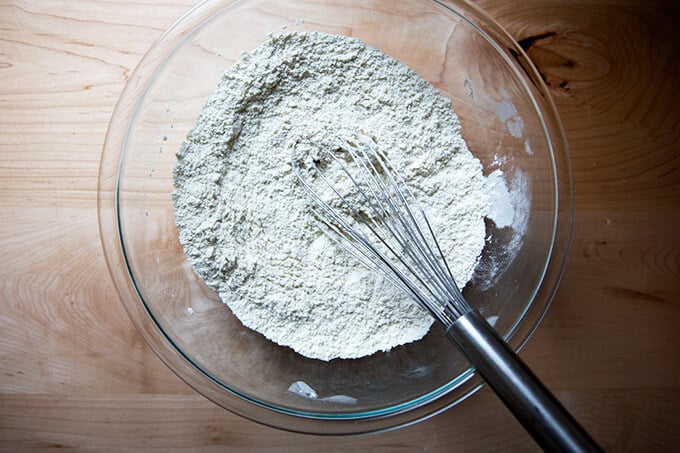
Whisk together flour, salt, and instant yeast (SAF is my preference):
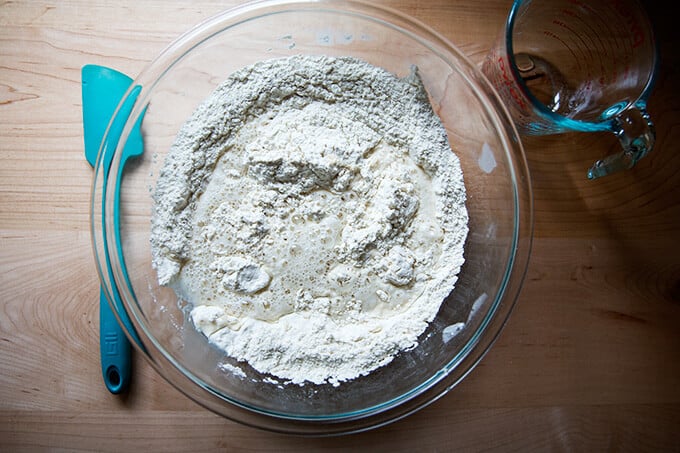
Add water, and …
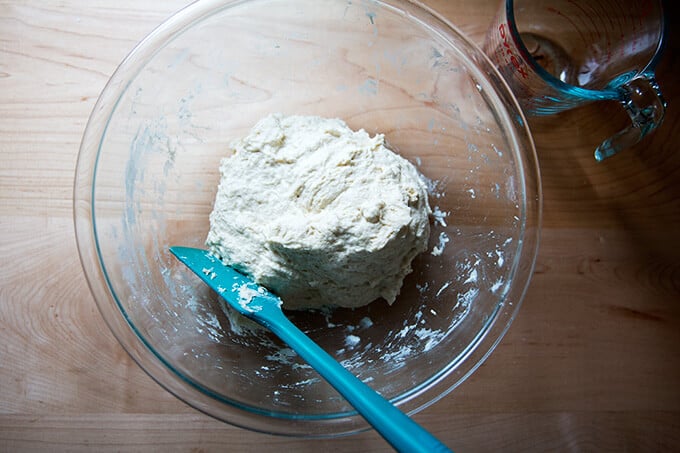
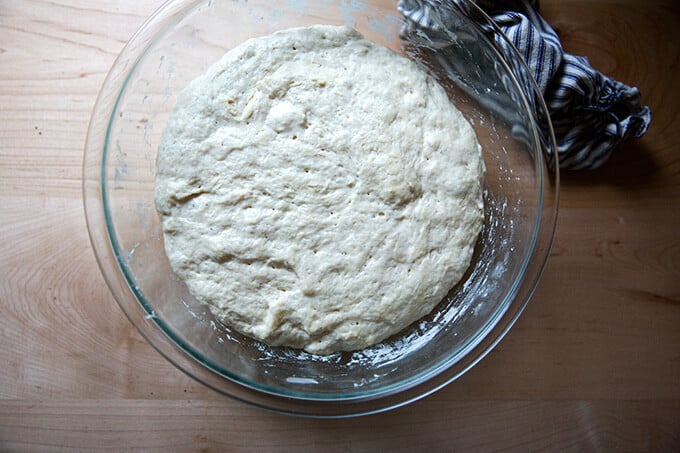
… mix to form a sticky dough ball:
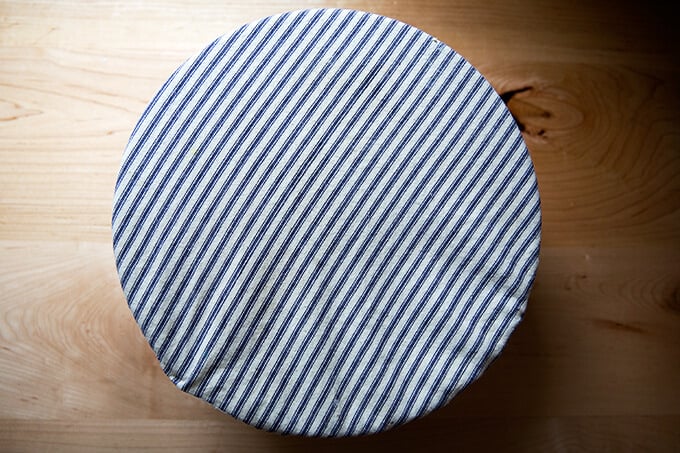
Let rise in a warm spot till nearly doubled, about 1.5 hours.
Turn out onto a floured work surface.
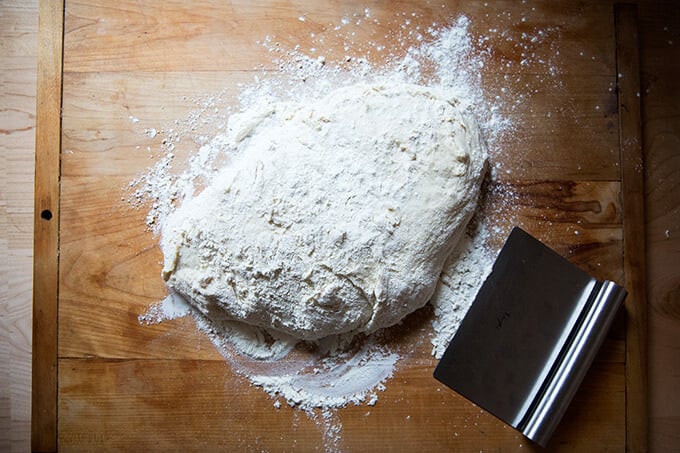
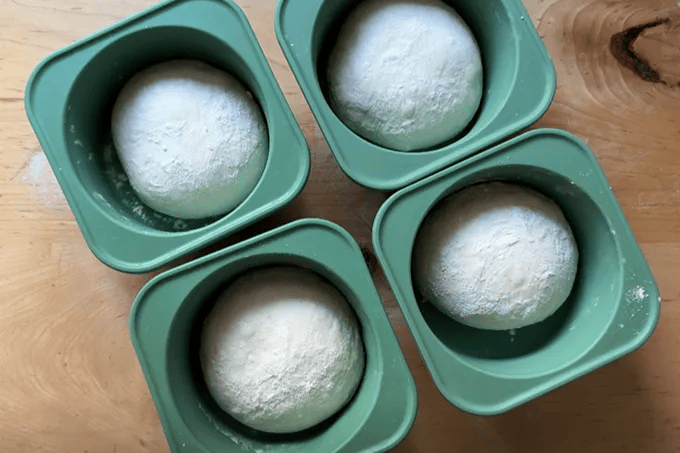
Divide into four portions and …
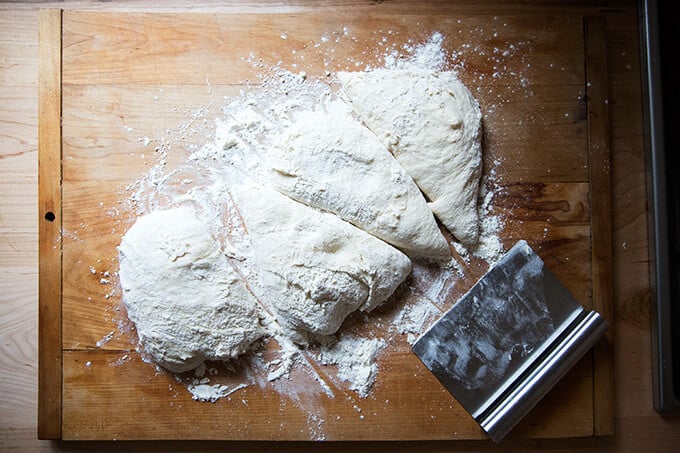
… ball up, using as much flour as needed.
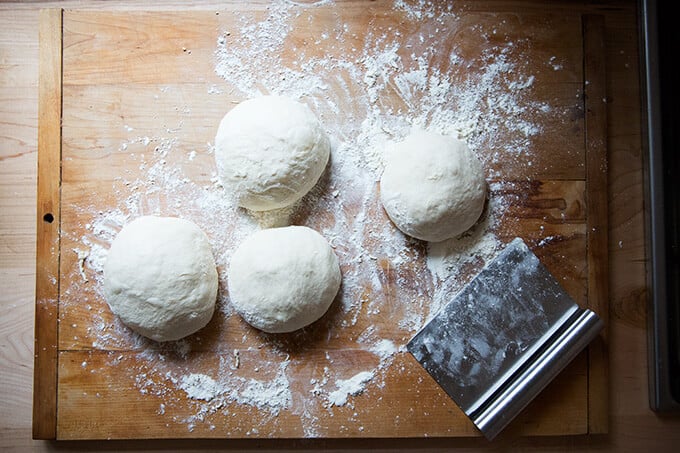
If you are baking pizza immediately, let the dough rest for another hour before shaping. Otherwise, transfer the balls to storage containers and stick them in the fridge. These Kevjes Dough Storage Vessels have become my favorite:
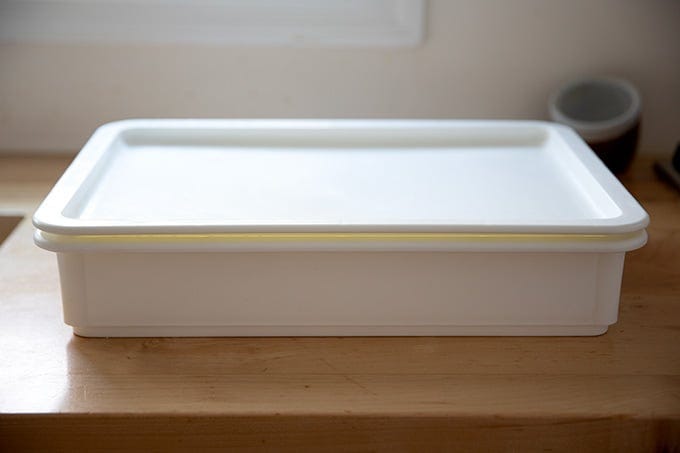
When it’s time to bake, transfer the dough rounds to a lidded vessel such as a DoughMate or a 9×13-inch baking dish covered with plastic wrap (to prevent the dough from drying out), and let the rounds sit for about an hour at room temperature.
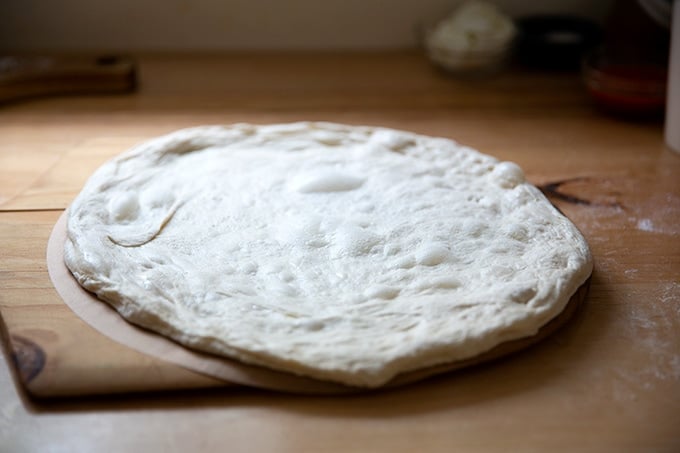
When the dough has proofed, gently stretch it into an 11-inch round, using lightly floured hands:
Transfer the round to a peel lined with parchment paper.
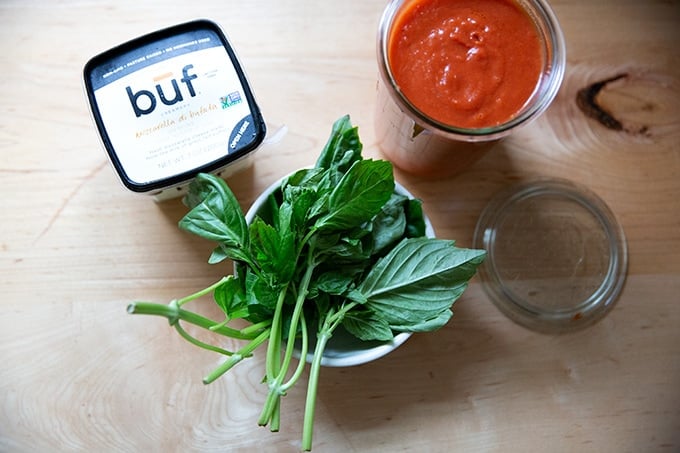
Get your toppings ready. For a classic Margherita pizza, you’ll need tomato sauce, mozzarella, and fresh basil.
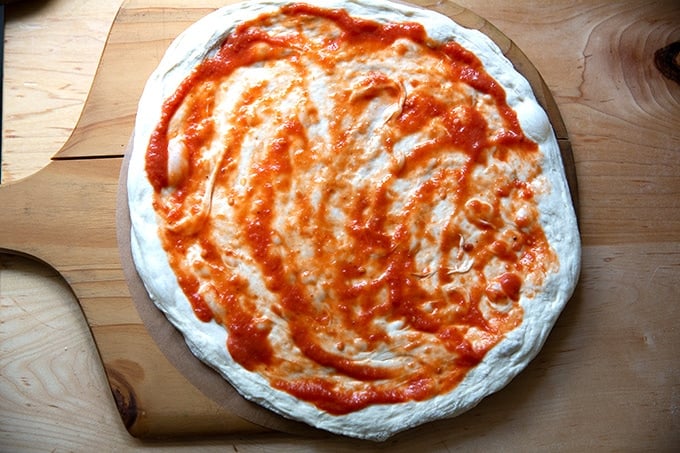
Spread about 2 ounces of tomato sauce over your dough.
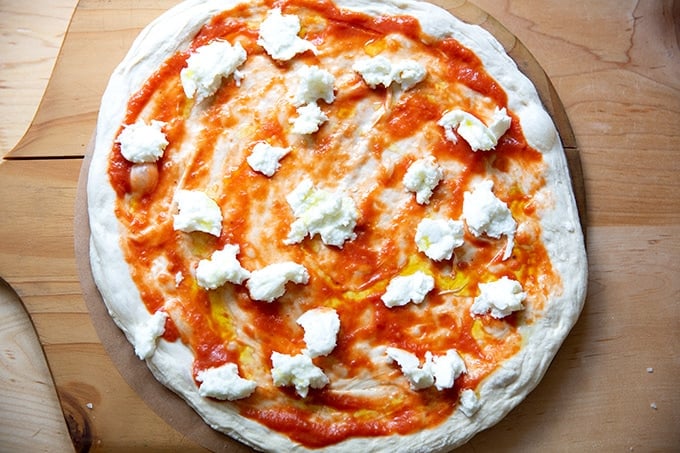
Top with about 3 ounces of mozzarella. Drizzle lightly with olive oil and sprinkle with sea salt.
Bake on a preheated Baking Steel at 550ºF for 5 to 6 minutes. Shower with fresh basil out of the oven.

The beauty of the Baking Steel + high hydration dough: oven spring.
Troubleshooting
Why is my pizza dough too wet?
It is possible that given your environment and the type of flour you are using, you are using too much water relative to the amount of flour. The fix is simple: reduce the amount of water. Ideally, you are measuring with a scale, so you can ensure you are measuring accurately and making meaningful adjustments. Try holding back 50 grams of water and seeing if that helps.
That said, please read above about the importance of using a high-hydration pizza dough in a home oven. If your dough, upon being mixed, is unable to form a sticky dough ball, you likely need to reduce the water. Reference the video for dough texture.
Why is my pizza dough soggy?
There are several culprits here:
- too much sauce, cheese, and/or toppings
- oven not hot enough
- too short of a baking time
Solutions:
- Invest in a Baking Steel. Read why above.
- Try laying the cheese on top of the dough; then the sauce. The cheese might provide some insulation from the sauce, thereby preventing the dough from getting soggy.
- Consider employing a parbake: bake your pizza “naked” for one minute; then continue baking for 4 to 5 minutes more once topped.
- Try using semolina on your peel.
- Before stretching your dough ball into a round, slick it lightly in a bit of olive oil.
- Use a lighter hand when topping.
PS: If you’re looking for more pizza-making guidance, check out my New York Times bestselling cookbook, Pizza Night, which includes 52 pizza and 52 salad recipes, one pair for every week of the year, as well as five simple desserts 🍕🍕🍕


Simple, 4-Ingredient Homemade Pizza Dough
- Total Time: 2 hours 35 minutes
- Yield: 4 pizzas 1x
Description
Made with 4 ingredients — flour, water, salt, and yeast — this simple, no-knead pizza dough recipe is a snap to throw together, and you can use the dough the same day you mix it or store it in the fridge for up to 5 days (or freeze it!). If you love pizza with a ballooned edge and crisp but pliable crust, this pizza dough recipe is for you.
**Attention Pizza Fans: My new cookbook, Pizza Night, is here.**
NOTES:
- This recipe yields 4 rounds of dough. The recipe can be halved but know that the dough can be refrigerated for up to five days. I refrigerate individual rounds of dough in Kevjes dough storage containers.
- The dough can be frozen, too. After the first rise and after you transfer the portioned rounds to quart containers, this is your opportunity to freeze. Transfer the quart containers to the freezer for as long as 3 months. To thaw, remove a container (or more) and let thaw in the refrigerator for 1 day or thaw at room temperature for 4 to 8 hours. Then, proceed with the recipe.
Ingredients & Tools
- Measure Accurately: As always, for best results use a scale to measure. I love this Ooni scale for its precision, especially when measuring smaller quantities of salt and yeast.
- Peel: This is my favorite.
- Parchment: These rounds are so handy for making the transition from the peel to the Baking steel or pizza stone.
- Yeast: SAF Instant Yeast is my favorite. If you need to use active dry yeast instead of instant, sprinkle it over the lukewarm water and let it stand for about 10 minutes or until it gets foamy before adding to the other ingredients.
- Warm place to rise: Here’s a trick for making the perfect warm spot for the dough to rise. Turn the oven on and let it preheat for 1 minute; then shut it off. The temperature will be between 80° F and 100° F. you should be able to place your hand on the oven grates without burning them.
- Flour: You can use bread flour and all-purpose flour here but if you live in a humid environment, I would consider using bread flour if you can get your hands on it. If you are in Canada or the UK, also consider using bread flour or consider holding back some of the water (see next paragraph). Reference the video for how the texture of the dough should look; then add water back as needed.
- Water: I find the sweet spot for me to be about 418 grams of water, which is roughly an 82% hydration dough. That said: If you live in a humid environment, if you live abroad, if you are using all-purpose flour or Tipo 00 flour, if you dislike handling wet doughs, consider starting with 400 grams of water, which will lower the hydration to 77%. If the dough feels dry, add water as needed to get it to the right consistency (reference the video).
- Salt: The rule of thumb with pizza dough is that the weight of the salt should be 2 to 3% the weight of the flour. For this recipe that is 10 to 15 grams. I tend to use 12 to 15 grams of salt, and I do not find the dough to be too salty, but I have a high salt tolerance. Use an amount appropriate to your tastes and preferences. Finally, I always use Diamond Crystal kosher salt, but you can use fine sea salt or whatever salt you like.
- Toppings: In the notes below the recipe, find the toppings for a classic Margherita pizza and for a kale, parmesan, and crème fraîche pizza. See above for 6 other favorite pizza recipes.
- Timeline: Make it Tonight: Plan on 3 hours start to finish from when you mix your dough to when you turn out a freshly baked pizza. Make it Tomorrow (and beyond): Method 1: Mix your dough today, let it rise for 1.5 hours (roughly). Portion it into 4 balls; then transfer to the fridge for up to 5 days. When using dough you’ve stored in the refrigerator, remove it one hour prior to baking.
Ingredients
Please Read All Notes Above Before Proceeding
- 4 cups (512 g) bread flour or all-purpose flour, plus more for assembly
- 3 to 4 teaspoons (10 to 15 g) kosher salt
- 1 teaspoon (4 g) instant yeast
- 1.75 to 2 cups (400 to 454 g) lukewarm water
Instructions
- Make the dough: In a large bowl, whisk together the flour, salt, and instant yeast. Add the water. Using a rubber spatula, mix until the water is absorbed and the ingredients form a sticky dough ball. Pour a drop or two of oil over the top and rub with your hands to coat. Cover the bowl with a damp tea towel or plastic wrap and set aside in a warm spot to rise for 1 to 1 1/2 hours, or until the dough has doubled in bulk. (Note: Optional Step: If time permits, 30 minutes after you cover the bowl, perform one set of stretches and folds: grab an edge of the dough using a wet hand and stretch it up and in. Repeat this 8 to 10 times, grabbing a different edge each time. By the end, the dough should transform from shaggy in texture to smooth and cohesive. I find performing a set of stretches and folds gives my dough more strength and ultimately more lightness.)
- Prepare the oven: If you are baking the pizzas right away (as opposed to refrigerating the dough for another day), place a Baking Steel or pizza stone in top third of oven and preheat oven to its hottest setting, 550°F. Be sure the Baking Steel heats for at least 45 minutes once the oven temperature reaches 550ºF.
- Ball up the dough: Cover a work surface or cutting board liberally with flour — the dough is very wet, so don’t hesitate to use flour as needed. Turn the dough out onto your floured surface and use a bench scraper to divide the dough into 4 equal portions. With floured hands, roll each portion into a ball, using the pinkie edges of your hands to pinch the dough underneath each ball. If you are not baking the pizza the same day, transfer each round of dough to a storage container (see notes above), cover, and store in the fridge. (At this point, if you plan on freezing the dough, transfer the vessels to the freezer for up to 3 months. See notes above for thawing.) If you are baking right away, let the balls sit on their tucked-in edges for 30 to 60 minutes without touching in a lidded, lightly floured vessel such as a DoughMate or a 9×13-inch pan covered with plastic wrap.
- Proof the dough: If using refrigerated dough, pull out a pizza round (or as many as you wish) from the fridge 60 to 90 minutes before you plan on baking. Transfer the rounds to a lidded, lightly floured vessel such as a DoughMate or a 9×13-inch pan covered with plastic wrap.
- Make the pizzas: Handling the dough as minimally as possible, shape the dough into a 10″–12″ round. If the dough has proofed sufficiently, you should be able to pick it up and stretch it very easily using the back of your hands. Lay a sheet of parchment paper on a pizza peel, and pour a few drops of oil into the center of it. (Note: the oil is optional. It’s especially helpful if you find shaping dough using the backs of your hands tricky.) Transfer the dough round to the parchment-lined baking peel.
- Top pizza as desired or to make the Margherita pizza: spread 2 ounces of tomato sauce over your pizza dough. Top with 3 ounces of mozzarella. Drizzle with olive oil. Season with a pinch of flaky sea salt. Shimmy the pizza, parchment paper and all into the oven. To make the kale and crème fraîche pizza: Place the kale in a small bowl, drizzle lightly with olive oil, season with sea salt, and toss with your hands till the kale is coated in oil and salt. Spoon crème fraîche over the dough leaving a 1/2-inch border or so—I use 1 to 2 tablespoons per pizza. Sprinkle with the garlic and a handful of the grated Parmigiano Reggiano. Top with the kale.
- Bake the pizza: Shimmy the pizza, parchment paper and all into the oven. Bake the pizza until the top is blistered, about 5 minutes. Transfer to a cutting board. Shower basil over the pizza Margherita. Cut and serve. Discard parchment paper.
Notes
Margherita Pizza:
- 2 ounces tomato sauce, such as this one
- 3 ounces fresh mozzarella (if using buffalo mozzarella, drain before using)
- olive oil
- flaky sea salt
- fresh basil
Kale & Creme Fraiche Pizza:
- extra-virgin olive oil
- a couple handfuls of baby kale
- 1 to 2 cloves garlic
- Sea salt, such as Maldon
- 2 tablespoons crème fraîche
- grated Parmigiano Reggiano, about 1/4 to 1/3 cup
- Prep Time: 2 hours 30 minutes
- Cook Time: 5 minutes
- Category: Pizza
- Method: Baked
- Cuisine: American, Italian
This post may contain affiliate links. Please read my disclosure policy.


824 Comments on “Simple, 4-Ingredient Homemade Pizza Dough”
Hello! I have a question about the parchment circles that you’re using for pizza baking. Such a smart idea. I have hesitated to use parchment on the baking steel in the past because the package usually says “safe up to 400 degrees” and the steel recommends 550. Have you had any problems with the parchment circles burning or sticking? Thrilled by the possibilities here-getting the dough off the peel is often such a mess (and some nights, a deterrent to pizza-making)!
Thanks so much for your great site and recipes!
Hi Annie! I have not had any trouble. I have never found a parchment paper that says safe up to 550, and I’ve used every single one on the steel without a problem. The circle ones are great because there is no overhang — in the past I’ve used rectangular sheets, and they do get a little toasty (and if you use them more than once, brittle) but they never burn. I find parchment the only way to get the pizza from peel to steel without the mess of flour/cornmeal burning on the steel and then eventually the oven.
One caveat: some recipes call for doing the broil method with the steel, and I would not do this with parchment. I’ve had parchment catch fire under the heat of the broiler. Regular oven cranked up to 550, however, has never been a problem.
Good luck! Let me know if there is anything else.
Thanks so much! I ordered some parchment paper rounds and WOW-big difference. Pizza making suddenly became so much more accessible! It’s amazing what a big difference easy clean-up can make. Thanks for the great tip.
I am so sad 🙁 I did everything as listed. I halted the recipe so I’m not sure if only have 1/4 teaspoon of yeast had something to do with it but my dough never rose 🙁 Not even after a 2 days refrigerator proof.! Wasted a bunch of good flour and no pizza tonight. So sad! Not sure what went wrong but I would say the biggest difference between this and recipe I always use was the lower yeast and lack of kneeding
Oh no! Kim, did you let it rise at room temperature first?
I can’t wait to give this a try! I’m wondering if you did anything special to get all the wonderful color on top? That’s been my issue in the past, lack of char.
Hi Ashley! A few things: really be sure to let your steel heat at your oven’s hottest setting (550 if possible) for an hour. So many ovens don’t actually get up to 550. Even my new fancy one barely gets there. The only way to really know is to get an oven thermometer — super cheap/sold many places. Second, a little bit of flour clinging to the dough will char in the oven giving the crust that appealing look — you don’t want to much flour, but a little helps.
Hi Ali! I 100% agree with type 00 flour. I’ve been using is exclusively for a while now and love it.
The texture is noticeably different, right?
I’m having pizza for Super Bowl Sunday, so I tried out this recipe for kale and creme fraiche! So delicious! And I am a baking steel fan. There’s no comparison to a stone when baking in a home oven: it generates more heat that magically transforms the dough into a chewy crust on the sides, crisp on the bottom, airy in between. I think the key to the best pizza is not to drown a pie in ingredients, in part to let the crust breathe and stay crisp and to preserve a delicacy to the pizza. There’s nothing inherently heavy about pizza, only heavy-handedness (understandable because toppings can be so good, but really less is more). The use of creme fraiche is ingenious. Great recipes.
Oh and I forgot to say that my local Italian flour supplier says that Tipo 00 in the blue bag is even better. It is excellent, but I haven’t compared one with the other. But definitely, it’s worth ordering or seeking out Tipo 00
I’ve tried that flour and it indeed is good!
Hello! A lot of the pizza pictured at the bottom don’t link out to posts. 🤷♀️ I made your potato and creme fraiche pizza a while ago – even without the steel it was delicious!
Oh no! Fixing now … sorry about this! Thanks for the heads up. So glad the pizza turned out well even without the steel. Did you use a sheet pan?
Links are all fixed! Thanks 🙂
For the pizza dough, is it necessary to use the “4 folds” method for each dough portion before shaping into a ball? I have seen a recipe (Lahey’s) using this technique but don’t know why it would be used or even if it’s necessary … your insight would be appreciated. Thank you.
Hi Linda,
The folding method you are describing is probably used to keep the ball in the shape of a round when baked. If you didn’t make the effort in some way (4-fold method or other) to get the portions of dough into balls, when you stretch them out, they likely wouldn’t be round (not the end of the world) and they might not puff up as beautifully.
Hope that helps!
Hi, Just a couple questions. For the Jim Lahey dough did you make 4 dough balls. On the top you mention a yield of 2, which I assume that you froze the rest for later use. In you picture you divide the dough in four, but the directions say 6. Or do you have a specific weight per dough ball. Also, do you lightly oil your containers before placing the dough balls for storage? Thanks, Tom
Hi Tom. Great questions. Will revise recipe soon to be more clear.
For Jim Lahey’s recipe, I divide it into 6 portions. For the Bread Toast Crumbs pizza recipe, I divide it into 4. I do not weigh each ball — I just eye it.
No oil in the containers.
Are you on Instagram? Yesterday I posted a story using refrigerated dough. You can view it here.
Alexandra, Thanks for your reply. I’m not on social media, but I will try to take a look somehow. I made half the recipe and ended up with 4 dough balls at 220gm each, which I think will be perfect.
I hope they turned out well Tom!
Hi,
I am going to attempt to make this pizza Sunday. I see the that the initial rise is 18 hours, can I leave the dough out overnight this whole time or best to put it in the fridge?
Thank you!
Hi Alice, Let the dough rise at room temperature. Happy Baking!
I’ve been making fabulous pizza for years, largely due to what I have learned from you! One question about the pizza steel, mine has gotten rusty. Do you have any thoughts about that? I always use parchment on it, so it doesn’t bother me to much, but I’m curious if you experience the same thing, or have thoughts of what to do about it.
Adria, this is a great question. I, too, have found a few rusty spots, but haven’t taken any action. Just found this on the Baking Steel website: Q. My Baking Steel has rusted, what now?
A. If the Baking Steel encounters water, it will encounter rust. Use something abrasive, such as an SOS pad or steel wool, to remove the rust. Once the rust is gone, you will need to re-season your Baking Steel.
I’m going to try this!
I made your pizza dough, let it rise overnight in the fridge and it was Fabulous! All those amazing holes, so perfectly chewy! Our search for the perfect pizza dough is over. Thank you!
Yay! So happy to hear this Liesl!
Wow – this looks just amazing! I am saving this recipe 😀
I don’t know you, but I love you – your dough recipe rocks, I have made 4 personal pizzas this week alone. The dough is simple and results in a crust with amazing flavor and texture. The use of parchment paper is genius! Thank you!!!
Oh wonderful! So happy to hear this, June!
Nice recipe, I love the simplicity of it all. The sauce I’ve been making lately is pretty good, but I like the idea of no-cook sauce, which will reduce the prep time. I also grabbed your dough recipe. I think I’m going to do this tonight, although my wife will probably think I’ve lost my mind, making pizza for the 3rd time in 4 days. I’ll just have to make her something else for supper I guess….. Thanks!
Nothing wrong with a pizza diet! I say go for it 🙂
Hi Alexandra! Love your pizza dough recipe. The no-cook pizza sauce was a winner. The whole family loved it!! THANKS!
Aloha … Nancy On Maui
Yay! So happy to hear this, Nancy!! And Aloha … wish I could visit 🙂 🙂 🙂
Tried to sign up for your website. Was sent repeatedly to a tech support type of website. In any event, kindly sign me up: . Thanks very much. Kind regards, /PM
Hey Hey,
I have a quick question regarding the dough!! I just finished making it yesterday and it has risen and everything over night etc! When it comes time to store the dough in the fridge, is there any way that I can freeze some of the dough for later use??
I am so excited to try this out!! All your recipes are amazing!!
Thanks so much!
Kristin
Hi! Sorry for the delay here … thank you for the kind words 🙂
Yes, you can freeze the dough! Freeze it immediately after you ball it up. If you’ve already stored it in the fridge, I would take it out, punch it down/deflate it/re-ball it, then transfer to the freezer.
hi Ali! The Lahey slow rise dough was delicious. I think my oven doesn’t get all the way to 550, since the pizzas took more like 12-15 mins to really bake and didn’t get the nice char you did; but nonetheless we loved it. I did as you said and froze a few quart containers of the dough (my husband and I are social distancing and couldn’t eat it all 🙂 ). Do you have any tips for defrosting? I assume I should put in fridge to defrost at least a day in advance, and then take out an hour before baking like we did before.
So happy to hear this Maria! So many ovens don’t get up to 550ºF, so that makes sense that your pizzas took longer.
Regarding defrosting: Give the dough at least a day at room temperature to defrost or 2 days in the refrigerator to defrost. Once the dough is defrosted, you can test it by poking it … you’ll be able to see if the center is still frozen. Then I would remove it from the quart container an hour before baking and let it rest on a floured surface.
Let me know if there is anything else!
Hi!
I made this tonight and had a few questions. My oven only goes up to 500, and I have a pizza stone. The results were delish (I topped them with the kale/creme fraiche recipe you recommended…omg yum…can’t wait to try mixed mushrooms in place of kale on the next one), but the look and texture of the cooked dough was not quite Neapolitan. Do you think I could get better results if I baked it on a baking sheet? And I noticed that my dough disks weren’t as bubbly as yours in the Instagram vid. When I transferred the dough from the initial bowl, I pulled it away from the sides with my forks similar to how you do with your peasant bread. Could that have deflated it too much? Sorry for the long post! Really appreciate any insights you have 😊
Hi Jennifer!
So happy to hear you are liking the toppings 🙂
OK: A few things, first: are you using a scale to measure the flour? Second: which dough recipe are you using: the fast, BTC recipe? Or the Jim Lahey, slow rise?
I don’t think you could have deflated the dough by your pulling technique … it sounds right to me.
Regarding your question about a baking sheet, I don’t think so. Your stone should do a fine job. How long are you letting it preheat before you place a pizza on it?
If you could tell me a little more about your process, I can troubleshoot a little more: after you portion the dough into balls, are you refrigerating them? Or are you letting them rest at room temperature for 30 minutes or so and then baking?
Hi Alexandra! I have had awesome success with two of your sourdough recipes lately and was thinking of trying your pizza dough but with sourdough instead of commercial yeast… any chance you’ve done this before? Thanks 🙂
I have yet to try but it is high on my list of to-do’s. Stay tuned. However, if you want to give it a go, I would suggest using this recipe for whole wheat-ish sourdough bread but not using any whole wheat flour … I’m kind of a purist when it comes to pizza dough in that I don’t want whole grains in it 🙂 And instead of shaping it into 1 loaf of bread, I would divide the dough into 2 or 3 rounds, and I would stick each of those rounds in a quart container and refrigerate overnight. Or for at least 6-12 hours. When you are ready to shape your dough, I would follow the instructions here regarding olive oil and parchment and a Baking Steel … do you have a Baking Steel? Or stone? How do you typically bake pizzas?
Hey Alexandra!! I am yet to try this pizza recipe but i have a question, i have always known that we freeze any kind of dough without proofing, in your case do i freeze after the first room temperature proof?!
Thank you in advance
Yes! I need to add a note to the recipe: After the first rise, I ball up the 4 portions and transfer each to a quart container. Then I date the container and stash it in the freezer. The dough balls will require a day to thaw at room temperature, or 2 days in the refrigerator.
Hi Ali,
I am a big fan of your cooking and blog. I made the pizza dough yesterday, let it rise, and then refrigerated it. I plan to make the pizzas tonight. My question is about using a stone (don’t have a steel). Where should I place it in the oven and should I use the same temperature in this recipe–550 degrees. How long should I preheat –I’ve made a lot of pizzas, but I’m trying your recipe and methods this time. Thank you so much and if they come out nice, I’ll post on Instagram!
Hi Nancy! I’m too late here … I’m sorry. I like to place my Baking Steel in the top third of the oven — I find I get the most blistering up there — and, as you say, I preheat it at 550F. My Baking Steel lives in my oven, so I preheat it while the oven gets up to temperature, which takes a long time (sometimes 30 minutes); then I heat it for at least 15 minutes once the oven is at 550. A good rule of thumb is 45-60 minutes of preheating before baking.
Do you know what temperature your pizza stone can tolerate? If you have the manufacturer’s name, I could do some googling.
Hope the pizzas turned out well!
Hi! I have trouble finding the right cheese that melts and bubbles without being too rubbery! Is there a brand that you like best? I feel like I have tried them all without finding that perfect one!
Hi Kait,
I have been using Trader Joe’s low-moisture mozzarella, and I’ve been happy with the results. But I can’t say I have a favorite, and I totally know what you mean with so many cheeses turning out rubbery upon baking.
Thank you for this recipe, we loved the flavor, but the crust came out tough. I will try again. I’m wondering if I used to much flour when getting balls ready to put pizzas ready. I used a pizza stone. Any hints on why crust is though
Hi Lupe! Are you using a scale to measure the flour? What type of flour are you using?
Hi! I have been making your peasant bread all through Corona-quarantine and bought your book. I made the Jalapeno Cheese bread over the weekend. Everything has been delicious! I am going to try the peasant pizza next. We do not have a pizza peel. I have a large wooden cutting board. Do you think I can use that and transfer it to the pizza stone (no steel and they are sold out on Amazon right now). Thanks!
So nice to hear this 😍😍😍 Thank you!
Yes, I do think a board will work. Are you going to be using parchment paper?
This recipe rocks! I’ve made it three times so far. We have fun creating new pizzas we’ve done spinach ricotta, buffalo chicken, sautéed Brussels and onions with balsamic drizzle and of course traditional with truffle oil. So while I’ve been successful making the pizza I find my dough is still rather sticky when it comes to the shape. The dough in your video seemed easier to shape and that you could lift it and put it down again ours seems to be “glued” to the parchment. I held back a bit of water this time when mixing because I felt the dough was way to moist and runny last time I made it. Also when I cut my dough into pieces it wanted to stick to each other – not clean cuts like you got in the video. Any additional tips would be appreciated. My first two times making this I had 00 flour so used that. This last time used Trader Joe’s all-purpose flour. I finally found bread flour (King Arthur brand) and was wondering if I can use that next time I make this or if I should stick with all-purpose (which is starting to run low).
And Happy Mother’s Day!
Hi Robin! So nice to hear this 😍😍😍 Regarding bread flour: absolutely use it. It absorbs more water than ap flour, so it’s a little more forgiving. Question: are you using a scale to measure? Know that you absolutely can hold back more water. So many factors play a role in texture of dough, namely type of flour and humidity. I am all for finding what works for you given what you have on hand and your environment. Keep me posted if you give it another go with bread flour and with holding back more water. You also can hold back water; then slowly add it to the dough while you mix it till the consistency looks right.
Thanks for responding. Yes I’ve been using a scale to measure. And I will try the bread flour next time we make it. Probably next weekend.
Wonderful! Keep me posted!
Hi! I love your site and recipes. Did you change this one though? I make the Lahey dough when I have time and your peasant bread one when I forget to start the night before. I love both and have been shared this a couple of times and I miss the old way the post was written! The kale pizza is surprisingly amazing!
Hi Jo! I did change some things … all in the name of SEO (😩😩😩)… sorry. It’s not ideal to have two recipes on one page, so I kept the peasant bread pizza recipe here, bc I have the Jim Lahey recipe in multiple spots on the site, find it here: Jim Lahey Pizza Dough. I did include the kale pizza instructions in the homemade pizza dough recipe here … please let me know if there is something from the old post that is missing. I mostly rearranged things. So glad you like the kale pizza!
Can this pizza crust be cooked on an outside grill?
Hi Carol! I worry this dough is a little too wet. Would you be open to cooking the dough in a skillet on the grill?
I find this dough is so wet, it’s more like batter. When I start to shape it after the first rise, it’s more like a puddle than a dough blob. I find I end up using at least another cup of flour to make it workable. And yep, I always use a scale! Am I doing something wrong?
Thanks so much for the tip about the baking steel!!! It was a splurge, but we made so much pizza this month, it’s already paid for itself. Wow. What a great tool!
So strange! What kind of flour are you using? And do you live in a humid environment? And are you weighing the water, too? If so, I would cut the water back by 50 g to save you the trouble of having to add more flour. If 50 g makes the dough too dry, you can always add more water in slowly.
Yay re Baking Steel!! Mine has never received so much use than these past two months 🍕🍕🍕
I convected roasted and at 8 minutes it still wasn’t charred. I used the steel, measured the flour, did everything else. My husband suggested bake without the convection.
Hi Elle! It’s hard to say. I find I have the best luck getting some charring when I put my Steel in the top third of the oven, and preheat it for at least 45 minutes before baking. You can try without the convection. What type of flour are you using? It’s also possible that your oven isn’t quite getting up to 550ºF. Do you have an oven thermometer?
Hello,
I just have to say simply this is the best pizza recipe ever. I have tried your simple sourdough recipe as well.
Thank you!
So great to hear this, Minsun 😍😍😍