 →
→ Foolproof Chewy Homemade Bagels
This post may contain affiliate links. Please read my disclosure policy.
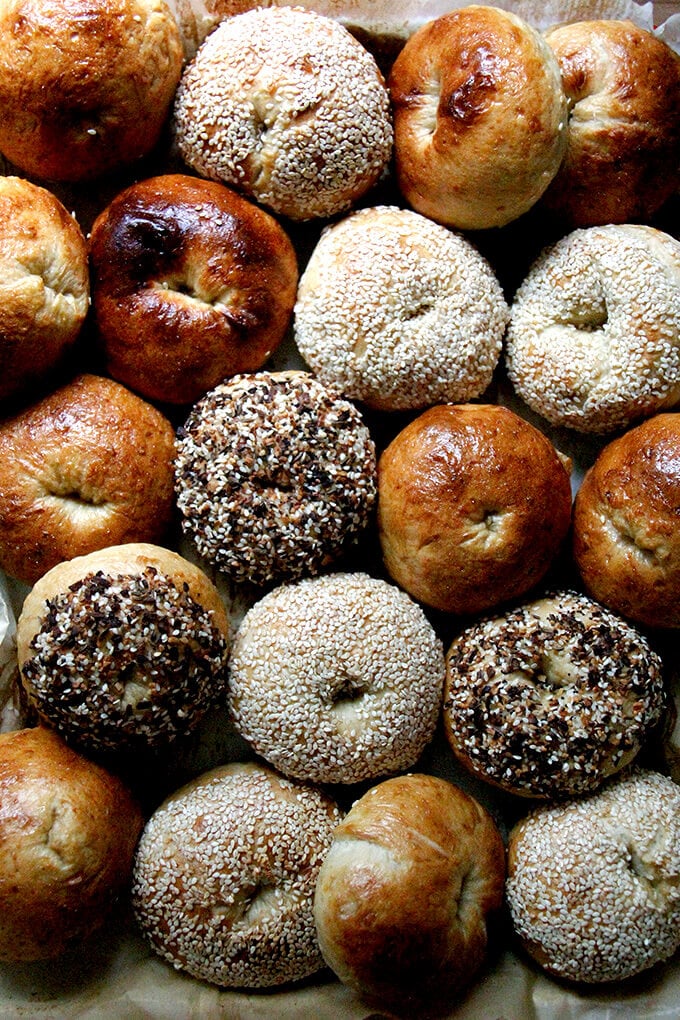
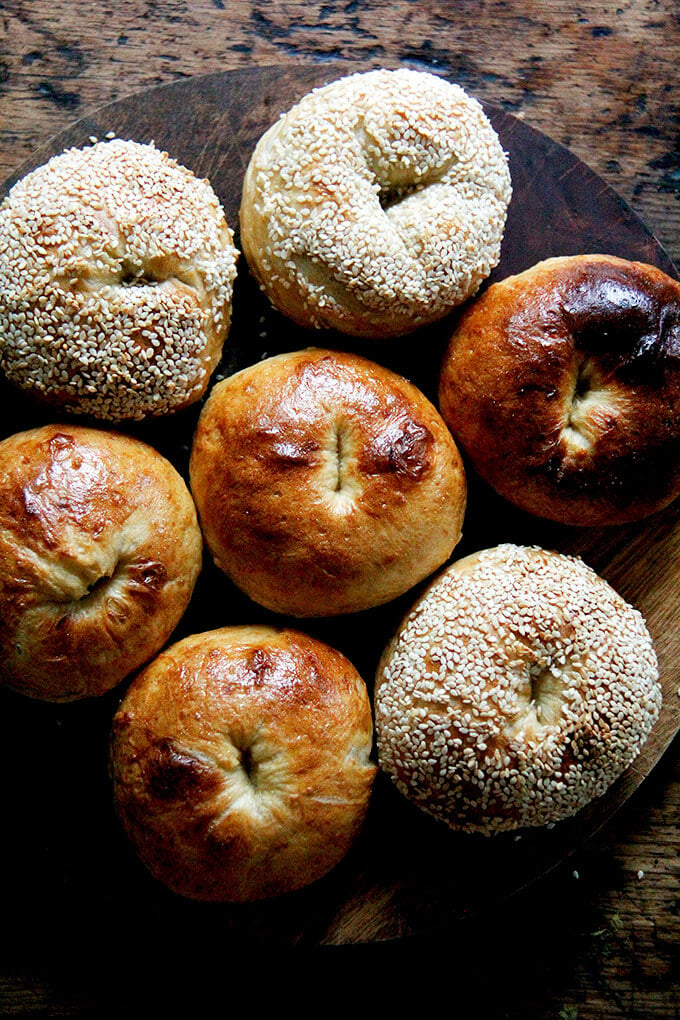
Chewy, golden, seed-crusted bagels at home? Yes. You. Can. This dough comes together in 90 seconds. Find step-by-step instructions below 🥯🥯🥯
Unlike many of the bread recipes in this site’s archives, bagels are made with a low-hydration dough and, as a result, require kneading to allow the dough to come together. Moreover, due to their nature, bagels require shaping, boiling, and egg washing.
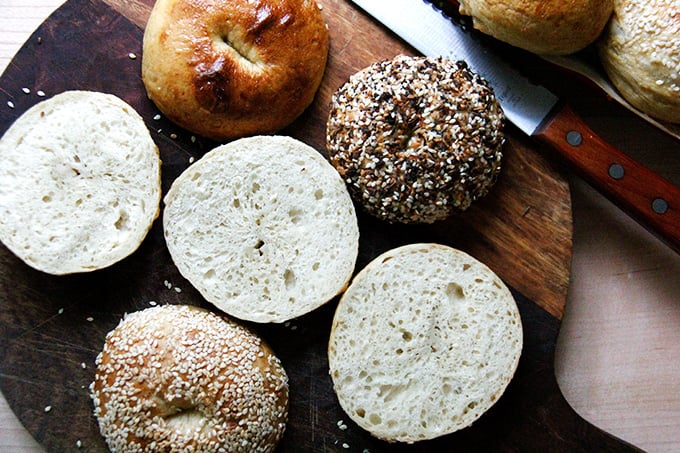
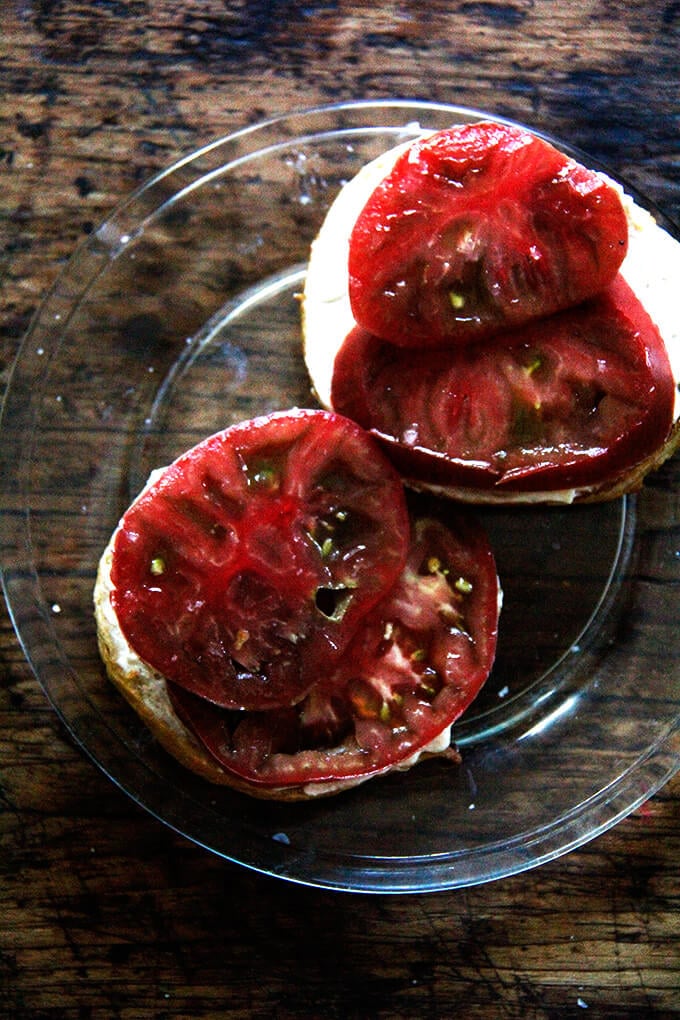
But overall, the process is simple — the dough comes together in 90 seconds — and the result — a chewy vessel perfect for cradling juicy summer tomatoes or cream cheese and lox — is well worth the effort. Find three tips for making deliciously chewy bagels at home and step-by-step instructions below.
3 Tips for Excellent Homemade Bagels
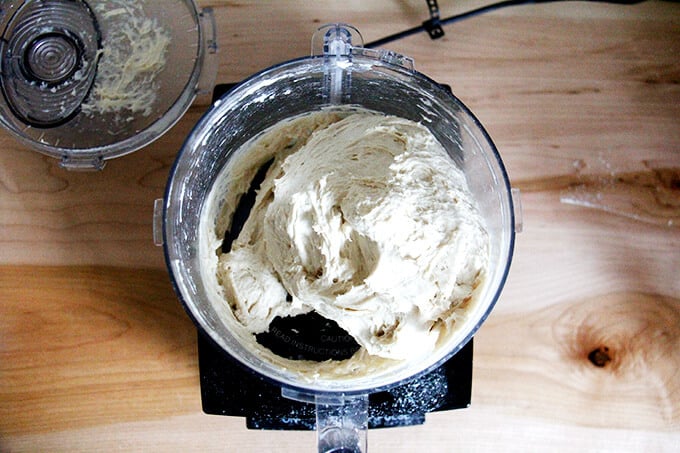
- Knead the dough. To get that characteristic chewiness—in other words, to ensure bagels don’t simply taste like bread shaped like bagels—the dough needs to be kneaded. You can do this in the food processor, which takes 90 seconds.
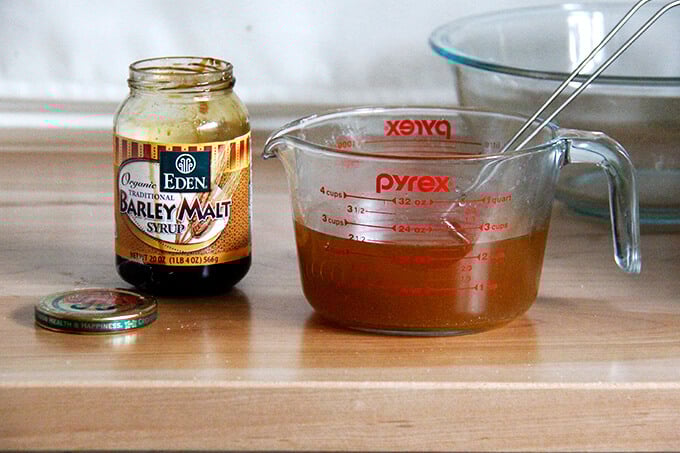
- Pick up a bottle of barley malt syrup. I learned from this Stella Parks article that barley malt syrup, not only provides flavor, but also promotes “a more delicate texture in the crust, one that’s chewy and crisp rather than crunchy and hard.” If you don’t feel like picking up another product, you can use honey, molasses, or maple syrup in its place.
- Use an egg wash. To get that nice, golden sheen during the baking, an egg wash is essential. Commercial bakers often boil their bagels in a lye solution, which promotes browning and gives the bagel crust a crispness. As lye is something I am unwilling to experiment with, an egg wash is a fine substitute.
PS: Foolproof Homemade Bialys: A Step by Step Guide
How to Make Homemade Bagels: A Step-by-Step Guide
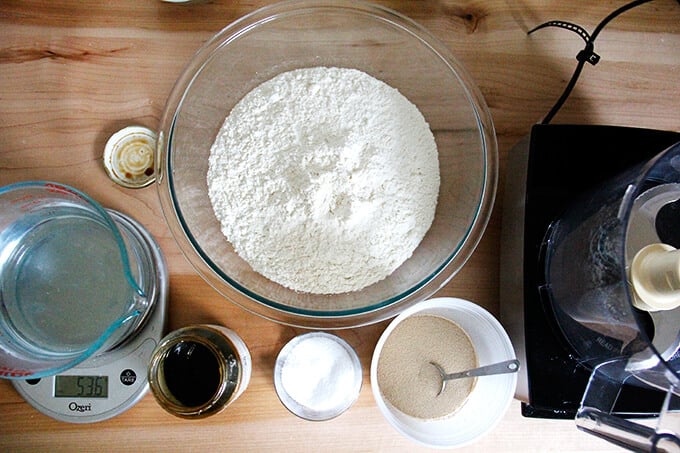
First, whisk together the flour, salt, and instant yeast. You can do this in the food processor or stand mixer, depending on which you are using.
Whisk together the water and barley malt syrup:
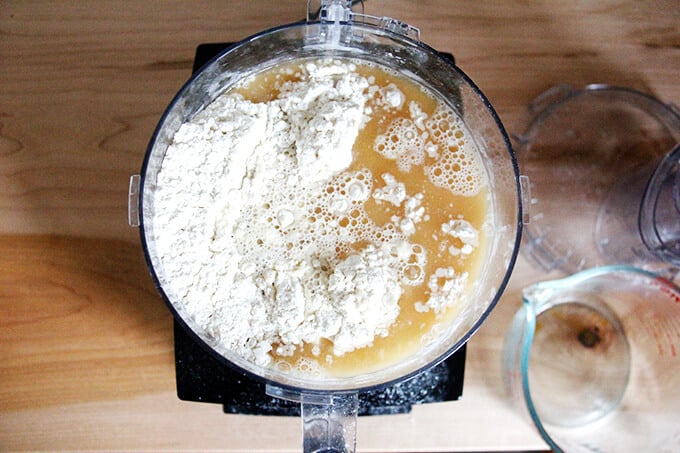
Add the liquid ingredients to the dry ingredients, and knead for 90 seconds:
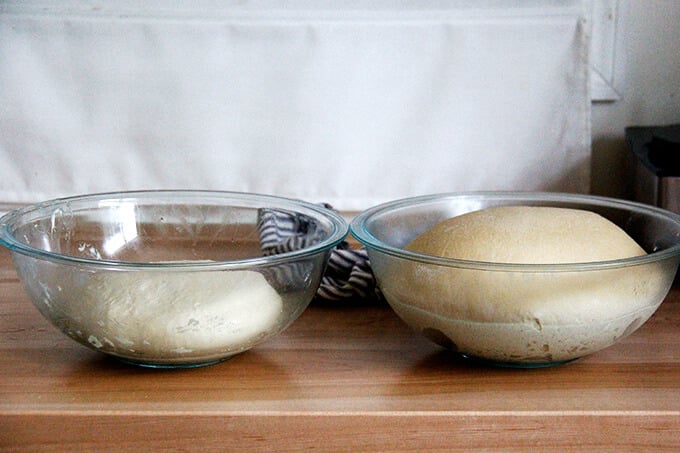
Use greased hands to transfer it to a bowl. Coat it with a little bit of olive or grapeseed oil. Cover the bowl with a lid and transfer to the fridge (see recipe box if you want to skip the overnight rise). On the left: just-mixed dough. On the right: dough after a night in the fridge.
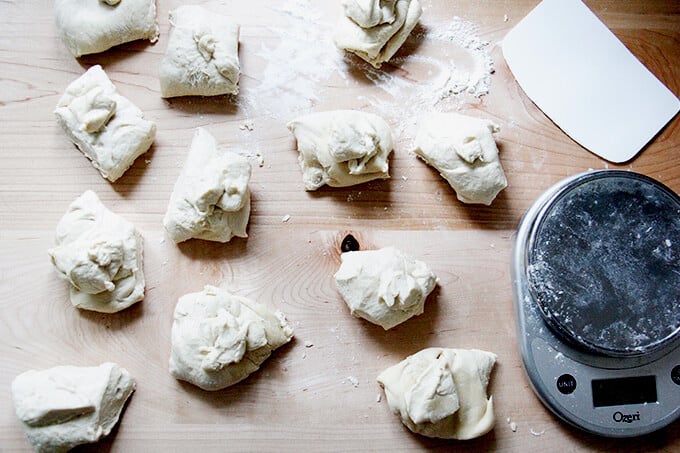
Turn the dough out onto a lightly floured work surface.

Portion the dough into 12 pieces:
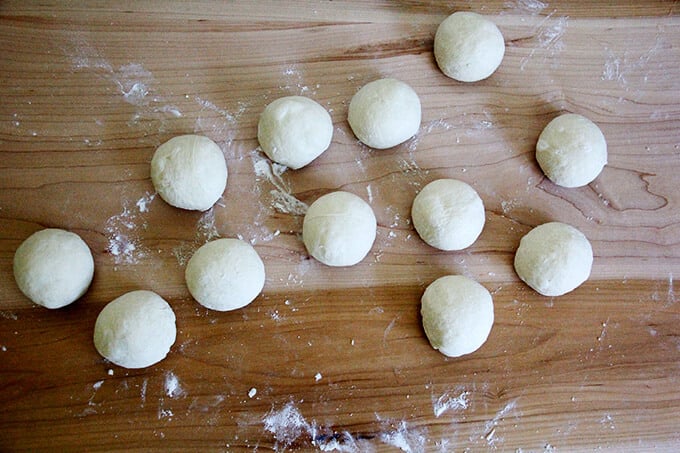
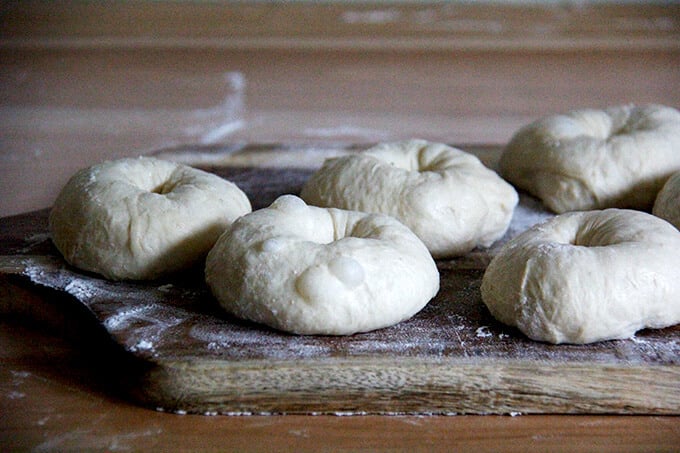
Ball them up and let them rest for 1 hour, covered with a towel or plastic wrap:
Shape them into rings, by using your thumb to poke a hole in the center of the round, then both hands to stretch the dough out and under—don’t be afraid to be aggressive.
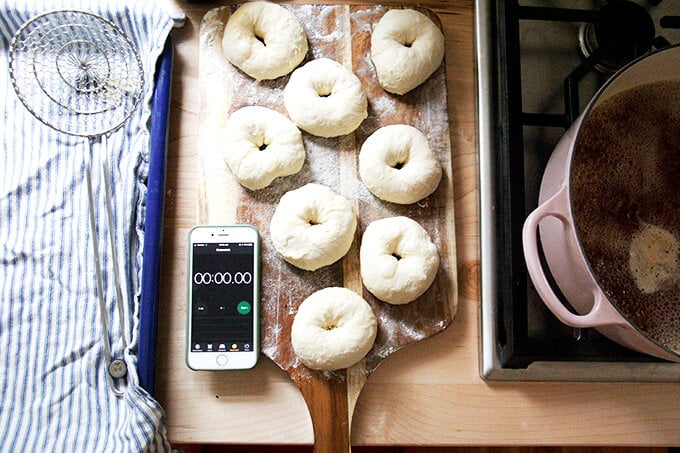
Prepare the water bath by boiling water with barley malt syrup or maple syrup.

Get ready to boil:
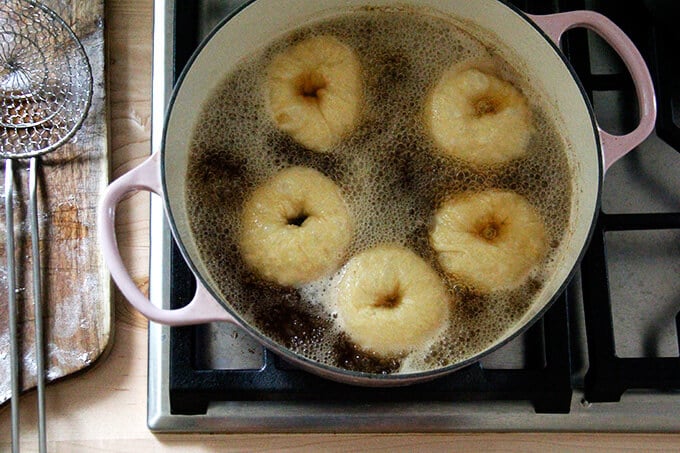
Boil 30 seconds a side:
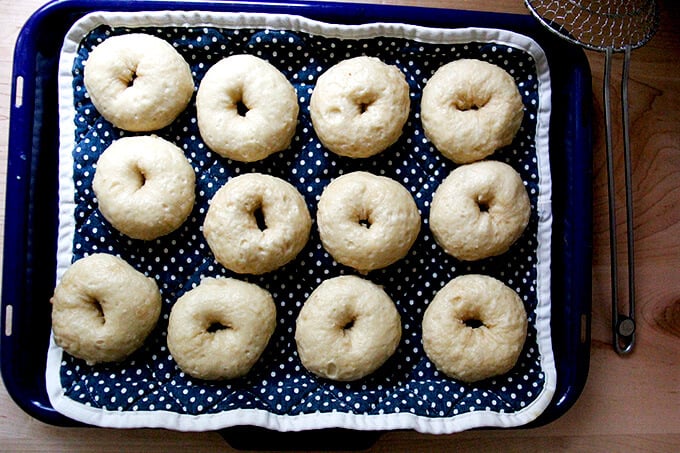
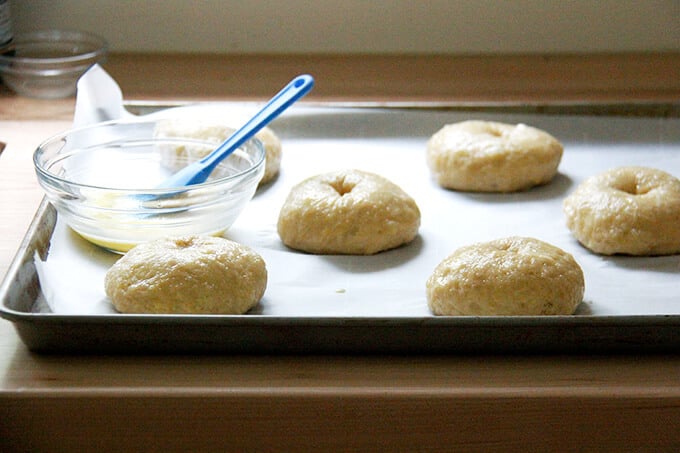
Transfer boiled bagels to a tea towel-lined sheet pan.
Brush bagels with an egg wash:
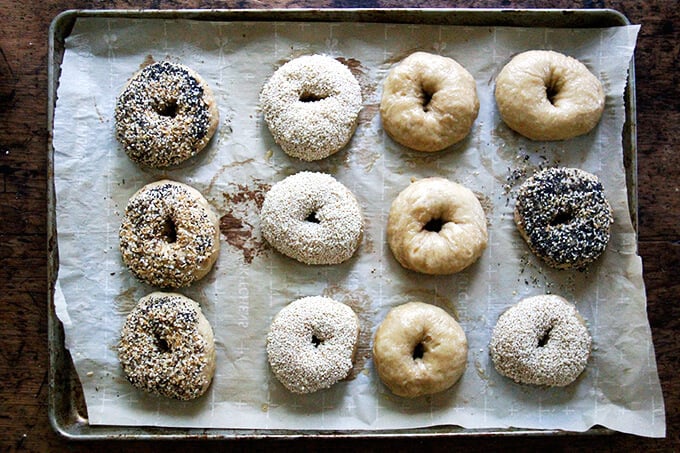
Dip in desired seasonings:
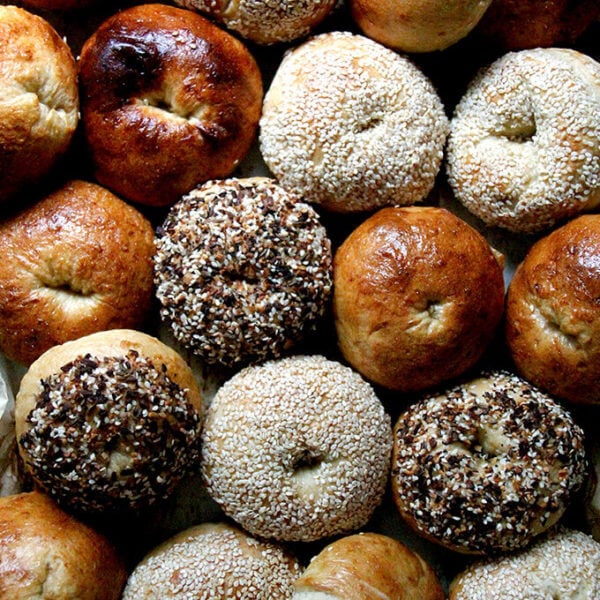
Bake until golden.

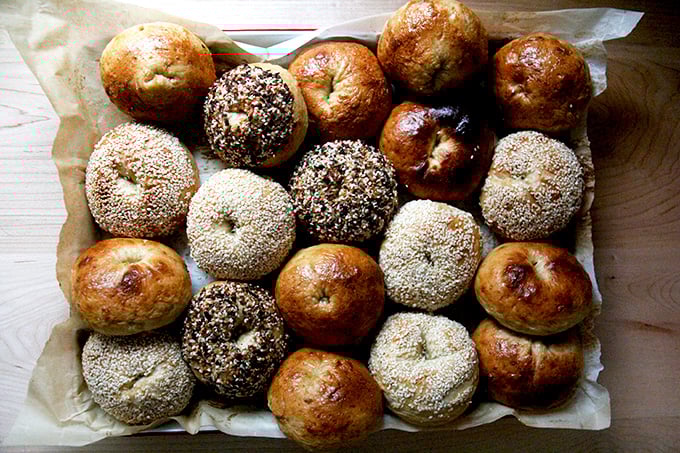
Invite some friends over for brunch. Find yourself some good tomatoes; enter summer-morning breakfast nirvana.
Foolproof Chewy Homemade Bagels
- Total Time: 12-14 hours
- Yield: 10–12 bagels 1x
Description
Chewy, golden, seed-crusted bagels at home? Yes. You. Can. This dough comes together in 90 seconds. Find step-by-step instructions below 🥯🥯🥯
Notes:
- Ideally the dough will spend at least 12 hours in the fridge, but if you wish to skip this rise, simply increase the yeast to 2 teaspoons, use lukewarm water, and let the dough rise at room temperature until it has doubled in volume, roughly 2 to 3 hours. Then proceed with the recipe.
Equipment Notes:
A scale is imperative to ensure you are measuring accurately.
A large sheet pan is so handy — it allows you to bake all of the bagels at once. If you don’t have a large one, you can squish them onto a standard sheet pan or use two standard sheet pans, and bake 5 to 6 on each.
You’ll need a spider or a slotted spoon to remove the bagels from the boiling water to a sheet pan.
A food processor or stand mixer will allow you to knead the dough quickly and powerfully. If you are using a food processor, be sure it is at least 14-cup capacity: I love my Cuisinart.
Note: Watch your food processor closely! This is a lot of dough for even a large food processor. You’ll only run the machine for 60 to 90 seconds, but it will work hard during that time and may jump around a bit — at any sign of the blade jamming, stop the machine and remove the dough. Also, after you add the liquids to the food processor, begin the kneading immediately to prevent the liquid from escaping through the center hole.
If you don’t have a food processor or a stand mixer, knead the dough by hand briefly, using as little additional flour as possible.
Ingredient Notes:
Bread flour or high-gluten flour makes for an especially chewy bagel, but if you don’t feel like picking up another product, don’t hesitate to use all-purpose flour. I have used it many times and my bagels always turn out chewy.
Barley malt syrup is hard to find. Shops like Whole Foods Market typically sell it. I order it online.
For homemade everything bagel seasoning, combine:
- 1/4 cup sesame seeds
- 1/4 cup poppy seeds
- 3 tablespoons dried onion flakes
- 3 tablespoons dried garlic flakes
- 2 tablespoons flaky sea salt
Ingredients
For the dough:
- 6 cups (768 g) bread, high-gluten, or all-purpose flour
- 3 teaspoons (20 g) kosher salt, I use Diamond Crystal
- 1.5 tsp (6 g) instant yeast
- 2 cups (454 g) water, room temperature or cold tap water
- 1 heaping teaspoon barley malt syrup, honey, molasses, or maple syrup + more for boiling
- grapeseed or olive or other neutral oil
For baking:
- 1 egg whisked with 1 tablespoon water
- various toppings: everything bagel seasoning (see above), sesame seeds, dukkah, etc.
Instructions
- Make the dough: *Please read all notes above before proceeding, especially the top note about timing.* In the bowl of a food processor fitted with the blade attachment (or in a stand mixer fitted with the dough hook), pulse together the flour, salt and yeast (or, if using a stand mixer, stir on low). In a medium bowl, whisk together the water and the barley malt syrup. Add it to the food processor (or stand mixer) and immediately (see notes above for why) blend for 60-90 seconds, standing nearby the entire time — at any sign of the blade jamming, stop the machine. (If using a stand mixer, knead on medium speed for 90 seconds or until the dough comes together and is tacky to the touch.)
- With oiled hands, transfer the dough from the food processor to the bowl. The dough will feel warm and tacky. With oiled hands stretch the dough up, then down toward the center several times to form a ball. (See video for guidance.) Lightly rub some oil over the dough to coat — this will prevent a crust from forming on the dough. Cover the bowl with a lid or plastic wrap. Transfer the bowl to the fridge for 12 hours or longer.
- Portion the dough: Remove the bowl of dough from the fridge. Turn the dough out onto a lightly floured work surface. For perfectly even bagels, use your scale to portion the dough into 10 to 12 pieces (I prefer 10). For 12 smaller bagels, each dough ball should weigh about 105 grams; for 10 slightly larger bagels, each dough ball should weigh 125 grams. Form each portion into a ball, using the pinky edges of your fingers to create tension. Place the balls on a lightly floured work surface and cover them with a tea towel or plastic wrap. Let them rest for 1 hour.
- Prepare your work station: When the hour is nearly up, place a large pot of water on the stovetop to boil. When it simmers, add a big glug (about ¼ cup) barley malt syrup. Preheat your oven to 425ºF. Line two sheet pans or one large pan one with parchment paper (see notes above). Prepare the egg wash. Place toppings of choice in small, rimmed plates.
- Shape the bagels: Lightly flour your hands. Use your thumb to poke a hole into the center of each dough ball. Use your hands to stretch the dough into a donut shape—don’t be afraid to really tug outward and under, almost as if you were going to turn the dough inside out, but stop before you do. Note: If you don’t pull out and under, the bagels will puff into cone-like shapes upon baking. Truly: Be aggressive with the shaping. Video guidance here.
- Prepare for boiling: Line a sheet pan with a tea towel. Have a stopwatch (or your phone or a clock) nearby. Drop 4 of the dough rings into the boiling water at one time. Boil 30 seconds on each side. Use a spider or slotted spoon to transfer the boiled rings to the towel-lined pan. Repeat until all of the rings have been boiled.
- Egg wash: Brush each ring with the egg wash. If you are using any toppings, dip the egg-washed bagels into the topping-filled bowls, then transfer to the parchment-lined sheet pan. If you are using an extra-large sheet pan (see notes), you can bake all 12 at once. If you are using a standard/smaller pan, bake 6 to 8 at a time.
- Transfer the pan or pans to the oven and bake for 20 to 25 minutes or until bagels are evenly golden all around. If you are using two pans, rotate the pans halfway through. Let bagels cool on sheet pans.
- Prep Time: 20 minutes
- Cook Time: 30 minutes
- Category: Bread
- Method: Boil & Bake
- Cuisine: American
This post may contain affiliate links. Please read my disclosure policy.


262 Comments on “Foolproof Chewy Homemade Bagels”
Your bagels look wonderful and I’m always willing to try a new recipe. Thanks for the write up!
Thanks, Susan!
Ali, #1 You never fail to amaze me. #2 Your bagels look awesome. #3 That’s a modestly equipped kitchen!?!? 🙂 Looks nicer and better equipped than my last 4 kitchens. – Hugs!
Oh Dana, thanks!! But what kitchen are you talking about?? I didn’t post any of our Lake George rental house …
These bagels look glorious Ali and I am so eager to try this recipe!
I loved the video too – you are so natural on TV!
Aww, thanks Marilena 🙂 🙂 🙂 xo
Oh dear god, these look sensational – I could never make them because if I did – I’d forget the bit about inviting friends over and just eat them all myself!!
Rebecca | http://www.peppermintdolly.com
Thank you, Rebecca!
I’m dying to make these but 1question-After its risen overnight and you turn it out and portion and form, do you let them rise again? Or rest? These do look amazing! Thank you so much.
Hi Trish! No rest in between. I think bc, at least where I am right now, it is very warm and humid, shortly after the bagels are formed and stretched, they feel very soft/pillowy/comfortable with their surroundings. Also, I think if you let them proof too much, they’ll deflate in the water anyway. If you need more time, you could definitely shape the bagels, then stick them back in the fridge till you are ready to boil. Many recipes call of another rest in the fridge.
I bake them and they were a success. Another dough is in the fridge tonight. Next time I’d like to shape them right away, leave them in the fridge overnight (covered) and proceed with the baking the following day. This is what I wanted to do this tonight but I didn’t…..
Thanks a lot for the recipe, another one of yours that is a keeper!
So happy to hear this, Caroline! Keep me posted if you experiment with another method. I’m curious!
This is the 4th time I’m baking these bagels since I saw the recipe in your story. Yes they are easy, and really good! Perfect for breakfasts, lunch boxes… I tried the method shaping them right after mixing the dough but it did not work well: dough is too sticky and needs some rest before you can work with it. Next will be the eggplants, the green gaspacho, thanks for sharing your wonderful recipes 🙂
You are so sweet, thank you 🙂 🙂 🙂 Hope you like the eggplant and gazpacho. Thanks so much for reporting back on the other shaping method—good to know letting the dough rise in bulk first is the preferred method. So happy you like the bagels!
Hi Alexandra!
I just tried the recipe and got awesome results. I didn’t use a food processor. I ended up making two batches: the first I accidentally kneaded for too long (10 minutes?) and then the second I kneaded only briefly as you instructed. They both turned out great, and I personally preferred the batch with the extra kneading as it gave the bagel a more dense and bagel-ey texture. Thanks for a fantastic recipe! 🙂
P.s. I am slowly making my way through your book and all the recipes are amazing!
You hand kneaded? I don’t have a hand mixer or a food processor 🙁
I only have active-dry yeast. that instead? If so, how much? Thank you.,
Have you ever tried a mix of half whole wheat flour and half white?
I have not with this recipe, but you definitely could give it a try. The bagels may be a little denser, but I think the texture will still be really nice. Good luck!
Hi Alexandra! It’s me, Nancy, again. I made pizza from your recipe yesterday. It was such a success that I decided to try your home made bagels. So glad to report, they were equally as wonderful. Everyone loved them!! Thanks so much for sharing!!!
So happy to hear this, Nancy! I need to start making them again … gotta get them right for tomato season 🙂 🙂
These bagels are unbelievably good! The recipe is great and the instagram video makes it super easy to follow. I used honey instead of the Malt Barley and they came out fantastic.
My family constantly asks when I am making these again! Thank you!!
Yay!! So happy to hear this, Lidor!
Sorry this didn’t meet your standards! Question: what is different about the process in the 1950’s cookbook than this one? I’d love to compare.
Hi, here’s the recipe ( for 6) 1 cup warm water, 3/4 tspn active dry yeast, 1 Tblspoon malt syrup, 1/2 Tblspoon veg oil( not olive): 3-4 cups bread flour, 1/2nTablspoon salt. Sprinkle yeast over warm water to disdolve. Add the 1 Tblspoon malt syrup then all the rest of ingredients, mixing till dough forms and comes away from sides of bowl. Continue to knead , adding flour as necessary. Bagel dough should be stiff. Work in as much flour as you can comfortably knead. Knead until soft and elastic.
RISING- roll dough into a ball, place in large oiled bowl, turning to coat. Cover and let fully rise until impression made with finger remains( about 1 hour). Punch down , divide into 4 pieces.
After shaping into rings, let rise about 20 minutes till puffy.
BOILING – large pot boiling water with 1 Tablespoon malt syrup. 30 seconds each side.
BAKING – after dipping in topping, 15-20 minutes in 425 degree oven , turning over after about 9 minutes.
Thank you!
Do you have any tips on reheating the bagels if you freeze them to preserve their freshness? I wanted to save some for later since I won’t be able to eat all 8 in a day!
After I freeze, I thaw the bagels at room temperature. Then I simply halve and toast them in my toaster. Hope that helps! Let me know if you have other questions.
Thank you, Alexandra! I’ll try this method.
I sprinkle frozen bagels with some water and heat at 300 degrees for about 10 minutes.
Hi, A lot of the recipes I read for bagels call for bread flour vs. AP flour. Do you have an opinion on this? I’m wondering if I should try this with bread flour. I’m a new and nervous baker… 🙂
Hi Kathryn! If you can get your hands on some bread flour, go for it. It’s great for bagels. If you can’t, ap flour is fine. But you are correct: a lot of bagel recipes call for high-gluten flour, which includes bread flour. Good luck! Let me know if you have any questions along the way 🥯🥯🥯
Hello Miss Alexandra :-). It has been a while 🙂
I made this bagel dough last night, about to proceed. I am not seeing that you bring the refrigerated dough to room temp? Is that right?
That is correct Miss Louise 🙂 🙂 🙂
Thank you, I took a chance…lol. I went to Costco and bought 50 lbs of bread flour, I’m on a bread-baking mission for my little apartment community. Yesterday I made 4 dozen, today I made 4 dozen, and I just realized I can coordinate this in 12-hour fridge-shifts, so I made a quadruple batch a moment ago (5pm). I can make another fridge-batch at 6am, bake the overnight batch by 9am, and then get going again at 8pm. I’m stay-at-home bored silly :-).
I tried lye once, and it made amazing bagels, but it wasn’t worth the stress. These? You knocked it out of the park, again ;-). Thanks!
Oh my goodness, Louise, I can’t get over all of this: you are amazing to bake for your community, and I love that you have a 12-hour schedule in place already. I found a 25-lb bag of flour at Hannaford’s and danced a little jig in the aisle! Happy happy baking to you 🍞🍞🍞💕💕💕🎉🎉🎉
By the way, now that I have plunged relatively cold, out-of-the-fridge dough into the bath, I realize…if they came to room temp, they might get to be 9 inches in diameter…LOL. This is a great dough!
Quick question – how would I use active dry yeast in this recipe if I don’t have instant yeast?
Thank you!
Hi! Sprinkle the yeast over the lukewarm water with the barley malt syrup. Let it stand for 15-20 minutes or until it looks foamy. Then proceed with the recipe 🥯🥯🥯🎉🎉🎉
I’ve made this recipe three times now (all in the last two weeks 😀). Each time I used my bread machine to mix and knead the dough and for rising. They have turned out great each time! Tonight I’m going to try the food processor + overnight fridge method to see if I get different results. Thanks for this awesome recipe!
PS. The link for the shaping video doesn’t seem to be working
I’m so happy to hear this!! Going to fix the video link now. I need to get it off IG somehow. Thanks for letting me know.
Hi Alexandra,
Can’t wait to try this recipe this weekend! Do you have any recommendations for a vegan substitute for the egg wash? By the way- we are obsessed with your recipes, especially peasant bread!! 🙂
Hi Lindsey! So nice to hear all of this. Thank you 😍😍😍 I think you probably could use any alt milk: almond, soy, oat, etc. I also think you might be able to get away with water. I use water to coat the loaves in this seedy sandwich loaf before coating them in seeds. Good luck!
Hi!
Excited to try this recipe this weekend- Question- you say Malt Syrup is optional. I see in Step #2 you don’t have Malt Syrup or Maple Syrup as an option ( like stated in Step # 9 of the post). If I don’t have Malt Syrup for Step #2 could Maple Syrup be used as a substitute ? Thank you!
Hi Allyson! Yes, absolutely.
Hi Ali, I have made these bagels twice now and they are exceptional! I’ve used honey or molasses in different trials and both were great. I’ve found it tough to get barley malt syrup in the current environment.
Question for you… I thought it would be fun to mail bagels to some friends and wondered if you had experimented with/had experience with par baking? I was thinking of boiling, baking for half the time, freezing and shipping. My idea was that the receiver could then bake for 10-15 minutes and have fresh bagels? Do you have thoughts on this?
So great to hear this, Kathryn! Yes, I imagine it is nearly impossible to find barley malt syrup at the moment.
OK, very interesting question. I’m afraid I don’t have experience, so can’t give you a definite answer, but I think your method sounds very good. Part of me thinks you should just maybe bake them fully, let them cool, and overnight them or freeze them; then ship them frozen. Part of me wonders if you could freeze them after the boiling phase… I am so tempted to try this, and the next time I make these, I definitely will, but I would hate to guide you wrong in the meantime without experimenting first.
So, in conclusion: I think your method is sound!
I love this overnight bagel recipe, as it lessens the work in the morning. I made changes, though. I added vital wheat gluten to my AP flour. No need to buy bread flour, just buy a bag of VWG, keep it in the freezer, it lasts forever. I used 1 scant Tbsp of regular yeast, added baking soda to the boiling bath, and boiled for 1 minute each side. I like chewy bagels. I will be trying your other bread recipes soon. They look yummy. Thank you.
Oh I love this! Thanks for sharing so many great tips EllenMarie! I like chewy as well. Will try the baking soda + 1-minute bath method next time.
Hello!
I made your bagel recipe today and they are absolutely delicious!
I have a question regarding adding in additional items.
My husband loves cinnamon raisin bagels and my son-in-law loves blueberry bagels. Do you have a recipe for either of these flavors or can you please tell me at what point would I add in the fruit? I am using a Cuisinart as in your recipe.
Thank you so very much!!:))
Hi Ann! OK, question for you: do you have a stand mixer? I’m thinking a stand mixer will more easily incorporate the ingredients without blitzing them (the raisins, blueberries) to pieces.
If you do: for the cinnamon, I would add the cinnamon and the raisins in with the flour. I would try maybe 1/2 cup raisins and 1 teaspoon cinnamon? Maybe more cinnamon?
for the blueberries, I don’t know how to advise, again because I don’t want them to get totally blitzed … I’m thinking add them during the last minute of mixing. Maybe 1/2 to 1 cup blueberries? It might take some trial and error to get it right.
If you don’t have a mixer, I would add the cinnamon with the dry ingredients, but maybe wait to add the raisins till the mixing is done. I might turn the dough out onto a floured work surface and knead them in by hand; same for the blueberries … as I think about blueberry bagels, they definitely are tinted blue and they definitely have some smushed berries, so I think it will be a little bit about managing expectations, too.
Love the recipe, I’ve been making it every other week for the past two months. I don’t think I’ll ever go back to store bought!
Best,
Kyle
Wonderful to hear this, Kyle 💕💕💕
Hi, if I were to use Bread flour instead of AP, how much would I need ?
Use the same amount, Cindy!
Hi. First time baker and I wanted to weigh the ingredients, as you highly recommended. My question is for the water… is it 350 grams OR 1 1/4 cups? Because 350 grams converted to cups is almost 1 1/2, not 1 1/4. Just concerned because you noted the importance of hydration in your notes. I am really excited to make these because these are my son’s favorite and your bagels look so good. Thank you!!!
Hi Maricar! Use the weight measure: 350 grams. Good luck! Hope your son loves the 🥯🥯🥯🥯
Hi Ali,
The bagels turned out really well. My son loved them.😊 Thank you for making it really easy for us neophyte bakers.
Maricar
Wonderful to hear this! 🥯🥯🥯🥯🥯
Made these today with great results! I had a few dome shaped breads, but I will improve on the shaping. I too am not willing to try lye. And the baking soda I have boiled in for pretzels always leaves a big mess. So glad this one has something easy like maple syrup that I could use. Thanks again for another excellent and easy recipe and for a nice, chewy bagel.
Hi Jamie! Wonderful to hear all of this. Shaping does take some practice — I’m always amazed by how aggressive you need to be to prevent the bagels from doming during the baking process.
Hi again! Question–I have non-diastatic malt powder, can I use that instead of the malted barley syrup? And if so, do I need to add more liquid? Thanks.
Hi Beth! I have never tried, but I just did some googling and found a comment on the KAF website that suggests you can — a woman used the recipe in a pretzel water bath, and said it worked beautifully. Worth a shot!
These were pretty easy and they turned out pretty well! I have bleached AP flour so I used half AP/half bread flour.
My biggest issue with them though was that the top crust didn’t really have the crispiness that I look for in a bagel – is it possible that’s because of the egg wash? Or should I just have let them go longer? Stella’s recipe is the only one I’ve made before and she doesn’t use an egg wash, so I may try without next time. (I loved the crispy crust on hers but her process/timing just didn’t work as well for my life)
Hi Alison! I can’t imagine the egg wash would make them less crisp, but it’s definitely a possibility. Only way to know is to give it a shot. Question: when you made the Stella Parks recipe (love her by the way!), did you use bleached flour?
I used 100% bread flour for that one since that’s what Stella had called for. Do you think that would make a difference?
I might try it that way. I’m planning to make another batch of dough today :).
That might make a difference! Bread flour is a stronger flour and will make a stiffer dough … great for bagels!
I made this recipe last weekend and it was great! The bagels were really simple to make and tasted delicious. I used all bread flour and mixed the dough in two batches because I have a 6 cup food processor. Because of the multiple batches, I had problems telling if I had a consistent mixture. Do you recommend doing a windowpane test to see if the gluten is properly developed?
Hi Angela! Wonderful to hear this. I have to be honest, I never do the windowpane test, but if that is something that has worked for you in the past, there is no harm in doing it here.
Love your bagel recipe! Halved the 12pc recipe n made 6, perfect. They turned out alright, not bad for a first attempt. Thanks so much for sharing!
Wonderful to hear this, Peen!