 →
→ Homemade Sourdough Bread, Step by Step
This post may contain affiliate links. Please read my disclosure policy.
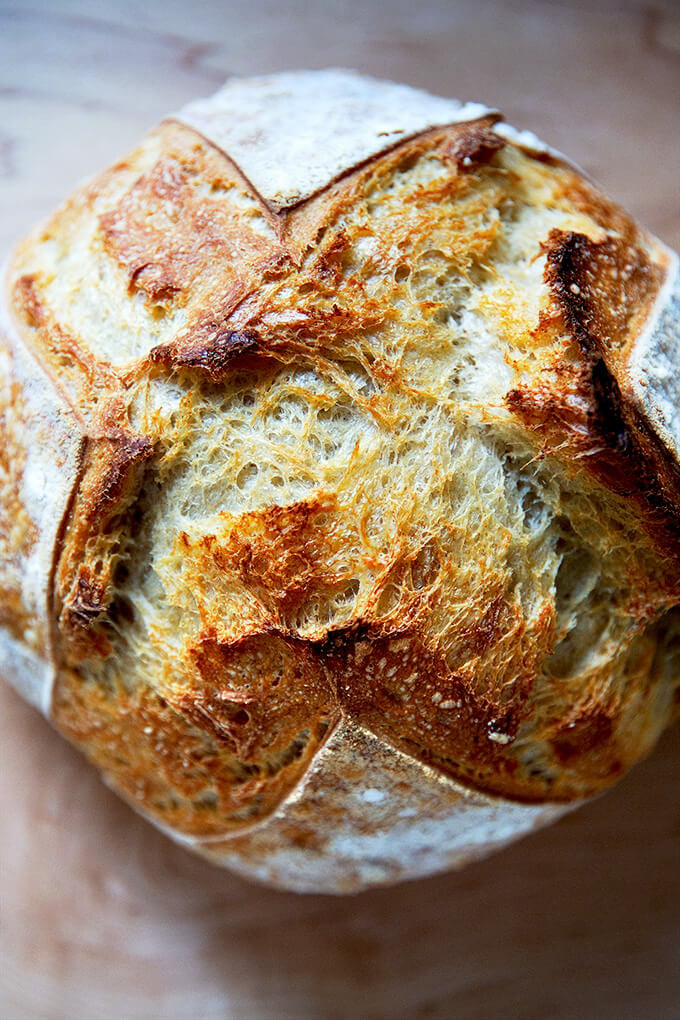
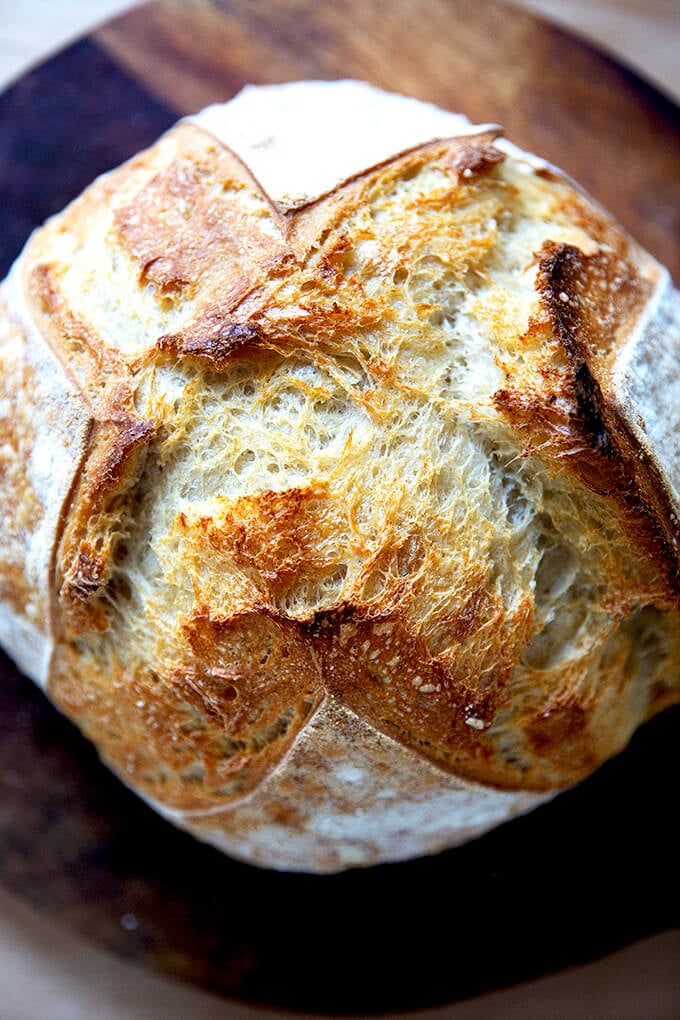
If you love fresh sourdough bread with a golden, crisp crust and a light, airy crumb, this recipe is for you. It’s one of the simplest homemade sourdough bread recipes, and one of the best, too. It requires only 25 minutes of hands-on work and no autolyse or preferment. Below you will find guidance for every step of the way. 🍞🍞🍞
⭐️⭐️⭐️⭐️⭐️ Review:
“Absolutely the best sourdough recipe EVER! I have been baking bread for years (sourdough included,) and things were many times hit or miss. Not with your recipe. You have nailed it. I thank you!” — Rosemary Patterson
This post will show you how to make the simplest of simple sourdough breads. There is no autolyse or preferment, which means the dough itself comes together in less than five minutes.
For those intimidated by sourdough bread baking, this recipe, as well as this sourdough focaccia recipe, are the recipes I suggest making first, both for their simplicity and flavor. Another great beginner’s bread recipe to try is this overnight, refrigerator focaccia or my mother’s simple peasant bread recipe, both of which require minimal effort but yield spectacular results.
This post is divided into 13 sections:
- What is Sourdough Bread?
- What is a Sourdough Starter?
- How to Feed a Sourdough Starter
- When is My Starter Ready to Be Used?
- Equipment
- How to Make Sourdough Bread: A 5-Step Overview
- How this Sourdough Bread Recipe Differs From Others
- Simple Sourdough Bread: A Step-by-Step Guide
- #1 Sourdough Bread Baking Tip
- Troubleshooting: Where Sourdough Goes Wrong
- Sourdough Baking Resources
- Other Sourdough Bread Recipes to Make
- Sourdough Bread Baking Schedule
What is Sourdough Bread?
Sourdough bread is bread that has been leavened naturally, meaning it has been leavened by a sourdough starter as opposed to by commercial yeast or a chemical leavening agent such as baking powder or baking soda.
What is a Sourdough Starter?
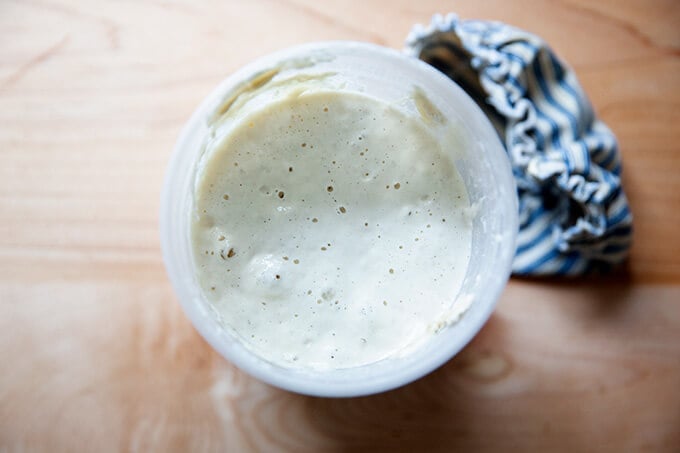
A sourdough starter is a fermented mix of flour and water containing wild yeast and bacteria (lactobacilli). Provided it is healthy and active, a sourdough starter is what will make your bread rise.
You can make a sourdough starter from scratch in just about a week. I only recommend doing so if it currently is summer (or a very warm fall) where you are. While it is immensely satisfying to build a starter from scratch and subsequently use it to make a beautiful loaf of bread, I am a huge proponent of purchasing one for a few reasons, namely: when you purchase a starter, you are guaranteed to have a strong, vigorous starter from the start. In other words, you can start baking with confidence right away.
Here are three online sources for reasonably priced sourdough starters:
How to Feed a Sourdough Starter
In order to keep your starter alive, you have to feed it — it’s not unlike having a pet, but know this: caring for a sourdough starter is akin to caring for a very low maintenance pet, one that requires feeding only once every two to three weeks to stay alive, but one that requires feeding much more regularly if you like to bake frequently.
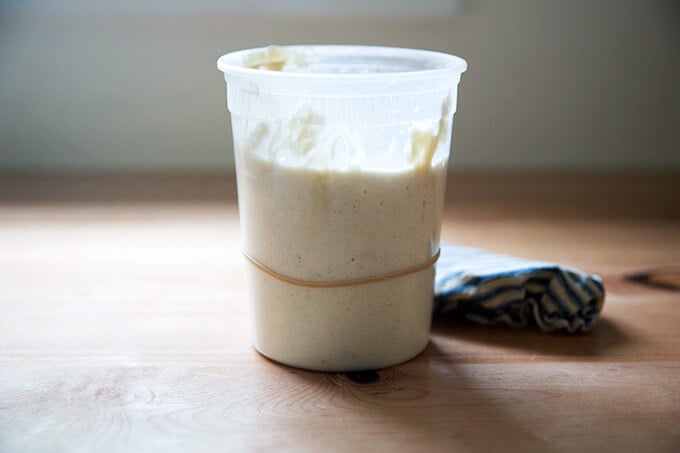
When I am not baking regularly, I store my starter in the fridge in the above-pictured vessel with its lid on. As noted above it can hang out there for 2-3 weeks (if not longer) without being touched. To wake it up or activate it, I like to feed it twice before using it. Often I’ll remove it from the fridge after dinner and feed it: this involves discarding most of it and replenishing it with equal parts by weight flour and water. (Please read this post, which explains in detail how to activate, feed, and maintain a starter.)
I will repeat this process in the morning — discard most of it; then replenish it with equal parts by weight flour and water. By midday, or when my starter has doubled in volume, it is ready to be used.
To store your starter, you should feed it, let it rise till it nearly doubles; then cover it and stash it in the fridge for 2 to 3 weeks until you are ready to use it again.
How Do I Know if My Starter is Ready to be Used?
If your starter doubles (or triples!) in volume within 4 to 8 hours after a feeding, it is ready to go. And ideally, you want to use your starter 4 to 8 hours after you feed it or when it has doubled. Every time I feed my starter, I place a rubber band around the vessel it is in to mark its height. This helps me see when it has doubled in volume and is, therefore, ready to be used.
If your starter is not doubling within 4 to 8 hours of feeding it, you should spend a few days strengthening it. This will involve discarding most of it — truly, don’t be afraid to be aggressive with how much you are discarding — and replenishing it with equal parts by weight flour and water. If you do this twice a day for several days, your starter will be in great shape.
What Equipment Do I Need?
At a minimum, you’ll need:
- a sourdough starter (see above)
- flour, bread flour if possible, my preference is King Arthur Flour
- salt
- water
Ideally, you’ll also have:
- digital scale
- straight-sided vessel for monitoring the bulk fementation
- bench scraper
- flour sack towels
- parchment paper
- banneton, such as this one or this one
- razor blade
- heavy lidded vessel, such as this one or this one
What is the Best Dutch Oven for Sourdough Bread?
I love my Lodge Pre-Seasoned Cast Iron Double Dutch Oven, which I’ve had for years! The Lodge is a great value at around $49, but if you like the idea of making batards, baguettes and other oblong-shaped loaves, I can’t recommend the Challenger Bread Pan enough, which costs $299. The placement of the handles makes for easy removal and closure of the lid, and it creates beautiful, crusty loaves every time.
How to Make Sourdough Bread: A 5-Step Overview
There are essentially 5 steps to making sourdough bread. Each of these steps is explained in more detail below.
- Mix the Dough: This is simply a matter of combining water, sourdough starter, salt and flour in bowl, and stirring to form a sticky dough ball.
- Bulk Fermentation: This is just a fancy name for the first rise. During the first two hours of the bulk fermentation, you’ll perform a series of stretches and folds, which will give the dough strength and elasticity.
- Shape + Bench Rest: This step ends the bulk fermentation. You’ll shape the dough, let it rest, then shape it once more.
- Proofing the Dough: In this recipe, you’ll cold proof the dough in the fridge, ideally for 24 to 48 hours, though you can get away with a shorter proof.
- Scoring + Baking the Dough: After the dough has proofed, you’ll turn it out onto a piece of parchment paper, score it; then transfer it to a preheated baking vessel.
How This Sourdough Bread Recipe Differs From Others
This recipe differs from others in three main ways:
- No Autolyse. Why? I’ve never found employing an autolyse makes a big difference in the final texture of the bread, and I find the process of doing an autoylse frankly to be kind of a pain. What is an autolyse? Autolyse is a technique that calls for mixing flour and water together and allowing them to sit for several hours before adding the salt and sourdough starter. This process allows gluten to develop in dough prior to mixing. It also makes the dough more extensible. This is due to the hydrating effects of soaking the flour, as well as — and this is getting a bit scientific — from the enzymatic activity of protease, which breaks down some of the gluten that forms as the dough hydrates. This process weakens the dough’s elasticity, in turn increasing its extensibility. If you are after a super open crumb, autolyse is something to consider.
- 50% (roughly) Increase in Volume. If you come from the yeast-leavened bread world, you are accustomed to letting your dough double in volume during the first rise. When I first got into sourdough, I was applying this same method, and while I had success, I realized I was often letting my dough overferment — I was pushing the bulk fermentation too far. As soon as I stopped the bulk fermentation when the dough increased by 50-75% in volume, I got a much better oven spring.
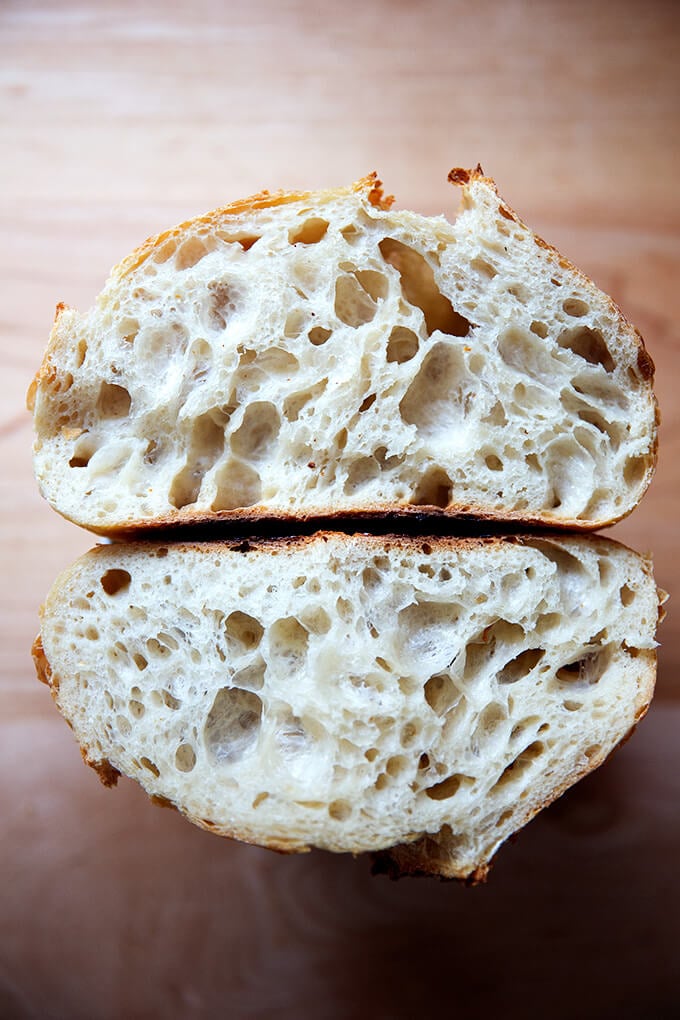
- Long Cold Proof. After the bulk fermentation, you’ll shape the dough, and store it in the fridge ideally for 24 hours but it can hang out there for 48 hours or even a bit longer. This long, cold proof will make for a much lighter, open, airy crumb. (Note: If you were to leave the dough in the fridge for 12 hours or less, which you can do, the crumb will be tighter and denser.) After you remove the dough from the fridge, you score it, and transfer it immediately to the oven — there is no need to do a room temperature proof first.
Simple Sourdough Bread: A Step-by-Step Guide
Mix the dough.
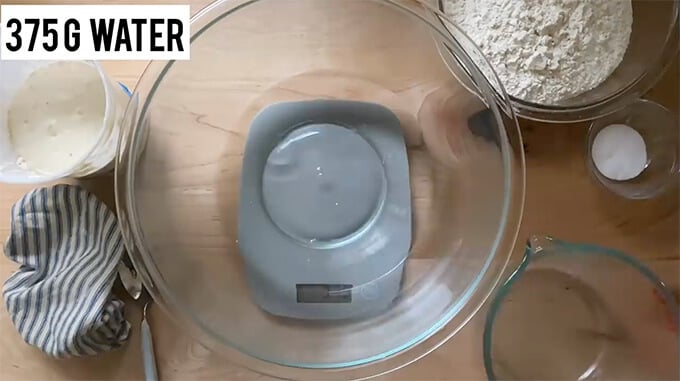
To start, pour 375 grams of water into a bowl:
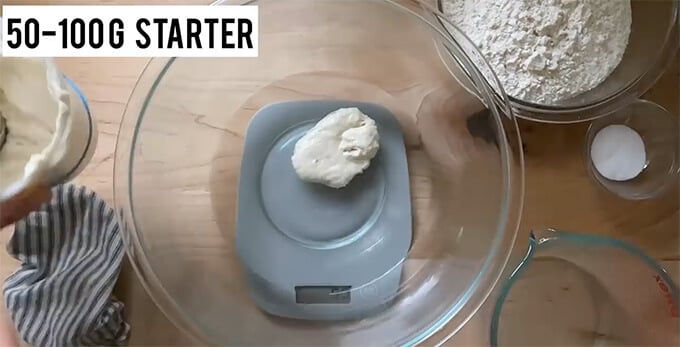
Add 50 to 100 grams of sourdough starter.
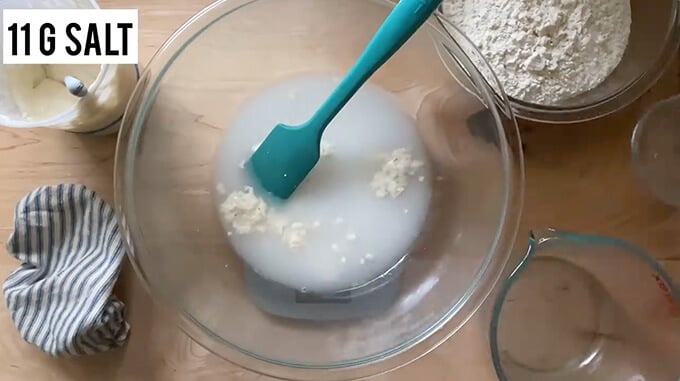
Stir to combine; then add 11 grams of salt:
Finally, add 500 grams of bread flour:
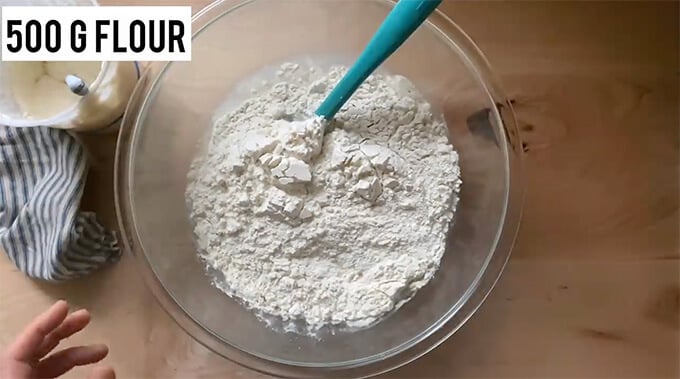
Stir to combine:
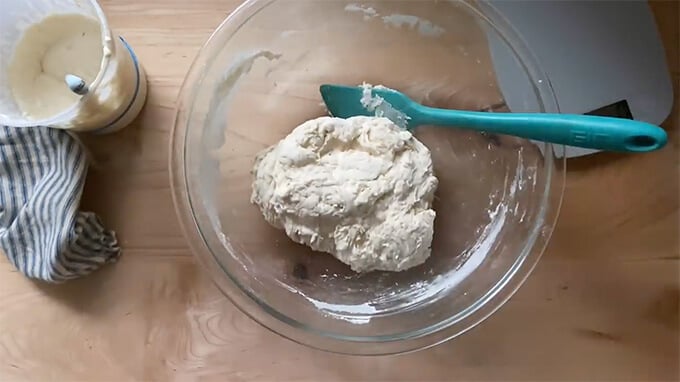
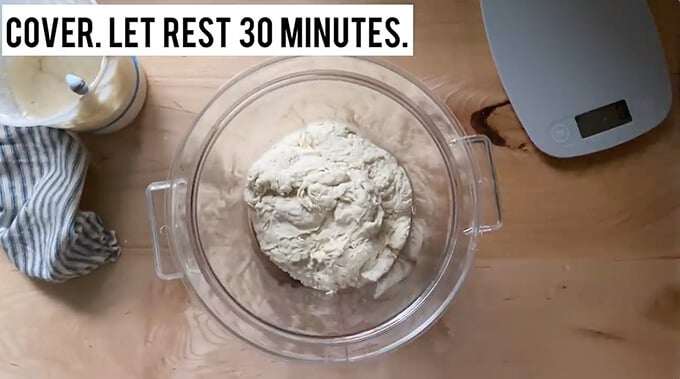
Let it Rise. (Bulk Fermentation)
Transfer the dough to a straight-sided vessel. Cover it, and let it rest for 30 minutes.
Perform a set of stretches and folds:
If time permits, perform four total sets of stretches and folds every 30 minutes for the first 2 hours. You should notice the dough getting stronger and more elastic with every set of stretches and folds. This is the 4th set:
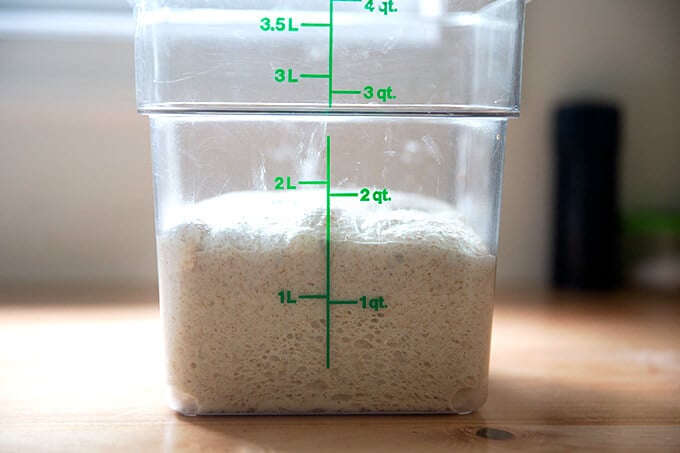
After the 4th set of stretches and folds, cover the vessel, and set it aside until it increases in volume by 50% or so.
How long should the bulk fermentation take?
The time will vary depending primarily on the strength of your starter and the temperature of your kitchen. Rather than rely on a time period, however, you should rely on visual cues.
This video shows the dough nearly doubling (increasing by 100%) in volume, but the more I bake sourdough, the more I realize I have better success when I stop the bulk fermentation when the dough increases by 50%. It may take some trial and error to know what works best for you. You may find a 75% increase in volume is best or you may find that to be too long. Sourdough is all about experimenting and adapting based on your experiences.
Shaping
Turn the dough out onto a lightly floured work surface:
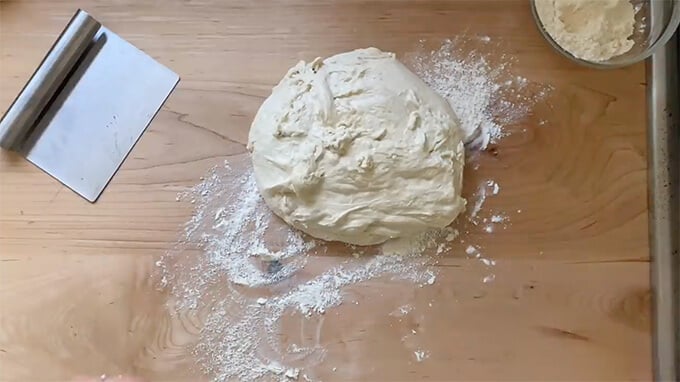
Shape the dough gently into a round and let it rest for 20-40 minutes. This is called the bench rest.
Meanwhile, prepare a bowl or banneton with a flour sack towel and rice flour.
Proofing
Shape the round again; then place in prepared bowl for proofing. Transfer to fridge for 12 to 48 hours.
Bake It.
Remove bowl from fridge, and turn it out onto a sheet of parchment paper.
Score it.
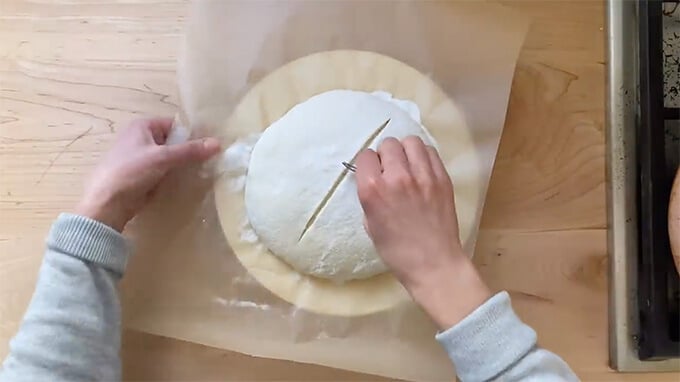
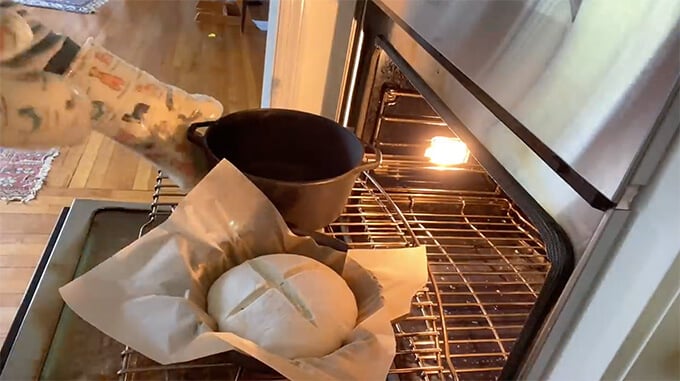
Transfer to preheated Dutch oven. Bake covered at 450ºF for 30 minutes; uncover, lower the temperature to 400ºF, and bake for 15 minutes more:
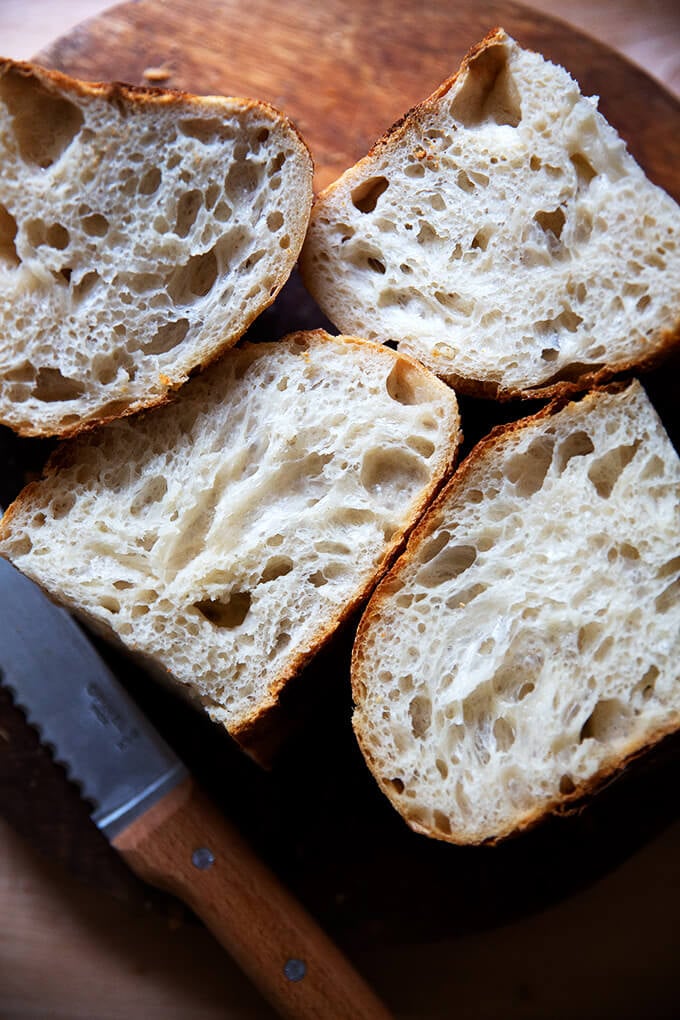
Remove from oven and let cool one hour before slicing.

You’ll need a sharp knife (like this one or this one) when it’s time to slice:

#1 Sourdough Bread Baking Tip
The refrigerator is your friend. Use it.
The most common mistake I see people make when making sourdough bread is letting the bulk fermentation go too long. They mix the dough at night; then wake up to dough that has tripled in volume and is a sticky mess.
To prevent over fermenting your dough, use your refrigerator as needed. After you complete the 4 sets of stretches and folds, you can put your dough in the fridge at any time. If you are tired and need to go to bed, transfer the dough to the refrigerator; then pick up where you left off in the morning: remove the dough from the fridge and let it continue to rise until it increases in volume by roughly 50%.
To accurately gauge when your dough has risen to roughly 50% in volume, I highly recommend investing in a straight-sided vessel such as this 4-qt Cambro (or this one, which is BPA-free!). When dough rises in a bowl, judging when it has risen sufficiently is tricky. There’s no question with a straight-sided vessel.
Troubleshooting: Where Sourdough Goes Wrong?
If you have ever had trouble baking sourdough bread, your issues likely stem from one of four places:
- Using a weak starter or not using starter at its peak.
- Using too much water relative to the flour.
- Over fermentation: letting the bulk fermentation (first rise) go too long.
- Using too much whole wheat flour, rye flour, or freshly milled flour.
I address each of these issues in this post: Why is my sourdough so sticky? 4 Common Mistakes, so please give it a read if you’ve had trouble with sourdough bread baking.
Sourdough Resources
- Sourdough Troubleshooting: This post addresses 4 common mistakes people make when baking sourdough bread and answers many FAQ’s as well.
- The Nutritional Benefits of Sourdough Bread + 6 Healthy Toast Topping Ideas
- Feeding Your Sourdough Starter
- Essential Equipment For Sourdough Bread Baking
- A tip for getting a more open crumb? Shape a batard as opposed to a round:
Other Sourdough Bread Recipes to Make
- Simple Sourdough Focaccia
- Sourdough Bread, Whole Wheat-ish
- Simple Sourdough Pizza
- Sourdough Detroit-Style Pizza
- Simple Sourdough Sandwich (or Toasting) Bread
- Sourdough Ciabatta
- Two Sourdough Discard Recipes: Sourdough Flour Tortillas & Irish Soda Bread
Sourdough Bread Baking Schedule
If you are new to sourdough bread baking, the timing of it all may feel overwhelming — you may find yourself asking: How can I do this without baking at midnight?
It’s a very good question! As noted above, your biggest friend when it comes to sourdough bread baking is your refrigerator. If after you’ve performed your stretches and folds, you don’t have time to stay up for the dough to complete the bulk fermentation, stick the vessel in the fridge and pick up where you left off the next day or the day after that.
Here is a rough schedule I like to follow. Adapt it to work for you:
Wednesday Evening: Remove starter from fridge. Feed it by discarding most of it and replenishing it with equal parts by weight flour and water.
Thursday Morning: Feed starter by discarding most of it and replenishing it with equal parts by weight flour and water.
Thursday Afternoon: Mix dough, let it rise. On Thursday evening, when the dough has completed the bulk fermentation, I’ll shape it and stick it in the fridge to proof. (As noted: If the dough hasn’t completed the bulk fermentation, I’ll stick the vessel in the fridge, and pick up where I left off the following day.)
Friday Evening or Saturday Morning: Score and Bake it. There is no need to let the dough come to room temperature before baking it. Simply remove it from the fridge, turn it out, score it, and bake it!
Print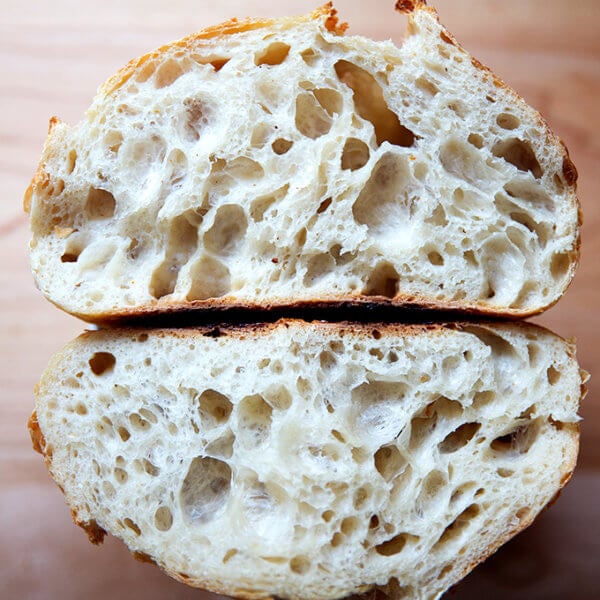
Homemade Sourdough Bread, Step by Step
- Total Time: 18 hours 45 minutes
- Yield: 1 loaf 1x
Description
If you love fresh sourdough bread with a golden, crisp crust and a light, airy crumb, this recipe is for you. It’s one of the simplest homemade sourdough bread recipes, and one of the best, too. It requires only 25 minutes of hands-on work and no autolyse or preferment. Below you will find guidance for every step of the way. 🍞🍞🍞
Inspired by The Clever Carrot
If you are new to sourdough, watch the step-by-step video here: Simple Sourdough Bread or in the post above.
Troubleshooting: If you have issues with your dough being too sticky, please read this post: Why is my sourdough so sticky? The 4 common mistakes.
Notes:
- You need an active sourdough starter. I have had success activating starters from:
- As always, I highly recommend investing in a digital scale before beginning any bread baking adventure.
- This is the Dutch Oven I use for sourdough bread. I used this Dutch oven for years, and it’s a great one, too.
- Flour sack towels are a great investment because they ensure your dough will not stick while it is proofing.
- I love using rice flour for dusting (as opposed to ap or bread flour) because it doesn’t burn. When you use a flour sack towel, however, you don’t need to use any flour.
- Find all of my sourdough essentials here: Essential Equipment For Sourdough Bread Baking
- I love a high-hydration dough, and I have great success using 380 grams of water in this recipe, so feel free to play around and push the hydration here.
- Salt: I have had success using both kosher salt and fine sea salt here. When I use kosher salt, I use the Diamond Crystal brand. When I use sea salt, I use the Baleine Fine brand. Regardless of the brand, I use 12 grams.
- Shaping: If you’re looking to get a more open crumb, try shaping a batard (as opposed to a round). Watch this video for guidance. Also: The recipe below follows the traditional shape once, rest, then shape again method. I often skip the preshape now and simply shape the dough once. I still get a nice open crumb.
- Adding Other Ingredients: If you’d like to add cheese, herbs, jalapeños, or other seasonings, do so before the third set of stretches and folds. Consider adding a fifth set of stretches and folds to ensure the ingredients are evenly incorporated into the dough.
How much Sourdough Starter to Use?
- Because my kitchen is cold for much of the year, I like using 100 g (1/2 cup) of starter as opposed to 50 g (1/4 cup). When determining how much starter to use, consider a few things: If you live in a warm, humid environment, 50 g should suffice. If you plan on doing an overnight rise, 50 g also should suffice. If you want to speed things up or if you live in a cold environment, consider using 100 g starter. Note: If you use 100 g of starter, your dough may rise more quickly, so keep an eye on it. As always, rely on the visual cues (increasing in volume by 50%) when determining when the bulk fermentation is done.
- A straight-sided vessel makes monitoring the bulk fermentation especially easy because it allows you to see when your dough has truly doubled.
Ingredients
- 50 – 100 g (1⁄4 – 1/2 cup) bubbly, active starter — I always use 100 grams, see notes above
- 375 g (1 1/2 cups plus 1 tbsp) warm water, or more, see notes above
- 500 g (4 cups plus 2 tbsp) bread flour
- 9 to 12 g (1.5 – 2.5 teaspoons) fine sea salt, see notes above
Instructions
- Make the dough: Whisk the starter and water together in a large bowl with a fork or spatula. Add the flour and salt. Mix to combine, finishing by hand if necessary to form a rough dough. Cover with a damp towel and let rest for 30 minutes.
- Stretch and fold: After 30 minutes, grab a corner of the dough and pull it up and into the center. Repeat until you’ve performed this series of folds 4 to 5 times with the dough. Let dough rest for another 30 minutes and repeat the stretching and folding action. If you have the time: do this twice more for a total of 4 times in 2 hours. Note: Even if you can only perform one series of stretches and folds, your dough will benefit. So don’t worry if you have to run off shortly after you mix the dough.
- Bulk Fermentation (first rise): Cover the bowl with a towel and let rise at room temperature, about 8 to 10 hours at 70°F (21°C) or even less if you live in a warm environment. The dough is ready when it has increased by 50% in volume, has a few bubbles on the surface, and jiggles when you move the bowl from side to side. (UPDATE: In the past I have recommended letting the dough rise until it doubles in volume. If you’ve had success with this, continue to let the dough double. Recently, I have been stopping the bulk fermentation when the dough increases by 50% in volume, and I feel I am actually getting better oven spring in the end.) (Note regarding timing: If you are using 100 g of starter, the bulk fermentation may take less than 8 to 10 hours. If you live in a warm, humid environment, the bulk fermentation may take even less time. In the late spring/early summer, for example, my kitchen is 78ºF and the bulk fermentation takes 6 hours. It is best to rely on visual cues (increase in volume by roughly 50%) as opposed to time to determine when the bulk fermentation is done. A straight-sided vessel makes monitoring the bulk fermentation especially easy because it allows you to see when your dough has truly increased in volume by 50%.)
- Shape (See notes above): Coax the dough onto a lightly floured surface. Gently shape it into a round: fold the top down to the center, turn the dough, fold the top down to the center, turn the dough; repeat until you’ve come full circle. If you have a bench scraper, use it to push and pull the dough to create tension.
- Rest: Let the dough rest seam side up rest for 30 minutes. Meanwhile, line an 8-inch (20-cm) bowl or proofing basket with a towel (flour sack towels are ideal) and dust with flour (preferably rice flour, which doesn’t burn the way all-purpose flour does). Using a bench scraper or your hands, shape it again as described in step 4. Place the round into your lined bowl, seam side up.
- Proof (second rise): Cover the dough and refrigerate for 1 hour or for as long as 48 hours. (Note: I prefer to let this dough proof for at least 24 hours prior to baking. See video for the difference in the crumb of a loaf that has proofed for 6 hours vs one that has proofed for 24 hours. If you choose to proof the dough in the fridge for an extended period of time, you may want to tuck it into a loosely tied bag — produce bags from the grocery store are great for this purpose — to ensure the dough does not dry out. The original recipe calls for a 1-hour rise, and if you have had success doing that, by all means, keep doing it.)
- Place a Dutch oven in your oven, and preheat your oven to 550°F (290°C). Cut a piece of parchment to fit the size of your baking pot.
- Score: Place the parchment over the dough and invert the bowl to release. Using the tip of a small knife or a razor blade, score the dough however you wish — a simple “X” is nice. Use the parchment to carefully transfer the dough into the preheated baking pot.
- Bake: Lower the oven to temperature to 450ºF (230ºC). Carefully cover the pot. Bake the dough for 30 minutes, covered. Remove the lid, lower the temperature to 400ºF (200ºC) and continue to bake for 10 – 15 minutes more. If necessary, lift the loaf out of the pot, and bake directly on the oven rack for the last 5 to 10 minutes. Cool on a wire rack for 1 hour before slicing.
- This loaf will stay fresh up to 3 days stored at room temperature in an airtight plastic bag or container. It freezes beautifully, too.
Notes
- This recipe has been adapted from Artisan Sourdough Made Simple. Changes I have made to the original recipe include:
- Using 11 g salt as opposed to 9 g.
- Performing 4 stretch and folds during the first 2 hours of the bulk fermentation, which build strength in the dough.
- Doing a cold proof for at least 24 hours before baking, which produces a lighter airier crumb. In the video, you can see the difference between the crumb of a loaf that has proofed for only 6 hours vs a loaf that has proofed for 24 hours.
- Finally, I like preheating my Dutch oven, which makes a crisper crust.
- Prep Time: 18 hours
- Cook Time: 45 minutes
- Category: Bread
- Method: Oven
- Cuisine: American
This post may contain affiliate links. Please read my disclosure policy.


5,723 Comments on “Homemade Sourdough Bread, Step by Step”
Hi Ali, please help. In your sourdough bread recipe, when it says BULK FERMENTATION.( first rise). It then says let the dough rest for 8 to 10 hours. Do I count the hours from that time on. Or from the beginning of mixing everything.
I count from when I’m done with the stretches and folds, but honestly, more important is watching the visual cues: if you keep your dough in a straight-sided vessel you will be able to accurately see how much it has grown. Once it has increased by 50-75% in volume, you are in business!
I’ve been using this recipe since I started my sourdough journey and it makes such delicious bread! I do have issues with it being a little sticky after the bulk fermentation though. When it’s under proofed, over proofed, or just right, it still tends to stick to the bowl and to my hands a little. Any ideas??
Hi! It sounds as though you might need to reduce the amount of water from the start. Questions:
Are you using a scale to measure?
What type of flour are you using?
Straight-sided vessel for the bulk fermentation?
Do you live in a humid environment?
I just made this for the first time and I also found the dough very sticky. During the stretch and folds I kept my hands wet, and this prevented the dough sticking to my fingers, and then when I tipped the dough out onto a board for the pre-shape and final shape, I used lots of bread flour on the board and on the dough and on my hands and the dough scraper and that way coped pretty well. It didn’t have any adverse effect at all on the final product. My loaf was perfect; it rose extremely high and the crumb was beautiful. I’ve had a few goes at making pure white sourdough before and they’ve never really worked, but this one was exactly what I was hoping for.
Great to hear Robin! Thanks so much for writing and sharing your notes 🙂
I saw your note about high hydration.
I’ve made this recipe 4 times now, with 100 G of starter, and have learned to back off the water to at least 325 G. Using 375 G, the dough remains too sticky and loose to be shaped, and won’t hold any shape at all. I could never even score it. And the rise was less than impressive.
This is with King Arthur unbleached bread flour.
Hi! Do you live in a humid environment? Are you using a straight-sided vessel for the bulk fermentation? How long is the BF roughly? It almost sounds as though it’s overfermenting during the bulk fermentation.
We have air conditioning, the RH in the house is about 50%, temp is from 68 to 72
Using a bowl for BF, BF is overnight.
Hi Ali! I’m super excited to try my first ever sourdough bread and I’ve just mixed the starter so fingers crossed. Silly question (because I’m a bit nervous) can I use a fine pink himalayan salt in place of sea salt? Thanks for the informative, step-by-step instructions and awesome video by the way 😊
Yes, absolutely! Go for it 🙂 And good luck 🎉
This recipe and your videos really helped me improve my sourdough. Thank you for the help!
I noticed that when you do your stretch and folds your dough seems to stretch more than mine. I find it harder to stretch the further along in the stretches I get. Any ideas you might have about what I’m doing wrong would be appreciated!
Hi! Great to hear 🙂
Questions for you:
Are you using a scale to measure?
What type of flour are you using?
Are you using a wet hand for the stretches and folds?
I’m a new bread baker. Do you use the large parchment paper to lift and put the dough into the Dutch oven, leaving the parchment or do you just cut a round piece for the bottom of the Dutch oven and slip the bread off of the larger parchment? Thanks!
I cut the large rectangle sheets of parchment in half lengthwise, so I have a long-ish narrow strip. Does that make sense?
Hello! A few ?s –
1. I have a large family. Can I double the recipe to make 2 loaves? What about tripling or quadrupling?
2. If I want to bake the loaves on Friday morning, can I start the process on Wednesday morning?
3. Do you have a post on how to take care of a Starter? I was considering purchasing from one of your links above.
4.I read somewhere that it needs to cool down at least a couple of hours before slicing?
5. What kind of bag do you store it in? It doesn’t seem to fit in a zip lock.
Thanks in advance! I’ve always wanted to bake sourdough for my family!
Hi!
1. I have a large family. Can I double the recipe to make 2 loaves? What about tripling or quadrupling?
Yes! For best results, use a scale.
2. If I want to bake the loaves on Friday morning, can I start the process on Wednesday morning?
Yes!
3. Do you have a post on how to take care of a Starter? I was considering purchasing from one of your links above.
Yes:
How to Build a Sourdough Starter from Scratch
How to Feed, Maintain, and Store a Sourdough Starter
4.I read somewhere that it needs to cool down at least a couple of hours before slicing?
1 hour is fine
5. What kind of bag do you store it in? It doesn’t seem to fit in a zip lock.
Try 2-gallon ziplocks.
Thanks for the swift reply!
After trying several recipes, this is the one. The others were heavy. I knew something wasn’t right. This one is soooo perfect! Crispy exterior and soft and pillowy inside.
I am so happy.
Thank you!
Great to hear, Dana! Thanks so much for writing 🙂
After experimenting with less and less water, I made this with 300 grams of water, and 100 grams of 50/50 (by weight) active starter (it had doubled in volume).
The dough was MUCH easier to handle, although it took a bit longer to assemble. But it was much less sticky, easier to fold, kept its shape, and was easily scored. I did mist the dough a little during the folding, as this helped with the handling.
I let it rise at room temp overnight, shaped it and let it proof for two hours, and misted it before putting the lid on my Dutch oven. Ovenspring and crust turned out perfect; I’m still working on the crumb, but it’s close.
I had heated the oven to 500 degrees F, along with the Dutch oven. Put the DO in, turned the temp down to 450, and baked for 20 mins. Removed the lid, put the temp down to 400, and went 20 mins more. Best effort so far.
Great to hear, Brian! Thanks for reporting back and sharing your notes and updated process — so helpful for others.
Alexandra, I have struggled making sour dough bread, have followed a number of recipes and had more failures than successes. Then I discovered your method and it has worked every single time. Thank you so much for being willing to share your technique. I feel confident enough now that if invited to a party I can tell the hostess, “I’ll bring the bread.”.
Awww this is the nicest thing to hear 🙂 🙂 🙂 Thanks so much for taking the time to write and share! And happy baking 🎉
I’m new to sourdough and started my journey on Jan 1st, 2024 and made my first sourdough starter. I found this recipe and have had great success with it and keep coming back to make the recipe. I love the sourdough taste and health benefits of it and have recently been trying to make my bread more sour. Any tips?
I’ve started using Rye flour for my feedings. I’ve lowered the amount of discard used as my starter in relation to water and flour, it’s now about 2:2:1 ratio. It’s getting better but was wondering your thoughts?
How much starter are you using for each loaf? 50 or 100 grams?
I’ve tried it with both 50g and 100g. My last loaf (made yesterday was 77g).
OK, great. Try with 50 grams again or even less: It’s counterintuitive, but using less starter usually means your bulk fermentation will be longer, which means your starter will go through its food source at a slower rate and therefore produce more acetic acid along the way.
That would be my first tip. How long are you letting your loaves proof in the fridge?
I normally don’t review recipes, but I have to write a review for this one. I had tried my hand at several loaves of sourdough, and wasn’t happy with how it was turning out – too dense, wasn’t rising enough. This recipe is fantastic! Not only was it some of the best sourdough I’ve had, it came out perfectly.
Great to hear, Beth! Thanks so much for writing 🙂 🙂 🙂
First two loaves were amazing using this recipe!
I’m starting my third and the dough feels really tight going into bulk fermentation. Like too tight to even fold – the whole thing comes up. Any recommendations?
Hi Joe! Just let it rest longer… you can wait 45-60 minutes between sets of stretches and folds…that will allow the gluten to relax even more.
Best sourdough recipe – super easy to follow and the final product is deliciously perfect!!
Great to hear, Jaden! Thanks so much for writing 🙂 🙂 🙂
My first try turned out great! I live in Hawaii and we live up at the top in Honolulu, with mini splits, not central ac. Always warm! So today I started a second loaf and after the 4th stretch I noticed my dough was super tight(not like first time) it was smooth and I had to leave so I stuck it in fridge. I’m wondering if this is because I used bread flour the first time and unbleached all purpose flour this time. I will do my bulk fermentation tomorrow on the counter and then put back in fridge for second proof?
Thanks,
Raelen
It’s definitely possible the bread flour is playing a role. It’s also possible that the dough just needed more time to relax between the 3rd and 4th sets.
I’ve been in search of the perfect sourdough recipe. I have finally found it here!!! Simple, yet wonderful. I’m making perfect sourdough bread every time now! Delicious!
Great to hear, Kathy! Thanks so much for writing and sharing this 🙂
I love making sour dough. Your recipe is the one my son gave me along with a batch of his starter. I have been playing with using some whole wheat flour or rye flour and have had good luck with the whole wheat but not so much with the rye. Rather than making round loaves, I am using 9×5 loaf pans and cover them with a second pan to make a dutch oven-like set-up. If the hydration is right, this is a very forgiving recipe. Now if you could just find a cure for celiac disease, I could enjoy my beautiful looking bread. My family loves it so I am happy to make more for them.
So nice to read all of this, Jill! And apologies for just seeing it. Thank you for sharing your method. Rye can be tricky. Try using 100 grams or even 75 grams — I feel like a little rye goes a long way, but a lot of rye can make for some very dense, sticky dough.
Hi Alexandra! I’ve attempted the loaf several times now. My first three were great – it was early August and hot in the northeast US and the bulk fermentation took between 10-13 hours. I got nice loaves that were tall and really airy. The last few loaves were in the last few weeks when temps in my house might be a few degrees cooler, and the loaves were shorter and denser. Bulk fermentation to a little less than 50% has taken 14+ hours. I haven’t waited longer because I’m impatient 😀 Could temp be affecting this? Should I let it keep bulking? Could I also feed my starter for a few days leading up to a bake? (I’ve been baking once a week, and the starter lives in fridge.)
Hi! Yes, I’d try pushing the bulk fermentation a little longer: see how the loaves turn out with a 75% rise during the bulk fermentation. And try feeding your starter two or three times before using it. Both should help 🙂
I love this recipe!! Over the past few years of making this bread, it’s got better and easier each time. I appreciate the notes on hydration because I live in a humid area so reducing the water helped. Thank you for all the tips and video. ❤️
Great to hear! It’s all about finding that magic ratio of flour to water given your environment and type of flour you are using. Glad you found the sweet spot!
I am new to sourdough bread baking (have made one loaf with your recipe that turned out great!)
I am not clear as to what to do with the remaining starter after i use a portion for a recipe. Does it go back in the fridge without feeding, or should i feed it first? Thanks
Feed it! And let it rise again. You want to refrigerate it when it’s at its peak, nice and strong 🙂
I’d like to make two loaves. Should I just double the recipe? Any other adjustments?
Yep! Just double it. Ideally you are using a scale for best results 🙂
Question? After you let it rise in the refrigerator for 24 hours do you need to let the dough come to room temp or just cook right from the refrigerator into the preheated dutch overn?
Just cook it right from the fridge (score it first)!
Thanks! for such a quick reply! Praying it come out as beautiful as yours!
Best sourdough recipe! So simple and easy to follow, everything really well explained and I loved the short videos clearly showing each step.
Great to hear! Thanks so much for writing 🙂
Alexandra! As someone who’s never ever baked in my life, this recipe has been such a great find. I’ve tried a few loaves and I’m starting to slowly figure out the nuances of temperature, humidity, starter, etc. your guide is my go to!
I’ve made a few amazing loaves and will keep playing with your core recipe and instructions as I try make more. Thank you, i never review anything, but this guide deserves it!
Question: can I substitute all King Arthur all purpose for whole wheat and expect the same results, or do you expect some of the timings to change when going whole wheat?
Great to hear, Gregor! And apologies for the delay here. You can definitely swap in some whole wheat flour. I always suggest starting small: try 25% whole wheat flour and see how you like the results. Keep in mind whole wheat flour will make for a less lofty loaf, but it will still taste great and you may enjoy the flavor even more thanks to the inclusion of some ww flour. Also: ww flour can be a little thirstier, so sometimes you’ll need to add more water, but I wouldn’t adjust the water until you’ve experimented once, because it’s possible you won’t have to make any adjustments to the water since this is a relatively high hydration dough already. Good luck!
If you put it in the fridge after the stretch and folds during the bulk fermentation, should you let it get to room temperature before shaping it? I need to use the fridge for timing purposes. I can’t stay up to allow proofing for 8 hours in the counter. It’s 630 and I finished the 2nd stretch.
Yes, you’ll need to let the dough continue the bulk fermentation at room temperature until it increases in volume by 50-75% — sourdough doesn’t rise much in the fridge.
Hello! I have used this recipe previously and it is my favorite! My loaf turned out great. I am now hoping to make a jalapeño cheddar loaf but am wondering what your suggestion would be on when to include the cheese and jalapeños? Thank you!
Great to hear! Add the ingredients just before the third set of stretches and folds. Consider adding a 5th set of stretches and folds to ensure the ingredients are evenly incorporated.
Whats your water adjustment? I can’t find it.
Simply outstanding guide..I tried making sourdough for the first time and it was a success thanks to this detailed post. Ali, you’re a legend! Thank you!
Awww Izzah, you are too sweet! So nice to hear this. Thanks for writing. xoxo
Hello, following your recipe all the way from New Zealand and trying your recipe for my second time making sourdough. And I’d say it was a success. Thank you for your quick and easy AND detailed instructions.
Great to hear, Serenity! Thanks so much for writing. Congrats on your success 🙂
I’ve followed your no-knead focaccia recipe every single time with the absolute best results so I thought I’d give this one a try. Unfortunately my first time was a bust.
However, I’d love to try again. My starter is 50/50 AP and whole wheat. Just wondering if I should do 500 grams bread flour or 450 grams bread flour and 50 grams whole wheat?
I’d try 500 grams bread flour. Can you elaborate on where things went wrong?
Of course! I let it bulk ferment from 4pm to 11 pm at room temp (~21°C) in a straight edged vessel. It didn’t rise as much so I left it in the fridge overnight. However, by the next morning it had become soupy for some reason.
Hmmm. Not sure how to advise as the timing doesn’t seem too long.
Have you made other sourdough breads with success or is this your first go?
Can you tell me about your starter? Is it homemade?
This is my first go! And my starter is homemade but it’s a couple months old at this point. I’d been feeding it and using it for other recipes (pizza doughs, waffles, etc.). But I can see it being a starter issue. I guess I can always strengthen it for a while before attempting bread again.
Yeah, I’d try strengthening your starter. To do so, you can start feeding it more regularly. I like to feed it at night meaning: discard most of it (down to a few tablespoons), then feed it with 75 grams each flour and water. Repeat in the morning: discard most of it; then feed it. Repeat. When your starter reliably doubles in volume within 6 hours or so, it’s good to go.