 →
→ My Mother’s Peasant Bread: The Best Easiest Bread You Will Ever Make
This post may contain affiliate links. Please read my disclosure policy.
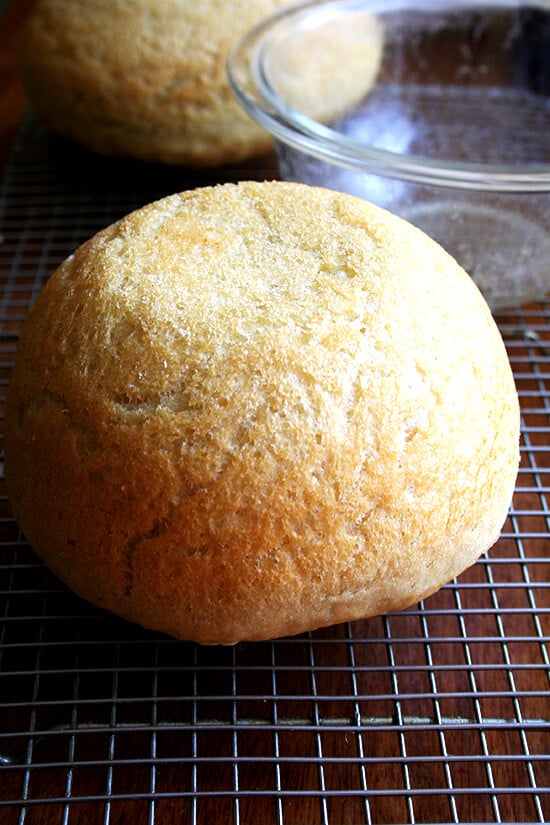
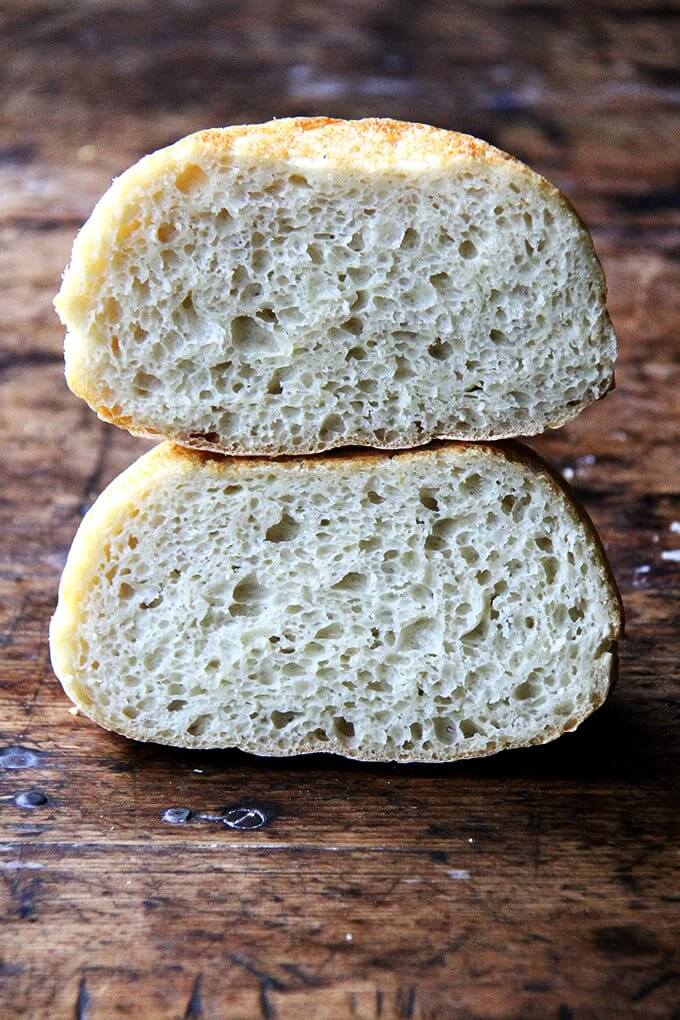
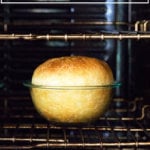
This is the no-knead bread recipe my mother has been baking for 45 years. Start to finish, it can be ready in three hours. It bakes in well-buttered Pyrex bowls — no need to preheat a baking vessel for this recipe — and it emerges golden and crisp with a soft, tender crumb. 🍞🍞🍞🍞🍞

When I tell you that, if forced, I had to pick one and only one recipe to share with you that this — my mother’s peasant bread — would be it, I am serious. I would almost in fact be OK ending the blog after this very post, resting assured that you all had this knowledge at hand. This bread will change your life.
The reason I say this is simple. People go insane over homemade bread. Not once have I served this bread to company without being asked, “Did you really make this?” And questioned: “You mean with a bread machine?” But always praised: “Is there anything more special than homemade bread?”
So what makes this bread so special? For one, it’s no-knead. But unlike other no-knead breads, you can start this one at 4:00 pm and turn it out onto the dinner table at 7:00 pm. It bakes in well-buttered Pyrex bowls — there is no pre-heating of the baking vessels in this recipe — and it emerges golden and crisp without any steam pans or water spritzes. This is not artisan bread, nor is it trying to be. It is peasant bread, spongy and moist with a most delectable buttery crust.
Genuinely, I would be proud to serve this bread at a dinner party attended by the bread Gods: Jim Lahey, Mark Bittman, Peter Reinhart, Chad Robertson, Jeff Hertzberg, and Zoe Francois. It is a bread I hope you will all give a go, too, and then proudly serve at your next dinner party to guests who might ask where you’ve stashed away your bread machine. And when this happens, I hope you will all just smile and say, “Don’t be silly. This is just a simple peasant bread. Easy as pie. I’ll show you how to make it some day.”
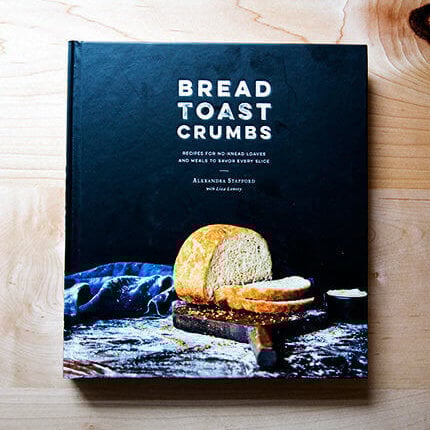
Bread Toast Crumbs
Love the peasant bread? There’s now a book filled with 40 simple bread recipes plus 70 recipes to use up every crumb of every loaf you bake.
How to Make Peasant Bread, Step by Step
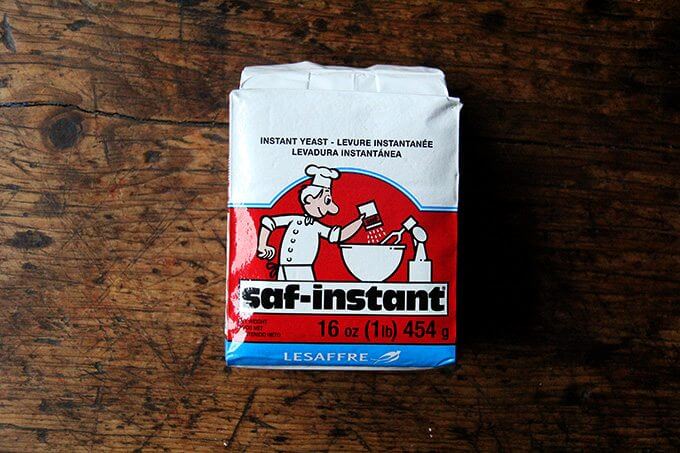
First: You need yeast. I love SAF Instant Yeast. Instant yeast can be whisked directly into the flour without blooming or proofing. If you want to stick to active-dry yeast, there are instructions in the recipe notes on how to do so. Red Star yeast is great.
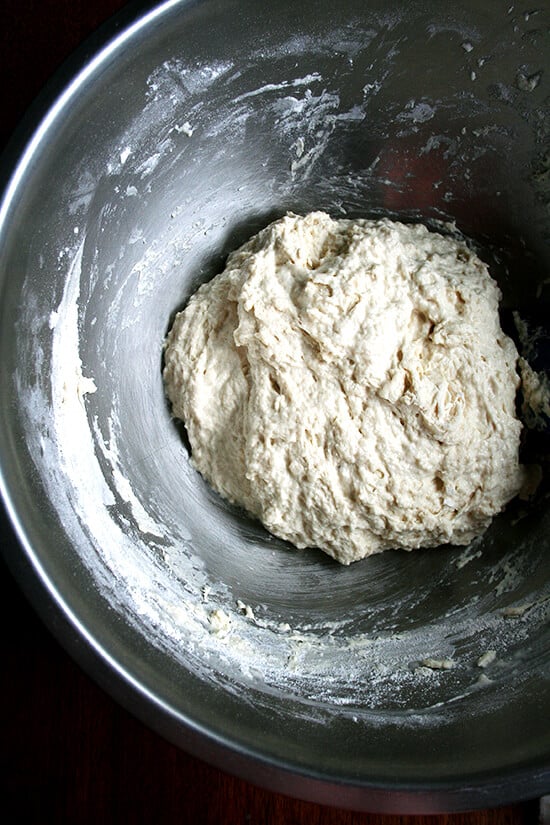
Whisk together flour, salt, sugar, and instant yeast. Add lukewarm water.

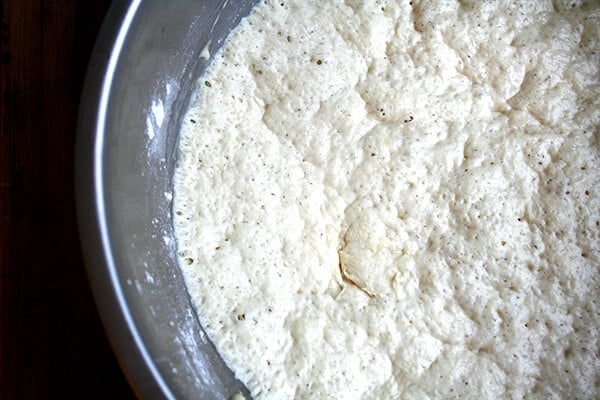
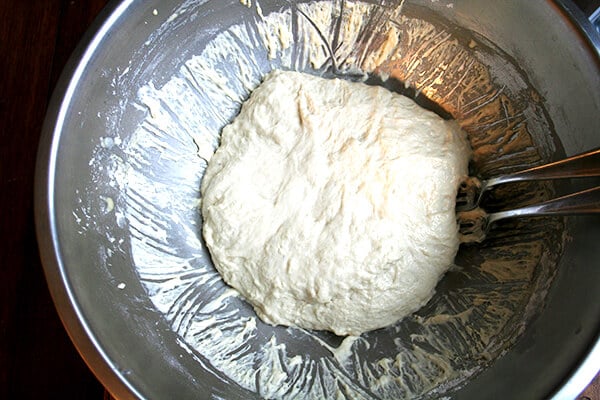
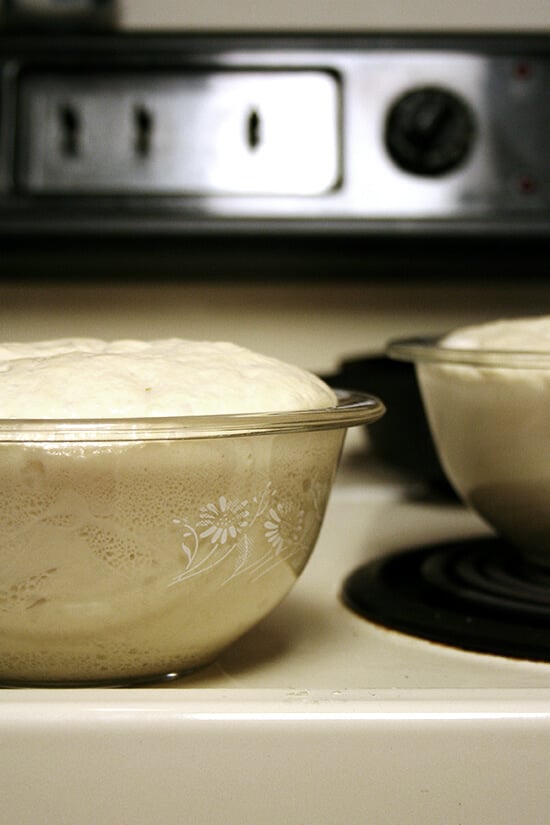
Mix until you have a sticky dough ball. Let it rise for 1.5 to 2 hours…
… or until it looks like this:
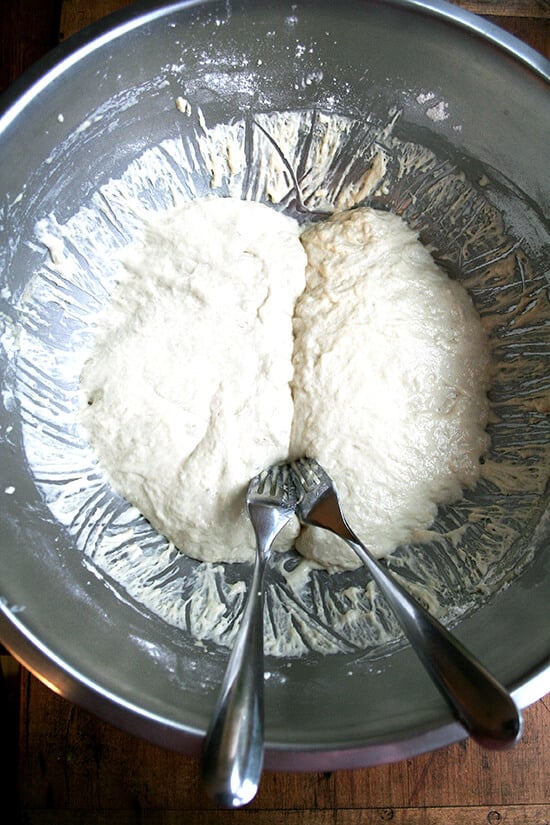
Punch down the dough using two forks.
Then split the dough down the middle again using the two forks.
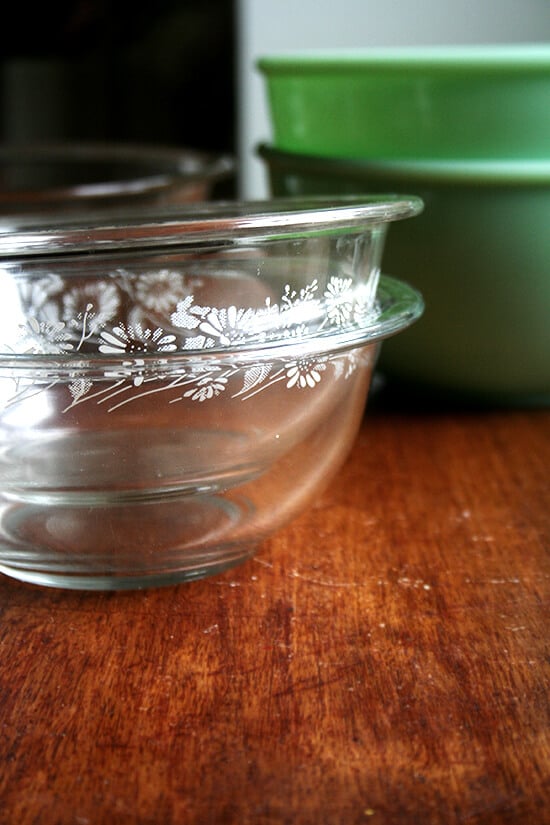
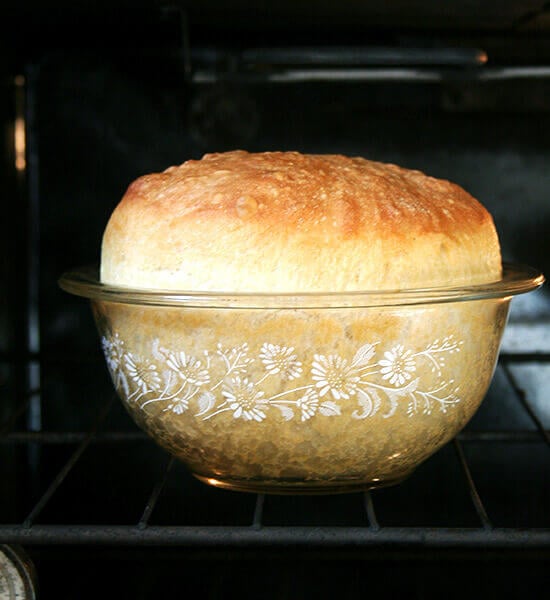
Because this is a very wet dough, it must be baked in an oven-proof bowl. I am partial to the Pyrex 1L 322 size, but any similarly sized oven-proof bowl will work.
Butter the bowls well; then transfer half of the dough to each prepared bow.
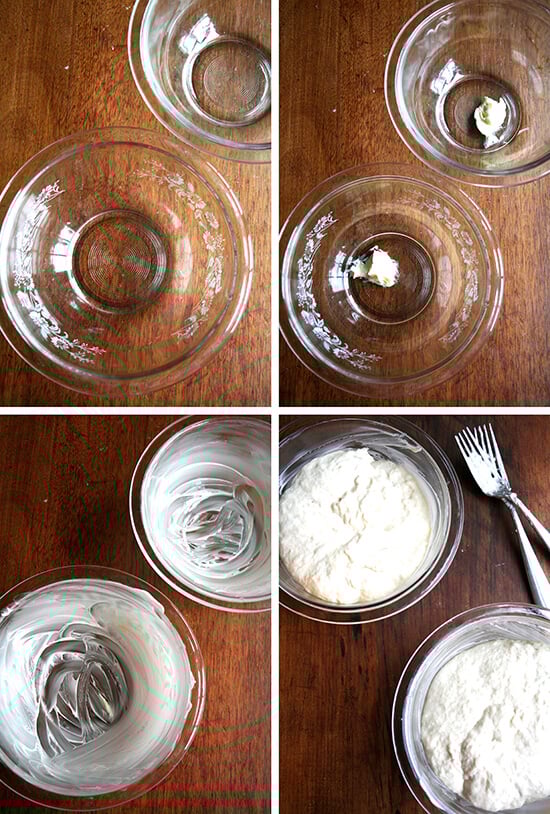
Let the dough rise again until it crowns the rim of the bowl, about 30 minutes.
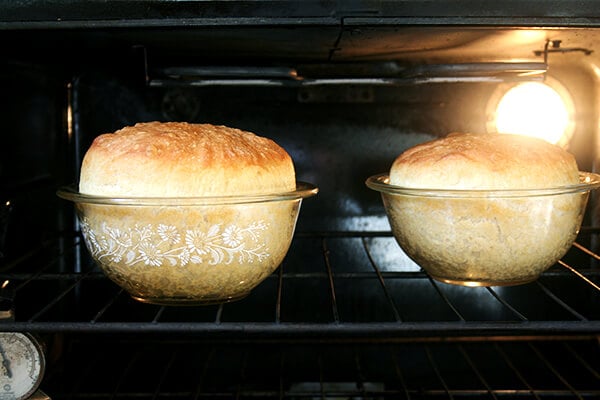
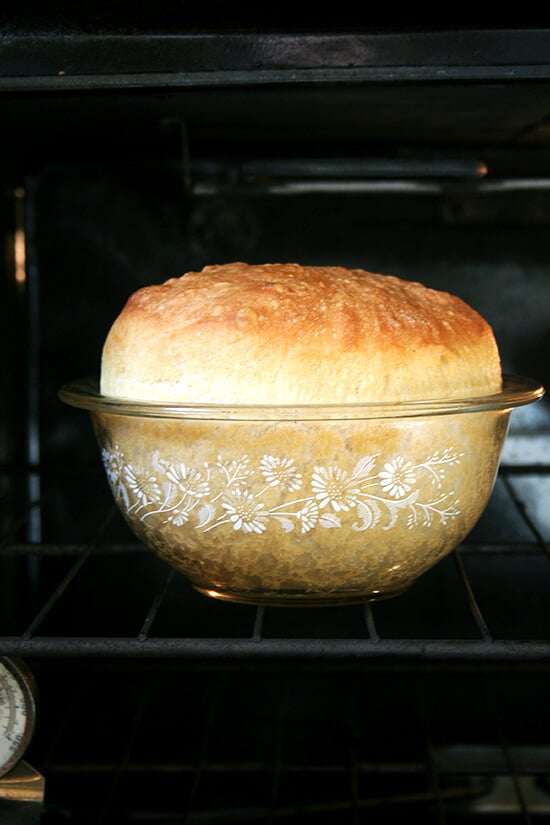
Transfer the bowls to the oven to bake:
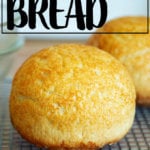
This bread is irresistible when it’s freshly baked, but it also makes wonderful toast on subsequent mornings as well as the best grilled cheese and sandwiches of all kinds.
My Mother’s Peasant Bread: The Best Easiest Bread You Will Ever Make
- Total Time: 2 hours 27 minutes
- Yield: 2 loaves 1x
Description
Notes:
This is a sticky, no-knead dough, so, some sort of baking vessel, such as pyrex bowls (you need two 1-qt bowls) or ramekins for mini loaves is required to bake this bread. See notes below the recipe for sources. You can use a bowl that is about 2 qt or 2 L in size to bake off the whole batch of dough (versus splitting the dough in half) but do not use this size for baking half of the dough — it is too big.
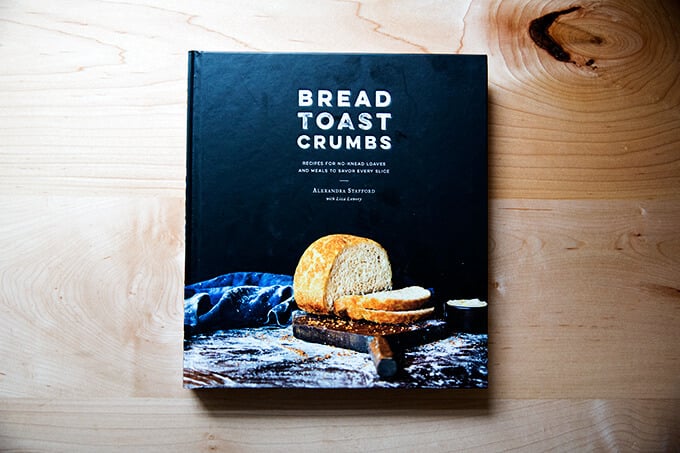
Peasant Bread Fans! There is a book: Bread Toast Crumbs, a loaf-to-crumb bread-baking book, filled with tips and tricks and answers to the many questions that have been asked over the years. In the book you will find 40 variations of the master peasant bread recipe + 70 recipes for using up the many loaves you will bake. Learn more about the book here or buy it here.
Ingredients
- 4 cups (512 g) unbleached all-purpose or bread flour
- 2 teaspoons (10 g) kosher salt
- 2 cups (454 g) lukewarm water (made by mixing 1.5 cups cold water with 0.5 cup boiling water)
- 2 teaspoons (8 g) sugar
- 2 teaspoons (8 g) instant yeast, I love SAF Instant Yeast, see notes below
- room temperature butter, about 2 tablespoons
Instructions
- Mixing the dough: In a large mixing bowl, whisk together the flour, salt, sugar, and instant yeast (I love SAF Instant Yeast). Add the water. Mix until the flour is absorbed. (If you are using active dry yeast, see notes below.)
- Let it rise. Cover bowl with a tea towel or plastic wrap and set aside in a warm spot to rise for at least an hour. (In the winter or if you are letting the bread rise in a cool place, it might take as long as two hours to rise.) This is how to create a slightly warm spot for your bread to rise in: Turn the oven on at any temperature (350ºF or so) for one minute, then turn it off. Note: Do not allow the oven to get up to 300ºF, for example, and then heat at that setting for 1 minute — this will be too hot. Just let the oven preheat for a total of 1 minute — it likely won’t get above 100ºF. The goal is to just create a slightly warm environment for the bread.
- Preheat the oven to 425ºF. Grease two 1-qt or 1.5-qt oven-safe bowls (see notes below) with about a tablespoon of butter each. Using two forks, punch down your dough, scraping it from the sides of the bowl, which it will be clinging to. As you scrape it down try to pull the dough toward the center (see video below for guidance). You want to loosen the dough entirely from the sides of the bowl, and you want to make sure you’ve punched it down. Then, take your two forks and divide the dough into two equal portions — eye the center of the mass of dough, and starting from the center and working out, pull the dough apart with the two forks. Then scoop up each half and place into your prepared bowls. This part can be a little messy — the dough is very wet and will slip all over the place. Using small forks or forks with short tines makes this easier — my small salad forks work best; my dinner forks make it harder. It’s best to scoop it up fast and plop it in the bowl in one fell swoop. Some people like to use flexible, plastic dough scrapers for this step.
- Let the dough rise again for about 20 to 30 minutes on the countertop near the oven (or near a warm spot) or until it has risen to just below or above (depending on what size bowl you are using) the top of the bowls. (Note: Do not do the warm-oven trick for the second rise, and do not cover your bowls for the second rise. Simply set your bowls on top of your oven, so that they are in a warm spot. Twenty minutes in this spot usually is enough for my loaves.)
- Bake it. Bake for 15 minutes. Reduce the heat to 375º and bake for 15 to 17 minutes longer. Remove from the oven and turn the loaves onto cooling racks. If you’ve greased the bowls well, the loaves should fall right out onto the cooling racks. If the loaves look a little pale and soft when you’ve turned them out onto your cooling racks, place the loaves into the oven (outside of their bowls) and let them bake for about 5 minutes longer. Remove from oven and let cool for 10 minutes before cutting.
Notes
- The bowls: The cheapest, most widely available 1-qt bowl is the Pyrex 322. Update: These bowls are becoming harder to find and more expensive. Here’s another option: the Pyrex 3-piece set. You can split the dough in half as always (see recipe) and bake half in the 1-quart bowl and half in the 1.5 quart bowl. The loaves will not be the same shape, but they will be delicious nonetheless. This Anchor Hocking set is another great option.
- Yeast: I buy SAF Instant Yeast in bulk from Amazon I store it in my fridge or freezer, and it lasts forever. If you are using the packets of yeast (the kind that come in the 3-fold packets), just go ahead and use a whole packet — It’s 2.25 teaspoons. I have made the bread with active dry, rapid rise, and instant yeast, and all varieties work. The beauty of instant yeast is that there is no need to “proof” it — you can add the yeast directly to the flour. I never use active-dry yeast anymore.
- If you have active-dry yeast on hand and want to use it, here’s how: In a small mixing bowl, dissolve the sugar into the water. Sprinkle the yeast over top. There is no need to stir it up. Let it stand for about 10 to 15 minutes or until the mixture is foamy and/or bubbling just a bit — this step will ensure that the yeast is active. Meanwhile, in a large bowl, whisk together the flour and salt. When the yeast-water-sugar mixture is foamy, stir it up, and add it to the flour bowl. Mix until the flour is absorbed.
- Troubleshooting: You can find step-by-step video instruction here.
- Several commenters have had trouble with the second rise, and this seems to be caused by the shape of the bowl they are letting the dough rise in the second time around. Two hours for the second rise is too long. If you don’t have a 1-qt bowl, bake 3/4 of the dough in a loaf pan and bake the rest off in muffin tins or a popover pan. The second rise should take no more than 30 minutes.
- Also, you can use as many as 3 cups of whole wheat flour, but the texture changes considerably. I suggest trying with all all-purpose or bread flour to start and once you get the hang of it, start trying various combinations of whole wheat flour and/or other flours.
- The single most important step you can take to make this bread truly foolproof is to invest in a digital scale. This one costs under $10. If you are not measuring by weight, do this: scoop flour into the measuring cup using a separate spoon or measuring cup; level off with a knife. The flour should be below the rim of the measuring cup.
- Here’s a printable version of this recipes that’s less wordy: Peasant Bread Recipe, Simplified
- How to Bake the Peasant Bread in a Dutch Oven: Preheat a Dutch Oven for 45 minutes at 450ºF. Dust a clean work surface with flour. After the first rise, turn the dough out onto the floured surface and shape it into a ball: I like to fold it envelope style from top to bottom, then side to side; then I flip it over and use the pinkie edges of my hands to pinch the dough underneath and create some tension. Transfer the dough to a sheet of parchment paper. Let rest for 20 minutes. If you feel your dough is spreading too much you can lift up the sheet of parchment paper, dough and all, and place it in a bowl of a similar size. After the 20 minutes, transfer the dough, parchment paper and all to the Dutch oven. Carefully cover it. Bake 30 minutes. Uncover. Bake 15 minutes more.
- To bake the peasant bread in a loaf pan: If you are using an 8.5×4.5-inch loaf pan or a 9×5-inch loaf pan, you can bake 3/4 of the dough in it; bake off the rest of the dough in ramekins or other small vessels … the mini loaves are so cute. You can also make 1.5x the recipe, and bake the bread in 2 loaf pans. If you have a large loaf pan, such as a 10×6-inch loaf pan, you can bake off the entire batch of dough in it. For loaf pans, bake at 375ºF for 45 minutes.
- How to Bake at Hight Altitude:
- First try the original recipe as written (preferably with a scale). You may not need to make any adjustments. One commenter, who lives at 9200 ft finds the original recipe to work just fine as is.
- If the original recipe doesn’t work, try adding a little bit more water because it rises fast and it is so dry: about a quarter cup for every 512 g of flour.
- Try decreasing the yeast to 1.5 teaspoons.
- If your dough is especially gooey, try decreasing the water by 1/4 cup. But, if you aren’t using a scale, my first suggestion would be to buy a scale and weigh the flour, and make the bread once as directed with the 2 cups water and 512 grams flour, etc.
- Punch the dough down twice before transferring it to the buttered Pyrex bowls. In other words, let it rise for 1-1.5 hours, punch it down, let it rise again for about an hour, punch it down, then transfer it to the buttered bowls.
- Variations:
- #1. Cornmeal. Substitute 1 cup of the flour with 1 cup of cornmeal. Proceed with the recipe as directed.
- #2. Faux focaccia. Instead of spreading butter in two Pyrex bowls in preparation for baking, butter one 9×9-inch glass baking dish and one Pyrex bowl or just butter one large 9×13-inch Pyrex baking dish. If using two vessels, divide the dough in half and place each half in prepared baking pan. If using only one large baking dish, place all of the dough in the dish. Drizzle dough with 1 tablespoon of olive oil (if using the small square pan) and 2 tablespoons of olive oil (if using the large one). Using your fingers, gently spread the dough out so that it fits the shape of the pan. Use your fingers to create dimples in the surface of the dough. Sprinkle surface with chopped rosemary and sea salt. Let rise for 20 to 30 minutes. Bake for 15 minutes at 425ºF and 17 minutes (or longer) at 375ºF. Remove from pan and let cool on cooling rack.
- #3. Thyme Dinner Rolls
- #4 Gluten-free
- #5. Everything Bagel Seasoning Bread. Simply coat the buttered bowls with everything bagel seasoning. Other seeds and seed mixes work, too, like sesame seeds and dukkah.
- #6: Whole Wheat Peasant Bread. Use as much as 50% whole wheat flour.
- Prep Time: 5 minutes
- Cook Time: 32 minutes
- Category: Bread
- Method: Baked
- Cuisine: American
This post may contain affiliate links. Please read my disclosure policy.


7,129 Comments on “My Mother’s Peasant Bread: The Best Easiest Bread You Will Ever Make”
I’m a fairly experienced baker but new to the no knead type breads. I made this bread by following your recipe exactly and everything looked exactly like the pictures shown until the second rise. Taste and texture were great but didn’t rise as high as I was expecting and looked nothing like the posted pictures. What could I have done wrong?
What size bowls are you using? And are you using a scale to measure? What kind of flour are you using?
Mine didn’t rise either even after tripling the time. Good taste but not what I was looking for.
Hi Guy! At what phase? First rise or second rise? What size bowls did you use to bake the bread in?
My family and I LOVE this recipe! I try to make a double batch every week! It does well in a well buttered bread pan, it makes it easier for us to cut! 5 stars!
Great to hear, Emily! Thanks so much for writing 🙂
Everybody absolutely loves this bread when I make it. Wonderful toasted!
Great to hear, Maureen! Thanks so much for writing 🙂
Making bread for the first time and I found this to be very confusing. Your video says to let it rise the first time for 2 hours. The numbered directions say 1 hour. The written out directions with pictures say 1.5 – 2 hours. I was following the numbered directions and did 1 hour and started punching it down, watched the video to be sure and it says 2 hours. Now I’m not sure if I’ve messed it up? Or can I keep letting it rise if I’ve punched it down
Hi! Sorry for the confusion and delay here … I hope it turned out OK. The truth is that it’s very forgiving: the first rise can be anywhere from 1-3 hours depending on the temperature of your kitchen and the time of year. You definitely didn’t mess up if you punched it down after 1 hour. Had it doubled in volume?
I love this easy bread I know I’ve asked you before if I could use sourdough and you gave me the instructions. What I forgot to ask was can I cook it in the same Pyrexx? Or do I need to score it and use a Dutch oven? this seems hard given how wet the dough is. Perhaps I’m better off just using this recipe for peasant bread and your other recipes for sourdough. Any thoughts?
Hi! Yes, use the Pyrex and don’t score it… in other words, follow the same peasant bread method with longer rises. The dough is too wet to score.
Pls. let me have the instructions for making the Peasant Bread using sourdough starter. Thanks.
Hi! Simply omit the yeast and sugar, add 100 grams of sourdough starter, and increase the rise times as needed. Are you familiar with the sourdough process?
Yes, I am familiar with the sourdough process and thank you for your prompt response.
Your instructions are really fantastic – I have been making sourdough bread/pizza and focaccia for some time. In my case the dough was getting over proofed all the time – I live in Canada and the house is heated so the temperature is always between 21 to 22C. I let the dough rise only 50% ( for this I keep the dough in the fridge overnight and it is ready in the morning) and not double as per your instructions. That has made a world of difference.
The sourdough pizza, I was keeping the oven at 450F and now I am setting at 525F which is the max. setting, as you call for 550F. This has also made a Hughe difference.
Great to hear, Arun! Thanks so much for writing and sharing all of this. Sourdough is all about finding the method that works best for you given your environment/ingredients. Glad you have been able to find methods that work well for you 🙂
I have made this bread a few times now, but mostly put the whole mix into a large loaf pan, rather than the bowls ( Just because that’s what I have)
It made a great loaf, crusty, but soft inside.. about 5 inches wide, 10 inches long and ? 21/2 high.
Also made one batch in small casserole dish… result like the photos, with half the batch in a 6 hole muffin pan, for small dinner rolls. They were great with a thick minestrone soup!
Great to hear, Robyn! Thanks so much for writing and sharing all of these notes 🙂
Hello! I’ve made this a few times and absolutely love how easy it is and how wonderfully good it tastes! What would I need to do to make it into cinnamon raisin? TIA
Really fantastic! I haven’t made much bread before, and I just made this – SO GOOD. The crumb is perfectly chewy and the flavour is amazing. Will definitely be making this again, and again, and again.
Great to hear, Mary! Thanks so much for writing 🙂
Although I appreciate the suggestion regarding Cairnspring Mill flour, If you don’t live in Washington state the cost of shipping is almost as much as the cost of the flour. Any Amazon suggestions ?
Can you bake this in a cast iron dutch oven?
Yes! See the notes at the very bottom of the recipe box.
Made this bowl and loaf pans and perfect both times. Went 3/4 tsp extra on the yeast with the Fleischmans instant packets and King Arthur flour and perfect with superb crumb. Been searching for along time for a good simplebread recipe. Thank you.
Great to hear, Douglas! Thanks so much for writing and sharing your notes 🙂
I’ve been baking bread for about 5 years and I always had to plan early in order to have time. This was the best and easiest “easy bread recipes” I’ve ever tasted! It’s so versatile ! So awesome for nights when you want some yummy homemade bread but just don’t have the time (or energy) to go all out. My family loved it!
Great to hear, Amy! Thanks so much for writing and sharing this 🙂
This and a stick of softened butter has become my go-to for church potlucks. I make one big loaf and it disappears!
Love this! Thanks for writing and sharing 🙂
I need a hearty recipe for hot dog buns that will hold a chili dog and all the fixins. I’ve baked with the Peasant bread and always had great results. Thanks.
Hi Gary! Someone recently used this recipe to make hot dog buns and had great success: The Best, Easiest No-Knead Brioche Buns
I need a hearty recipe for hot dog buns that can hold a chili dog and all its fixings. I’ve baked with the Peasant bread and always had great results. Thanks I believe I want to use your present bread for this because I need more hearty buns for chile dogs. Please LMK ASAP and thanks
Hey! Did you see my earlier response re brioche buns?
This is my favorite recipe to bake bread, especially with coating the crust with seasonings! This last time, I made 1 Everything Bagel and the other I used a Pampered Chef, Everything But the Pizza seasoning. It looked odd, very orange, but tasted great! I keep looking at all my seasoning mixes wondering which will be the next hit. I have never had a problem with this recipe and as I read the comments, I just wonder if it was warm enough for the rise time. One tip I will give is that I have an electric blanket (perfect for Midwest winters) and I will set to a low temp and put covered bowls under it. My Mother used to make Scalded Milk bread when I was a kid (similar to Japanese bread) and she always put her bowls under the comforters on the beds to help keep warm.
So nice to read all of this, Sharon! Thanks so much for writing and sharing your notes. I’m so intrigued by the Everything But the Pizza seasoning… I’ll have to try 🙂
Thanks! The Everything but Pizza is an odd seasoning. The bread was orange on the crust and the first day I was not impressed, but the next day, the flavors came out. You never know! Dukkah that you have listed is also wonderful!
Well YUM! Since I live alone now I have not made regular bread in quite a few years. I read about this recipe ( on Margaret Roach’s blog) and made it the first chance I had. Super easy, super delicious. Only frustration is that I do not have the appropriate Pyrex bowl so used 2 9×5 loaf pans, as mentioned. The delicious loaves are not very high, so I will use 8×4 pans the next time, hopefully yielding a taller loaf.
Greasing the pans with so much butter had me raising m eyebrows, but it creates a delicious crisp crust.
Super!
Great to hear, Peggy! Thanks so much for writing and sharing your notes. Glad you were able to find baking vessels that work well in place of the Pyrex bowls.
OMG! This is now my go-to recipe! Easy, quick and delish. Perfect crust.
Great to hear, Emma! Thanks so much for writing 🙂
I found this recipe on your TikTok but in loaf form and I loved it! I’m excited to try some of your other recipes as well to find which loaf works best for my family! I did have a question regarding doubling the recipes in case I wanted to make two loafs at a time. Do I just double the amounts (in grams)?
Yes, double away (in grams!) but you won’t need to double the yeast: you can actually keep the amount of yeast the same 🙂
Thank you so much for your quick reply! Would that be the same for your Simple Soft Sandwich Bread recipe as well?
Yes!
Hello,
Can this recipe be a make ahead? Making the dough in the evening and baking for morning.
Thank you
Hi! And yes: use cold water or room temp water and cut the instant yeast back to 1/4 teaspoon. Let the dough rise slowly overnight; then proceed in the morning. Keep in mind the second rise will take longer, so just be patient and rely on the visual cues: the dough crowning the rim of the bowls before placing them in the oven.
Have made this bread (and the focaccia version) over the years and my family loves it. Was wondering if it would work with fresh yeast as well if that is all that I have on hand. Thanks!
Yes! I believe you need to increase by 3x by weight when converting from dry to fresh.
I’ve made this bread countless times, and it’s perfect every time! Something that works really well for me is placing the dough in my Instant Pot on the yogurt setting for 1.5 to 2 hours for the first rise. The rise is always spot-on and fuss-free.
Thank you Ali ❤️
Love this idea Noreen! Thanks so much for sharing it 🙂
I’ve made this many times now, and my family and friends love it! I’m starting to experiment with whole wheat. Have you had any success with using 100% whole wheat with this recipe? The 50% version works great, but curious if you have tried it with 100% and have any guidance to share.
Yes, I have, but the texture is much denser. As long as you manage your expectations about the texture, you can use 100% whole wheat flour. Also, all ww flours absorb water a little differently, so the results will vary brand to brand.
Love this recipe – so easy and so fast!
I would like to make mini boules but have not been completely successful using smaller bowls – the second rise seems to collapse a bit when I start baking – maybe different oven temperatures? Any suggestions, please?
Hi Susan! What size bowls are you using? And how many mini bowls are you doing at a time?
Four 51/2” bowls for half of the dough – I do reduce cooking times but haven’t tried changing temperatures – thank youS
Ok, great. I think as long as you are not filling the bowls more than 3/4 full, they should bake just fine. Let the dough rise until it crowns the rim, then I would bake it the same way: 15 minutes at 425ºF, lower the temp and bake for maybe 5-10 minutes more or until they are golden brown all around. Are the bowls glass?
They’re those glass or similar material that come in many sizes and I think are used to hold measured ingredients during food preparation – I use them for small salads, ice cream, etc
Thank you for spending so much time on this – I’ve really loved sharing the recipe as well as the finished product!
Great to hear, Susan! I asked about the glass, because it allows you to see how the underside of the bread is browning, and it might help you assess when the loaves are done — you want that crust to be nicely golden brown 🙂
When it says to preheat the oven for 1 minute and then turn it off, are you placing your bowl with the dough in it into the oven and letting it rise in there while the oven is turned off? Or are you just letting it preheat to get the kitchen warm so it has a warm spot to rise? Thanks.
Just let it preheat so that the dough has a warm spot to rise — you’re turning the oven on, then turning it off one minute later, then placing your bowl of dough inside.
Hi Ali 🙂
just my experience with your Mom’s bread.
As a European, I didn’t bother with cups; I simply got out my scales.
I used 500g of flour, 2tsp. of salt, but only 1tsp. of sugar. I used half of that to feed the yeast.
Since I didn’t have any dried yeast, I used a cube of fresh yeast (which I prefer anyway) & made a small starter as usual. (One cube of yeast weighs 42g here.)
By the way, I also love to knead dough, but in this case, I generously skipped it LOL :DD
I measured 450ml of water & used it all (including for the starter).
I let the dough rise twice at room temperature: the 1st time for 2 hours, the 2nd time for one hour.
I used my 1-liter casserole dish, raised the sides slightly with aluminum foil, then let the dough rise for another 30min.
I baked it without preheating for 15 minutes at 200°C, then another 15 minutes at 170°C.
I was sceptical, but oh boy, there was no need to. The bread was simply perfect!
I froze the second batch (after the 2nd rise)
Later I simply placed it frozen in the buttered casserole dish &, after about three hours at room temperature, put it in the oven & baked it as above.
It was just as perfect as the first batch 🙂
Dear Ali, thank you so much for sharing this great recipe.
Sending you hugs all over the mighty ocean ♥ ♡
Nele
Wow, Nele, it’s so interesting to read all of this. Thanks so much for writing and taking the time to share all of these notes. I have never used fresh yeast, but your account here is making me want to try. I appreciate all of the freezing notes, too, as people ask about freezing dough all of the time.
This is a great recipe. I love all your no knead recipes, so easy and delicious. I have made this one several times. I started experimenting with add ins. I found cheddar cheese, pickled jalapeño and a touch of garlic powder make the best combo. Everyone loves it!!! Thanks you…
Great to hear, Jodi! Thanks so much for writing and sharing your notes. Your jalapeno-cheddar combo sounds divine!!
What about the 2 tablespoons of room temperature butter???
That’s for buttering the bowls.
Hello Ali,
I scale all my wheat berries for 512 gm. I used hard white wheat berries and very good SAF yeast. It’s finishing baking right now and so delicious. Because it’s not processed or bleached it is a truly delicious vitamin, protein enriched bread that won’t make you fat. MAHA. I love this quick recipe you shared from your mother. I serve it with a farmers cheese ( probiotics) sour cream dill spread. Lithuanian. Fabulous.
Wonderful to read all of this 🙂 Thanks so much for writing and sharing your notes!
I have tried this over and over adn followed your directions exactly. Can’t get it to rise enough for either rise.
Hi Nancy,
Are you using a scale to measure? What type of flour are you using? What type of yeast? And what size bowls?